Whilst Windows isn’t officially supported for fastai or the lessons at this stage, it does seem to be working now so those with the patience and boldness to venture into something a little new and somewhat untested, here’s instructions on getting started running on a GPU on Windows. (NB: most people using Windows on their laptops are advised to use a cloud GPU provider like Paperspace - accessing a cloud provider from Windows is well supported and tested for this course).
You must have an Nvidia GPU installed, and have installed the most recent Nvidia drivers
Install Anaconda (Python 3.6) using the 64-bit graphical installer. Choose the option to install for “this user only”
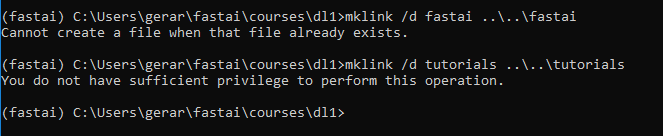
If you are doing the Deep Learning course replace the linux symlink with a Windows one (note that this requires an admin command prompt if you don’t have a fully updated version of Windows 10): cd courses\dl1 del fastai mklink /d fastai ..\..\old\fastai cd ..\..
If you are doing the Machine Learning course replace the linux symlink with a Windows one (note that this requires an admin command prompt if you don’t have a fully updated version of Windows 10): cd courses\ml1 del fastai mklink /d fastai ..\..\old\fastai cd ..\..
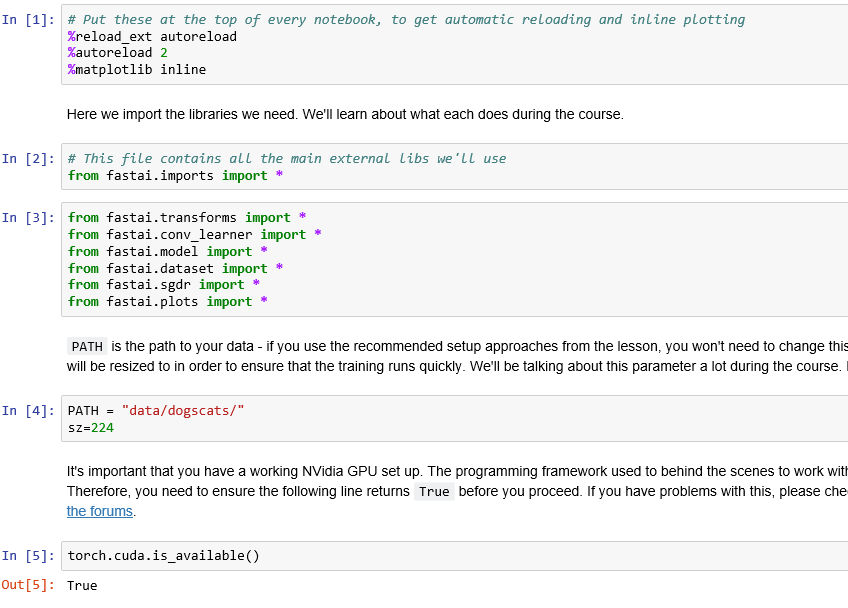
That’s it! You should be ready to now type jupyter notebook and a notebook will pop up running jupyter. Click through to courses and then dl1 and try lesson1.ipynb. The start of the notebook will show you how to check everything is working. Note that you don’t need to install CUDA, Visual Studio, CuDNN, or anything else (although it’s fine it you have installed some of these things).
If you have any problems, please tell us exactly what your set up is (e.g. Windows and driver versions, type of GPU) and full details of what you did and what errors you saw. Remember that this is a new and unsupported option, so is only recommended if for some reason you can’t use Paperspace or similar, or you’re interested in helping develop and test a the cutting edge!
Additional notes:
To use the NLP libraries in lesson 4 and onwards, you’ll need to install Spacy’s English model. To do so, run the Anaconda prompt as admin (i.e. click start, type ‘anaconda’, type ctrl-shift-enter, or right-click anaconda and ‘run as administrator’) and type: python -m spacy download en
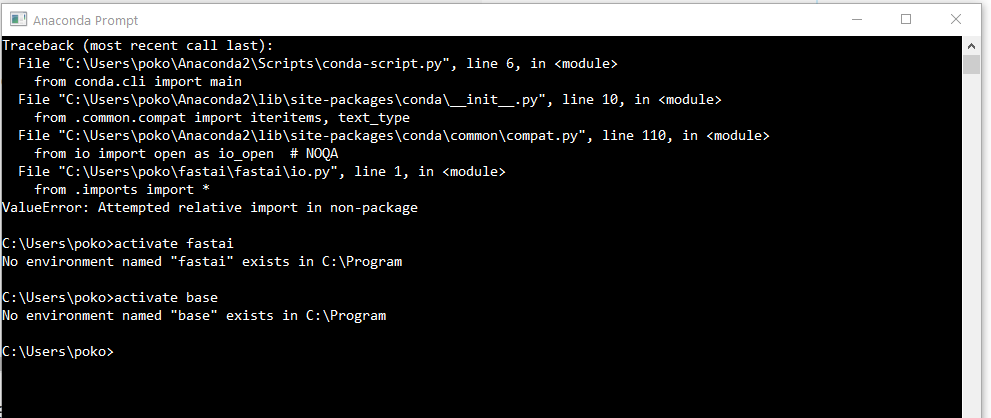
Obviously, it should look in C:\Program, because no such folder exists.
Pity, I was on the verge of having everything up and running.
It seems that my entire anaconda installation is broken. If I call conda with its absolute path, it just shows me those error messages.
But I understand you cannot provide system specific support, it was just for the record. I’ll figure out something (probably I’ll just have to reinstall anaconda and all the stuff. Damn, I have five envs with a lot of stuff).
my opinion, not that it means much, is that it is possible to have multiple versions of cuda installed on the machine. I think the last install takes precedence for cuda_path, but other ones are created per version as shown in this image from one of my machines.
As far as fastai and pytorch, there was a thread that said the developers of pytorch auto compiles the needed cuda files in their packages. Therefore, you do not need to install them separately like above. In fastai’s environment file, you will see pytorch and the necessary cuda90 packages getting installed by themselves and should only affect your fastai env.
Again, I am no know-it-all, but I read it on the internet.