NOTE: this thread id obsolete. Use the following, instead:
Howto: installation on Windows
Setting up Windows 10 for fast.ai part1v2
Important Note for Beginners: Before you venture in a windows installation, take a look at post #64 and #65 below. Always prefer python functions to shell commands in your notebooks.
New Installation Instructions (updated Jan 26, 2018)
The following instructions are somewhat easier than the preceeding ones, but they have not been tested on windows 10 yet. Should an installation attempt fail, fall back to the older instructions below.
Update: They have actually been successfully tested by @jeremy in person.
A) This tutorial assumes you already have a functional anaconda installation.
Moreover, if you don’t have git installed on your machine, install it by following these instructions: https://git-scm.com/book/en/v2/Getting-Started-Installing-Git
B) Now, move into a directory where you are comfortable installing the Fastai repo, with its libraries and required packages.
Now you got to clone that repo as follows:
> git clone https://github.com/fastai/fastai
C) Once the cloning process finishes, be sure to be in the directory created by git for the Fastai repository, and type:
> conda env create -f environment-win.yml
followed by:
> activate fastai
This will install the required packages and their dependencies into the fastai environment by leveraging the file environment-win.yml prepared by Fast.ai.
D) Now, open jupyter:
(fastai)> jupyter notebook
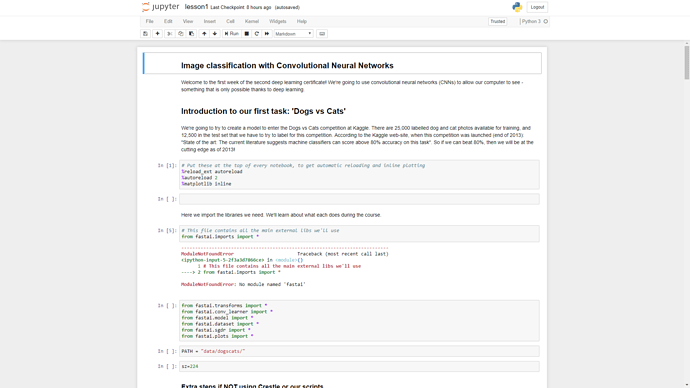
and create a new notebook (or open one of the lessons’ notebooks). Check if an appropriate kernel has been installed by the preceeding command(s). If you find out you don’t have any kernel other than the base one (usually named python 3.6), you got to install it manually:
(fastai)>python -m ipykernel install --user --name fastai --display-name "fastAI custom"
Once you open jupyter, you will select fastAI custom from the available kernels.
That would be all.
Remind that you will probably need to edit some lessons’ notebooks code, or at least the parts where you interact with the filesystem from inside the notebook.
Indeed, Fastai notebooks are written down aiming at linux systems, so if you call, for example, ls -la | head, it won’t work (quite obviously) on Windows.
Accessing the workstation remotely:
one may want to log in into such workstation remotely. In that case, there are various options, for example:
- Using remote desktop (mind that it’s slow if you have a slow or high-latency connection)
- Just leaving the notebook server on (unpractical: you would not be able to run administration tasks)
- Using the Windows Subsystem for Linux, AKA “linux on windows” with tmux (install LoW from windows store)
- Using an ssh server (which, contrarily to popular belief, is natively supported by Windows, although a bit clumsy to get working. Google for it).
Windows 10: Old Installation Instructions.
Use the following instructions just in case something goes awry with the preceeding ones.
a) Create a new anaconda env with python 3.6 and some additional packages:
(base)>conda create -n fastai python=3.6 numpy cython statsmodels opencv
This will create a new environment named fastai with some additional useful packages.
b) Install pytorch for cuda. If you already have a keras/TF setup which works only with cuda 8.0, and want to avoid headaches, you would rather install the cuda 8.0 version:
(base)>activate fastai
(fastai)>conda install -c peterjc123 pytorch cuda80
If you don’t care about Tensorflow, then you’ll be fine with cuda 9.0. In that case:
(fastai)>conda install -c peterjc123 pytorch cuda90
However, keep us posted should you manage a successful installation of the cuda9 version alongside TF and cuda8
c) Install fastai library
(fastai)>pip install fastai
be patient, that will install a lot of stuff.
d) Now you are done, but you may want to install the ipython kernel in order to use lessons’ notebooks and do your own experiments. In my case:
(fastai)>python -m ipykernel install --user --name fastai --display-name "fastAI custom"
That would be all.
Now, one may want to log in into such workstation remotely. In that case, there are various options, for example:
- Using remote desktop (mind that it’s slow if you have a slow or high-latency connection)
- Just leaving the notebook server on (unpractical: you would not be able to run administration tasks)
- Using the Windows Subsystem for Linux, AKA “linux on windows” with tmux (install LoW from windows store)
- Using an ssh server (which, contrarily to popular belief, is natively supported by Windows, although a bit clumsy to get working. Google for it).
Hope this helps.
Additional notes:
Some users report various issues, which I will try to address as I hear of them.
-
bcolz: Shuld you get an error related to packagebcolz, it’s because it was installed via pip when you installedfastailibrary, and the pip version doesn’t quite match. Remove it bypip uninstall bcolz, then install it byconda install bcolz. Quick test:python -c "import bcolz" -
torchvision: Should you get import errors related totorchvision, install it with pip:pip install torchvision. -
Should you get errors related to PyYAML, remove it if you installed it with conda, then reinstall it with pip:
pip install PyYAML. Mind that another, different, package namedpyamldo exist. Furthermore, the conda packagepyyaml(all lowercase) did produce errors on my machine, but you can try it if you want. Obviously, do not install pipPyYAMLalongside condapyyaml. -
(important) Once you start a notebook, don’t forget selecting the right kernel from inside Jupyter, otherwise you’ll get a ton of import errors. In the example above, the kernel we would select is “
fastAI custom”.


