It may sound duplicated from other posts, but I did try all the mentioned approaches but they failed in my case.
I am working with Windows 10 and anaconda prompt. I could easily setup the environment for the previous version of the course (dl1) by following @jeremy 's post Howto: installation on Windows.
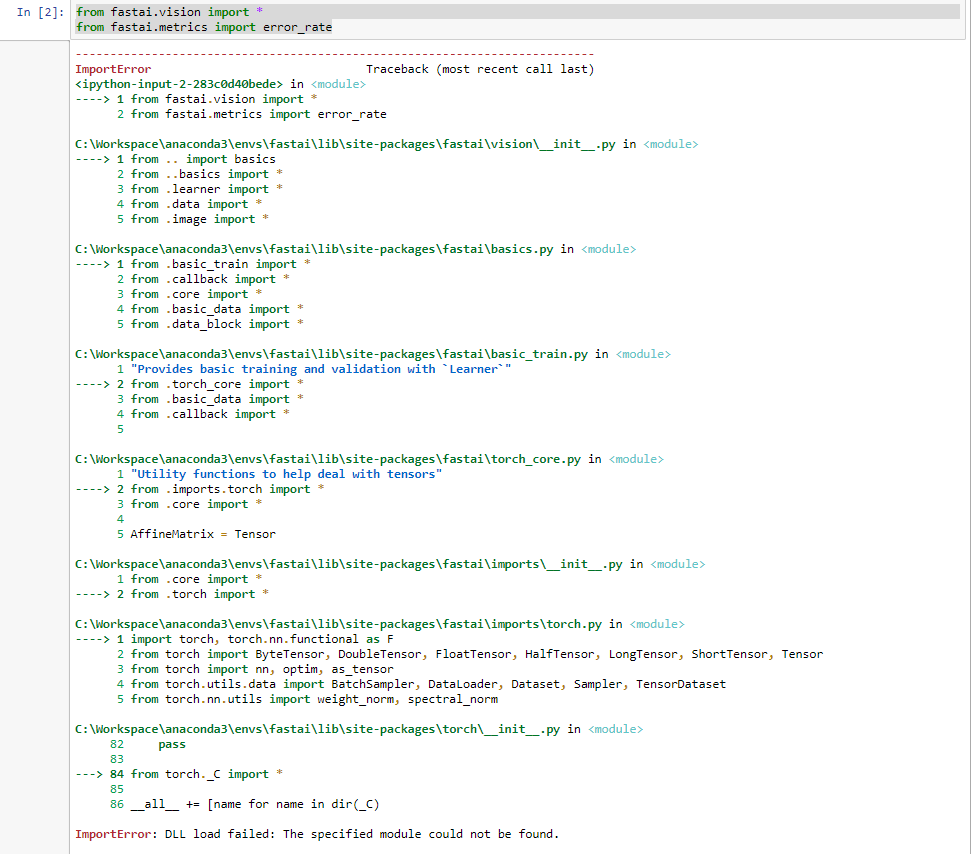
Now I would like to start the v3 course. I checked out the new course in a different drive (d:\ instead of c:). It couldn’t find fastai. Then I delete the old env and set up a new one, but I still got ModuleNotFound error.
ModuleNotFoundError: No module named ‘fastai’
I must have screwed up the path and links. Could we have a step by step setup for course v3 for Windows. Thanks!
In my case, what is the best way to clean my messy enviorment?
Thank you soooo much for mentioning this. I was so confused the last days over getting my own laptop ready for the course and was finally thinking of a Linux installation on it. I’m glad i saw this. Thank you!
OK. Now I know my problem. I have been creating a fastai environment following Howto: installation on Windows . Apparently the enviorment created in the fastai/fastai folder does not work for course v3. This didn’t work even if I do
conda install -c pytorch -c fastai fastai pytorch torchvision cuda92
Now, if I simply do the above installation in the base environment of conda, then it works. It would be nice though if a fastai enviorment can be created for course v3. Maybe it is already existing somewhere but I just don’t know of.
In short, do what @alice mentioned in the base environment in conda. Thanks everyone for helping out!
The problem I noticed was that the create_cnn in lesson1 was hanging indefinitely when I updated Pytorch to 1.0.1. To resolve it I pinned version of Pytorch to 1.0.0 by running : conda install -c pytorch pytorch=1.0.0. You can use this script that is used on Azure Windows Data Science VM as a reference.
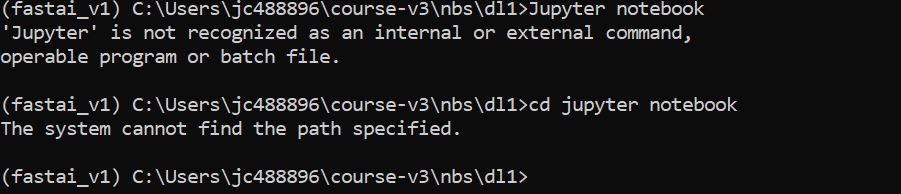
It’s weird when I lunch jupyter notebook from fastai env ( installed from coursev1 and updated) it shows nothing (blank page with 302 get error) however when I lunch jupyter notebook without env everything works fine and I can execute nb cells and train models, etc…
Should I keep it this way or I need to launch it from fastai env ?
No luck setting up v3 course on win10. Followed instructions here. Either ordinal 242 problem, and if I follow fix instruction to fix it I get “the procedure entry point fatbinaryctl_createhandle” error. I tried fresh env with python 3.6.8, 3.7.1 and 3.7.2, pytorch different versions, mkl different versions, fastai different versions. fix one, break another
EDIT: For the [Intel MKL FATAL ERROR: Cannot load mkl_intel_thread.dll.] -error I finally found another fix removing some dlls from system32 that doesnt create a new problem:
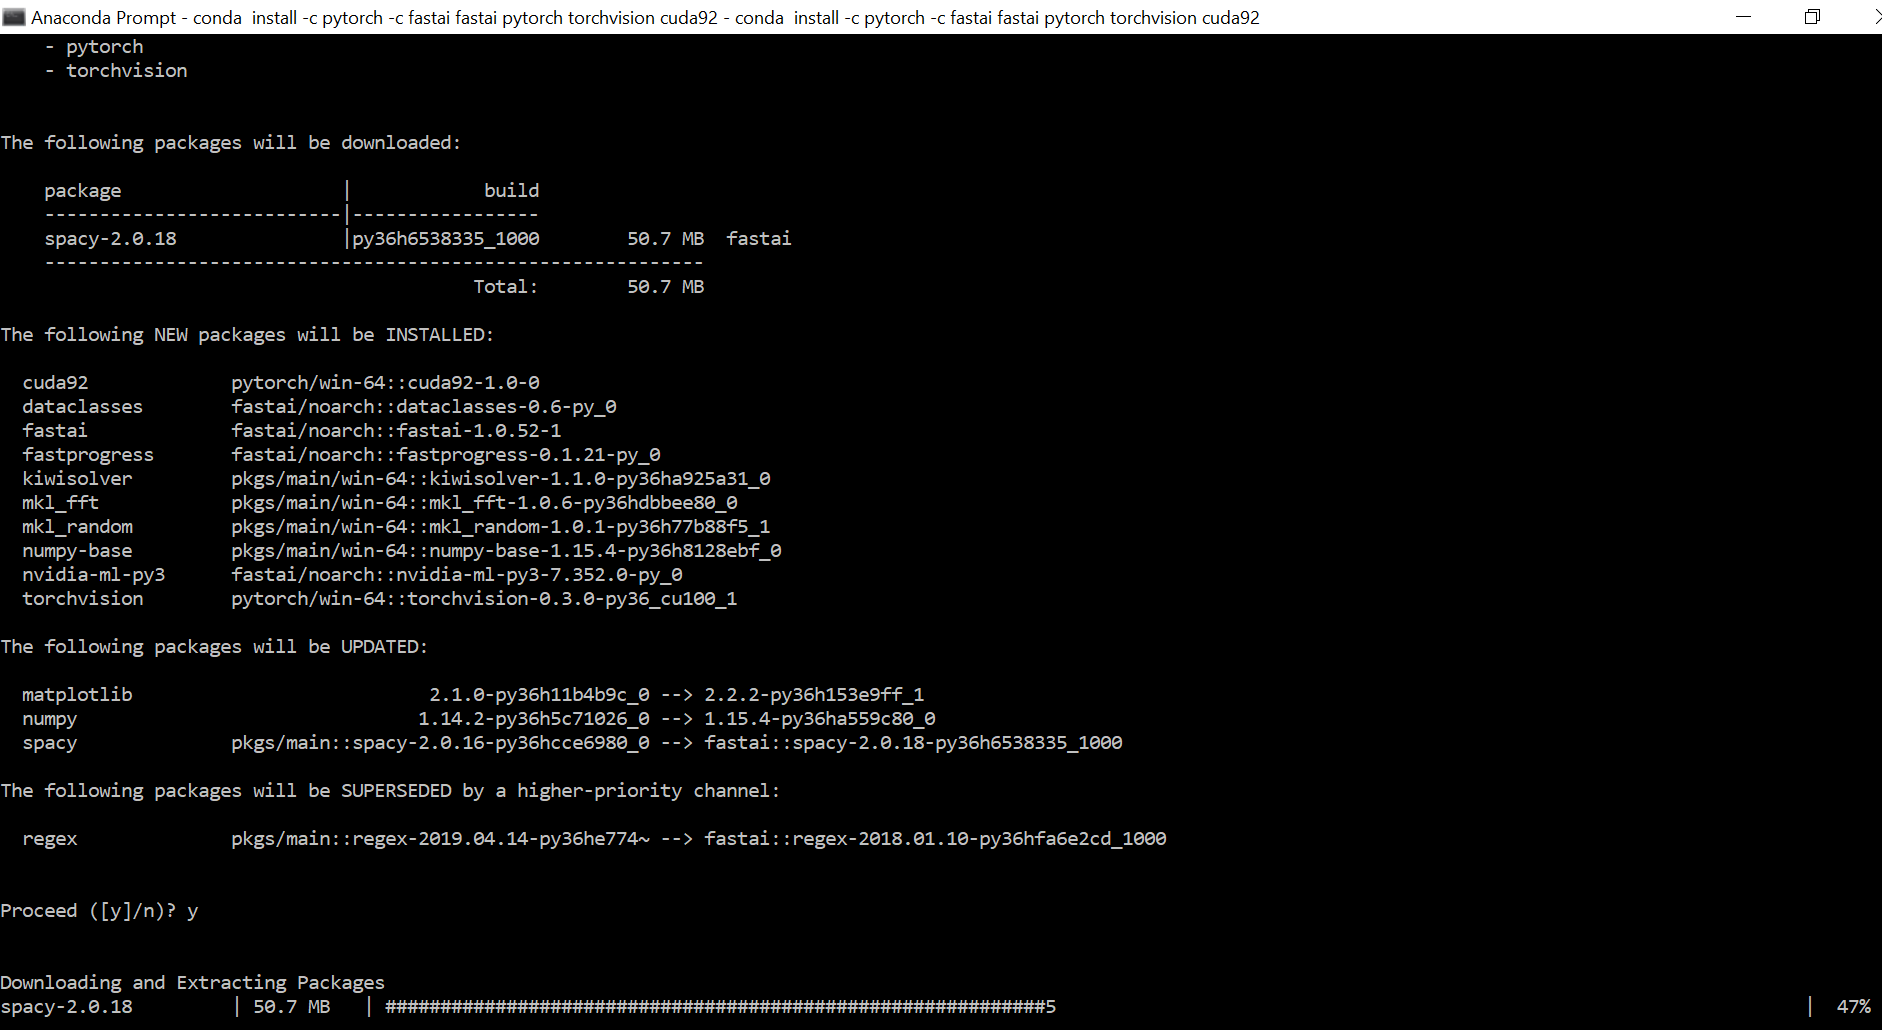
I have had the previous version of fastai installed and working fine on my Windows 10 laptop. I used @alice’s instructions and it shows a weird error after the following line- conda install -c pytorch -c fastai fastai pytorch torchvision cuda92
This code tries to look for packages to be updated, installed and downloaded. All the packages get downloaded except for SpaCy 2.0.18. after downloading 40-50% it gives out the HTTPError everytime.
Not sure what’s going on. I also tried to do pip install spacy which worked but maybe not the required version. Not sure how to work around this and why this is happening.
I just got started with fastai v3 on windows 10 and followed the above steps. There was an issue with the wrapt module. With conda command the latest was 1.11.1 so it complained about the dependency.
UnsatisfiableError: The following specifications were found to be incompatible with each other: