Hi there,
I work at UCSF in brain tumor imaging prediction, and would love to be a part of this effort. Is there any organized meeting for working on this project so far?
2 Likes
Thanks for sharing this is very helpful.
Hi @julclu - would love to have you helping, esp with your background!
Re: organized meeting - not yet (nothing beyond this thread). Personally, I was waiting for tonight’s class as I think we will learn to build ResNet using the new framework (FastAI 1.2) and that’s probably what we would want to use to start with for this project.
Maybe tomorrow (4/18) we can start discussion about a more formalized meeting/organization as we should have enough tools to get going if we get to building various nets in class tonight?
1 Like
Thanks for posting this. This is very useful. I’m also taking part in this competition and I was trying to understand what slice meant here? Should we interpret each slice as a separate image ?
I’m going to edit the code above shortly with some changes I made.
In MRI, a slice is a single image in a stack. You can use a 2D convnet to perform image-level classification, then derive study-level classification from that. Or you can use a 3D convnet to achieve study-level classification by treating the entire stack of images as a volume. There are also some hybrid approaches using object detection architectures, like this paper.
2 Likes
Awesome work guys!
awesome, thanks for the notebook! Nice to be able to see the data now.
1 Like
Do you guys have any preference on an eventual virtual meetup. We could perhaps do a google hangouts. What timezones are people here in? (me GMT +2)
1 Like
Hi. Thanks to @melonkernel for creating this thread. I just read all posts and saw your proposals of models and links to papers. Great ![]()
However, why not starting with the model of the original paper “Deep-learning-assisted diagnosis for knee magnetic resonance imaging: Development and retrospective validation of MRNet”:
Code for replicating these findings is provided as Supporting Information (S1 Code and S2 Code).
At first, we could turn this code into fastai in order to get the same results (even exceed them thanks to the great ideas of fastai ![]()
Thus, we could post in github the fastai notebook and put the weights online (in order to help the DL and health community not to train the same models again and again from scratch).
Then, as a team or through different teams (here at Brasilia, we are creating a team for this competition), we could train better models to improve our results.
What do you think of that?
5 Likes
The solution is done in another thread about MRNet : Stanford MRNet Competition trouble downloading dataset to gcp - #3 by kushaj (I guess it is what @nswitanek used, no?):
- Use this Google extension to download in GCP (
wget ...) the 6 Go MRNet dataset: it works well
The structure after unzip is the following one:
- train
-- axial
-- coronal
-- sagittal
- train-abnormal.csv
- train-acl.csv
- train-meniscus.csv
- valid
-- axial
-- coronal
-- sagittal
- valid-abnormal.csv
- valid-acl.csv
- valid-meniscus.csv
With the command du -h MRNet-v1.0 in my terminal ubuntu, I get the following folder sizes:
258M    MRNet-v1.0/valid/axial
222M    MRNet-v1.0/valid/coronal
230M    MRNet-v1.0/valid/sagittal
709M    MRNet-v1.0/valid
2.4G    MRNet-v1.0/train/axial
2.1G    MRNet-v1.0/train/coronal
2.2G    MRNet-v1.0/train/sagittal
6.6G    MRNet-v1.0/train
7.3G    MRNet-v1.0
Hi Pierre,
Thanks - my issue was on Windows but yes I may have to download to a server as no luck yet on Windows!
I have been able to download and run the above code to view the images. But I am using mac.
@LessW2020 @rsrivastava : in fact, I did not try to download the MRNet dataset to a mac or a windows notebook but to my instance in GPC. I guess that the Google Extension given works in all situations.
1 Like
It is working for me too.
1 Like
I just submitted a PR to the repo with my EDA nb.
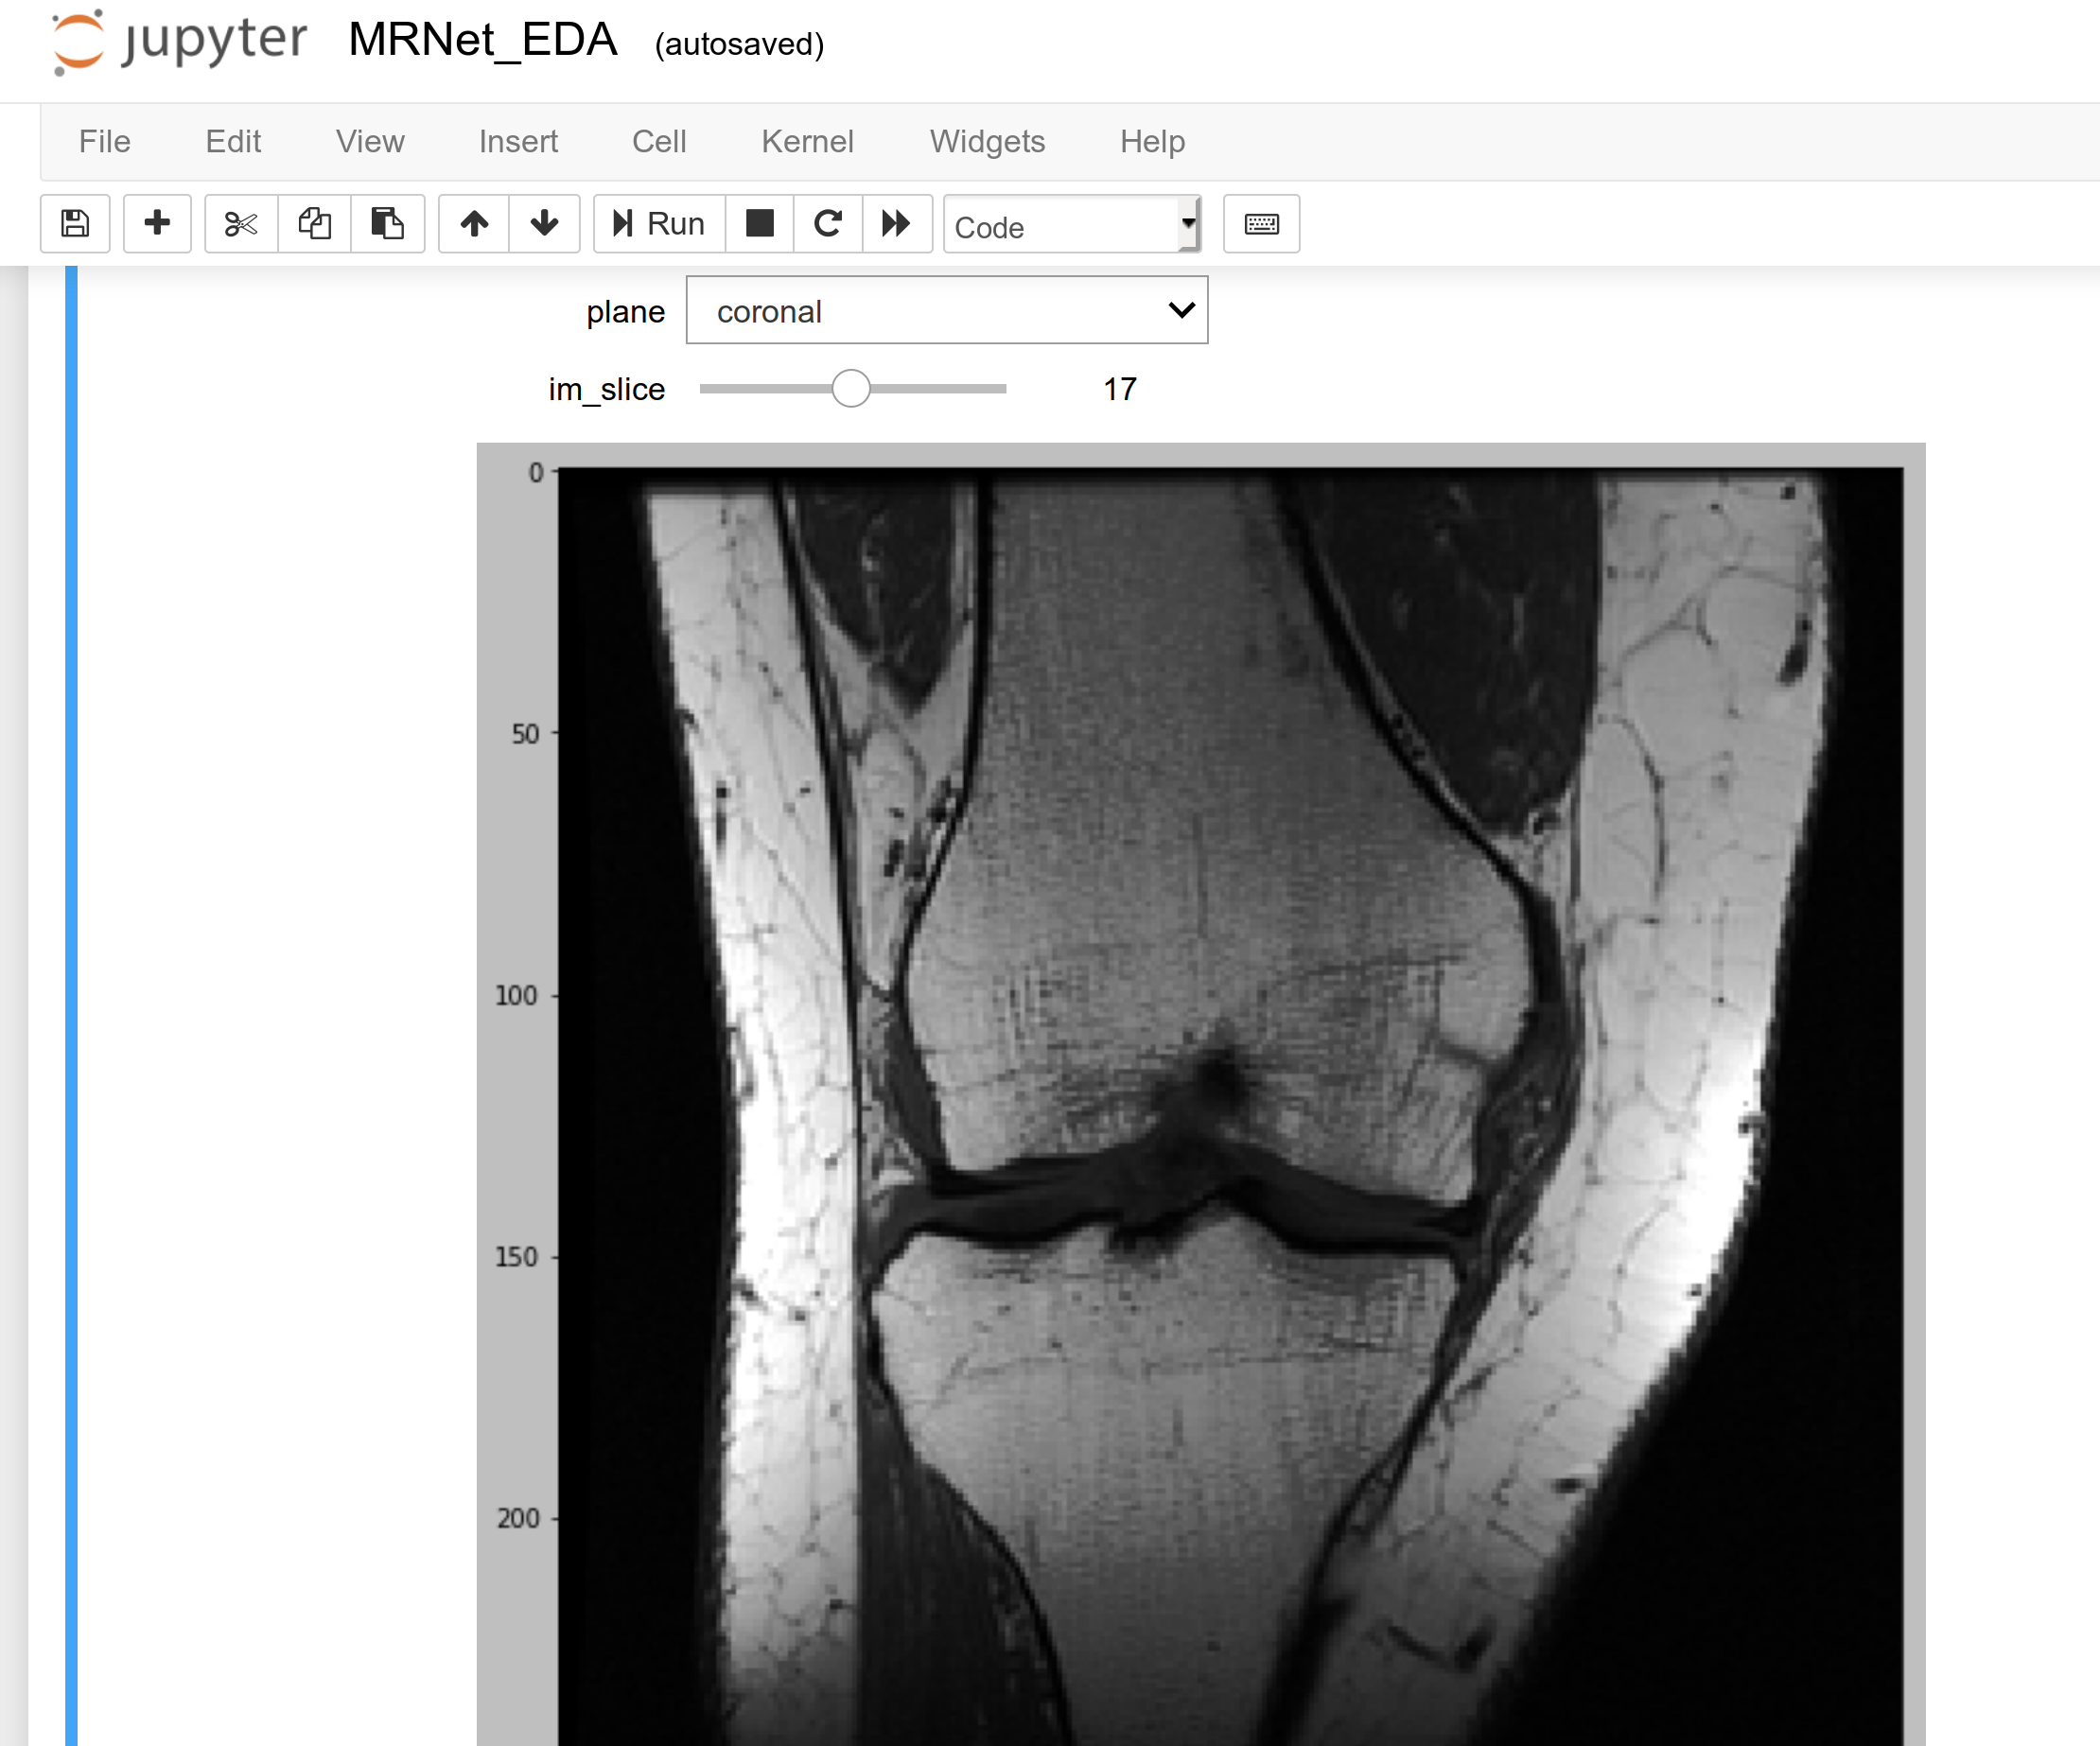
I’ve edited my code above with a little refactoring/upgrading of the original KneePlot class. But the big addition is a new class that generates an interactive plot of all three imaging planes (axial, sagittal and coronal) for each case.
This is the code to load the data for use in each class.
train_abnl = pd.read_csv(data_path/'train-abnormal.csv', header=None,
                       names=['Case', 'Abnormal'],
                       dtype={'Case': str, 'Abnormal': np.int64})

def load_one_stack(case, data_path=train_path, plane='coronal'):
    fpath = data_path/plane/'{}.npy'.format(case)
    return np.load(fpath)

def load_stacks(case):
    x = {}
    planes = ['axial', 'coronal', 'sagittal']
    for i, plane in enumerate(planes):
        x[plane] = load_one_stack(case, plane=plane)
    return x

case = train_abnl.Case[0]
x = load_one_stack(case)
x_multi = load_stacks(case)
And this is the code for the new class to generate the multi-viewer.
from ipywidgets import interact, Dropdown, IntSlider

class MultiKneePlot():
    def __init__(self, x_multi, figsize=(10, 10)):
        self.x = x_multi
        self.planes = ['coronal', 'sagittal', 'axial']
        self.slice_nums = {plane: self.x[plane].shape[0] for plane in self.planes}
        self.figsize = figsize

    def _plot_slices(self, plane, im_slice):
        fig, ax = plt.subplots(1, 1, figsize=self.figsize)
        ax.imshow(self.x[plane][im_slice, :, :])
        plt.show()

    def draw(self):
        planes_widget = Dropdown(options=self.planes)
        plane_init = self.planes[0]
        slice_init = self.slice_nums[plane_init] - 1
        slices_widget = IntSlider(min=0, max=slice_init, value=slice_init//2)
        def update_slices_widget(*args):
            slices_widget.max = self.slice_nums[planes_widget.value] - 1
            slices_widget.value = slices_widget.max // 2
        planes_widget.observe(update_slices_widget, 'value')
        interact(self._plot_slices, plane=planes_widget, im_slice=slices_widget)

    def resize(self, figsize): self.figsize = figsize
Example usage with screenshot of viewer.
plot_multi = MultiKneePlot(x_multi)
plot_multi.draw()
5 Likes
@neuradai Thanks a ton for the notebook - it’s merged into the master so everyone can use.
We got our resnet (XResNet!) tonight as I had expected/hoped, along with the final updates to FastAI 1.2 so I think we are set in terms of framework and base CNN to work with.
I did do some testing with the Lisht activation and it looks promising, though it’s prone to exploding due to the fast learning rate…but I will try and test with it in the XResNet soon.
I see we can do polls here, so maybe we need to do that but imo, the current question is how do we want to get started?
One idea I had was to just build a tiny toy dataset with the images and throw it into XResNet as a simple test to start seeing how that performs…then build up from there?
I’m in US PST and can do a video chat/hangout at pretty flex times.
@pierreguillou - thanks for the link to the Stanford code. I did not know it was published…I downloaded it…
and I had to double check b/c the model is is so basic. Here it is:
import torch
import torch.nn as nnfrom torchvision import models
class MRNet(nn.Module):
def init(self):
super().init()
self.model = models.alexnet(pretrained=True)
self.gap = nn.AdaptiveAvgPool2d(1)
self.classifier = nn.Linear(256, 1)def forward(self, x): x = torch.squeeze(x, dim=0) # only batch size 1 supported x = self.model.features(x) x = self.gap(x).view(x.size(0), -1) x = torch.max(x, 0, keepdim=True)[0] x = self.classifier(x) return x
I still question if I missed something b/c this looks like something an intern built, but anyway, if that’s their model then we should be able to blow the doors off of them with FastAI ![]()
1 Like
I propose creating a toy dataset by creating a subset of the data balanced by “abnormal” positive/negative. Then take the middle slice from each plane to create a 3-channel stack for input into the XResNet.
train_data = np.zeros(train_df_reduced.shape[0], 3, 256, 256)
planes = [‘axial’, ‘sagittal’, ‘coronal’]
for i, case in train_df_reduced.Case.iteritems():
    for j, plane in enumerate(planes):
        data = np.load(‘{}/{}.npy’.format(plane, case)
        mid_slice = data.shape[0] // 2
        train_data[i, j, :, :] = data[mid_slice, :, :]
There’s surely a more fast.ai-y way to do this, but I’m just trying to illustrate my suggestion here with code.
1 Like
I’m in US PST and same for @rsrivastava.
I think a video chat would be great, but at the same time, we may be able to just work via these forums here and possibly some kind of slack channel or similar.
It may be too difficult to get everyone online at the same time in general?
1 Like
I’ll definitely vote for this toy dataset proposal…I think the faster we get to actually running some scans through XResNet and get some vague idea of how it does, the better.
That way we can start getting actual feedback asap on what XResNet can and can’t readily pickup on, and then we start looking at more complicated architectures/inputs, testing more images as input, testing whether we need segmentation and/or super resolution,etc.
It will be interesting also to try a small mixup test and see if that does any good on this starter set.
I’m going to try and play with the new XResNet via the notebook later today if possible.
I still can’t get the dataset to unzip here…I’ll reboot later today and try again, but if you make a basic starter dataset, can you post it somewhere or push it to the repro, so I can download and test with it?
Yes, I used wget to download it, to GCP.
1 Like