This topic is for discussion of the seventh live coding session
Important note
During this video at one point I install mamba into my local conda env. This turns out to be a mistake, so later in the video I remove it and all the stuff it adds, and use micromamba instead. To skip all that headache, when you run through these steps don’t run the command that installs mamba at all!
Links from the walk-thru
- (please contribute here)
What was covered
- (please contribute here)
Video timeline - thank you @Daniel
00:00 Radek intro
Practice walk-thru 6 / chp1 on Kaggle
03:22 Jeremy introduces Kaggle competitions and reminded us that we have to join the competition before downloading the dataset
06:05Paperspace had some running issues even to the paid servers, and continue the session on local machine
10:08 How to install Kaggle (presumbly the code will work on both local and paperspace)? pip install --user kaggle
10:58 What’s special about the things installed/stored in a /bin/ directory? things/programs you can execute
11:17 Why we can’t run kaggle in terminal just now? because the /bin/ directory is not in $PATH
11:41 How to get the bin/ directory where kaggle is installed into $PATH? On paperspace, we can add the bin directory to $PATH through /storage/.bash.local file (here is Jeremy explain what the file does it for you) which enable kaggle to work on a new terminal next time; on local machine, you can do the same with .bashrc file; Radek and Jeremy also confirmed that if you want to run !kaggle in jupyter notebook, you need to also to add bin/ directory to $PATH in pre-run.sh file.
12:31 Another question answered
13:14 How to edit .bashrc : 1. vim .bashrc or /.bash.local if paperspace; shift + g to go to the bottom of the file; o to enter a new line and edit; type export PATH=~/.local/bin:$PATH to add the bin/ directory to $PATH; 2. type :qw to save and exit vim; 3. in terminal type source !$ (meaning source theLastCommandParameter) to run .bashrc or you can close and reopen a terminal
14:12 How to get kaggle.json and put it in the right directory? 1. type kaggle will remind you to have kaggle.json ready in the right place; 2. go to your Kaggle account and click create new API token to download the kaggle.json file; 3. sudo cp .kaggle/kaggle.json ~anotherUser/.kaggle to copy a file (here kaggle.json) from one user to another user; 4. and other command to change the ownership of a file
18:09 How to use kaggle cli to download competition dataset? cd git; mkdir paddy; cd !$; kaggle competitions download -c paddy-disease-classification to create a folder to download the dataset; How big is the paddy doctor dataset size? 1GB
18:52 mamba vs pip on installing kaggle? for simple python packages, pip install is a more obvious choice than mamba install
20:35 How to unzip the dataset file? paddy$ unzip -q paddy-disease-classification.zip to unzip the file without display the processing messages with -q for quiet
20:54 How to get kaggle.json available in paperspace? 1. use the upload button in paperspace jupyter lab to upload kaggle.json and store it in ~/.kaggle/kaggle.json; 2. make sure the file permission is properly -rw------- and search chmod for how Jeremy taught us to change user permission on files; 3. Radek in the post suggested to write your own kaggle.json and save in paperspace as a different solution
21:46 How to copy files to different local server? How to utilize .ssh/config file? involving cp, chown, scp etc
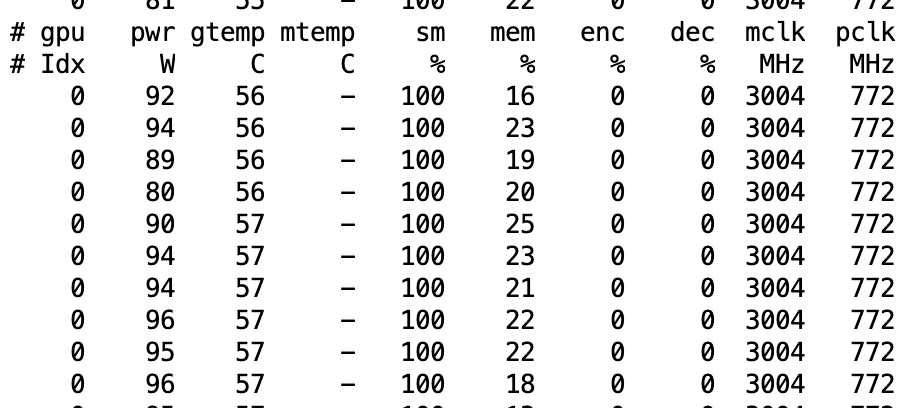
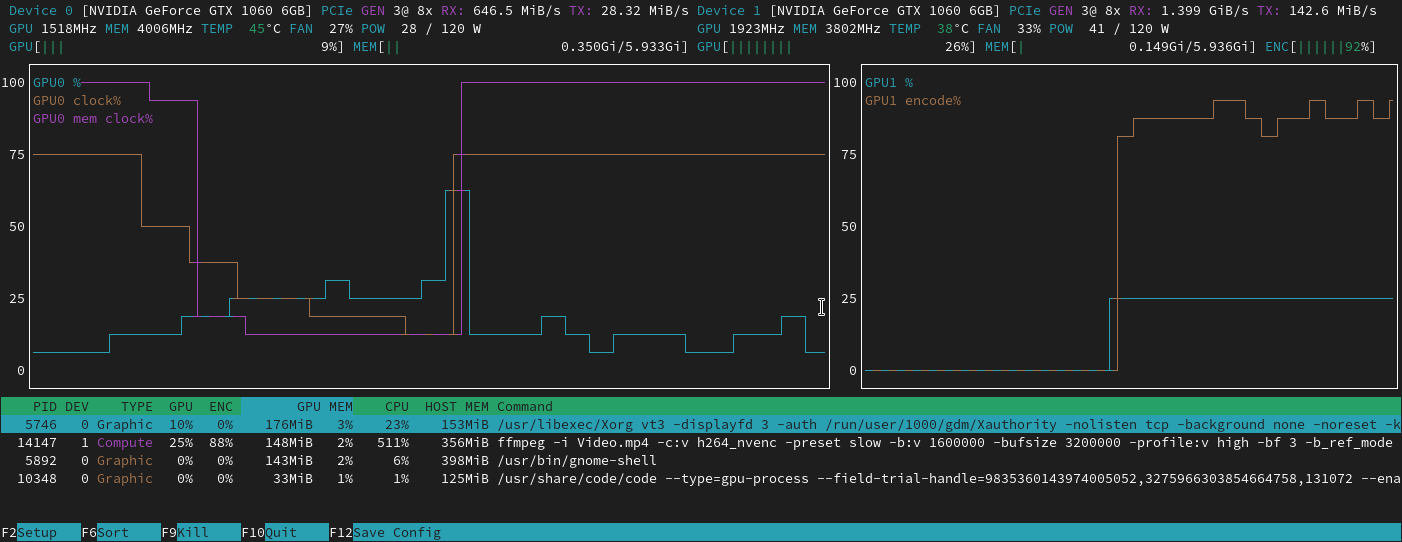
24:14 How to check your local GPU? type nvidia-smi
25:06 How to check out the paddy dataset? mv ~/padd-disease-classification.zip ./ move the zip file to current folder from home directory, and unzip it with unzip -q paddy-disease-classification.zip; and ls to see what inside;
25:32How to explore the dataset folder in terminal? ls train_images/ |head and what this command does is to take the output of ls train_images/ and send it to head to process; How to look into files in subfolder? ls train_images/bacterial_leaf_blight/ | head; How to count the number of files inside a subfolder? ls train_images/bacterial_leaf_blight/ | wc -l in which | wc -l takes the output from ls folderName and count the number of lines; What are other useful functions like | head? | tail output the last few file names, | grep 33 to output the filenames with ‘33’ in it; paddy# cat will output what inside this folder; cat train.csv | head can give us the first few rows of the csv file; cat train.csv | grep ADT45 | wc -l to search rows with ‘ADT45’ in train.csv and count the number of those rows
Go through the above steps in paperspace
29:09 How to use the correct version of pip to install kaggle? 1. check the version which pip: if it is not from the directory opt/conda/bin/pip then remove the found version with mv root/conda/bin/pip for example, and restart terminal and try which pip to check and confirm; 2. ctrl + r and type pip to find pip install kaggle --user to install kaggle; 3. However, the warning message confirmed that the kaggle is installed in a directory /root/.local/bin which is not on the $PATH, and we need to get it into $PATH; 4. we could add it to the $PATH by .bashrc in local machine or .bash.local in paperspace, but we will try Radek’s approach with pre-run.sh: just add the following command into the end of the file export PATH=~/.local/bin:$PATH and be aware that bash is very much sensitive on space, so don’t leave space inside the command; 5. if you run export PATH=~/.local/bin:$PATH directly in terminal, then you don’t have to close and restart a terminal to activate the new $PATH; 6. type kaggle, it should run and also tellings us to get kaggle.json in the right directory; 7. upload kaggle.json to paperspace; 8. did kaggle created a ~/.kaggle folder for us? yes, we can confirm by cd ~/.kaggle; ls; 9. let’s move the updated kaggle.json into ~/.kaggle by mv /notebooks/kaggle.json ./; 10. we will find the permission of kaggle.json is wrong as it is -rw-r--r-- by ls -la; 11. we can fix the permission by chmod 600 kaggle.json; 11. now copy the download command from the paddy competition site, and run ~/.kaggle# kaggle download -c paddy-disease-classification; 12. let’s move the zip file into /notebooks/paddy/ by a trick taught by Jeremy earlier in walkthru 6 ~/.kaggle# mkdir -p ../notebooks/paddy/; mv paddy-disease-classification.zip ../notebooks/paddy/;; 13. let’s unzip the dataset zip file by unzip -q paddy-disease-classification.zip;
34:47 How to install unzip for paperspace? micromamba install -c conda-forge -p ~/conda unzip and hopefully by July or August 2022 mamba and unzip will be installed by paperspace without us doing it manually;
34:50 How to get the keyboard shortcut in terminal working for paperspace terminal too? (later sessions?)
36:59 How to deal with large dataset and cost of persistence storage? 1. if dataset sits in /notebooks/ it will be charged with 0.29 dollar per GB/month; 2. if don’t want to spend any money, then move dataset into home directory ~/, and you will lose the dataset when closing the notebook/machine and have to download it again when starting the notebook again. You could write a script to automate the downloading process; 3. If you will work on this dataset for a month, then $0.29 surely worth your time.
38:04 It takes a long time for Paperspace to store large files into persistence storage, at least for folders with a lot of files. How to make utilising dataset faster in paperspace without much trouble? 1. How to find the disk space a folder take? du -sh train_images/; 2. why does Jeremy think it may be a better idea to move dataset back to home directory ~? we don’t want to take a long time to utilise the datasest when training a model; 3. how to delete multiple folders and files in one go? rm -rf test_images/ train* sample_submission.csv and train* include train_images/ and train.csv, and even deleting them takes a while; 4. How much time does it take home directory to unzip a 1GB dataset file? time unzip -q paddy-disease-classification.zip (only 8 seconds, and only 5 seconds to download), so we should make the download and unzip automated in the home directory when starting the paddy notebook.
41:14 How can we create a script to automate the download and unzip process of paddy dataset inside home directory (when starting the paddy notebook)? 1. create a directory paddy inside \notebooks\, save the paddy jupyter notebook there, and the automation script get_data.sh there too; 2. What does the get_data.sh look like? ( #question shouldn’t we do pushd ~; popd in the script below?) 3. how to make get_data.sh executable? chmod u+x get_data.sh; 4. so now, you can run this get_data.sh every time you start the paddy notebook/machine to automatically download and unzip the dataset into the home directory; (or you can put get_data.sh into pre-run.sh so that you don’t need to run get_data.sh yourself.
!#usr/bin/env bash
cd
mkdir paddy
cd paddy
kaggle download -c paddy-disease-classification
unzip -q paddy-disease*
43:08 Create a jupyter notebook for paddy competition. 1. What’s the first thing Jeremy usually do for an image competition/task like this? from fastai.vision.all import * to get all the classes and methods on vision ready for use; 2. How to get the path for dataset ready? path = Path.home()/'paddy', use path to check the dataset directory; 3. use path.ls() to show us what in there, and if we type Path.BASE_PATH = path, then path.ls() will leave the directory part out and make the content name more readable; 4. How to take a look at the train.csv file? df = pandas.read_csv(path/'train.csv'); df to read the first and last few rows of the csv file; (continued to the next paragraph below)
from fastai.vision.all import *
path = Path.home()/'paddy'
path
path.ls()
Path.BASE_PATH = path
path.ls()
df = pandas.read_csv(path/'train.csv')
df
45:19 How to take a look at the image listed in the csv file? 1. How to get the path for train_images/ and a path to a particular category bacterial_leaf_blight: trn_path = path/'train_images'; blb = trn_path/'bacterial_leaf_blight';; 2. How to display an image with its path? img = PILImage.create(blb/'100330.jpg'); img; 3. What is the size of the image? img.size (size is not a method as it seems); 4. How to get all the image paths into a list? files = get_image_files(trn_path); files; img = PILImage.create(files[0]);; 5. How to check whether the image size is consistent in all images? [PILImage.create(o).size for o in files[:10]]
from fastai.vision.all import *
path = Path.home()/'paddy'
path
path.ls()
Path.BASE_PATH = path
path.ls()
df = pandas.read_csv(path/'train.csv')
df
trn_path = path/'train_images'
blb_path = trn_path/'bacterial_leaf_blight'
img = PILImage.create(blb/'100330.jpg')
img
img.size
files = get_image_files(trn_path)
files
img = PILImage.create(files[0]);
img
[PILImage.create(o).size for o in files[:10]]
df.variety.value_counts()
ImageDataLoaders.from_folder(trn_path, valid_pct=0.2, seed=42, item_tfms=Resize(224)) dls.show_batch()
learn = vision_learner(dls, resnet34, metrics=error_rate)
learn.fine_tune(1)
49:40 What to think about image sizes? paddy image size is consistent, which is handy and interesting (why interesting?), and the size of the images seem big. Jeremy’s advice is to start with smaller sizes and then move onto original size, but 480x 640 is not terribly large.
51:00 What shall we do with the meta data variety of paddy/rice? 1. our model may not need the variety data to train itself for the task, as the images can give model enough knowledge to figure out variety; 2. but if the number of variety is too many, then this variety data may be useful/necessary to our model; 3. how to count the unique varieties of paddy using variety data? df.variety.value_counts(); 4. given only 10 unique varieties, and 70% of images belong to a single variety, so variety should be a low priority in our dataset for training model;
53:10 Build a ImageDataLoaders with train_images or its path: 1. since chap1 or 01_intro notebook of fastbook is on vision model, so maybe some code can be borrowed; 2. How to create a ImageDataLoader from train_images/ folder? dls = ImageDataLoaders.from_folder(trn_path, valid_pct=0.2, seed=42, item_tfms=Resize(224)) and we can show a batch of images with dls.show_batch();
56:50 Build a learner and fine-tune it: 1. How to build a model with vision classification model with Resnet34 using our dls? learn = vision_learner(dls, resnet34, metrics=error_rate) will download the resnet34 weights for us and create the model learn; 2. How to fine-tune this model for one epoch? learn.fine_tune(1)
57:07 How do we know our model is using GPU efficiently? 1. in terminal type nvidia-smi dmon and focus on reading two columns sm and mm (memory); 2. sm stands for GPU, we want to see the number to be high 70-90% is good, and if the error rate is quite low from training, then we can assume we are successfully training our model; 3. if sm is lower than 50% then it suggest GPU is not properly used by our model; 4. if that happens, what are the potential causes for the lower number to deal with: A most likely cause is that we are not reading and process images fast enough for model to use, which could be a result of storing dataset inside /storage/ or /notebooks/ as they are network storages meaning slow;
1:00:11 What are the potential solutions to improve on sm? 1. move dataset to local storage like home directory from storage/ or notebooks/; 2. resize images ahead of time (to make them smaller); 3. decrease the amount of augmentation; 4. pick an instance/machine with more CPUs
1:02:03 Next session for kaggle submission and kaggle notebook