Fastai v2 daily code walk-thrus
Fastai v2 chat
Notes for this walk-thru from @Honigtoast:
Notebook 10 Pets Tutorial
Hint: Always make sure to git pull before you start!
The Notebook can be found here: Notebook 10. And here is the lesson video.
Pipelines:
Q: Can we decode from Pipelines?
A: Similar to encoding, we can also use Pipelines to decode! If you are using a pipeline to decode something, it will pipe through all the steps and call decode on each.
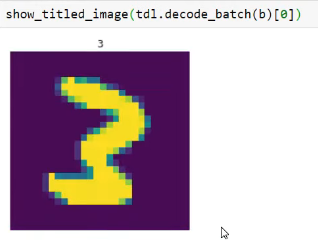
pipe.show is an interesting pipeline: when you want to show a pipeline, it is going to decode every part of the tuple. It will stop as soon as it gets to a type which has a show method defined.
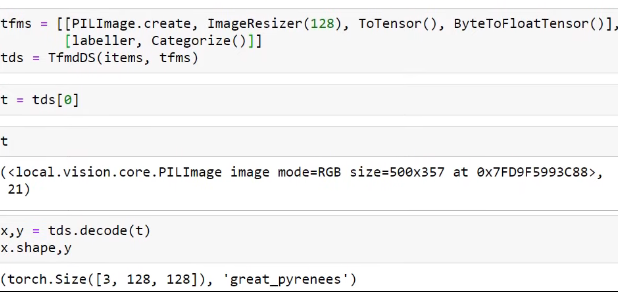
Example:
t is a tuple of a PILImage and a number.
This decodes each part of the tuple by decoding each of the pipelines.
It ends up with the name of the dog breed.
DataLoader TfmdDL
TfmDL understands two things:
- How to maintain types (makes sure PILImage and subtypes are maintained);
- Decoding (you can have transforms in a TfmDL and they behave the same way as in a TfmDS).
Compared to last time:
- The labeller pipeline is still the same
- But: the Image pipeline is just PILImage.create
- class PILImage(PILBase): pass
- PILBase has a create-method and a show-method
Why are we able to get rid of these three things in our pipeline?

-> We moved them into our DataLoader pipeline

DataSource
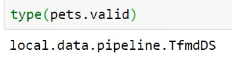
DataSource is basically a transformed dataset TfmDS with the ability to create different training sets and validation sets (in fact as many subsets as you like).
Additionally to the things we passed in to TfmDS, we will pass the indices of the splits into the DataSource:
pets = DataSource(items, tfms, filts=split_idx)
len(split_idx) has two arrays in it which are just a list of Ids for train/valid set.
You can use the same functionality as with TfmDS, but you can also ask for a subset:
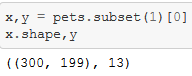
x,y = pets.subset(1)[0] This is the validation set which has the shortcut pets.valid[0]
pets.subset(0)[0] is the training set with the shortcut pets.train[0]
You can do everything with this just like before with TfmDS!
Special pipelines:
after_item=ds_img_tfms transform that runs on each individual tuple
after_batch=dl_tfms runs after the tuples have been collated together by the PyTorch DataLoader into a single batch. This means we are able to easily run GPU-transforms which will be much faster than on CPU!
What happens, when a pipeline first gets its DataSource?
Example with Categorize()

- It first calls the special method
setup() - If there is a training-subset of the
DataSource, it will be grabbed here - This ensures that your category-vocab is only done on the training-set
Segmentation
cv_source = untar_data(URLs.CAMVID_TINY)
cv_items = get_image_files(cv_source/'images')
cv_splitter = RandomSplitter(seed=42)
cv_split = cv_splitter(cv_items)
cv_label = lambda o: cv_source/'labels'/f'{o.stem}_P{o.suffix}'
- Grab a subset of CAMVID
- Get the image files
- Create a RandomSplitter
- Create the split indexes
- Create a labeling function
tfms = [[PILImage.create], [cv_label, PILMask.create]]
camvid = DataSource(cv_items, tfms, filts=cv_split)
trn_dl = TfmdDL(camvid.train,  bs=4, after_item=ds_img_tfms, after_batch=dl_tfms)
	- Transforms are basically the same as we have seen before. But: for y we first call cv_label which grabs the name of the mask-file from the image-file
	- class PILMask(PILBase): _open_args,_show_args = {'mode':'L'},{'alpha':0.5, 'cmap':'tab20'}
	- Then we call PILMask.create which is just a single line of code. With this we can do seperate encodes for PILImages and PILMasks (doing different functionality for different types).
Note: This style of intermediate API is chosen for the purpose of being very transparent and easy to use. (compared to the higher DataBlocks API)
Notebook 06 Data Transforms
The Notebook can be found here: Notebook 06
What we will learn:
We will take a look into fastai.data.blocks with the tiny MNIST dataset (which only consists of 3s and 7s). This is not a tutorial notebook! This notebook actually defines data.core and ends up with defining /local/data.py
- How
get_filesandget_image_fileswork - Splitter
- Labeller
- Categorize and Multicategorize
- MNIST example
- TfmDL
getting items
def get_files(path, extensions=None, recurse=True, include=None)
Basic get is just as in fastai v1: get_files takes 4 parameters
-
Path: where we are looking for files in -
extensions: which file extensions to look for -
recurse: if we want to do this recursively -
include: is there a subset to include
/local/data.py
Automaticall created __all__: this is used by python to decide what will be imported if you say import *
- In most python libraries, this dunder method is not created and this is the main reason people are saying "don’t use
import *". If there is no__all__, it will also import everything recursively -> awful!

back to get
An item can be kind of anything you like:
- For vision, it is normally a list of paths
- An item list can also be a DataFrame, connection to a DataBase, a network, a pipe… etc
- For now we are using these with paths and are looking at DataFrames later.
# export
def _get_files(p, fs, extensions=None):
    p = Path(p)
    res = [p/f for f in fs if not f.startswith('.')
           and ((not extensions) or f'.{f.split(".")[-1].lower()}' in extensions)]
    return res
# export
def get_files(path, extensions=None, recurse=True, include=None):
    "Get all the files in `path` with optional `extensions`, optionally with `recurse`."
    path = Path(path)
    extensions = setify(extensions)
    extensions = {e.lower() for e in extensions}
    if recurse:
        res = []
        for i,(p,d,f) in enumerate(os.walk(path)): # returns (dirpath, dirnames, filenames)
            if include is not None and i==0: d[:] = [o for o in d if o in include]
            else:                            d[:] = [o for o in d if not o.startswith('.')]
            res += _get_files(p, f, extensions)
    else:
        f = [o.name for o in os.scandir(path) if o.is_file()]
        res = _get_files(path, f, extensions)
    return L(res)
tests in the documentation
Used to ensure functionality.
t3 = get_files(path/'train'/'3', extensions='.png', recurse=False)
t7 = get_files(path/'train'/'7', extensions='.png', recurse=False)
t = get_files(path/'train', extensions='.png', recurse=True)
test_eq(len(t), len(t3)+len(t7))
test_eq(len(get_files(path/'train'/'3', extensions='.jpg', recurse=False)),0)
test_eq(len(t), len(get_files(path, extensions='.png', recurse=True, include='train')))
t
Sometimes there are additional checks that are not that interesting for documentation purposes but just useful as tests. These are marked with "#hide" so that it will not be included in the docs.
The docs are here: fastai v2 docs
Sometimes there are CamelCase functions that return functions, like FileGetter, and this is similar to partial functions in Python.
get_image_files
def get_image_files(path, recurse=True, include=None):
    "Get image files in `path` recursively."
    return get_files(path, extensions=image_extensions, recurse=recurse, include=include)
This is just calling get_files with the additional parameter for image_extensions (this is everything within mimetypes which starts with ‘image’)
Splitting things
The functions return two lists for training and validation sets. The lists can contain either indices or masks.
Splitting things randomly with RandomSplitter where you optionally can pick a specific seed.
def RandomSplitter(valid_pct=0.2, seed=None, **kwargs):
    "Create function that splits `items` between train/val with `valid_pct` randomly."
    def _inner(o, **kwargs):
        if seed is not None: torch.manual_seed(seed)
        rand_idx = L(int(i) for i in torch.randperm(len(o)))
        cut = int(valid_pct * len(o))
        return rand_idx[cut:],rand_idx[:cut]
    return _inner
With GrandparentSplitter you can look at the parent of the parent. In MNIST oder IMAGENET that would be the path for valid or train.
Note: More documentation will be added. You can also contribute to the docs if you are interested!
Labeling things
For labeling you need something that takes a Path and gets a label out of it.
def parent_label(o, **kwargs):
"Label `item` with the parent folder name"
return o.parent.name if isinstance(o, Path) else o.split(os.path.sep)[-1]
parent_label labels everything with the name of the parent. Nothing to customize in this case, so no returned function and therefore no capital letters for the functions name.
def RegexLabeller(pat):
    "Label `item` with regex `pat`."
    pat = re.compile(pat)
    def _inner(o, **kwargs):
        res = pat.search(str(o))
        assert res,f'Failed to find "{pat}" in "{o}"'
        return res.group(1)
    return _inner
RegexLabeller is again CamelCase. We need to pass in a pattern for what we are regex labelling things with.
Note: if you want to understand how stuff works, just open these notebooks like in the fastai lessons and experiment with them!
Categorize
Categorize is a Transform and so it has encodes and decodes. When you create a Categorize object, the dunder init function just works in the usual way. It can be created with a predefined vocab which will be assigned within __init__, but if not, the special setup method is used.
# export
class Categorize(Transform):
    "Reversible transform of category string to `vocab` id"
    order=1
    def __init__(self, vocab=None, add_na=False):
        self.add_na = add_na
        self.vocab = None if vocab is None else CategoryMap(vocab, add_na=add_na)

    def setup(self, dsrc):
        if self.vocab is None and dsrc: self.vocab = CategoryMap(getattr(dsrc,'train',dsrc), add_na=self.add_na)

    def encodes(self, o): return self.vocab.o2i[o]
    def decodes(self, o)->Category: return self.vocab[o]
cat = Category.create()
tds = TfmdDS(['cat', 'dog', 'cat'], tfms=[cat])
-
['cat', 'dog', 'cat']list of items -
tfms=[cat]list of transforms -
TfmDSis creating a number of different listsTfmdList -
TfmdListwill callself.setupin the__init__ -
self.setupwill setup your transforms which again calls setup in theCategorize
def setup(self, dsrc):
        if self.vocab is None and dsrc: self.vocab = CategoryMap(getattr(dsrc,'train',dsrc), add_na=self.add_na)
This sets the vocab to CategoryMap which uses the train-datasource if it has a train attribute and otherwise will just use the whole dsrc.
class Category(str, ShowTitle): _show_args = {'label': 'category'}
decodes returns Category which is a tiny class that inherits from ShowTitle and this simply has a show-method.
class CategoryMap(CollBase):
    def __init__(self, col, sort=True, add_na=False):
        if is_categorical_dtype(col): items = L(col.cat.categories)
        else:
            # `o==o` is the generalized definition of non-NaN used by Pandas
            items = L(o for o in L(col).unique() if o==o)
            if sort: items = items.sorted()
        self.items = '#na#' + items if add_na else items
        self.o2i = defaultdict(int, self.items.val2idx())
    def __eq__(self,b): return all_equal(b,self)
CategoryMap grabs all of the unique values in your column, optionally sort them, and then optionally creates the object-to-int o2i.
Multicategorize
Like in the planet-dataset, this is used for when each item can have mutiple labels.
Here, every item has a list as labels. Item number 1 is labeled with b and c, item number 2 is labeled with a and item number 3 is labeled with a and c.
cat = MultiCategorize()
tds = TfmdDS([['b', 'c'], ['a'], ['a', 'c']], tfms=[cat])
test_eq(cat.vocab, ['a', 'b', 'c'])
test_eq(cat(['a', 'c']), [0,2])
Tests: The vocab should be a,b,c and categorizing a and c should give us 0 and 2.
# export
class MultiCategorize(Categorize):
    "Reversible transform of multi-category strings to `vocab` id"
    def setup(self, dsrc):
        if not dsrc: return
        if self.vocab is None:
            dsrc1 = getattr(dsrc,'train',dsrc)
            vals = set()
            for b in dsrc1: vals = vals.union(set(b))
            self.vocab,self.o2i = uniqueify(list(vals), sort=True, bidir=True)
        setattr(dsrc, 'vocab', self.vocab)

    def encodes(self, o):                return [self.o2i  [o_] for o_ in o]
    def decodes(self, o)->MultiCategory: return [self.vocab[o_] for o_ in o]
This is very similar as before, only that encodes and decodes have to do it for everything in the list.
show method for MultiCategory is a bit different as well because we have multiple things to show. Therefore we use this string joint in python sep.join(self.mapped(str)
class MultiCategory(L):
    def show(self, ctx=None, sep=';', **kwargs): return show_title(sep.join(self.mapped(str)), ctx=ctx)
test_stdout
test_stdout(lambda: tds.show_at(2), 'a;c')
We will learn about this more later, but this is a super handy test function. The show method actually prints something and the problem here is: how do you test if something is printed correctly? So, this function will actually test if tds.show_at(2) prints out 'a;c' or not.
One-hot encoding
Usually, multi category stuff needs to be one-hot encoded. This works the same way as in fastai v1.
# export core
def one_hot(x, c):
  "One-hot encode `x` with `c` classes."
  res = torch.zeros(c, dtype=torch.uint8)
  res[L(x)] = 1.
  return res
This is done with this Transform:
# export
class OneHotEncode(Transform):
   "One-hot encodes targets and optionally decodes with `vocab`"
   order=2
   def __init__(self, do_encode=True, vocab=None): self.do_encode,self.vocab = do_encode,vocab

    def setup(self, dsrc):
       if self.vocab is not None: self.c = len(self.vocab)
      else: self.c = len(L(getattr(dsrc, 'vocab', None)))
      if not self.c: warn("Couldn't infer the number of classes, please pass a `vocab` at init")

    def encodes(self, o): return one_hot(o, self.c) if self.do_encode else tensor(o).byte()
    def decodes(self, o): return one_hot_decode(o, self.vocab)
-
encodescallsone_hot -
decodescallsone_hot_decode
Mini Test: taking a bunch of items and passing it through a pipeline (which contains MultiCategorize and OneHotEncode).
tds = TfmdDS([['b', 'c'], ['a'], ['a', 'c']], [[MultiCategorize(), OneHotEncode()]])
test_eq(tds[1], [tensor([1, 0, 0]).byte()])
test_eq(tds.decode([tensor([0,1,1])]), [['b','c']])
test_stdout(lambda: tds.show_at(2), 'a;c')
Putting it all together for MNIST
Getting the image files:
items = get_image_files(path)
splits = splitter(items)
train,valid = (items[i] for i in splits)
train[:3],valid[:3]
We have not created anything from the vision application yet, so we would not want to #export anything with Pillow, but we can use them as tests.
from PIL import Image
def open_img(fn:Path)->Image.Image: return Image.open(fn).copy()
def img2tensor(im:Image.Image)->TensorImage: return array(im)[None]
Here are two transform pipelines and the TfmdDS which takes the training and the testset:
tfms = [[open_img, img2tensor],
    [parent_label, Categorize()]]
train_ds = TfmdDS(train, tfms)
Then, we grab one item of it, decode it, and test it.
x,y = train_ds[3]
xd,yd = train_ds.decode_at(3)
test_eq(parent_label(train[3]),yd)
test_eq(array(Image.open(train[3])),xd[0])
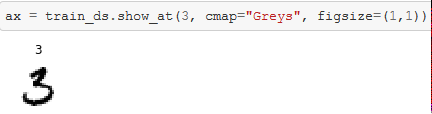
show_at takes the TfmdDS and shows it at point 3 with optional parameters that are passed along to matplotlib.
img2tensor
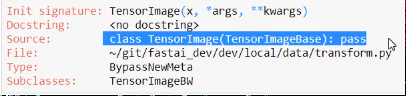
Q: img2tensor is actually converting image into numpy array not torch array, is this a desired approach?
A: The return type here is TensorImage and this is only calling pass. This is just used to mark the type so that transforms can be created that are restricted to that type. But basically this is just a subclass of Tensor (the numpy array is cast to tensor). And actually this is not a transform, but a function. The thing is that everything that is not a transform (but just a function) will be turned into a transform when you create something that is turned into a pipeline.
from PIL import Image
def open_img(fn:Path)->Image.Image: return Image.open(fn).copy()
def img2tensor(im:Image.Image)->TensorImage: return array(im)[None]

This creates a transform object that will run that function.
TfmdDL
TfmdDL inherits from DataLoader which is not a PyTorch DataLoader, but a fastai local.data.load.DataLoader which has extra stuff added to Pytorches DataLoader. TfmdDL turns this DataLoader into something that can understand transforms. For a full understanding, we need to look at the code for DataLoader which will be done next time.
tfms = [[open_img], [parent_label, Categorize()]]
tds = TfmdDS(items, tfms)
tdl = TfmdDL(tds, after_item=img2tensor, bs=4)
b = tdl.one_batch()
test_eq(L(tdl.decode_batch(b)[0]).mapped(type), (TensorImage,Category))
Some familiar transforms: creating a Pillow Image and label the categories. TfmdDL then takes the dataset tds and converts the images to tensors in the DataLoader. Here, the batchsize is 4 (4 images and 4 labels).
test_eq(L(tdl.decode_batch(b)[0]).mapped(type), (TensorImage,Category)) tests if the decode version of the batch when we map the function type over it is TensorImage,Category. This is interesting because it shows that fastai knows hot to take a tensor that comes out of the DataLoader (and which does not generally have types) and will put the correct types back onto it. Handy for inference so that in production you are going to have proper types!
Going through this line of code in detail:
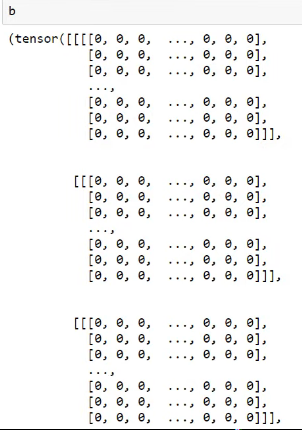
Decoded version of b:
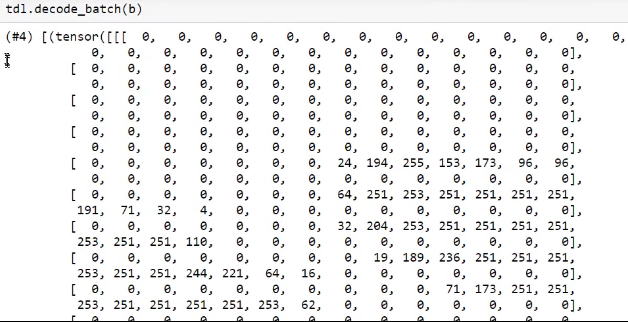
Rather than 2 things we now have got 4 things: 4 pairs of image and label.
This output is a bit awkward:

So we wrap this in an L and map the function type over it:

TfmdDL has a one_batch method which actually is from DataLoader.

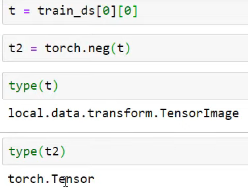
NegTfm
train_ds is an image and a label and the type of that is local.data.transform.TensorImage.
class NegTfm(Transform):
    def encodes(self, x): return -x
    def decodes(self, x): return -x
    tdl = TfmdDL(train_ds, after_batch=NegTfm(), bs=4, num_workers=4)
b = next(iter(tdl))
test_eq(type(b[0]), TensorImage)
Here we check if the type is still TensorImage after going through the transform.

These still pass the test, either though it looks like they should not pass! The reason is, that all of the transformation pipelines check (after it goes through encodesand decodes) that the type does not change. And if it does change, it will convert the type back to what it used to be, but only in special situations like here: you end up with a superclass torch.Tensor of the input (whereas the input was a subclass of that).
Back to TfmdDL
Decorator @delegates()
#export
@delegates()
class TfmdDL(DataLoader):
    "Transformed `DataLoader`"
    def __init__(self, dataset, bs=16, shuffle=False, num_workers=None, **kwargs):
        if num_workers is None: num_workers = min(16, defaults.cpus)
        for nm in _dl_tfms:
            kwargs[nm] = Pipeline(kwargs.get(nm,None), as_item=(nm=='before_batch'))
            kwargs[nm].setup(self)
        super().__init__(dataset, bs=bs, shuffle=shuffle, num_workers=num_workers, **kwargs)
        it  = self.do_item(0)
        its = self.do_batch([it])
        #TODO do we still need?
        self._retain_ds = partial(retain_types, typs=L(it ).mapped(type))
        self._retain_dl = partial(retain_types, typs=L(its).mapped(type))
The interesting thing here is the decorator @delegates(). Jeremy wrote an interesting article about delegation: Make Delegation Work in Python
Quick summary of what’s going on:
-
TfmdDLis a subclass ofDataLoader - When calling
__init__it wants to pass along any keyword arguments**kwargsthat you passed in. Normally, there are a couple of issues when putting**kwargslike this: - When we want to use Shift+Tab: rather than seeing the list of things we can pass in, we will see
**kwargs. But this is not what happens here, you can see the actual arguments and use the code completion for it!
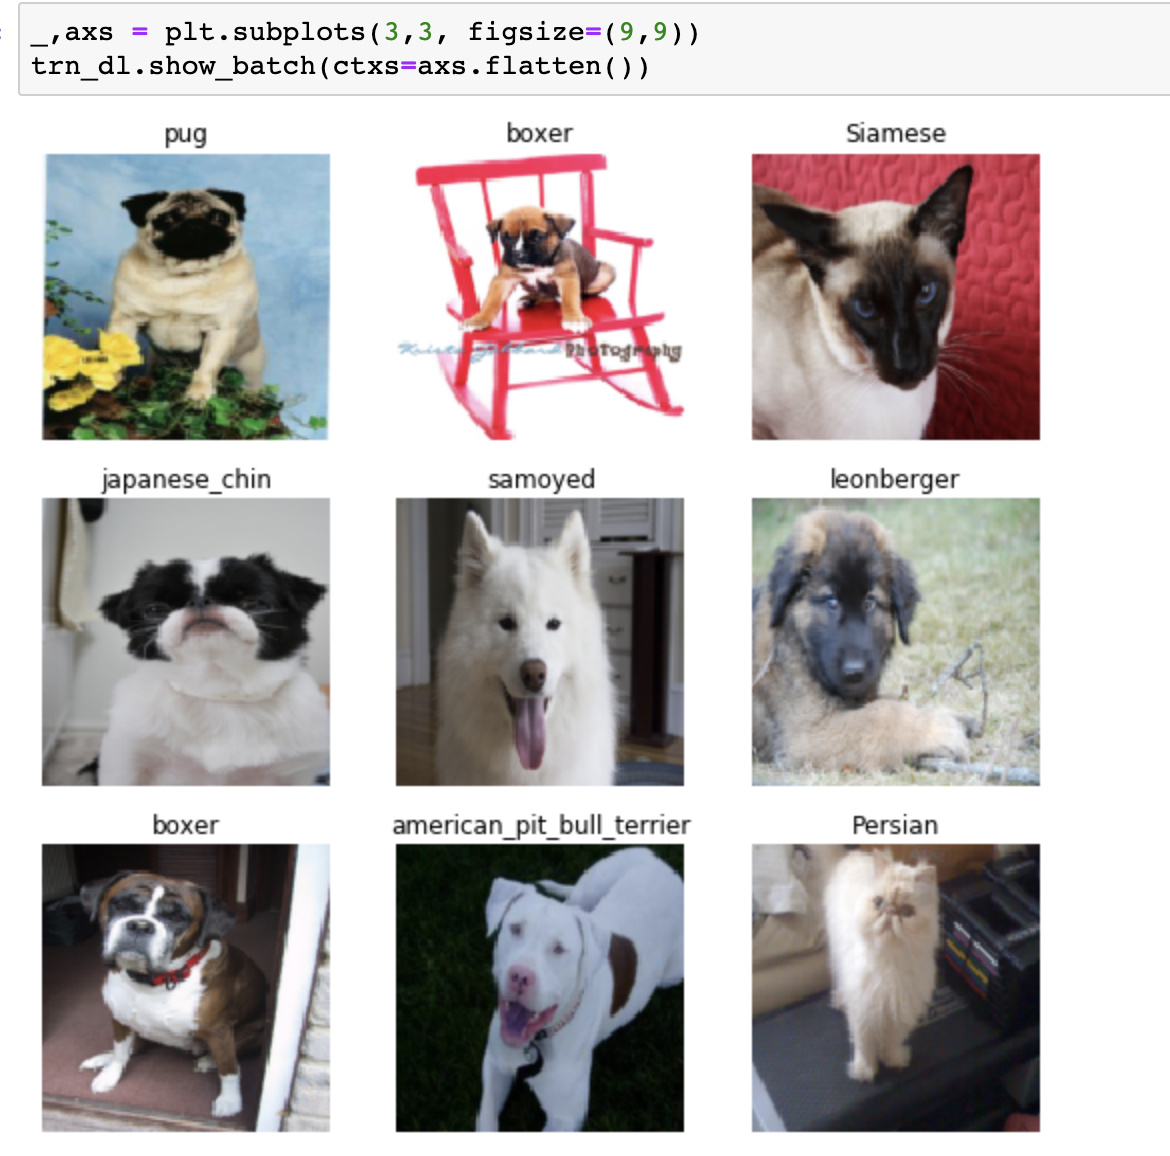
show_batch
def show_batch(self, b=None, max_n=10, ctxs=None, **kwargs):
        "Show `b` (defaults to `one_batch`), a list of lists of pipeline outputs (i.e. output of a `DataLoader`)"
        if b is None: b = self.one_batch()
        b = self.decode(b)
        if ctxs is None:
            if hasattr(b[0], 'get_ctxs'): ctxs = b[0].get_ctxs(max_n=max_n, **kwargs)
            else: ctxs = [None] * len(b[0] if is_iter(b[0]) else b)
        db = self._decode_batch(b, max_n, False)
        ctxs = [self.dataset.show(o, ctx=ctx, **kwargs) for o,ctx in zip(db, ctxs)]
        if hasattr(b[0], 'display'): b[0].display(ctxs)
We saw show_batch in the segmentation and pets section like this:
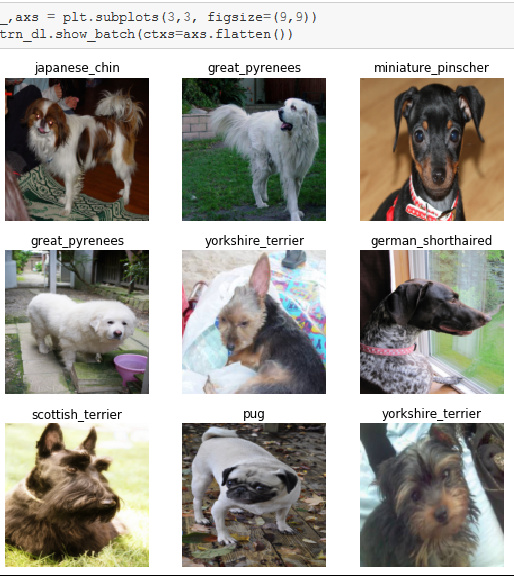
The idea is: it takes an input and knows how to display it according to the input. Like in pets, it shows the images and the categories, or in the segmentation, it shows a mask and an image.
Things that can be passed in:
- A batch to show (or default is one batch)
- Contexts: a grid of plots. Each one of the above will be a different
ctxs
 I’ve copied the notes from

 )
)