Deploying your notebook as an app under 10 minutes

This short post will walk you through all of the steps necessary to deploy your app

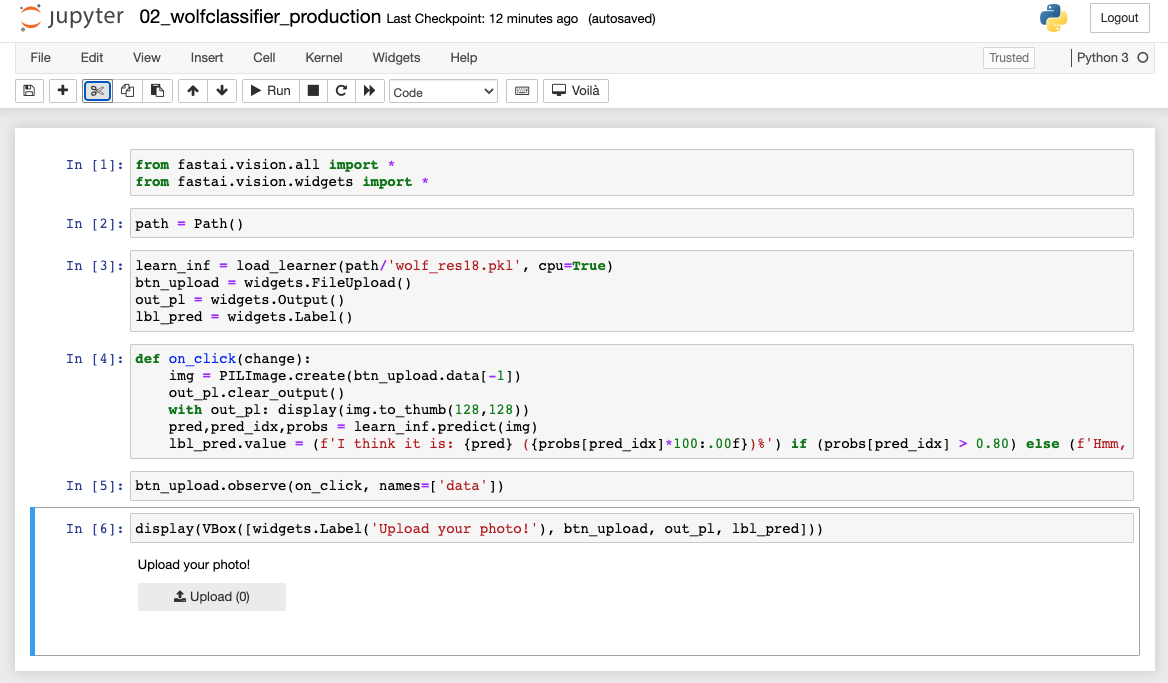
Build Model and app notebook

  1. Once it is model is trained and notebook is ready, create a duplicate of your working notebook with minimal content. Here is sample notebook from my work (Find My Food app) of what it should look like
  2. Once done, download export.pkl & the minimal version of your notebook created in step 1 above

Setup repository in Github

  1. Create a Github account by clicking here
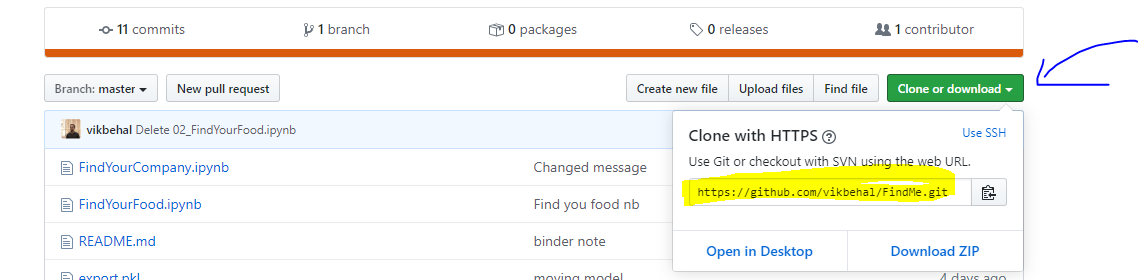
  2. Create a repository in Github by clicking here
    Note: Repository Name can be ‘FindBear’, Type can be ‘Public’ and you can check ‘Initialize this repository with a README’ option. Finally, click on Create repository button to create it
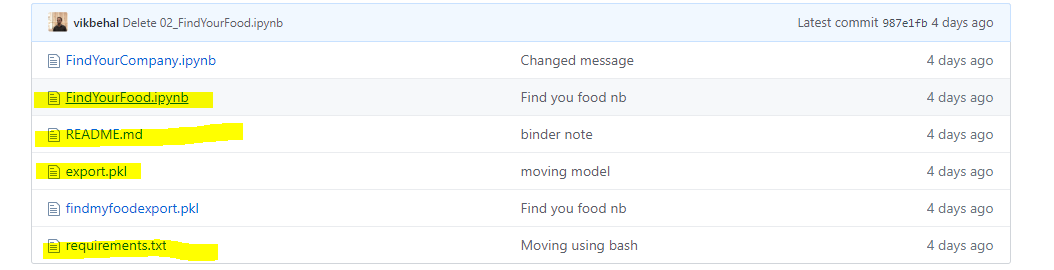
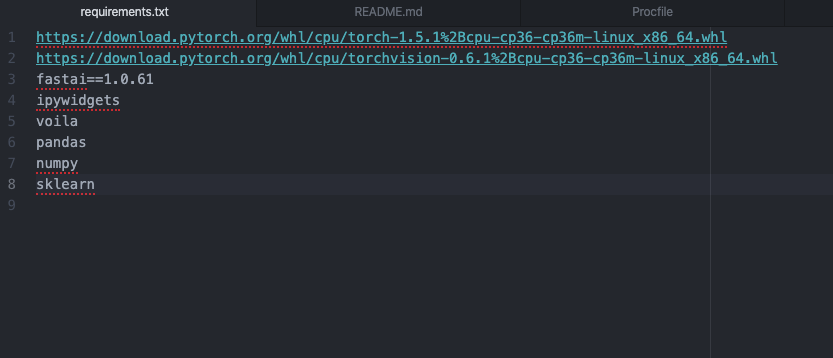
  3. Upload your model (export.pkl), notebook to this repository. Additionally, you also need requirements.txt file, which you can download from here. You do not need to modify requirements.txt. Use as-is.
    Note: If your model (export.pkl) is larger than 25 MBs (which is very possible, even with Resnet18, you need to use Git Large File Storage service. Steps for same are given at the end of this post
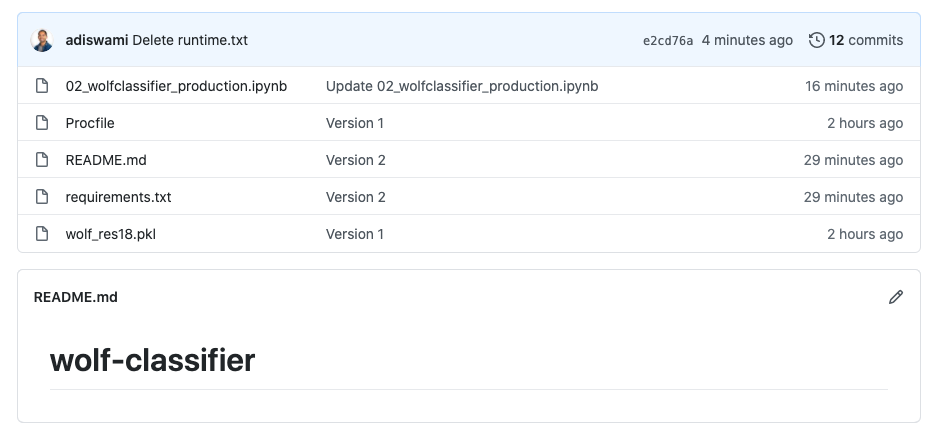
  4. You only need 3 files (+1 README.md) to build this app. Same are highlighted below

Using Binder to launch your app

  1. Head over to binder by clicking here
  2. Configure binder as shown below. Please ensure to add /voila/render/ before your notebook name
  3. Once done, click on launch button and you are all set
  4. Share URL to your app (marked with text 3 in the above image) with others to explore

In case your model is larger than 25 Mb, please use below steps to set up Git Large File Storage
Note: Below steps are tested on Windows

  1. If you do not have Git installed locally, please download from here
  2. Download and install Git Large File Storage
  3. Next, create a new folder to hold your Github repository in one of your drive
  4. Open Git bash and head over to above-created folder by using “cd” command
  5. Next, Clone your github repository using “git clone (URL)”
    Note: You can find URL here

    Note: You may be prompted for username and password. If so, please provide your Github username and password
  6. Finally, run below commands in same order to upload large file. Run in the same folder where you cloned your Github repository
git lfs install
git lfs track "*.pkl"

Note: Please use double quotes around .pkl keyword

git add .gitattributes
git add export.pkl
git commit -m "Add model"
git push -u origin master
  1. This shall upload your large model file to Github

Good luck and keep learning!

22 Likes

Thanks for posting this as it really helped to get me to understand what I needed.
I changed the requirements.txt:

voila
fastai
pillow<7
packaging
ipywidgets==7.5.1

I also took a look at your sample notebook which was great that you gave me that as a reference. I changed this in my notebook:

from fastai.vision.all import *
from fastai.vision.widgets import *

With that it almost worked.
Binder wanted to deploy at url that looked like this

https://hub.gke.mybinder.org/user/andrewn2000-findfish-rtfim94r/tree/voila/render/Fish_classifier.ipynb

but when I looked at it on binder and ran the voila from there it worked but the path took out the /tree directory and then it was working!!!

https://hub.gke.mybinder.org/user/andrewn2000-findfish-qr4v7hy9/voila/render/Fish_classifier.ipynb

  • I later found out this was because I didn’t change it to URL and left it as File as the image shows. It should really be like this:

Thanks for your very insightful post!

Andy

4 Likes

Also don’t share those hub.gke links around. They time out after a while and won’t work. Use the /v2/gh/ link it gives you in your screenshot.

1 Like

Thanks for the comment. I didn’t realize they’ll timeout!

Hi all,

I made a fastai binder app github template based on the instructions in this thread.

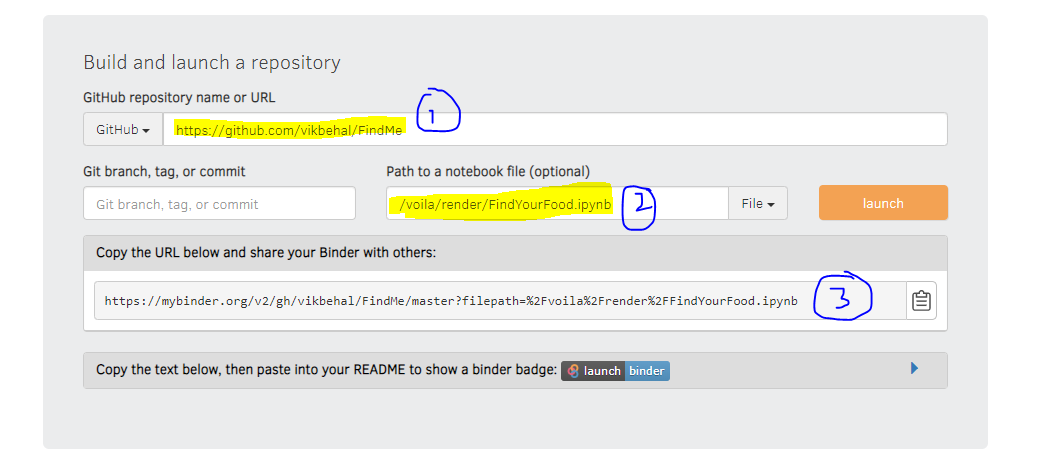
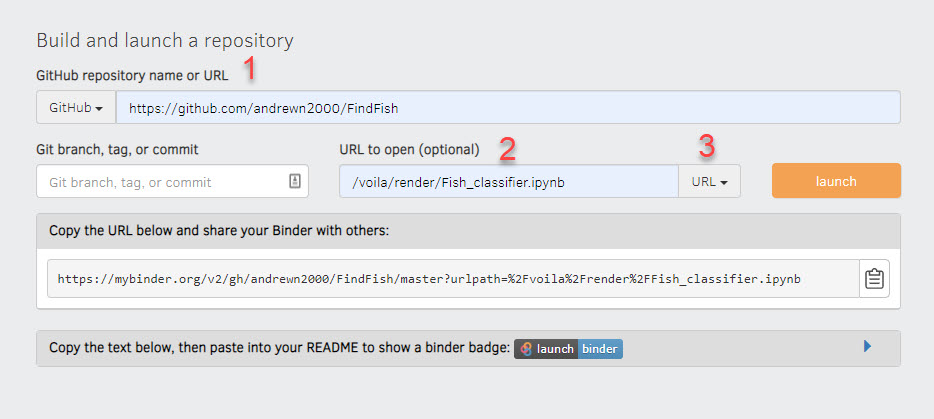
It also includes some additional links to things you need to run your app on binder.

I tested it out on Paperspace Gradient (and to a lesser extent, Colab) but if you encounter errors, feel free to reply in this thread so I can update it.

HTH.

Butch

Just to mention that Github has changed things a bit and the default branch is now called main not master
(see https://stackoverflow.com/questions/24114676/git-error-failed-to-push-some-refs-to-remote)
So the last command should read
git push -u origin main

Right now deploying on Binder doesn’t seem to work, but this is another topic.
(Lesson 2: Binder deployment not working with voila)

1 Like

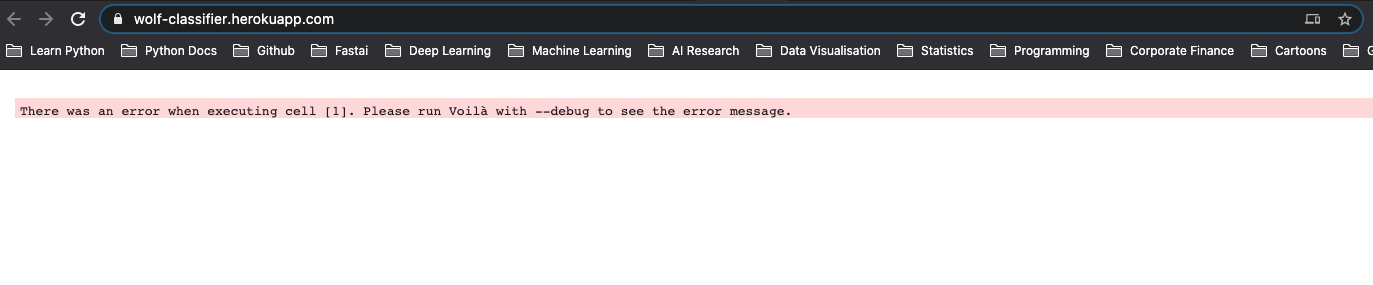
I can second after working for multiple days with people from Binder, Microsoft, the people on this forum, and looking through the Voila documentation, Binder does not seem to render voila at all, however has no problem with jupyter notebooks as is. Heroku seems to be fine at the moment.

1 Like

Hi @joedockrill ,

I went through all the steps you shared in your guide - https://course.fast.ai/deployment_heroku
which was fantastic btw. Thanks for putting it together.

I managed to get through all the steps however the app throws an error when I try to view it.

There was an error when executing cell [1]. Please run VoilĂ  with --debug to see the error message.

Here are all steps I took

  1. Used package versions you’d suggested in the requirements.txt file including cpu for pytorch

  2. Included model.pkl file in repo

  3. Included procfile

  4. Included ipython notebook

The app works fine in Jupyter.

The app deployed successfully in Heroku

I get this error when I view the app

Wondering if you could help me out? :sweat_smile: I feel like I’m nearly there.

Cheers,
Adi

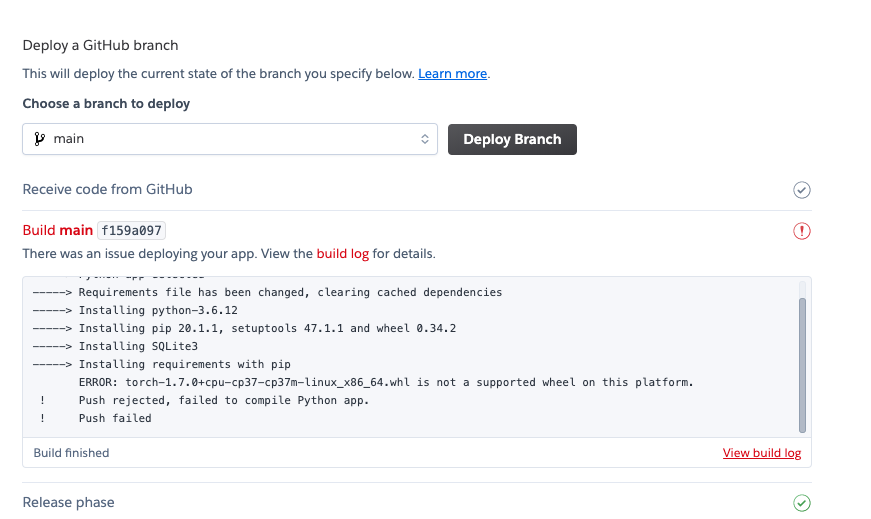
Hey Adi. In the requirements file you used fastai==1.0.6 but as I see you use fastai v2 in your notebook. Try to change fastai requirement to v2 and see if it helps. Also the latest version of fastai requires pytorch 1.7, so to use it you need to change the first two lines in the requirements.txt too

1 Like

Update

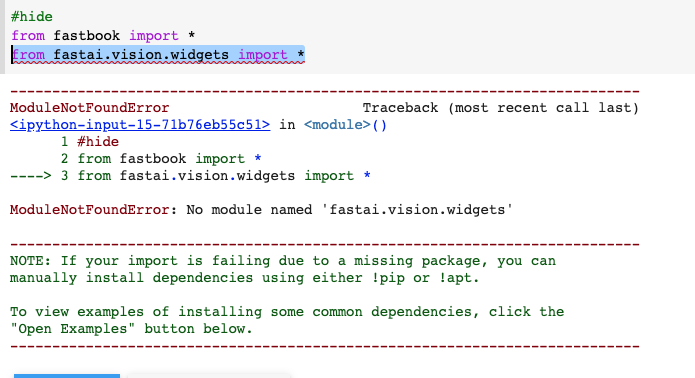
I tried running my notebook with the pinned versions that are compatible with heroku. Unfortunately fastai.vision.widgets throws a module not found error with the older version of fastai.

It feels like a version compatibility issue. Any suggestions?

Original

Thanks @arampacha

I think you are right. I tried using the pinned versions of fastai, fastcore, torch, torchvision which I trained the model and had installed in the stripped down version of the notebook.

I originally used wheels that matched this

fastai==2.1.5
fastcore==1.3.2
torch==1.7.0
torchvision==0.8.1

When that did not work I downgraded to a wheel that Heroku supports. Tried your suggested and it confirmed my original hunch.

I think Heroku does not support anything above
torch==1.5.0+cpu torchvision==0.6.0+cpu

What I’m thinking is to retrain model and reinstall the packages in the stripped down notebook using the versions heroku supports and trying again.

Thanks a lot for your help! :smile:

Cheers,
Adi

After spending 4 hours changing requirements, I realized that I didn’t set it as URL. Thank you so much for this.