Wow, sounds great, if you can make “AWS credits usable on Salamander”, I am already avid user of Salamander, but if you can add option to use AWS credit, then it will be fantastic…
can you please let us know steps for getting fastai v1 version .
@sashankpappu With Salamander, fastai 1.0 is available already (as “fastai”)
@jm0077 Salamander includes both fastai 1.0 & 0.7. You can run both old & new course material.
These are the available kernels:
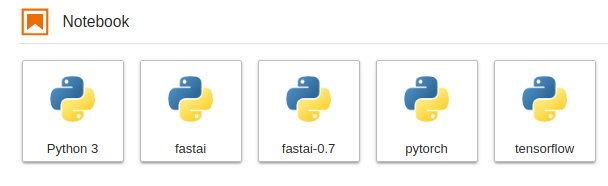
After opening a notebook you can change your selected kernel with the selector in the top-right:

This thread is for supporting students using version 1.0, for any questions re fastai 0.7 please email support@salamander.ai or ask in the 0.7 support thread
@crcrpar nvidia-296 should be the version installed on Salamander, here’s the install script I used for the drivers:
sudo add-apt-repository -y ppa:graphics-drivers/ppa
sudo apt-get update
sudo aptitude install -yq nvidia-396
sudo apt-mark hold nvidia-396
sudo shutdown -r now
2 Likes

Hey @ashtonsix, just wanted to say thanks so much for your service. I’ve set up ML boxes on AWS, GCP, Paperspace, you name it, but this was hands down the easiest time I’ve had getting up and running with both PyTorch and Tensorflow with Tensorboard. I’ll definitely be recommending this to others…
396 
@bartdegoede, @johnhartquist: thanks! It’s silly for students & scientists to repeat the same rituals thousands of times when it only takes one person to setup. I’m just amazed nobody from aws or gcp tried to make this stuff easier.
3 Likes
Is
K80 GPU
4x vCPU
61GB RAM. !
enough for fast.ai? And will I be able to upload my own data? And download trained weights? @ashtonsix
can you use fastai v1 with jupyter notebook as well? or does it only work with jupyter lab?
JupyterLab is just an IDE for working with notebooks, code and data. When you are using JupyterLab you would still be using your Jupyter notebooks in the usual way.
Thanks Andrew, just tested the jupyter notebook option but in the courses directory inside fastai there were 0.7 courses so switched to jupyter lab
opened jupyter lab
selected ‘fastai’ which i understand is v1
imporeted lesson 1 from new course
and got error message when importing fastai:
from fastai import *
from fastai.vision import *
import fastai.vision.transform as foo

---------------------------------------------------------------------------
ModuleNotFoundError                       Traceback (most recent call last)
<ipython-input-2-bb50de15a0f6> in <module>()
      1 from fastai import *
----> 2 from fastai.vision import *
      3 import fastai.vision.transform as foo

ModuleNotFoundError: No module named 'fastai.vision'
am i doing something wrong here? thanks for your help!
@bluesky314 The K80 is a great option for the fastai course. You’ll probably want to ssh into your server to download data / weights (click “Setup Access Keys” & follow along)
both Jupyter Lab & Jupyter Notebook work well - they just look different is all. Jeremy will be teaching using Jupyter Notebook so if you’d like to use the same thing open “Preferences & Account Details”, then click “Switch to Jupyter Notebook”
If you selected the “fastai” kernel that should work fine. I’m updating the images today in preparation for Monday & will double-check the lesson1 notebook works. (if you can’t figure it out you may want to create a brand new Salamander server on Monday)
5 Likes
Thanks for a great service!
N00b question here: In the “Design Another Server” page it states “NB: Once launched, Salamander can’t install new software automatically”
How do I update fastai and pytorch to the latest version? I tried
conda update -c fastai fastai
And got
PackageNotInstalledError
I’m missing something here…
@Edward conda updates on Salamander have been broken for the last 3 days. I’m working on a fix right now.
Once fixed, you’ll need to run “source activate fastai” before “conda update fastai” (no channel needed for updates). I also recommend creating a brand new Salamander server on Monday.
OK, will do!
@ashtonsix How do I buy credits? does it just keep on taking 20$ amounts from my account? Also what does “Setup access key” do and how do I SSH into my laptop as you said? (I’m totally new to this)
Is there a running timer I can see how much time server has been running?
In order to completely stop my server do I have to just log out or click ‘destroy’? How do I stop my server to halt the time usage but access it again later?
@ashtonsix Thank you very much for providing this very easy to use setup.
I created a Salamander server 2 days ago. The versions I find when using the jupyter fastai launcher are torch 0.4.1 and fastai 1.0.5. From the Unofficial Setup thread (Local, AWS) we would expect to use PyTorch 1.xxx instead. Is that something you’re going to address also for servers that are newly built today? Please let us know when the new changes are ready, or if we should still wait a while. Your setup is so easy to use that it’s tempting to create a new server every once in a while just to check, instead of waiting for your updates.
I am unable to run functions from the new v3 version of the course including untar_data and ImageDataBunch. @ashtonsix can you do something about this before the course starts?
Create a brand new server & you’ll have the latest software: pytorch-nightly (1.0.0) & fastai (1.0.11). Besides the tutorial, everything on Salamander is ready for class.
Could you try creating a new server, make sure you’re using jupyter notebook (you can change this by opening “Preferences and Account Details”, then clicking “Switch to Jupyter Notebook”) & try again? & make sure the “fastai” kernel is selected (should be selected automatically for servers created after today)
Click “Setup Access Keys” & follow along, you’ll soon be able to ssh into your server.
To stop the server click “Stop Server”