Before starting fast.ai, I tried to learn from people who had already passed through the class. Many of them have blogs and wrote about what they would do differently.
Most consistent piece of advice: “Really listen to Jeremy and spend your time how he suggests”
Most consistent regret: “I should have listened when Jeremy said don’t spend hours lost in theory trying to understand everything right away”.
For each lesson I’m going to make a list of everything Jeremy says to do, and then I’m going to do it. I hope others will join me.
Lesson 1
- Don’t try to stop and understand everything.
- Don’t waste your time, learn Jupyter keyboard shortcuts. Learn 4 to 5 each day.
- Please run the code, really run the code. Don’t go deep on theory. Play with the code, see what goes in and what comes out.
- Pick one project. Do it really well. Make it fantastic.
- Run this notebook (lesson1-pets.ipynb), but then get your own dataset and run it! (extra emphasis: do this!)
- If you have a lot of categories, don’t run confusion matrix, run…
interp.most_confused(min_val=n)
Lesson 2
-
If forum posts are overwhelming, click “summarize this topic” at the bottom of the first post.
-
Please follow the official server install/setup instructions, they work and are easy.
-
It’s okay to feel intimidated, there’s a lot, but just pick one piece and dig into it. Try to push a piece of code, or learn a concept like regular expressions, or create a classifier, or whatever. Context: Lesson 2: It’s okay to feel intimidated
-
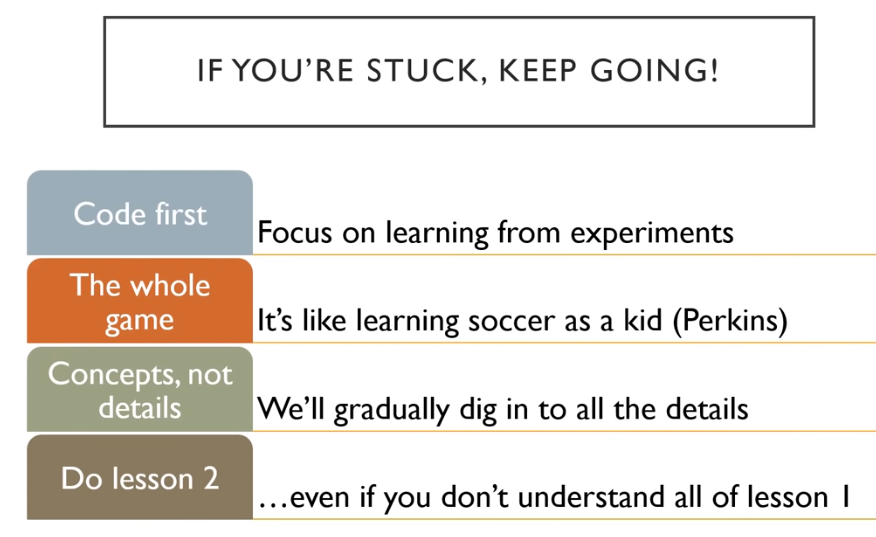
If you’re stuck, keep going. See image below! Context: Lesson 2: If you’re stuck, keep going
-
If you’re not sure which learning rate is best from plot, try both and see.
-
When you put a model into production, you probably want to use CPU for inference, except at massive scale. Context: Lesson 2: Putting Model into Production
-
Most organizations spend too much time gathering data. Get a small amount first, see how it goes.
-
If you think you’re not a math person, check out Rachel’s talk: There’s no such thing as “not a math person”. My own input: only 6 minutes, everyone should watch it!
Lesson 3
- If you use a dataset, it would be very nice of you to cite the creator and thank them for their dataset.
- This week, see if you can come up with a problem that you would like to solve that is either multi-label classification or image regression or image segmentation or something like that and see if you can solve that problem. Context: Fast.ai Lesson 3 Homework
- Always use the same stats that the model was trained with. Context: Lesson 3: Normalized data and ImageNet
- In response to “Is there a reason you shouldn’t deliberately make lots of smaller datasets to step up from in tuning, let’s say 64x64 to 128x128 to 256x256?”: Yes you should totally do that, it works great, try it! Context: Lesson 3: 64x64 vs 128x128 vs 256x256
Lesson 4
-
If you’re doing NLP stuff, make sure you use all of the text you have (including unlabeled validation set) to train your model, because there’s no reason not to. Lesson 4: A little NLP trick
-
In response to “What are the 10% of cases where you would not use neural nets”. You may as well try both. Try a random forest and try a neural net. Lesson 4: How to know when to use neural nets
-
Use these terms (parameters, layers, activations…etc) and use them accurately. Lesson 4: Important vocabulary for talking about ML
Lesson 5
-
The answer to the question “Should I try blah?” is to try blah and see, that’s how you become a good practitioner. Lesson 5: Should I try blah?
-
If you want to play around, try to create your own nn.linear class. You could create something called My_Linear and it will take you, depending on your PyTorch experience, an hour or two. We don’t want any of this to be magic and you know everything necessary to create this now. These are the things you should be doing for assignments this week, not so much new applications but trying to write more of these things from scratch and get them to work. Learn how to debug them and check them to see what’s going in and coming out. Lesson 5 Assignment: Create your own version of nn.linear
-
A great assignment would be to take Lesson 2 SGD and try to add momentum to it. Or even the new notebook we have for MNIST, get rid of the Optim.SGD and write your own update function with momentum Lesson 5: Another suggested assignment
Lesson 6
-
Not an explicit “do this” but it feels like it fits here. “One of the big opportunities for research is to figure out how to do data augmentation for different domains. Almost nobody is looking at that and to me it is one of the biggest opportunities that could let you decrease data requirements by 5-10x.” Lesson 6: Data augmentation on inputs that aren’t images
-
If you take your time going through the convolution kernel section and the heatmap section of this notebook, running those lines of code and changing them around a bit. The most important thing to remember is shape (rank and dimensions of tensor). Try to think “why?”. Try going back to the printout of the summary, the list of the actual layers, the picture we drew and think about what’s going on. Lesson 6: Go through the convolution kernel and heatmap notebook
Lesson 7
- Don’t let this lesson intimidate you. It’s meant to be intense in order to give you ideas to keep you busy before part two comes out.
Parts 2-5 come from a great speech towards the end of the lesson. I’d highly recommend revisiting here: Lesson 7: What to do once you’ve completed Part 1
-
Go back and watch the videos again. There will be bits where you now understand stuff you didn’t before.
-
Write code and put it on GitHub. It doesn’t matter if it’s great code or not, writing it and sharing it is enough. You’ll get feedback from your peers that will help you improve.
-
It’s a good time to start reading some of the papers introduced in the course. All the parts that say derivations/theorems/lemmas, feel free to skip, they will add nothing to your understanding of practical deep learning. Read the parts where they talk about why they are solving this problem and the results. Write summaries that will explain this to you of 6 months ago.
-
Perhaps the most important is to get together with others. Learning works a lot better if you have that social experience. Start a book club, a study group, get involved in meetups, and build things. It doesn’t have to be amazing. Build something that will make the world slightly better, or will be slightly delightful to your two year old to see it. Just finish something, and then try to make it a bit better. Or get involved with fast.ai and helping develop the code and documentation. Check Dev Projects Index on forums.
-
In response to “What would you recommend doing/learning/practicing until the part 2 course starts?” "Just code. Just code all the time. Look at the shape of your inputs and outputs and make sure you know how to grab a mini-batch. There’s so much material that we’ve covered, if you can get to a pointwhere you can rebuild those notebooks from scratch without cheating too much, you’ll be in the top echelon of practitioners and you’ll be able to do all
of these things yourself and that’s really really rare. Lesson 7: What to do/learn/practice between now and Part 2 Bonus: This is lesson 7 and the clip starts at t=7777!
Lesson 8
-
The cutting edge of deep learning is really about engineering, not about papers. The difference between really effective people in deep learning and the rest is really about who can make things in code that work properly and there’s very few of those people. The Cutting Edge
-
There are many opportunities for you in this class. Experiment lots, particularly in your domain area. Write stuff down for the you of six months ago, that’s your audience. It doesn’t have to be perfect. The Opportunities are Much Greater Now
-
If you don’t understand something from Part 1, go back and watch the video about that thing. Don’t just keep blasting forwards. Especially the later lessons of Part 1 where we went into more detail. It’s Assumed You Understand Part 1
-
Overfit -> Reduce Overfitting -> There is no step 3. Remember overfitting doesn’t mean having a lower training loss than validation loss, that is normal. It means you have seen your validation error getting worse, until you see that happening you’re not overfitting. 3 Steps to Training a Really Good Model
-
Learn to pronounce Greek letters. A big part of reading papers is getting past the fear of Greek letters. It’s very hard to read something you can’t pronounce. You’re saying to yourself "squiggle bracket 1+squiggle G squiggle 1-squiggle. Time to Start Reading Papers
-
Get very used to…
- PyTorch tensors
- ‘.view()’, this is how we reshape vectors (e.g from 784 -> 28*28)
- Matrix multiplications - Resource for Visualizing Matrix Multiplication
- This equation
c[i,j] += a[i,k] * b[k,j]Equation Context
-
Homework: Take our most mind-bending broadcast and convince yourself of why it works. Put it in Excel, or do it on paper if it’s not already clear to you why this works. Mind Bending Broadcast
-
Apply the simple broadcasting rules when working with higher ranked tensors. Don’t try to keep it all in your head. (rules are listed in notebook) Apply the Broadcasting Rules
-
Always make sure your validation and training set were normalized in the same way.
-
Reading papers from competition winners is a very very good idea. Normal Papers vs Competition Papers
-
More Homework: Go read section 2.2 of the Resnet Paper
-
When you’re writing your own code, put some comments in your code to let the next person know what the hell you’re doing. Jeremy Finds Undocumented Suboptimal Constant in PyTorch
-
More Homework: If you don’t remember the chain rule, go to Khan Academy, they have a great tutorial on the chain rule
Lesson 9
-
When you see something in a library, don’t assume that it’s right or that it makes sense. When it comes to deep learning, none of us know what we’re doing. It doesn’t take too much to dig into it yourself. Lesson 9: Don’t assume libraries are correct
-
I dont set a random seed, this is very intentional because I want to see variation in my model, I don’t want it to be hidden away behind a fixed seed. Lesson 9: When not to use a seed
-
Coroutines in python are worth looking up and learning about, we’ll be using them lots.
-
You can and should schedule everything, your dropout amount, what kind of data augmentation you do, weight decay, learning rate, momentum, everything. It’s very unlikely you would want the same hyperparameters throughout. Lesson 9: Hyperparameter Scheduling
Lesson 10
-
I want to remind you that it’s totally okay if you’re not keeping up with everything, I’m trying to give you enough to keep you busy until Part 2 next year, but don’t feel like you need to understand everything within a week of first hearing it. Lesson 10: Don’t worry
Reminder: This was also advice from Part 1 Lesson 2. If you’re here you got through that and you’ll get through this too! -
What will tend to happen with stuff in fast.ai is that we’ll start with something trivially easy and at some point in the next hour or two you might reach a point where you’re feeling totally lost,
the trick is to go back to the point where it was trivially easy and figure out the bit where you suddenly noticed you were totally lost and find the bit in the middle where you kind of missed a bit because we are going to keep building up from trivially easy stuff. Lesson 10: Where’d you get lost? -
Dunder methods, there’s a particular list I suggest you know, and this is the list: Lesson 10: Dunder Methods
__getitem____getattr____setattr____del____init____new____enter____exit____len____repr____str__
- You need to be really good at browsing source code. This is a list of things you should know how to do in your editor of choice: Lesson 10: What an editor needs
- Jump to tag/symbol by with(with completions)
- Jump to current tag
- Jump to library tags
- Go back
- Search
- Outlining/folding
-
Standard deviation is more sensitive to outliers than mean absolute deviation. For that reason the mean absolute deviation is very often the thing you want to be using because, in ML, outliers are often more of a problem than a help. Mean absolute deviation is really underused, you should get used to it. Lesson 10: Mean absolute deviation
-
Replacing things involving squares with things that use absolute values often works better. It’s a good tip to remember. Lesson 10: Squares are for squares
-
From now on, you’re not allowed to look at an equation, or type it in LaTeX without also typing it in python, actually calculating some values, and plotting it, because this is the only way we get a sense of what these variables and equations actually mean. Lesson 10: Always play with equations
-
Your problem to play with during the week is "how accurate can you make a model just using the layers we’ve created so far, and, for the ones that are great accuracy, what does the telemetry look like? How can you tell it’s going to be good? And then what insights can
you gain from that to make it even better? Try to beat me (0.9898 at best point, 0.9822 at end) You can beat it pretty easily with some playing around, but do some experiments. Lesson 10: Toy Problem #1 (Homework) -
Epsilon appears in lots of places in deep learning and is a fantastic hyperparameter that you should be using to train things better Lesson 10: More about epsilon
-
It’s really good to create interesting little games to play, in research we call them toy problems. Almost everything in research is toy problems you come up with and try to find solutions to. Another toy problem to try during the week is, what’s the best accuracy you can get in a single epoch using whatever normalization you like and only architectures we’ve used up to lesson 7? Lesson 10: Toy Problem #2 (Homework)
Lesson 11
-
A big part of getting good at deep learning in your domain is knowing how to create small workable useful datasets. In your domain area, whether it’s audio or sanskrit texts, try to come up with a toy problem or two which you hope might give insight into your full problem. Lesson 11: Small useful datasets
-
If you haven’t seen
composeused in programming before, google it. It’s a super useful concept and it comes up all the time. Lesson 11: Compose -
A great opportunity to contribute is using telemetry to view activations of different layers and seeing what happens experimentally. The theory people generally don’t know how to train models, and the practitioners forget about actually thinking about the foundations at all, but if you can combine the two and try some experiments to see what happens when you adjust weight decay, you can find some really interesting results. Lesson 11: Another opportunity
-
The trick to making Adam and Adam-like things work well is to make epsilon 0.1 (or between 1e-3 and 1e-1). Most people use 1e-7 and that’s never going to be a good idea.
Lesson 11: Another place where epsilon matters -
When you’re augmenting your data, look at or listen to your augmented data. Don’t just chuck it in a model but look at the augmented output and try to find something to study to see if you’re losing information. Lesson 11: Mindful data augmentation
-
Image augmentation isn’t just about throwing some transformation functions in there, but think about when you’re going to do it because you have this pipeline where you start with bytes, which become floats. Think about where you’re gonna do the work. Do whatever you can while they’re still bytes, but be careful to not do anything that will cause rounding errors or saturation problems. Lesson 11: Optimizing data augmentation
-
When doing data augmentation on non-images, ask yourself what kind of changes could occur in data that wouldn’t cause the label to change but would still leave that data as a reasonable example that could show up in your dataset. Lesson 11: Data augmentation in other domains
Lesson 12
-
Be careful about using automated formatting and creating too many rules. Sometimes unconventional formatting can help you to understand your code better. This is the only way to make your code work. Debugging machine learning code is awful so you have to make sure the thing you write makes sense and is simple. Lesson 12: Unconventional Formatting
-
The mixup paper is a pretty easy read by paper standards. I suggest you check it out.
-
Make your equations in code as close as possible to the paper you’re implementing. When you’re comparing something to a paper, you want something that you can look at and straightaway say “oh, that looks very familiar”. As long as it’s not familiar you may want to think about how to make it more familiar. Lesson 12: When to use Greek Letters
-
Don’t listen to people in your organization saying we can’t start modeling until we do all this cleanup work. Start modeling right now, see if the results are okay, and if they are, maybe you can skip the cleanup or do them both simultaneously.
-
Read the Bag of Tricks Paper and think about for each of those resnet tweaks, why did they do that? It wasn’t some brainless random search where they tried everything. They sat back and thought “how do we use all the inputs we have and take advantage of all the computation we are doing?” Spend time thinking about architectures and experimenting with them, it’s really important for effective practitioners to be able to write nice concise architectures so that you can change them and understand them. Lesson 12: Build Architectures Thoughtfully
-
A super important thing to remember if you’re doing fine-tuning is don’t ever freeze the weights in the batchnorm layers if you’re ever doing partial layer training. Lesson 12: Batchnorm Does Weird Things
-
The way to debug in DL is to not make mistakes in the first place. The only way to do that is to make your code so simple that it can’t have a mistake, and to check every single intermediate result along the way. You also need to be a great scientist, which means keeping a journal notebook to keep track of your results. Lesson 12: A War Story About DL Debugging (really long and detailed response that’s worth a second listen)
-
When preprocessing data for neural nets, leave it as raw as you can is the rule of thumb.
-
Anybody who has made it to lesson 12 in this course should be learning Swift for TensorFlow. This one comes with some great advice.
- Python’s days are numbered.
- DL libraries change all the time so if you’re spending all the time learning one library in one language, you won’t be prepared for that change.
- I’ve spent time using, in real world scenarios, at least a couple dozen languages, and each time I learn a new language, I become a better developer. It’s just a good idea to learn a new language
Lesson 12: Why Swift for Tensorflow
Lesson 13
-
Importing Python into Swift is a super cool feature that you should use to fill in the gaps while this ecosystem doesn’t exist, but as soon as possible, fill in the gaps. We shouldn’t use this as such a crutch that we never write our own even better dataframes and libraries. Lesson 13: Use It, Don’t Abuse It
-
If you’re hacking around over the coming months and you find things aren’t the way you want then you can, and should, change it. Lesson 13: Swift Is Fully Customizable
-
Take a look at the code below after the lesson and think “what is going on here?” because this is something really interesting. Lesson 13: Only Possible In Swift
-
Some advice from Chris: “The thing I want to emphasize is that optimizing unsafe buffer pointers is a super low-level geeky thing that not everyone should do. It exists because at certain points in your journey you may find it useful, but usually you’re not working at this level”. Lesson 13: You Don’t Have To Use Every Feature
Lesson 14
- There are many ways to get involved. Pick some piece of this that might be interesting in your domain, and over the next 12-24 months, explore with us so that by the time all the pieces are together you’ll have what you need for your domain. It’s not so much, how do I build this custom derivative thing in Swift for TensorFlow (hard), but rather, starting to use little bits of this in the work that you’re doing. Start by just building a notebook, or converting a small library from Python to Swift, or writing a blogpost (Chris). Lesson 14: How You Can Help


 is the size of their ears, right ?


