A writeup on the exploration of the cost, time, and quality relationship when training an ML model in relation to how much data and how many epochs (runs) are needed. Based on Lesson 2 of Part 1 DL course.
Changed to look prettier and added signing certificate!
https://real-or-fake.lab.jayway.com
It was trained on a small pre-trained model in a very small amount of time, so it can not really color everything, the fake column is the output of the model, which the model learned what is the real one and will try to make it more real.
Hello!
I developed a classifier to differentiate between Hollywood actors who look very similar (even human deduction often fails to make out between them).
I’ve written all about it in the following blog post:
Please do give it a read!
Hi khushipathak hope all is well!
I read your post on medium and found it a nice, conscise and enjoyable read.
I am not a member of medium so here is a  for you.
Cheers mrfabulous1 

Thank you very much! I appreciate that you took time to go through the post! And warmest thanks for the applause haha!
This general idea (substitute whatever appropriate ML technique for CNN’s) has been part of the lore of signal processing and machine learning for a very long time. I remember people doing this kind of thing to the time indexed frames or windowed segments of the short term Fourier transform. I’m sure it was done a long time before the STFT became the standard time-frequency analysis transform.
I have seen this done in time frequency masking (see Yılmaz and Rickard, 2004). Image processing techniques have been applied to the time indexed frames of the STFT or the binary mask function that “picks” the STFT points that belong to a specific audio source. I wish I had some examples, but in my experience applying image processing techniques was a pretty ad hoc thing to do although it often yielded good results.
In my experience this translates to the necessity of meaningful feature selection.
This app was developed by me who had no coding background and me and my High school friends have developed this. Thank you Jeremy, you are a true inspiration.
I just wrote my first Medium blog on tensor basics! Please feel free to take a look at it and give your comments
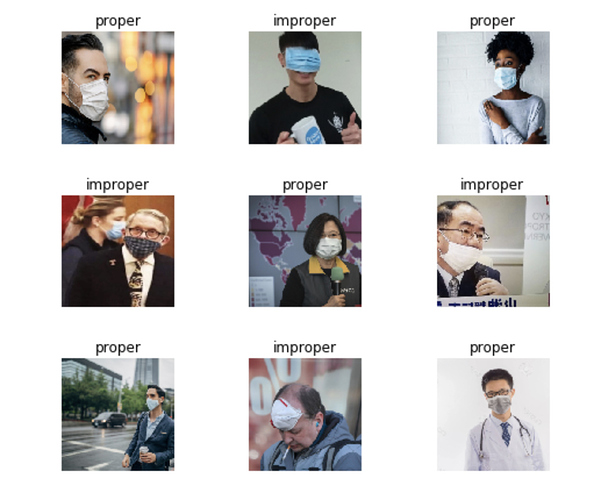
Hi all! Just finished lesson 1 and decided to have a little fun gathering my own dataset for this week’s project: identifying whether a person is wearing their mask properly or improperly. Images were manually gathered using Google Images. A total of 45 images of proper mask wear and 45 images of improper mask wear were gathered. Here is a random batch:
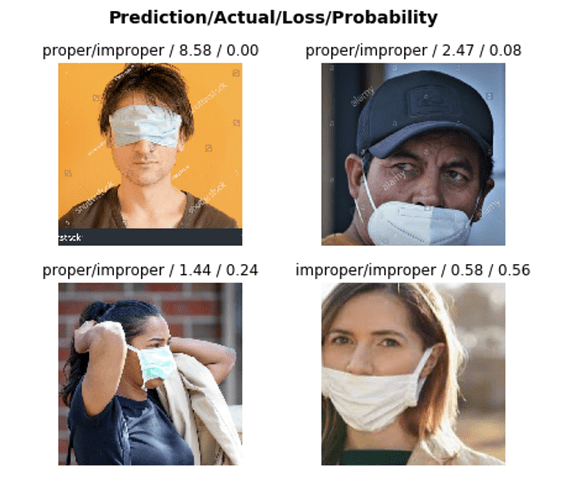
I managed to reach an error rate of 17% (3 out of 18 images incorrectly classified). Not too sure how to improve this given the small dataset size. I tried applying some data augmentation using mixup, but it did not help much. Here are the top losses (some very obvious errors):
I’ll be moving on to lesson 2 so hopefully new tips and tricks will help. Code is available on GitHub.
Ha Ha LOL! Hi stochastic your post made me laugh, I hope your having lots of laughter today to!
Try adding some more pictures to your classes and try it with a bigger model. See this post here.
Great post!
Hope this helps
mrfabulous1 

brand new fanboy right here.
first, i have to say, i’ve been writing code for a little over 30 years so i’ve seen my fair share of really good and really not good, and this library is absurdly good.
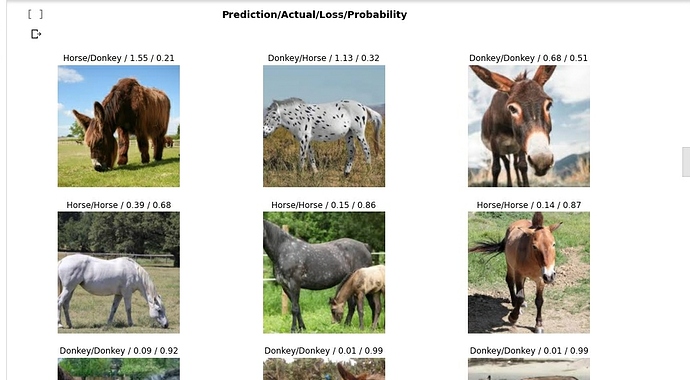
i gave it some horses and donkeys to play with. it took quite a long time to run lr_find() but after that i got 93% accuracy, training in about 10 seconds on colab free. 
[edit] i forgot to try resnet50. that got 96.5%
i also went on a little tangent because i couldn’t use the javascript method from lesson 2 to get the urls out of google (i’m running on a tablet for the next 2 months) so i created a notebook to do the image scraping/cleaning/zipping.
that’s over here if anyone wants it:
https://colab.research.google.com/drive/1F9YpbiQAAThlk09BjN_r7XSNQSMJ98Xd?usp=sharing
I finished lesson 3 yesterday and been playing with what I learned so far. Specifically, I took a Kaggle dataset for pneumonia chest x-rays and built a classifier. I’m went through the usual process for training, playing around with learning rates after unfreeze to see if I can improve the result. I ended up with 93.5%.
On the Kaggle forum, people are getting around 98%. I’m wondering what I can do to improve my results?
Should I keep fine-tuning the learning rate? Would it help to expand the validation set to be a larger percentage of the overall data? Is there something I can do with test data to improve the results?
Here’s the notebook: https://gist.github.com/misham/deed749654e58980fcd6400ba3bd728b
The small red lines are for the giant number of warnings about nn version stuff.
I’ve finally been able to finish the Lesson 2 webapp with the help of mrfabulous1. It’s a coin time-period identifier. However, the model is very biased since I pulled most of my images from a UK finds database. I did try to compensate a little by adding some images from other sources, but the data is still going to have trouble with most coins minted outside the UK.
Edit: I should mention that my accuracy for my model ended up being something like 88%-89%, mostly due to similar motifs showing up between the medieval-ish time periods. That, and some coins look like they’re incredibly difficult to id unless you have the expertise to do so.
if it’s the same giant number of warnings i was getting at the beginning, it’s because of a mismatch between fastai and pytorch versions.
i downgrade my pytorch version at the top of each notebook (on colab). it trains faster and better (for me).
!curl -s https://course.fast.ai/setup/colab | bash
!pip install torch==1.4.0 torchvision==0.5.0
those are my first 2 lines in every notebook.
Thanks @mrfabulous1, happy it made you laugh! I’ll be trying out your tips!
Thanks, will try this out.
I’ve finally got something deployed properly. I love binder.
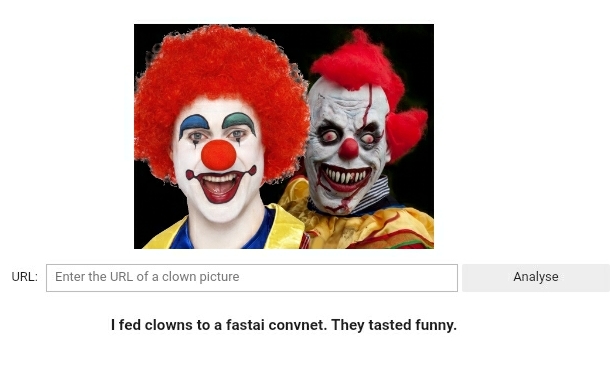
You can play with it here if you want to.
Also I hadn’t realised that Colab was giving out my email address when people run my notebook through a sharing link(!) so I’ve put that image scraper into github instead.
As of 07/15/20, I was able to use these instructions for jetson-nano but with several adjustments. Installed JetPack 4.4, torch 1.4.0, torchvision 0.5.0. Use instructions from nvidia for torch & torchvision link.

