@dpoulopoulos it’s very very interesting!
Thanks for sharing it!
1 Like
COVID-19 Early symptom detector
A little late to the 2019 course party, but I guess better late than never.
If you think you may have coronavirus, here’s an app that tells you how many days you should wait before you seek medical attention.
https://covid19-app-272409.appspot.com/
PLEASE NOTE: Do not take this app seriously, the dataset is an ‘EDUCATIONAL USE ONLY’ dataset(github repo here)
I wrote a blogpost exploring the limitations of this dataset on my custom blog inspired by fastai’s fast_template
Thank you fastai community
Coming from a non-development background, last few months have been an extremely frustrating experience. I learned about version control by accidentally wiping out 3 months worth of work and observed the perils of rm -rf after virtually destroying my machine.

But going through the fastai forums and seeing people share amazing projects and positive messages kept me going.
If nothing else, this course made me have a newfound respect for software developers. Cheers guys!
2 Likes
Here is my result from your app, so I think I am ok:
Please wait for 5 days before you see a medical professional
1 Like
That is really cool. This is not something I had thought about!
I just made it through Lesson 1 and trained a model on a small dataset of birds that have similar characteristics. https://fastai-birds-test.onrender.com/
Excited to be here. Looking forward to learning more 
2 Likes
So I was trying out the DeHazing dataset. Here are results and man I am impressed for a dataset of just 100 images. Understanding such information from barely any context is really amazing I think.
Any feedback would be amazing
Thank you,
Stay safe everyone.

7 Likes
Hi everyone !
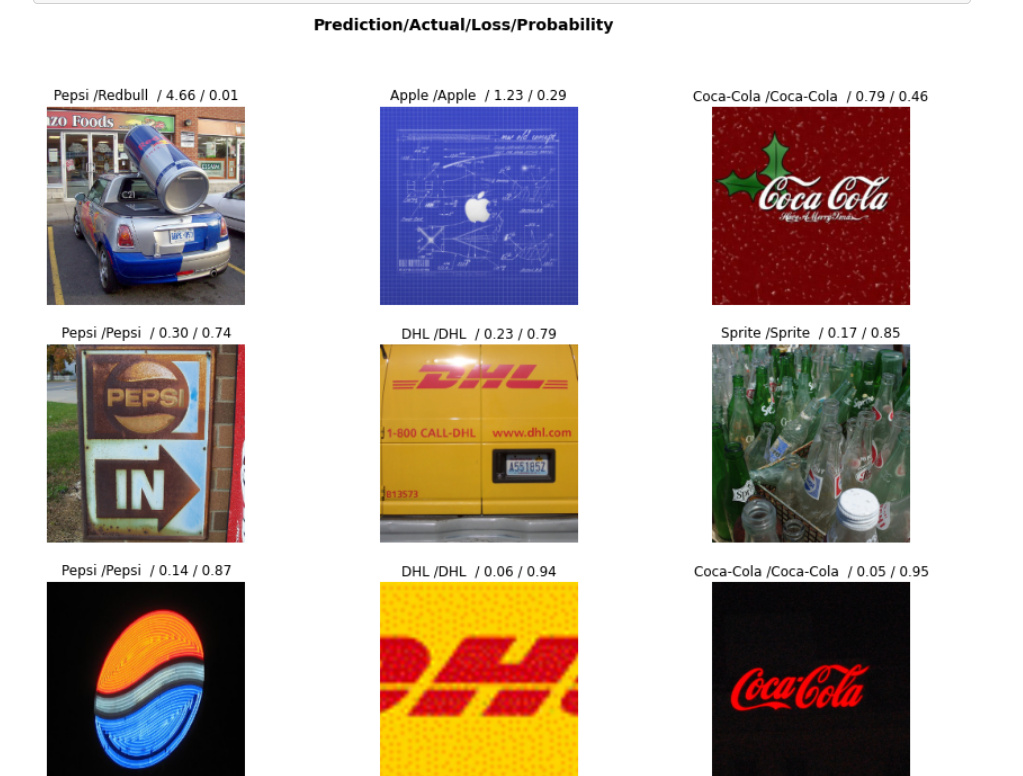
I created my first Image Classifier which can recognize 8 world-famous brands from all around the world (216 photos). I’m really glad that I found your course Jeremy, this is so awesome and Thank you. My error_rate is 2.3% (resnet34) so it’s a success I guess Now I’ll try to put in on website like you said.
I took these brands photos from Flickr Logos 27 dataset.
3 Likes
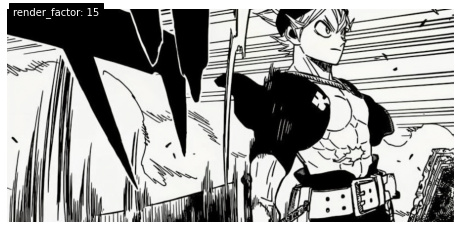
@Nubbinsonfire just wanted to show some cool examples of it working (and not working). Really a lot of fun to play and toy around with the render factors!

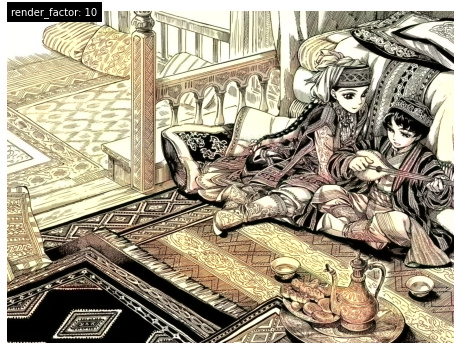
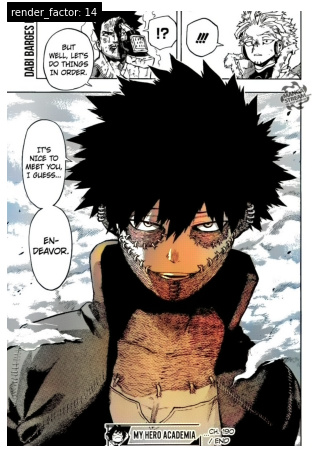
Here’s the not working one (render_factor of 15 looks the same as the OG):

Awesome work
3 Likes
Yes, you should be fine 
They looks really good!
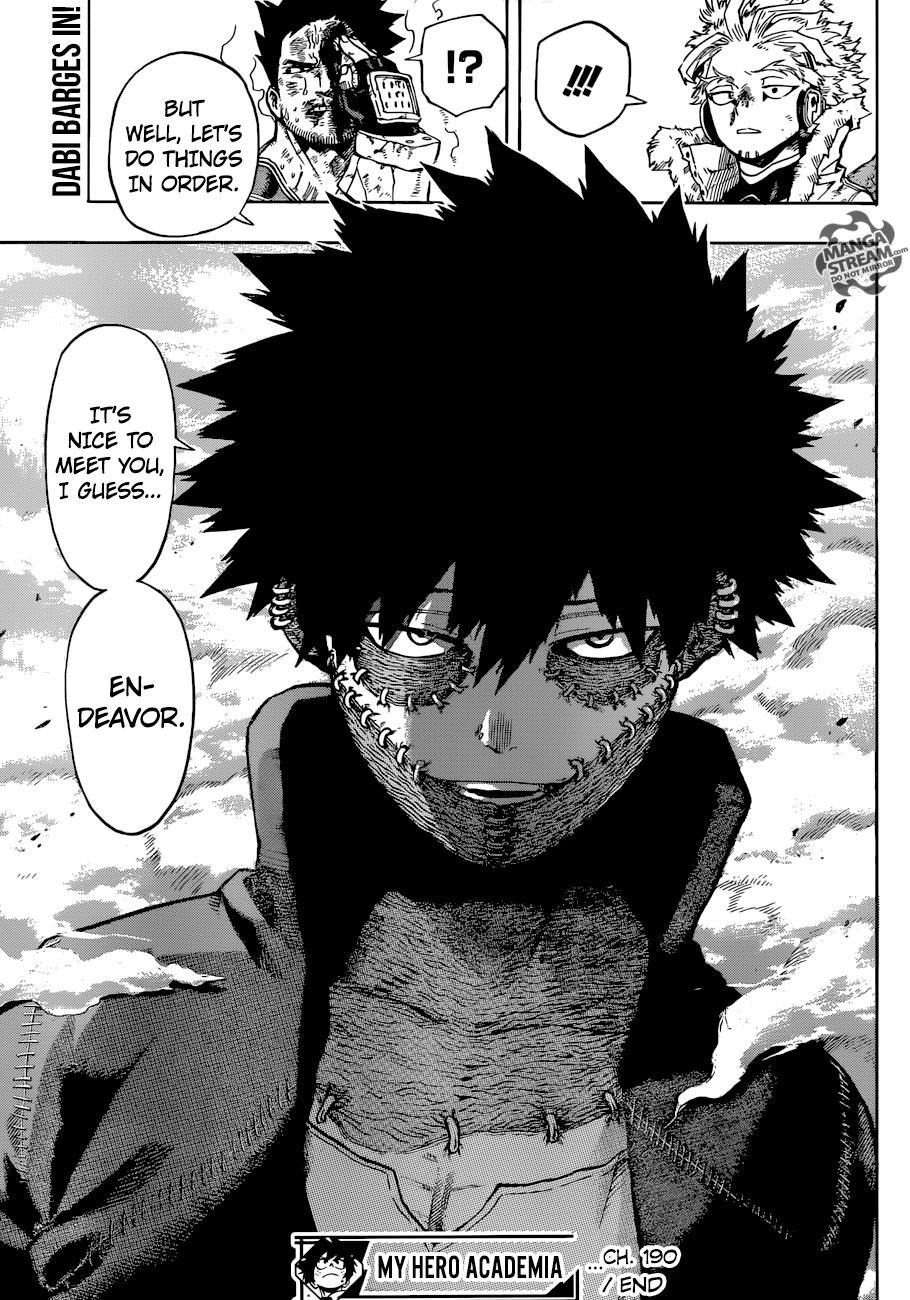
The one thing my model really seems to struggle with is manga like panels.
In the dataset I used they aren’t colored, and I think my model learnt that. Its the next thing I am going to look at. Just need to find a good dataset for that.
1 Like
Excellent!
mrfabulous1
I wanted to share my work on lesson 2. I built a squash classifier (for 5 varieties). Here it is:
I can’t figure out how to get it into production, but it took a lot of work to get my model to have a reasonable degree of accuracy, so I’m pretty happy.
Lessons Learned:
-
Image scraping pumpkins from Google Images is really hard. No matter how much you use
-keywordto get rid of fluff, there just aren’t many great photos of pumpkins. Lot’s of jack-o-lantern carving ideas though -
You can’t necessarily trust that your top losses portray all the noise in your data. After running
ImageCleanerand still getting really bad results, I finally dove into my image files head first. I had to clean out about 70 percent of pumpkin photos and about 30-50 percent of the other squash types. -
I learned how to create an ImageDataBunch from csv, specifically using the ‘cleaned.csv’ file.
Outstanding Questions:
-
How many images per class is enough for your model to be robust when faced with new images? I read 1,000 per class in several places online. In the video Jeremy says something to the effect of “less than you would think”. After cleaning my dataset, I had anywhere between 25 and 50 good images per class.
-
After cleaning the data, why keep the parameters from the run on uncleaned data? This is what ended up working for me:
- Create combined DataBunch, no splits
- Train a model and get its top losses
- Use top losses to clean up noisy photos
- use ‘cleaned.csv’ to create a brand new DataBunch with appropriate train/valid/test split
- Start new model with new, clean DataBunch that it has never seen before.
Am I missing something there?
- After enough epochs, I noticed that sometimes training and validation loss continue to drop while error_rate begins to creep up. From my understanding of loss, I thought it was directly tied to error rate. For example in linear regression, I thought loss and mean squared error are actually the same thing, and gradient descent is used to minimize loss, and thereby also minimizing error. So, it appears that I have made a conceptual error. What am I missing?
Thanks!
1 Like
@subhadityamukherjee amazing! Can you please share a link to the dataset? I would like to work on it too, for another project.
@PalaashAgrawal Thank you! Here is the dataset https://data.vision.ee.ethz.ch/cvl/ntire19//dense-haze/.
Best of luck for your project
2 Likes
I created a thin wrapper of the source code of First Order Motion Model for Image Animation by Aliaksandr Siarohin et al., to write a console script using nbdev. Now it is really easy to play with your own DeepFakes. I compiled a brief tutorial on Medium.
3 Likes
Awesome job!!
I wanted to share my small success. This is something I started working on from lesson 1, but finally got to a level I felt was worthy of sharing after lesson 3.
https://which-captain-of-the-enterprise.onrender.com/
How I did this:
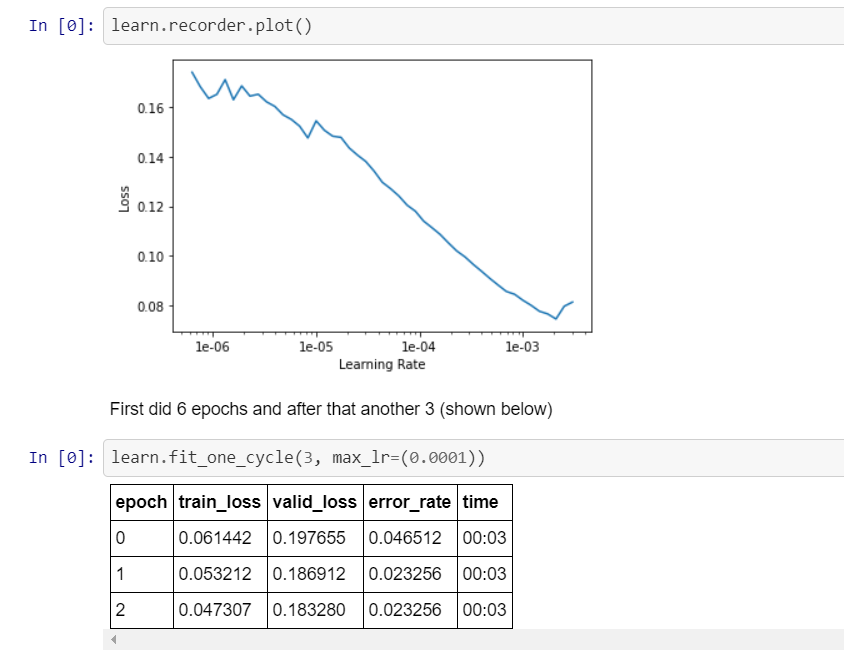
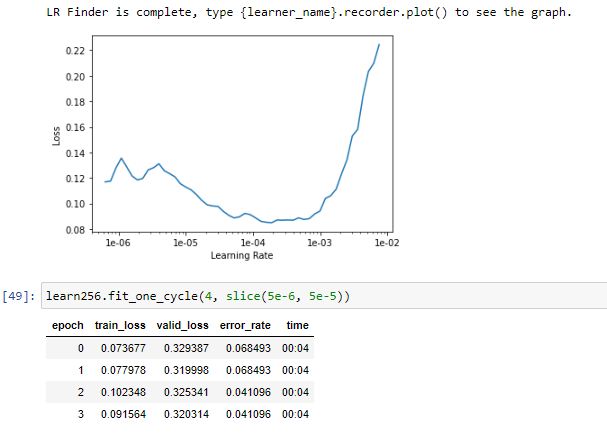
I followed the “Progressive Resizing” method that Jeremey demonstrated in lesson 3. I started with resnet34, on size 64 images. Trained, unfroze, trained. Did the same on size 128 images, and finally size 256 images. I got an error rate of about 8%. Then I repeated the same process with a resnet50, which got the results shared above.
Things I learned/observed:
- I am getting a better sense how to look at the learning rate graphs.
- The image set needs to be cleaned a lot. I pulled so many junk images.
Questions I still have:
- How the heck can you make .from_csv() work? I ended up importing my cleaned csv into pandas and running ImageDataBunch from there.
- I’m still confused on how many epochs to run.
I have very little formal education in programming. It’s incredible that the tools have reached a level where someone with my background can actually run an image classifier and reach these kinds of results.
1 Like
This is an awesome course, and I’m excited to be learning about AI. I’ve started with the first couple of video lessons and notebooks.
I’m using fastai on my own gaming PC, in Debian with an NVIDIA 2060 Super. It wasn’t too difficult to set up, and it’s working well.
I put together a download script to get image sets from Google image search, and a simple image classifier script, to sort images into folders using an exported model, when the probability exceeds a certain confidence level.
I downloaded 25GB of different animal images, 263 different types of animal. I noticed that “chicken” gives mostly cooked meals, “crane” gives large machinery, and “cricket” gives that boring ball game! So I fetched those sets again with more specific queries. I trained a resnet34 model on these images, it’s working pretty well, but not great… perhaps because many of the images are misclassified or otherwise dodgy.
There are too many images for me to clean up by hand in a reasonable amount of time. So now I’m working on a model or series of models to automatically clean up the image sets, and remove “bad” images.
For starters, I want to get rid of any image containing text, so I’ve made a model to classify supposed animal images as “with text” or “without text”. It’s working pretty well, and it seems to filter out certain other “garbage images” too, which is a bonus.
After wrapping up Lesson 1, I decided to classify DBZ characters, shout-out to any DBZ fans out there. Given that I don’t know a ton about DL (why I am taking the course haha) I was pretty happy that with lesson 1 under my belt I was able to get 82% accuracy. Some of the misses were images where the heads were cut-off and the image quality wasn’t the greatest (had about 30-40 on avg per class)
I did two types of classification
Version 1
Goku
Vegeta
Trunks
Krillin
Tien
Super Saiyan Goku
Super Saiyan Vegeta
This ended up being easier and higher accuracy than the second cut where I just did Goku and Vegeta (and included their transformations in the class)
Version 2
Goku
Vegeta
Trunks
Krillin
Tien
I saw more goku and vegeta misses in this second step because their character now had a wider variety of looks.
One last thing, I am sure I could have boosted the score if I did more characters. Piccolo a green character would have boosted accuracy, I chose characters that look fairly alike on purpose to see how the algo would do
but overall fun exercise!
Here are sample sample cases from version 1
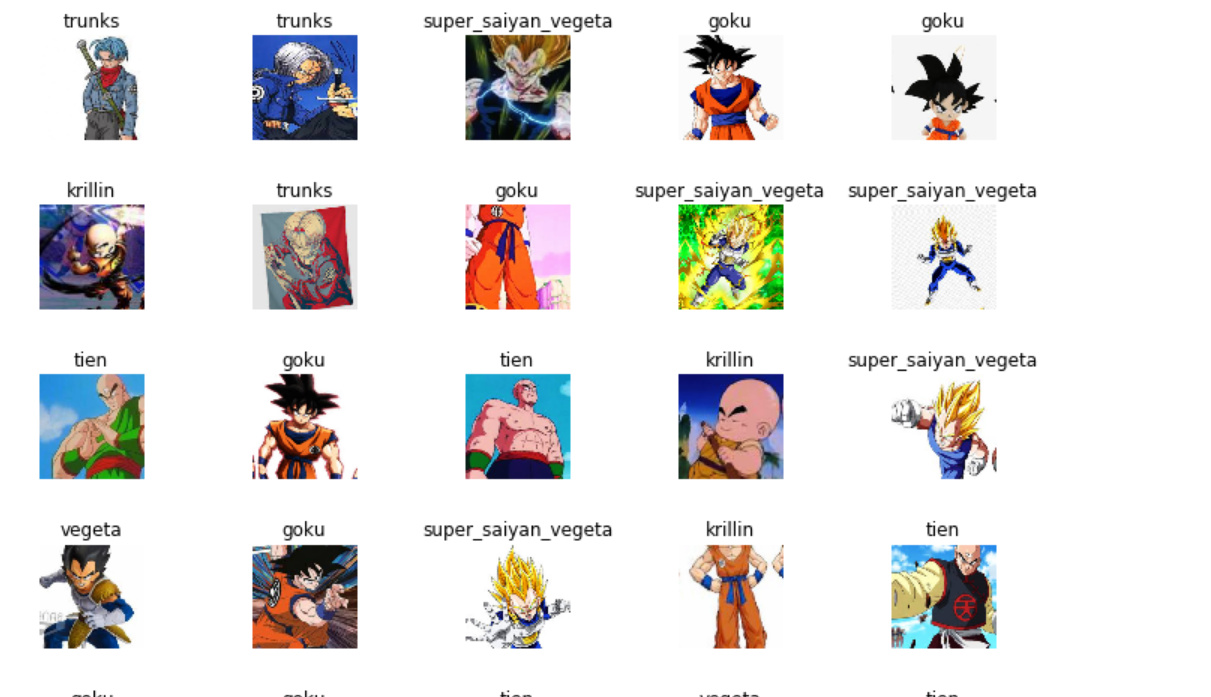
Update: Went back to this after lesson 2 and did two things:
- Got rid of bad photos poor quality, didn’t quite fit, some photos has Goku and Vegeta threw those out.
- Got rid of duplicates.
Accuracy went from 80% to 93%. I followed notes from lecture where I fit the model and then looked at learning rates and then unfroze and it’s cool to see that cleaning up the training data had this effect.
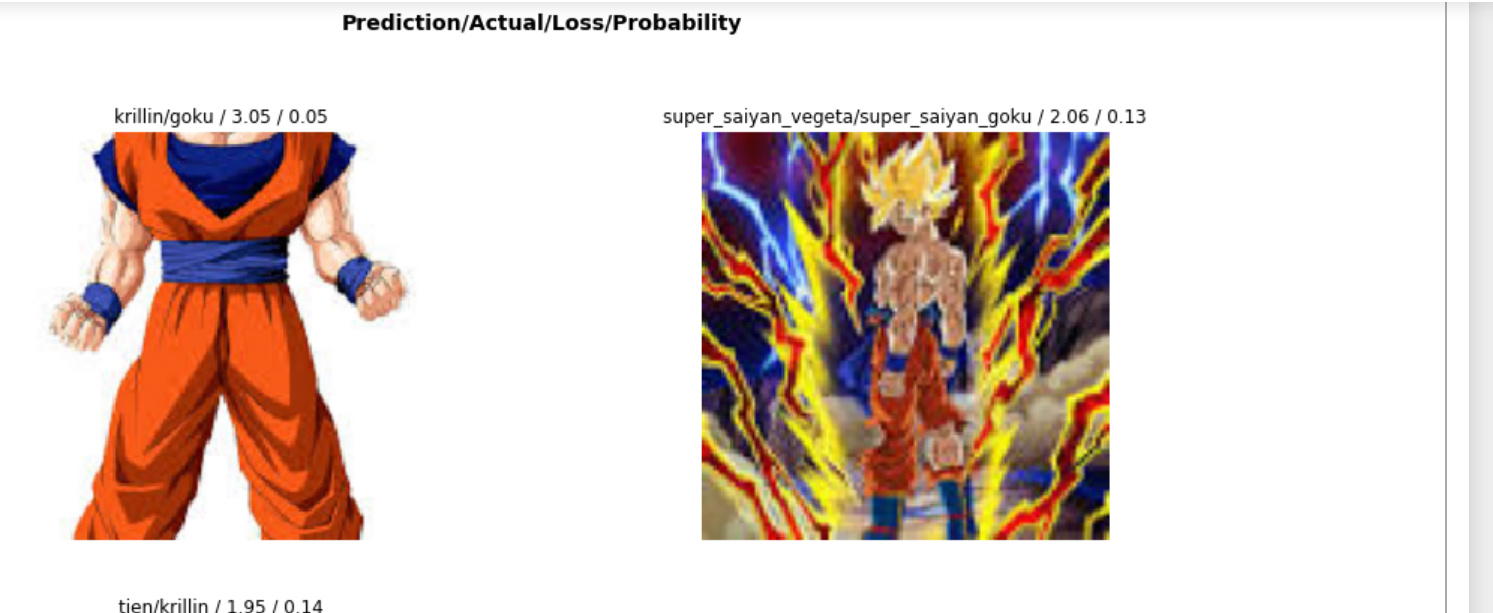
Here were top 2 misses. I thought about getting rid of these in the data quality clean up since image 1 the head is missing (decided against it since you can still tell it’s Goku) and image 2 since quality is bad (but again you can tell it’s Super saiyan Goku) so I’m okay with these being the top 2 missed given that they are kind of ambigous.
I started with around 330 images, then cleaned up bad images to around 290 then eliminating dupes got me down to 275
3 Likes