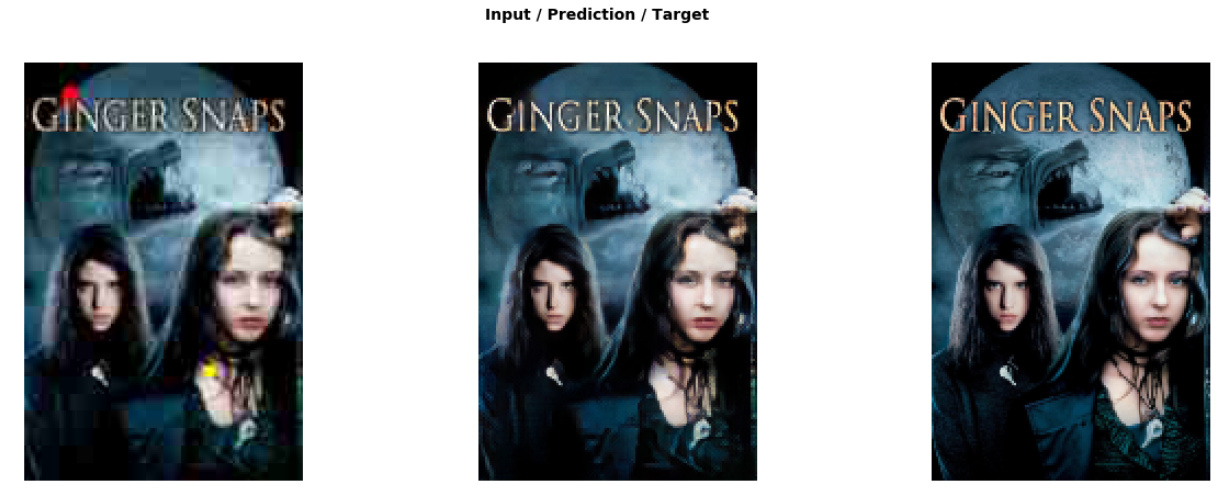
After Lesson 7, I tried my hand at building a super resolution model that restores movie poster images (by improving image quality and removing defects). I trained it on a dataset of ~15,000 movie poster images, which I was able to find for free online.
Technical details:
- The first step was to get some images of movie posters. I found a website which had a large database of images. They had an API which was quite easy to use, and it wasn’t too hard to build some code to automatically download 15,000 images
- Next, I needed to create my lower-quality images. I created a “crappificate” function (inspired by Jeremy’s crappify function), that reduces image size, reduces image quality, and draws a random number of circles of random size and color on the image. The circles can be red, yellow, or brown. The idea is that it simulates someone spilling ketchup, mustard, or BBQ sauce on a movie poster
- Creating the model after that was not too hard, as I was able to use a lot of Jeremy’s code from the lesson. There are a few parts of it I don’t understand yet (e.g. the gram matrix loss function, why we set pct_start to 0.9 when training, and the [5,15,2] layer weights values we pass into the loss function), but it sounds like we might cover this in Part 2
- One other interesting thing was that I used rectangular images, rather than square images (I trained with sizes of 192x128 and 384x256). It seemed to work, but I remember Jeremy saying in an earlier lesson that using rectangles properly requires a fair bit of nuance, so I’m hoping we cover this in Part 2 as well
- Code for the model is available at GitHub