I have created an alternative approach to giving persistence to AWS spot instances. Have simplified to one line of code to create a server with a persistent volume; and one line of code to terminate it and save all the data and programs to a snapshot.
Both data and programs are persisted on a non-boot drive using a docker container; rather than the boot drive as per the @slavivanov solution.
@simoneva Thanks for this. I’d be interested in trying it out…
I tried @slavivanov’s scripts… but I had a tough time getting them to work correctly. I ran into problems (Maybe my errors?)
Quick Q for you @simoneva:
– Is the use of Py3 Ok for Jeremy’s notebooks?
– In your config.yaml, you have some Amazon AMIs. Are these the same as Jeremy’s fast-ai-gpu AMIs? If not, how would one change to them?
Thank you @simoneva! Are there freedom to set maximum bidding price?
My goal is to use container_2.7_theano for one type of exercise and container_3.6_tensorflow for other types of exercise. I want to be able to use both but not necessarily simultaneously. Is that possible with your approach?
Also, can you elaborate on “Notebook config and notebooks are on /v1 outside the container”?
py3 is fine. you have to change a few lines occasionally e.g. import cpickle=>import pickle.
The AMI can be changed to another amazon AMI in a different region - just add a copy of the config file in ~/.xdrive/config.yaml and make the changes to that. Also you can load any image you want in the docker container. Therefore there should be no need to change the AMI…if you think otherwise please tell me why?
My aim was a thin server with all the work done in the docker container. The fastai AMI is 130GB as is the amazon deep learning AMI. I tried basic ubuntu but was unable to install the GPU drivers using the 100 page installation manual! So I then tried to find an AMI with the GPU drivers installed. The only lighweight one I could find was nvidia/amazon; and despite this being nvidia branded it has 7.5 CUDA and not the latest drivers. I could not find an AMI with CUDA 8.0 without a bunch of other stuff and a massive boot drive.
If you “connect” the drive to an existing server then you can use any AMI you like as nothing is installed with this method. However all of the apps.py is written for amazon ami which is centos based so uses yum not apt-get. Also the launch of an instance installs docker and nvidia-docker using yum. So that will not work on ubuntu say. But then why do you care what the AMI is - if you use docker you can install any image you like in that? You can also install any programs you want in the fastai container. You just “docker exec -it fastai bash”. This opens a bash console in fastai container. You can then install anything you want.
Finally…the home drectory in the docker container is mapped to /v1 which is the root of the external volume. The jupyter config is stored there. So you can change the password in plain text. Also the notebooks are copied there. So you have a master copy of the notebooks inside the docker container; and a copy on /v1, the root of the external volume.
The current spot price for P2 is around 18c. I bid 25c and have never yet been terminated. However I am told there are occasional spikes to $2. So if you do bid high you may end up paying $2 for the whole hour.
If you do get terminated then it is not a huge issue as your volume will still exist. You just manually save it to a snapshot and launch a new instance.
Regions are divided into availability zones e.g. there are three availability zones in eu-west. It chooses the lowest price availability zone within the region.
I am not sure of the practicality of using multiple regions. You cannot access volumes and snapshots in a different region to your server. You can move the data but this takes time and Amazon charge for this. So you typically want to stay in one region - likely nearest to where you live.
The AMI fixes the region. The default for xdrive is eu-west as I am in Europe! If you are not in Europe then copy the config.yaml to ~/.xdrive/config.yaml and change the two AMI numbers to the equivalent Amazon AMI and Amazon/nvidia AMI in your region. These images are available in all regions but with a different AMI number in each.
Snapshots are fixed to one region. Volumes are fixed to one availability zone. The xdrive data is stored as a snapshot so when you create a server it can pick the lowest cost availability zone. Note though that if you have a volume and manually create a spot instance using the AWS menus then you may find it is in a different availability zone to your volume so you cannot attach the two!
Hi, great work on this (I’m very new to Dev and especially Docker, so please bear with me is this is an idiot question - I have tried for more than 30 mins on this.
I’ve changed my config.yaml for a US AMI and US region.
When I run the example notebook, I get the warning below:
Note that I really can’t see where this AMI is getting pulled from - I’ve searched all files both locally and searched through all files on the docker for reference to that AMI. I"ve also deleted my docker several times, but really can’t see why I have this issue and where that AMI ref is getting pulled from or how to change it.
That is the default AMI for eu-west. If your aws config is a US region then it won’t find the AMI. You can put a copy of config.yaml in ~/.xdrive folder which should override the default. Check the folder name - note the dot.
Note also there are a number of other glitches and enhancements which I am currently testing. One of these will be to lookup the region and AMI. When I have completed these there will be zero configuration. I have also created a container for the example notebook which avoids any potential conflicts. So watch this space - will post here when completed…I hope tomorrow but am an obsessive tweaker and testing the whole thing is time consuming.
Another quick question - I switched to the US region as I had accidentally deleted my default VPC in Europe and the script threw up some errors about this. is there a way to specify a VPC in the script? (AWS support will take an eternity to restore my default as I don’t have premium support).
I have uploaded a much revised version with significant changes/fixes.
It should now work much better without any fiddling! I had been testing on a drive I had been using for a while which worked for me but probably not for anyone else without a lot of tweaking. Now I have just run through the whole example notebook from scratch and it all seems to work fine. Would be pleased if someone could try the example notebook and confirm it was successful.
I have also removed all the configuration e.g. it looks up your aws default region and uses that to determine the AMI.
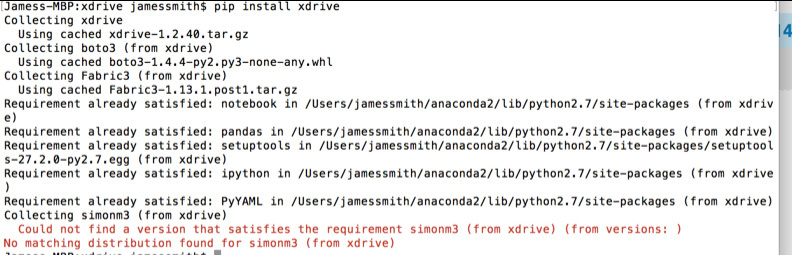
Hm! That is odd. You seem to have the right command but it says downloading 1.2.40. Yet on the pypi website it definitely shows version 2.0.0.
It is likely somewhere in a cache. I would try pip uninstall xdrive; then search for xdrive in explorer and delete any folders or files. Perhaps search for simonm3 as well. Then try pip install again with --no-cache --update.
One more possibility. I have also created an xdriveclient docker container. This gives you a completely clean environment which avoids this kind of problem.You can docker pull simonm3/xdriveclient. Then on github download simonm3/xdriveclient/xdriveclient.py. When you run the python file it launches a docker container with xdrive 2.0.0 already installed and runs the notebook.
Note you now have four computers - your laptop, xdriveclient container, AWS server and xdrive container. Easy to forget which which computer you are sending commands to via the browser!