Hi @zaoyang, In Lesson 8 discussions some of us including myself had same problems.Check lesson 8 discussions for fix
1 Like
thanks I’ll check it out. Did the Keras 2 implementation from Romano work for you? It wasn’t exactly the same issue. It’s the orange blob.
Hi @zaoyang, try , loss = K.mean(metrics.mse(layer, targ)) .I think the current content loss function you have doesn’t return a single value
2 Likes
Here:
Here’s my conda and pip environments:
Thank you that worked. That removed the orange output. I just don’t understand why that worked.
Hi @zaoyang, The loss returned by the original function won’t be a single value if you are using keras 2. So I had to wrap a K.mean around it
1 Like
k Thank you appreciate it. I have the invalid argument as well. Not sure if encountered it. I’ll try romano’s code unless you have a quick suggestion.
My answers of question 3, anyone who find something wrong or incomplete, please help me correct them, thanks.
1 : What problem are they solving?
They figure out an algorithm which could generate artistic image by deep learning
2 : What is the general idea that they are using to solve it?
a : They use pre-trained network(vgg19) to extract features from content images and style images
b : Generate a random image(white noise) and try to minimize the loss between random image, content images and style images. Total loss = content_loss(content, random_image) + style_loss(style_image + random_image). style_loss could be a summation of gram matrix of many conv output, content_loss is mean square error.
3 : What kind of results are they getting?
The results is the combination of source image and the style image, the results of the paper seem rosy. However, I find out not every images work out of the box, you may need to tune this and that to make the result looks good.
4 : What previous work are they building on?
They are using a technique which called non-photorealistic rendering. I haven’t read this paper yet, have no idea how it works.
For those who are interested in building their own deep learning box I created a tutorial in 2 parts to install the necessary tools for deep learning on your linux machine.
Link for part 1: How to setup your own environment for deep learning - Locally
Link for part 2: How to setup your own environment for deep learning - For remote access
Hi @Matthew, I am hitting my head against a brick wall as I am getting the same “All Orange” images using the default notebook for neural style. Initially i thought it was a problem with keras, tensorflow or cuda causing this, because i am doing this 6 months behind the course timeline, so i went and upgraded everything, but i am still getting this problem. Do you have any insights on how to fix that. or what you did to solve it.
I am at a loss to understand the problem. If you need further screen shots etc i can provide.
edit: I see others had this issue. Im going hunting for the solution. If you or others can post a link to the solution please do. Thanks
edit2:
Ok looks like i solved it from above posts. Thanks all. Heres what i did. Changed the following loss function.
# loss = metrics.mse(layer, targ)         ## This caused the problem
loss = K.mean(metrics.mse(layer, targ))   ## This fixes the issue
grads = K.gradients(loss, model.input)
fn = K.function([model.input], [loss]+grads)
evaluator = Evaluator(fn, shp)I’m having trouble understanding the how the content loss is calculated. In the notebook, it’s
layer_model = Model(model.input, layer)
targ = K.variable(layer_model.predict(img_arr))
loss = metrics.mse(layer, targ)
It seems like this is calculating the loss between the input image and the activations in the final convolution layer. But, if I understood correctly, it should be comparing the activations of the noisy image with the activations of the target image.
Nevermind, I get it now. The layer variable is the activations of the model on the noise image image.
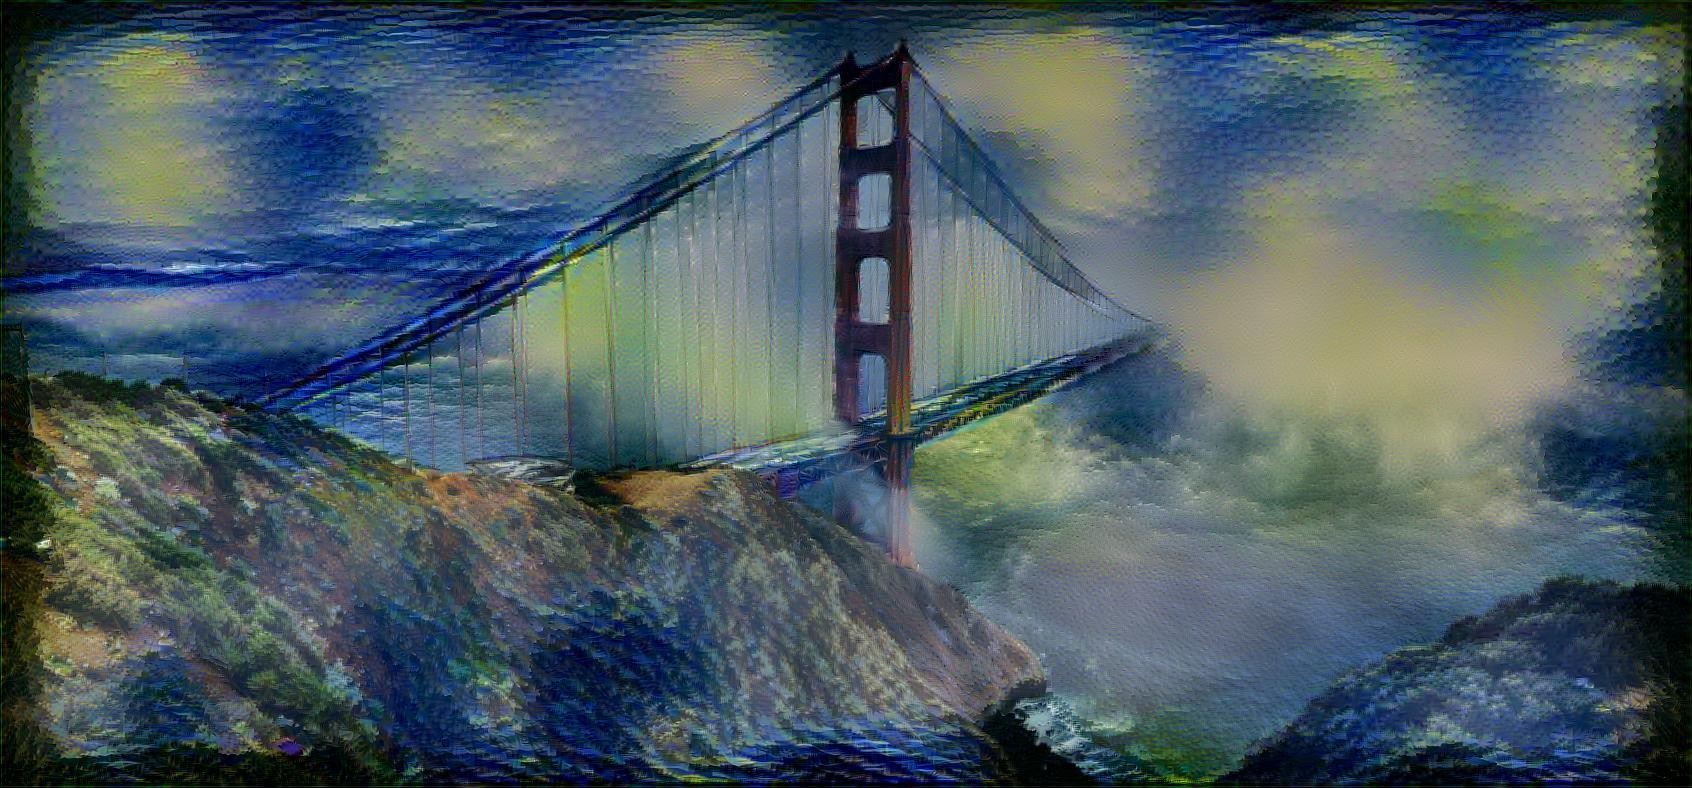
I finally got it working! I used a picture of the golden gate bridge from here, and Van Goh’s starry night as the style. I ran it for 50 iterations, and the result was pretty cool.
5 Likes
In case anyone is confused about why this is, I dug into it a bit. I don’t know why this worked in Jeremy’s original notebook (perhaps it was an older version of Keras) but the mean squared error function is defined here. It performs a mean over the final axis, which in our case is the filters, but this is a marginal mean – it returns the MSE over each individual value rather than reducing the entire difference matrix to a single value. We then apply K.mean to this value without passing a specified axis; in tensorflow it falls back to this function, which, when an axis is not specified, reduces the entire dataset to a scalar.
It seems in the original notebook, metrics.mse was doing this by default. Something must have changed, but I’m not sure what it is. Hope this makes things a little more clear to anyone that was struggling with this issue (as I was).
.
Anyone else having trouble reaching the level of performance displayed in Jeremy’s notebook, even when running the code (nearly*) unchanged? My best losses are in the hundreds – generally 400-500 – while Jeremy’s gets down to around 5. I must be missing something, or a default in one of the underlying libraries may have changed and needs to be adjusted. Just wondering if anyone else has as a good solution.
*the only changes I’ve made to Jeremy’s code are those meant to switch to Keras 2 (e.g., wrapping all the metrics.mse calls in a K.mean). It’s possible that I messed one of these up and that’s causing the issue, but I haven’t been able to spot it.
I am working hard to make the vgg16 to work with custom dataset but there are some compatibility issue that I am facing right now , can anyone suggest the requirements.txt that is needed to run the vgg16 model for my custom dataset.
I was trying to edit the vgg16.py file to make it work with my dataset but value error as well as InvalidArgument error is poping up which is making me nuts while debugging. please do specify the packages that are needed