Lesson 11 official topic

I think the mask is being used similarly in both cases but one is in the image space and the other in latent space.
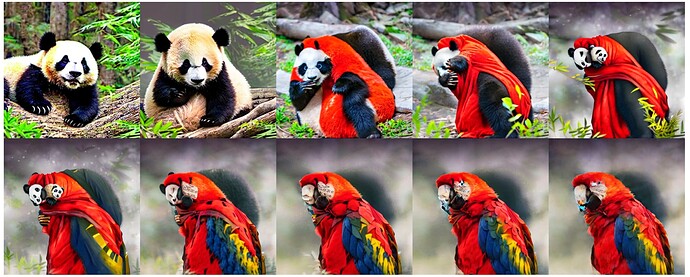
If you look at the johno’s notebook of converting a parrot to nat geo dancer, we see something similar. We were operating in latent space.
It was harder to grasp for me in that notebook with the prompt “A colorful dancer, nat geo photo”, so i replaced that with a “a panda sitting”


The very first image you see some color from the parrot in the panda.
This is what i think is happening :smiley:

3 Likes

I am not absolutely sure that the mask is used the same way :slight_smile: I believe the example from johono’s notebook is because the images are progressively sort of mixed-in as they progress through the diffusion process. And I believe that’s what happens when you do the non-inpaiting for DiffEdit. Or rather, what I think is happening - you take only the parts of the image (in latent space) that are not masked and continue on the diffusion process for that part with the edited prompt. The masked part can either be diffused using the original prompt and/or replaced by the final latent result from the original prompt — depending on how you do things. (I’m just phrasing things here as I see how this might work — the paper probably has a specific way to do this but I don’t recall …)

For the inpainting, my intuition is that it completely replaces the editable portion of the masked image with the results of the edit prompt instead of mixing the edit prompt result with the existing image. Which is why you get completely white stripes on the zebra with this approach, for example …

But I do acknowledge that I might have this totally wrong :slight_smile:

1 Like

Ah i agree with you about johno’s notebook not having masks, but what i was trying to say was when we are in latent space and mask things out that directly doesn’t translate to image space. In the inpainting case the masked out parts are lost. but in the latent space the the parts that are masked are not lost since the neighboring pixels in the latent space have information about it (due to compression)

PS:are we both saying the same thing :grimacing:?

1 Like

For folks looking to improve their masks, you might find morphological operations useful:

https://docs.opencv.org/3.4/d9/d61/tutorial_py_morphological_ops.html

12 Likes

I think we are saying the same thing :smile:

1 Like

Thanks, Jeremy :smile: I found the whole Python tutorials section on OpenCV very helpful/illuminating. I spent hours trying out different things but somehow missed the morphological operations …

Following @jeremy 's advice I decided to try quarto. Seems really good, I published the notebook used above here: https://fromlittleacorns.github.io/fastai-course-22p/. Next step is to make it into a proper website so that I can have multiple notebooks etc. Seems a nice tool and got it working from JarvisLabs without any issues

5 Likes

@johnri99 Feel free to use my website code for styling or structuring - GitHub - aayushmnit/aayushmnit.github.io: Code for my website.

I have found looking at other website code built on quarto helpful while building my own website.

1 Like

Thanks @aayushmnit will certainly do so, your site looks very similar to what I had in mind

1 Like

Quarto lets you generate a html locally (from the jupyter nb) and you can post to github just the html.

2 Likes

From code snippet to LATEX

latexify is a Python package to compile a fragment of Python source code to a corresponding LATEX expression.

1 Like

I was going through the lesson again and trying to read some papers from my field.
I came across this matrix notation and got stuck:

A ∈ RD|V|×2D|V|

To me it seems matrix A has shape (D x 2D) OR (V x V). Is this the right way to interpret it?

Hi, I wrote this notebook implementing broadcasting from the foundations as an exercise. I thought I’d add some prose and turn it into a blog post using Quarto. Any feedback is welcome!

5 Likes

maybe |V| is an integer number (probably the norm of a vector or the absolute value of an integer) therefore, D|V| should be read as the result of “D times |V|”. So D|V| is the number of rows, and 2D|V| is the number of rows. Same idea for the number of columns. Does it make sense?

Very cool! I’d love to see a blogpost :slight_smile:

The All in One Mathematics cheatsheet link is broken. What does it contain? Can somebody please share alternate link?

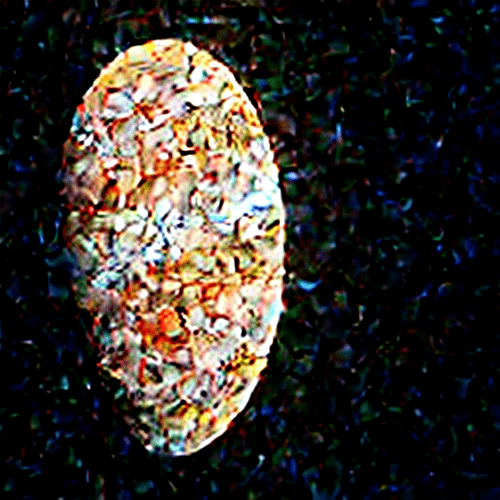
I’m trying to implement the DiffEdit paper, and to do so, I need to add noise to the input image.

The following is how I’m doing it.

img = Image.open('/content/planet.png').resize((512, 512))
import torchvision.transforms as T
with torch.no_grad():
  lat = vae.encode(T.ToTensor()(img).unsqueeze(0).half().to('cuda')*2-1)
  lat = 0.18215 * lat.latent_dist.sample()
sched = LMSDiscreteScheduler(
    beta_start=0.00085,
    beta_end=0.012,
    beta_schedule='scaled_linear',
    num_train_timesteps=1000
)
sched.set_timesteps(15)
noise = torch.randn_like(lat)
ts = tensor([sched.timesteps[10]])
lat = sched.add_noise(lat, noise, timesteps=ts)

However, the last cell outputs the following error and I’m baffled as to why it’s occuring.

RuntimeError: a Tensor with 0 elements cannot be converted to Scalar

Full Traceback
---------------------------------------------------------------------------

RuntimeError Traceback (most recent call last)

[<ipython-input-24-8d2efdc445c5>](https://6umz6pprmf5-496ff2e9c6d22116-0-colab.googleusercontent.com/outputframe.html?vrz=colab-20230509-060147-RC00_530563781#) in <cell line: 3>() 1 noise = torch.randn_like(lat) 2 ts = 10 ----> 3 lat = sched.add_noise(lat, noise, timesteps=tensor([sched.timesteps[ts]]))

---
1 frames
---

[/usr/local/lib/python3.10/dist-packages/diffusers/schedulers/scheduling_lms_discrete.py](https://6umz6pprmf5-496ff2e9c6d22116-0-colab.googleusercontent.com/outputframe.html?vrz=colab-20230509-060147-RC00_530563781#) in add_noise(self, original_samples, noise, timesteps) 302 timesteps = timesteps.to(original_samples.device) 303 --> 304 step_indices = [(schedule_timesteps == t).nonzero().item() for t in timesteps] 305 306 sigma = sigmas[step_indices].flatten()

[/usr/local/lib/python3.10/dist-packages/diffusers/schedulers/scheduling_lms_discrete.py](https://6umz6pprmf5-496ff2e9c6d22116-0-colab.googleusercontent.com/outputframe.html?vrz=colab-20230509-060147-RC00_530563781#) in <listcomp>(.0) 302 timesteps = timesteps.to(original_samples.device) 303 --> 304 step_indices = [(schedule_timesteps == t).nonzero().item() for t in timesteps] 305 306 sigma = sigmas[step_indices].flatten()

RuntimeError: a Tensor with 0 elements cannot be converted to Scalar

I’ve thoroughly checked the tensors that are being used and none of them have 0 elements. I’ve also tried directly editing the add_noise method, but any changes I make to it don’t seem to be registering (e.g., doing a print statement causes the same error to be thrown, and the traceback says it’s occuring at that print statement); I’m doing this on Google Colab.

You can view the code on Colab here: Google Colab
The relevant code is under the “Add Noise to Image” header (there are two headers of the same name in the notebook; it’s the first one that is the relevant one).

I’d really appreciate help; I’m baffled.
Figured out what was causing the runtime error when I decided to manually implement the sched.add_noise method.

The scheduler’s timesteps were of type float64. Yet when I tried to obtain the sigma at timestep 10, the scheduler returned, for some reason, a tensor of type float32.

The sched.add_noise method involves comparing all the timesteps inside the scheduler, and the specific timesteps you pass in to the sched.add_noise method (only timestep 10 in this case). A boolean tensor is then created, containing True for each specific timestep that exists inside the scheduler timesteps, and False for those that don’t. And from that, another tensor containing only True timesteps is created.

Because the scheduler’s timesteps and the timestep 10 had different precisions, a boolean tensor comprising purely of False values was created, despite timestep 10 existing in the scheduler’s timesteps (i.e. 0.00010002 ≠ 0.0001). Hence a tensor containing 0 elements was created.

To fix this, I set the precision of the scheduler’s timesteps to float32.

sched.timesteps = sched.timesteps.to(torch.float32)
ts = tensor([sched.timesteps[10]])

And the error was solved!

Man, it’s satisfying figuring out what’s happening and managing to solve it heh.

2 Likes

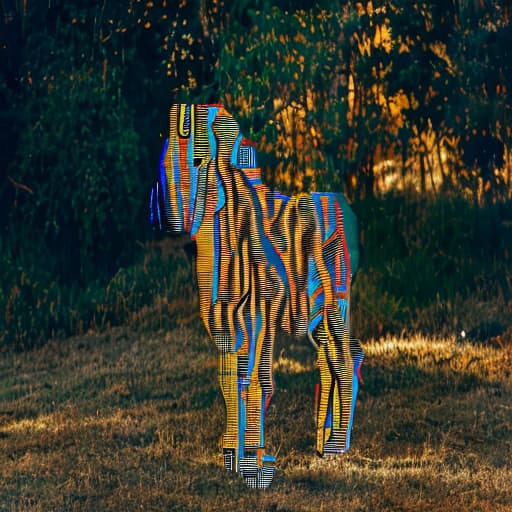
I need some help on how to properly apply the generated mask during the denoising phase of DiffEdit.

If I’m understanding the steps of DiffEdit correctly, the mask is applied during each denoising step — meaning the background pixels of the original image are added to the latent at each denoising step.

However, when I try to implement this, I get the following result (I’m replacing a horse with a zebra).

This is how my denoising loop looks like.

prompt = ['zebra']
img = Image.open('/content/img.png').resize((512, 512))
embs = get_embs(prompt, neg_prompt)
lat = get_lat(img)
inv_mask = 1 - mask
back = torch.mul(F.to_tensor(img).permute(1, 2, 0), torch.from_numpy(inv_mask))


for i, ts in enumerate(tqdm(sched.timesteps)):
  if i >= start_step: 
    lat = denoise(lat, ts)
    back = get_lat(Image.fromarray((back*255).numpy().round().astype(np.uint8)), start_step=i)
    back = decompress(back)
    fore = torch.mul(torch.from_numpy(decompress(lat)), torch.from_numpy(mask))/255
    lat = compress_img(Image.fromarray(((fore+(backn/255))*255).numpy().round().astype(np.uint8)))

back is the background pixels, which I obtain by inverting my mask and applying it to the original image.

fore is the pixels comprising the zebra, which I obtain by decompressing the latent and applying the mask to it.

I then obtain the final latent by adding fore + back together, and then compressing it for the next loop.

I’d really appreciate some help. If you need any more information to do so, please do let me know.

1 Like

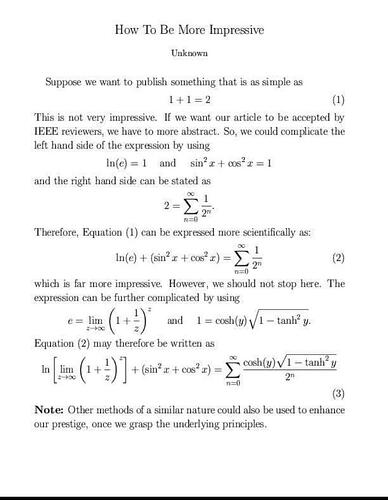
In this lesson, it’s mentioned that the reason why the “Background” section in papers is included is to impress the reviewers. Reminds me of the following meme :smile:.

1 Like