I decided to try adding a scratch to a piece of glass to see if that would work, but realized after trying it and thinking about it that it won’t work to do something like that because there is nothing that would bring all of the scratch locations to the same spot. I’m thinking the diffedit technique will only work if there is a somewhat correct answer of where the query object should go in a picture where something like a scratch on a piece of glass would have a huge number of orientations and sizes that would all be valid so it is almost the same issue as the random noise when a generator isn’t used.
Maybe I am just not thinking of the mask right and that wouldn’t be an issue though. Because we would really want the mask to cover the entire piece of glass since a scratch could occur anywhere on the glass. So if that is the case, then it would be valid to have the full glass pane highlighted as inside of the mask and the location of the scratch will be determined during step 3. I think I’ve talked myself out of this being an issue, but going to post anyways in case it is helpful, or anybody has anything to add!
Did anyone give textual inversion training a go? I see textual_inversion_train.py in the diffusion-nbs repo but am getting a few errors when trying to step thru that… any good starting point that others have tried?
@KevinB How did you get your mask object in latent space? When you calculate a mask in 512x512 dimension and do a vae encode on it, does it retain 1/0 properties correctly?
My mask object is in latent space because it is the output of the unet. So as long as I don’t run the vae.decode step, it will still be in latent space. Let me know if that doesn’t make sense I can try to explain it again.
Great discussion. @KevinB ,I was similarly confused as to whether the mask was generated from the noise generated or the final image and the discussion has helped with that. As I have seen others say since the mask generation is the core of the paper, the description is rather vague and subject to different interpretations, its a shame there is no code example. Overall I agree with your interpretation, but as others have shown it can work well with taking the difference of the denoised images (though I suspect this way of doing it it is more dependent upon colour differences between the two images).
I did also note that in the paper they take a blend of the initial image latents and a random noise array of the same shape, which is different to the approach of the scheduler.add_noise, which simply adds the noise to the image, however, I haven’t tried varying things to explore this as a starting point yet.
The other thing I am finding is that the choice of start_step makes a big difference and even moving by a couple of places can seem to generate very different denoised images (start to early and the image typically is lacking the content of the original and very idealised, to late and the image retains too much noise).
It would also be interesting to see how much difference the two types of scheduler make, I have used the LMS one so far but would like to see how well it works using the DDIM one
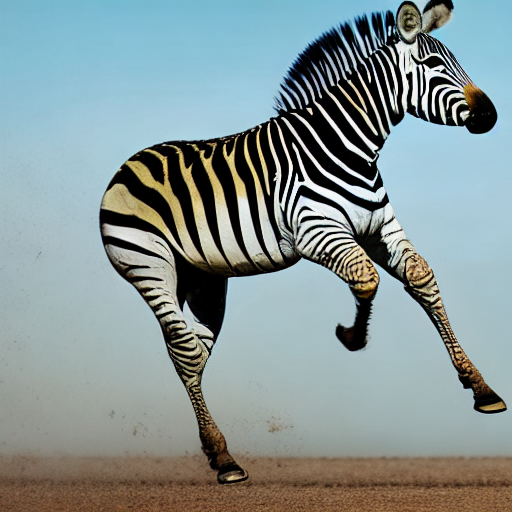
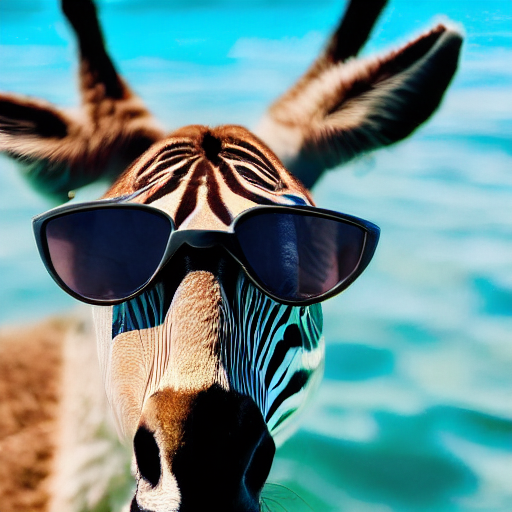
This is surely something to consider/talk about. After a ton of playing around I had to start Googling “dark horse with no tail” images to try and get better mask generation (the tail was morphing into appendages, for anyone wondering).
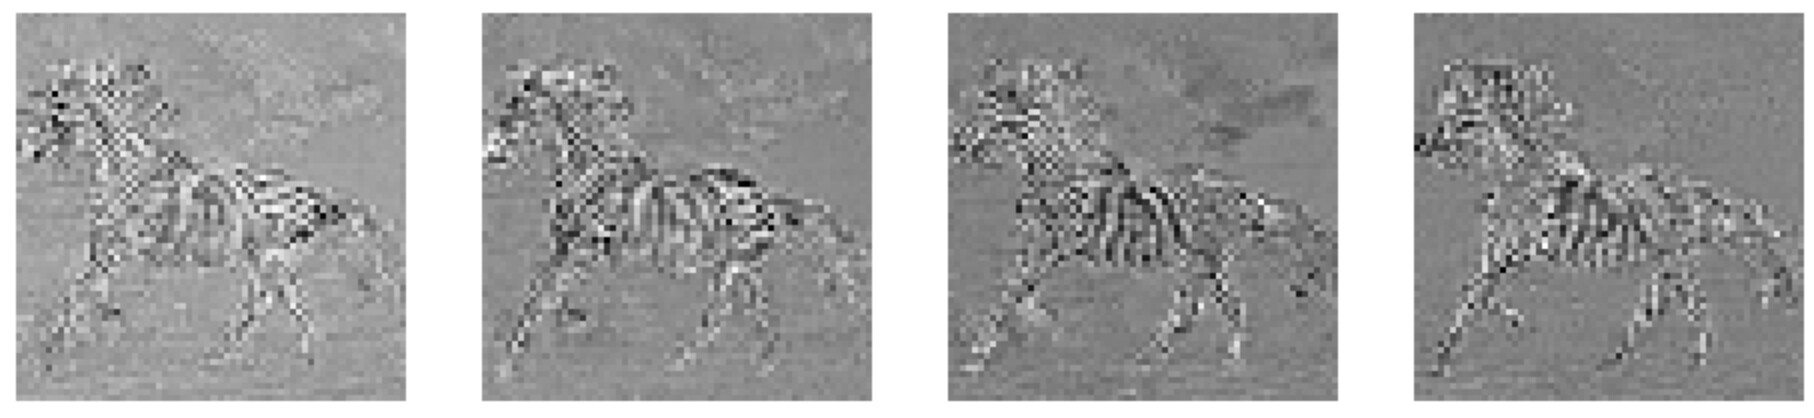
Here are my results after working the whole week on the DiffEdit paper. Thanks also to @aayushmnit, @KevinB, @_lucas and @Fahim for sharing their progress. I’m will post the code later this week. The only different approach in my implementation was to use directly gaussian noise on the input image latents, without using the scheduler. The inpainting is done using the StableDiffusionInpaintPipeline.
Mask Generation using noise
I have tried the approach @kevinB followed for an image downloaded from the web. The original image, denoised original, and denoised with zebra prompt are below:
It just needs a bit of fine tuning to get rid of the zone above the zebra’s back. I will apply the mask tomorrow and see how smooth the transition from masked to unmasked areas is
I gave it a try sometime back — might have been a couple of months ago maybe? (So many things have happened with Stable Diffusion that I’m losing track of time …) I think I followed a guide based on a Medium article, let me see if I can dig it up …
There might be better guides around now but that’s the one I used back then. My use-case was rather specific (I was trying to generate Great A’Tuin from the Discworld since SD never seems to get that right …) and so it didn’t yield that great results. But I do see a lot of people using textual inversion to great effect these days, so probably should give it a go again
Edit:@johnrobinsn I just found this as well and since the Hugging Face docs are pretty useful and to the point generally, adding it here:
Is anybody having trouble using "runwayml/stable-diffusion-inpainting" pipeline?
When I am trying to generate and image its giving back __call__() missing 1 required positional argument: 'init_image'
It looks as if that particular pipeline requires the first argument to be an image. So if you pass the input image as the first argument, instead of the named image argument, it should (probably) work …
Need some closure for DiffEdit so gonna share some last minute results before the next lesson.
I know it could be improved by all the amazing ideas discussed on this thread. I was inspired by many of them. I’m just running out of steam and maybe will take a look in the future again.
I never used the cv2 tricks or anything but I know that would improve the results if I had a bit more time/energy. I really enjoyed all the tips/discussions from everyone above. I probably will return to this project in the future after trying something else for a bit.
My code is in this repo but it will look different from many of the other notebooks shared here because a lot of the SD functionality is in another class. So it’s a little tricker to reproduce by just opening a notebook but it just helps me to learn better by refactoring code that way.
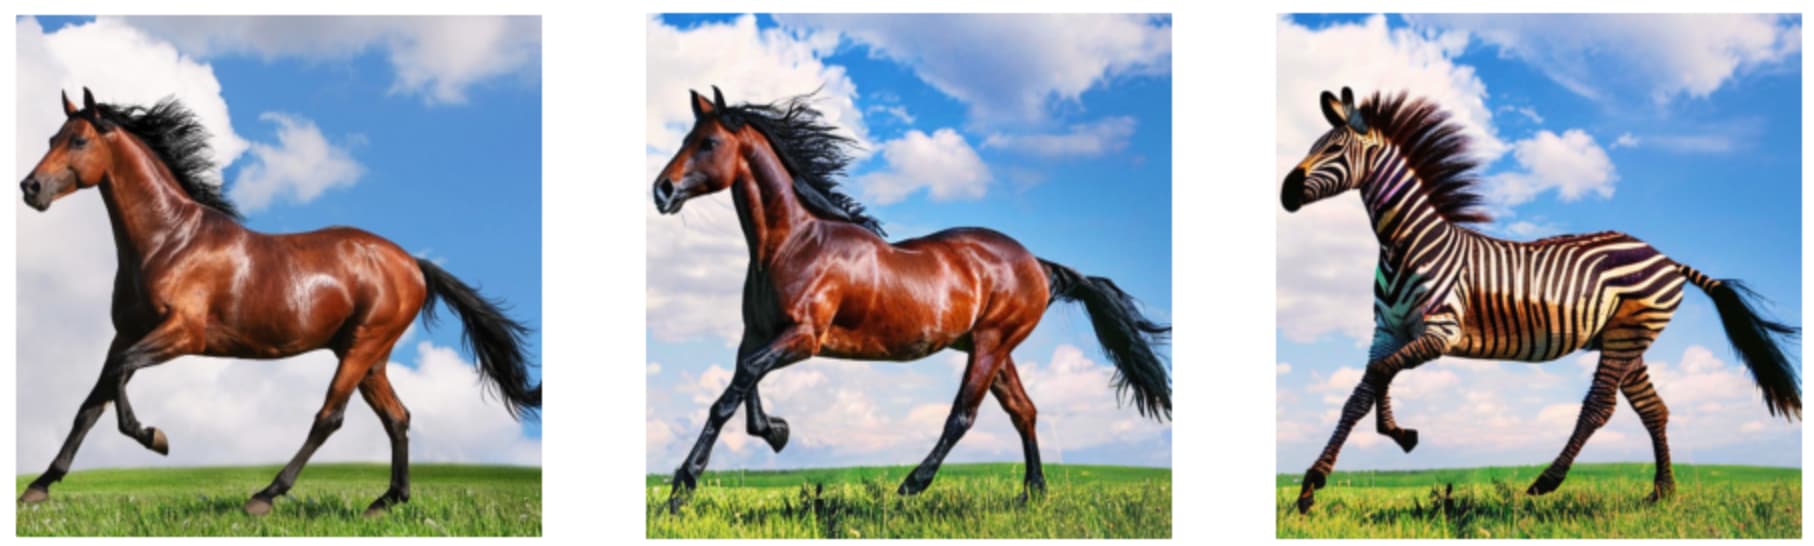
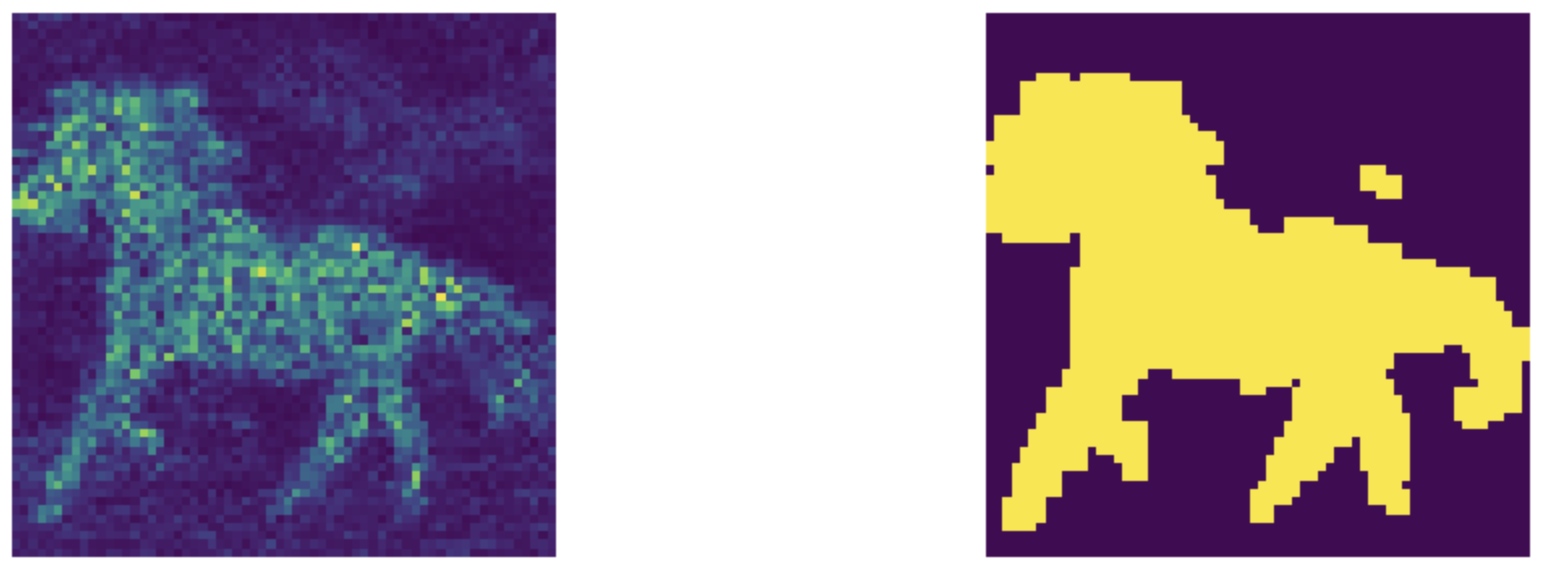
The main contribution of the diffEdit paper is the automatic mask generation.
Once this mask is generated we can continue with the diffEdit algorithm of mixing the latents or use the mask for inpainting.
Both these yield different results.
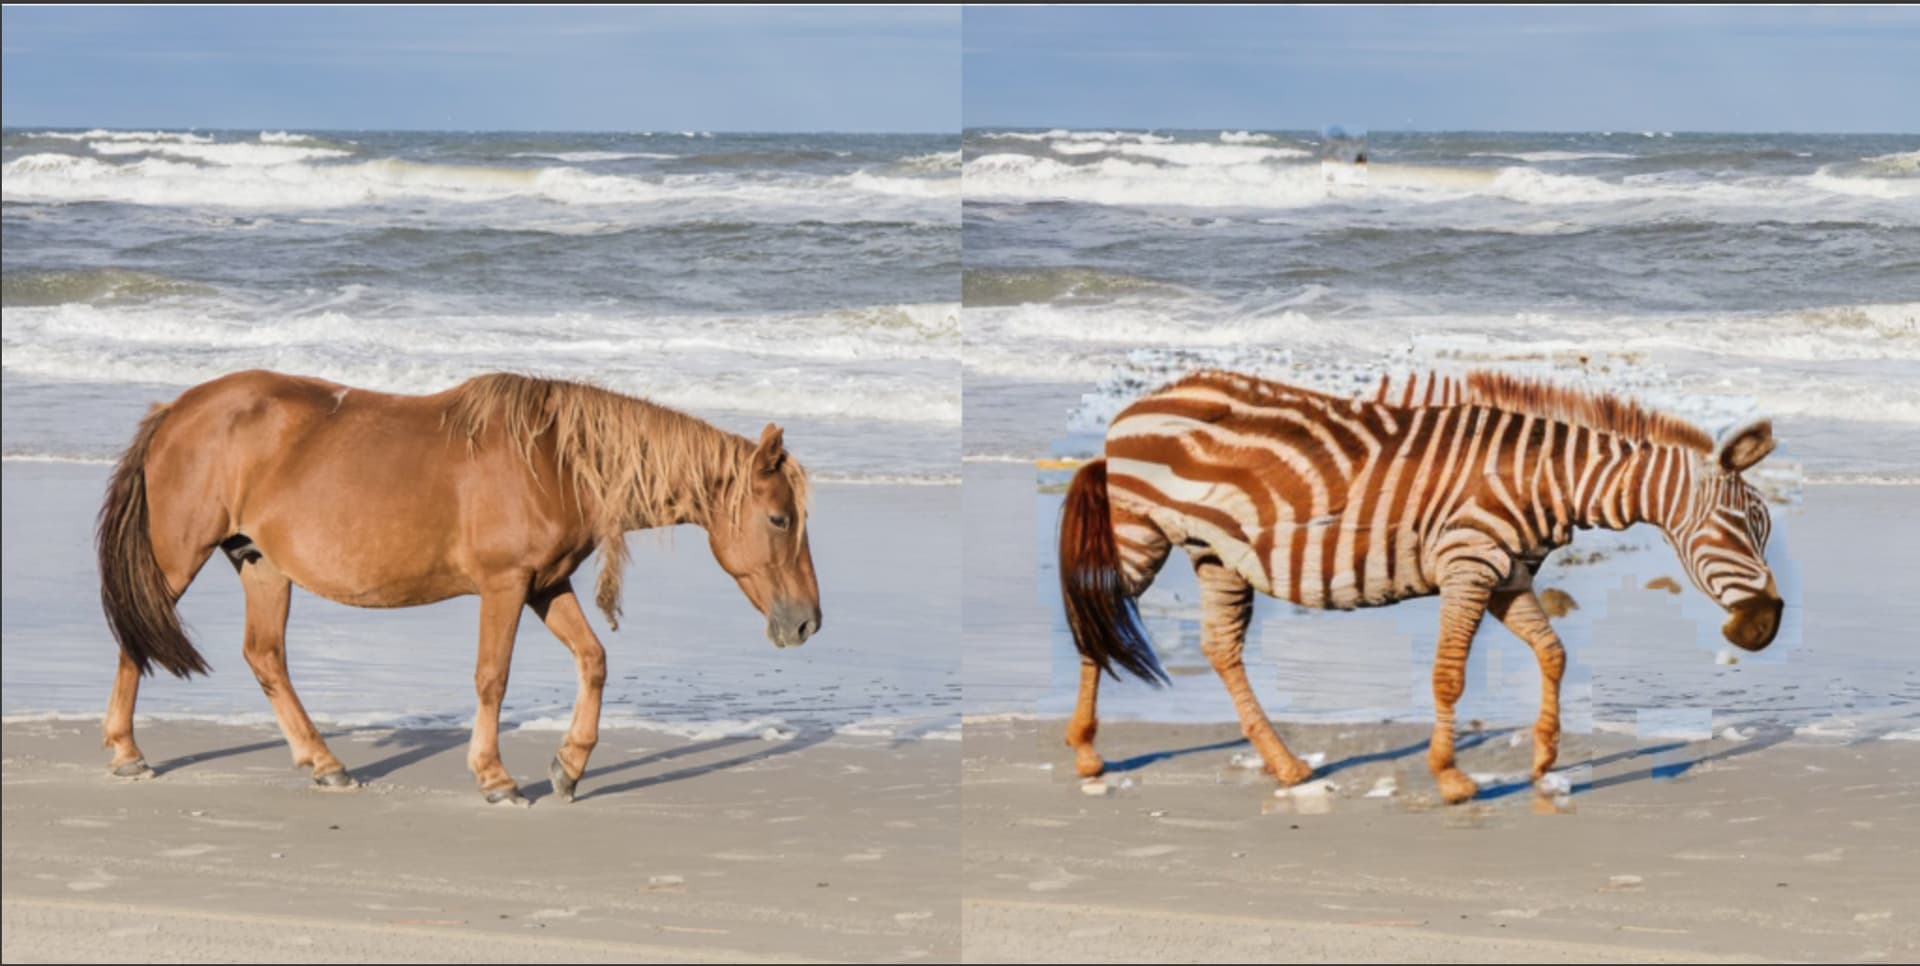
With the diffEdit algorithm of mixing latents we see the final zebra still retains the brown color of the horse (the input latents from Step 2 are being mixed in)
In the painting case we do not mix the latents. The part that is masked out is never seen by the model, it is discarded.
Hence it generates cleaner white and black stripes.
So inpainting is a better algorithm?
Well in this case inpainting seems to produce the cleaner black and white stripes.
But as the paper points out “(i) inpainting discards information about the input image that should be used in image editing (e.g. changing a dog into a cat should not modify the animal’s color and pose)” so instances when we want color and pose to be retained diffEdit should perform much better than inpainting.
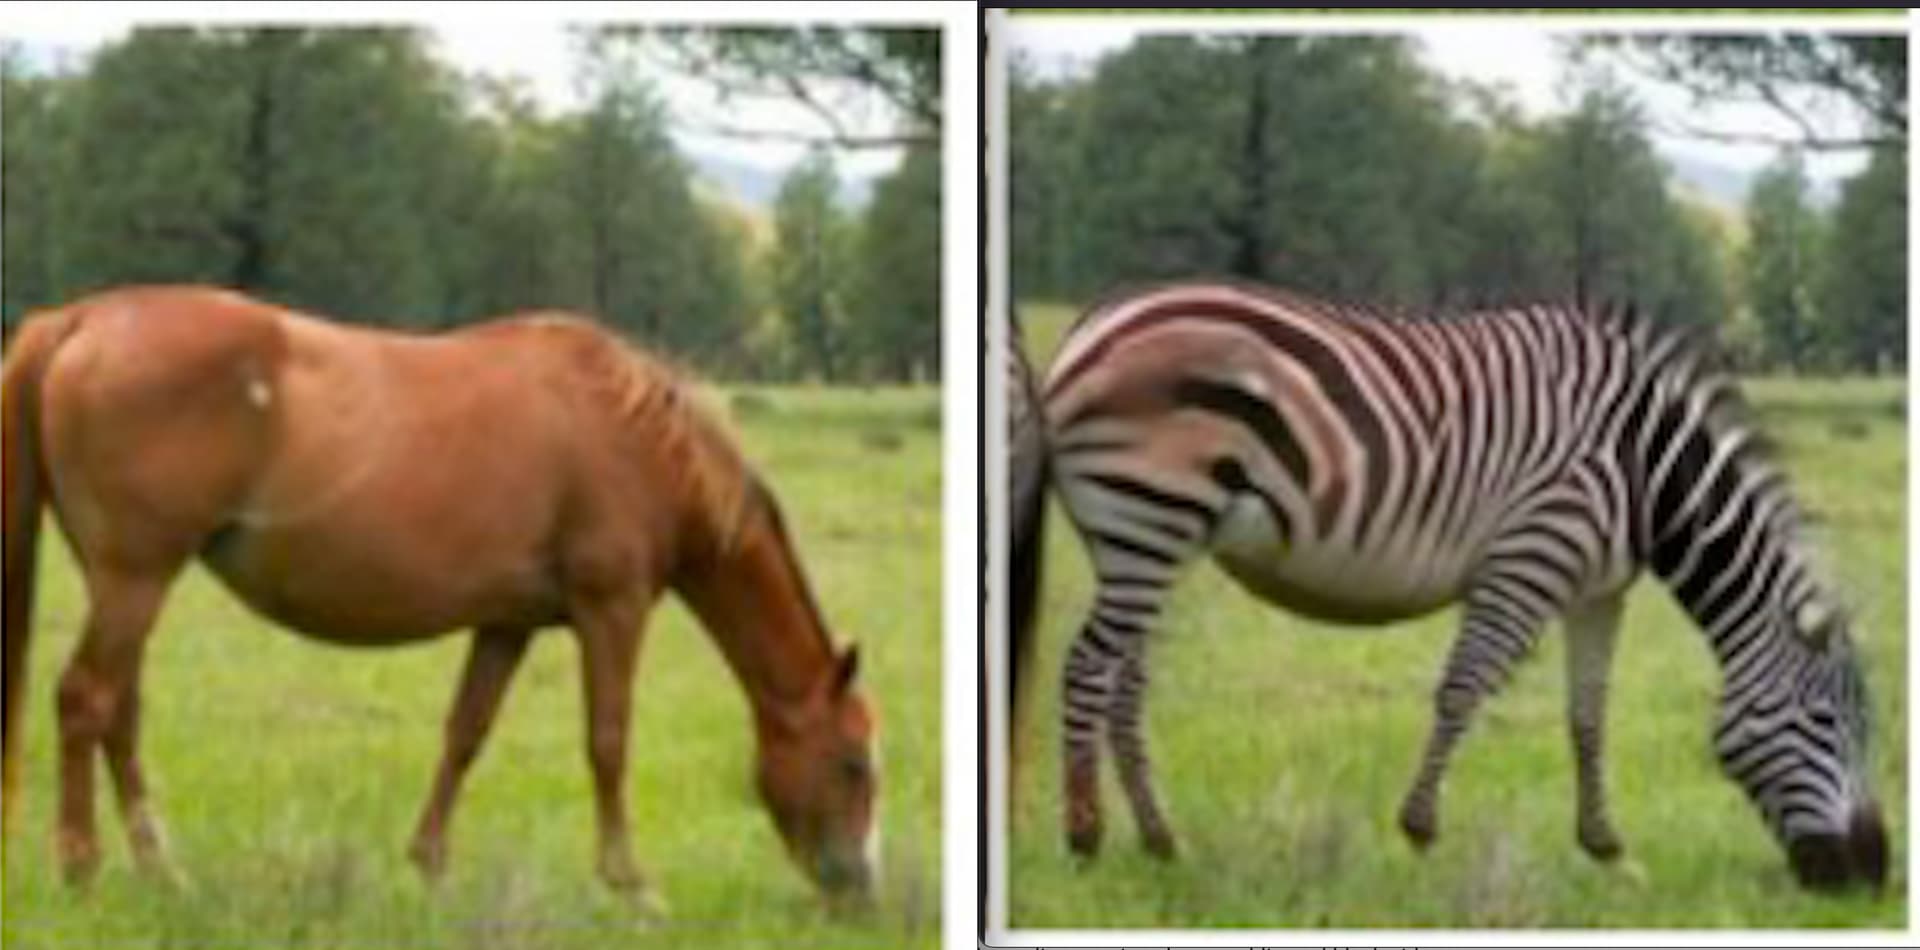
PS: i was curious why Figure 5 in diffEdit has a brownish zebra
Good eye! I didn’t even notice that till you pointed it out, but it makes sense … I mean if you use the mask to replace selectively rather than to inpaint …
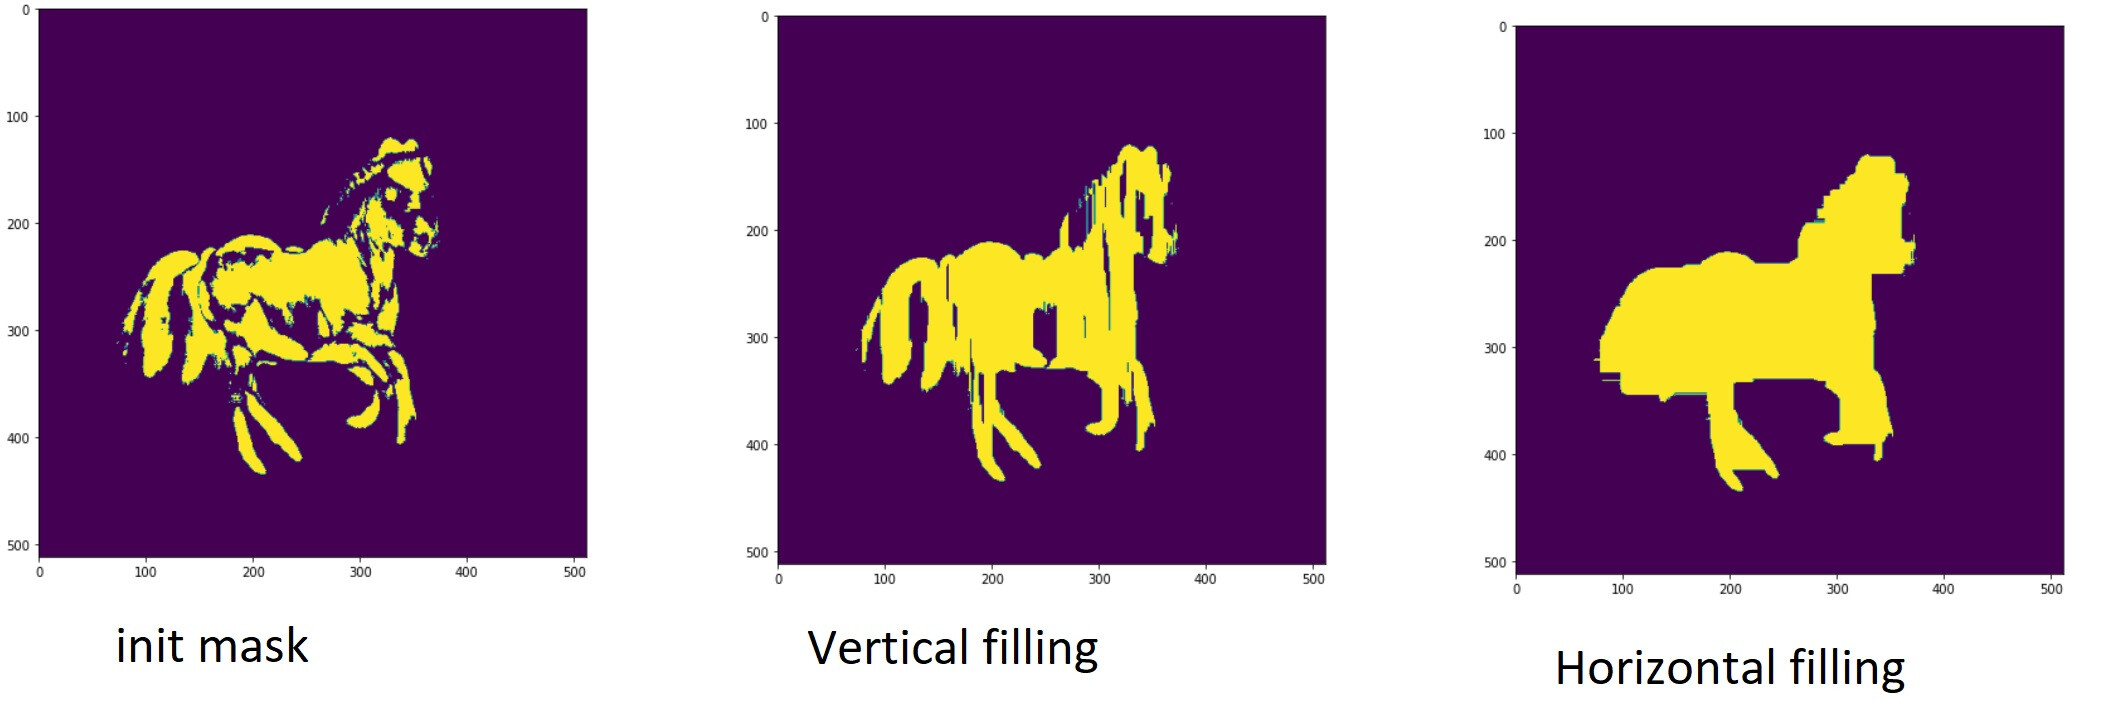
Great work. I was also facing similar issues with masks as shown in the last example of person. I create a simple function with fills an area with 1s in mask if its between two 1s. Example of application below.
Link to gist here