Lesson 1 official topic

I am implementing the below code and everything works fine. I just wanted to understand the working of the search_images_ddg function thus I was trying to implement its code directly rather than importing it, otherwise one can just import the function from fastbook and it works without any issues.

Like I said, I think the code from your reference (GitHub - fastai/fastbook: The fastai book, published as Jupyter Notebooks) is outdated, it’s not the same code you imported in your notebook from fastbook import search_images_ddg (that seems to be coming from here).

I’m not sure if that code is any clearer if you want unpack it.

Yes, you are right, I am using a Python debugger now to analyse the updated source code and understand it better. Works well.


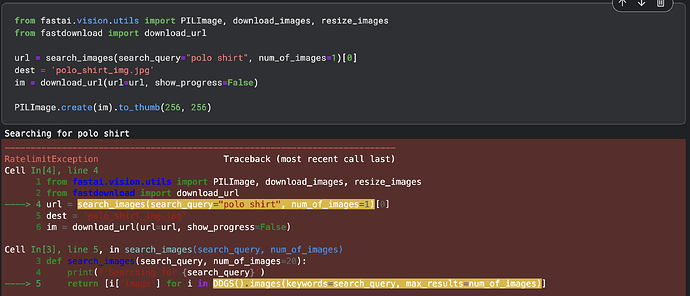
Got errors due to ddg_images being decrepitated.


Got the cell to work by changing the old code to the code in the image immediately above.

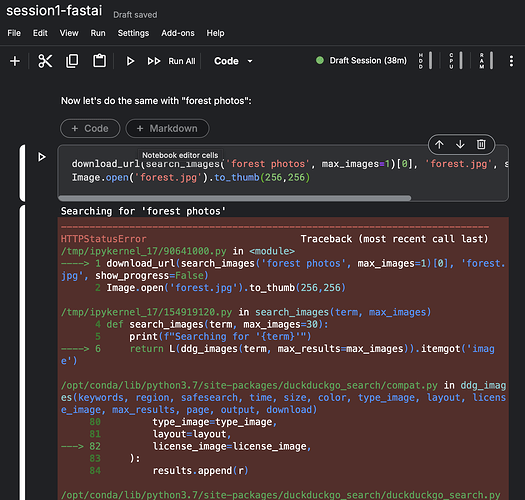
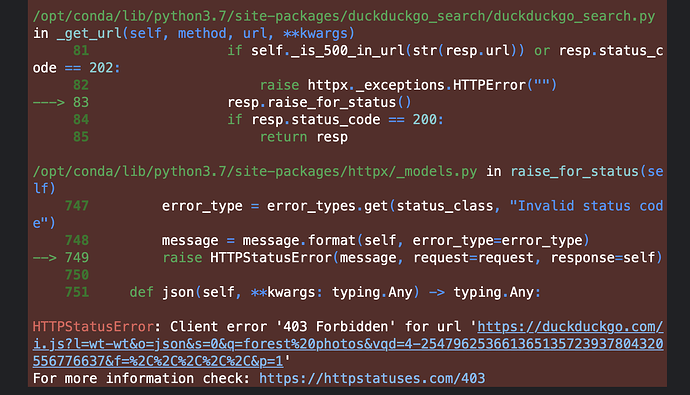
@n-e-w I found that when I ran the codes in the notebook(Is it a bird?..), it turns out like the problem below. It seems that the website reject my visit, Could you please help me with this problem. Many thanks.

1 Like

@soar I solved the issue by Settings/Environment Preferences to Always Use Latest Environment. Hope this helps!

Hi all,
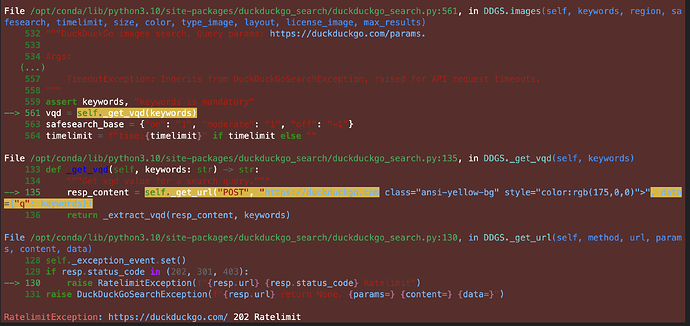
Has anyone encountered 202 Ratelimit when using duckduckgo_search?
I’ve been receiving this since yesterday.


1 Like

hi @wsaujanya

Yes, I have been getting this since yesterday. First time I solved by just upgrading

pip install --upgrade duckduckgo_search

But today it didn’t work that way, a small hack from the web said to use particular version, so I did

!pip uninstall duckduckgo_search -y
!pip install duckduckgo_search==5.3.1b1

It worked!

1 Like

Thanks a lot Jitesh,

Using the code below did the work for me.

!pip install -Uqq duckduckgo_search==5.3.1b1
1 Like

Hey,
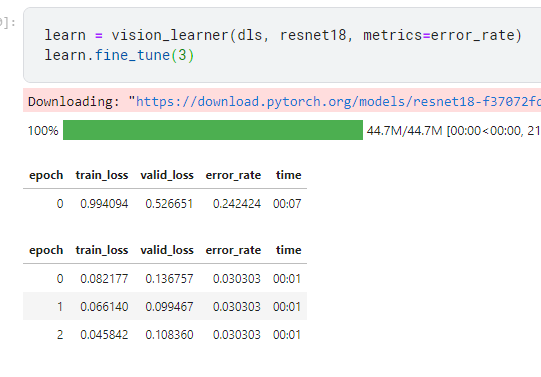
I just wanted to note that the error_rate that I get when training the “is it a bird?” resnet18 model is higher than what is shown in the lecture:
error_rate

It’s a bit confusing as a beginner that you get a value so different from what is shown now.
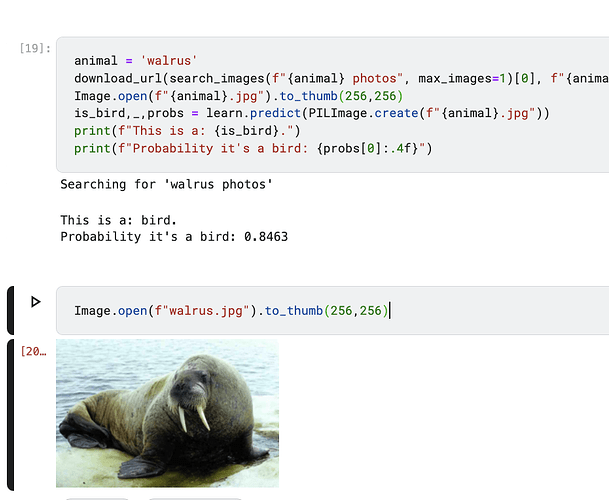
Also, the model misidentifies almost any animal as a bird, which I guess is because it is only trained on two classes (forest and bird) but I don’t think this is explained anywhere and as a beginner its easy to assume that something went wrong:

I’m very new to programming so this may be a dumb question but the documentation for Image.to_thumb() just says “Same as `thumbnail, but uses a copy”. But I cannot for the life of me find the thumbnail() method in the documentation. Can someone direct me to where it is?

NVM I figured out it was from PIL.

Hi everyone,

In the introduction chapter, there’s an example of a tabular data application where “salary” is treated as a categorical variable. I’m curious about training a neural network using continuous variables. Specifically, I’d like to know how to use “salary” as a continuous variable rather than categorizing it.

I’ve searched for materials on this topic but haven’t found much. Does anyone know of good resources or examples of modeling continuous variables in the context of tabular data with fastai?

Thanks in advance!

Great question. Chapter 9 predicts a continuous variable (sale price) using a tabular model, although it doesn’t explicitly talk about the difference between how to handle categorical vs continuous dependent variables.

I asked Claude and it gave me an example which I have illustrated in this Colab notebook—basically you specify y_block as CategoryBlock for a categorical dependent variable and RegressionBlock for a continuous one.

Looking a bit deeper into the fastai codebase. I think this line shows how fastai automatically detects whether the dependent variable is categorical or continuous and then appropriately assigns CategoryBlock or RegressionBlock to the y_block parameter.

1 Like

Hi everyone,
so I thought maybe for some of you could be of interest to have a short podcast about the first lesson of fast.ai and listen it as a review in your free time and so I wanted to share it with you. You can access it here: Podcast - fast.ai - lesson1

Let me know if you liked it!
Ivan

Hello all,

I ve made the cat vs dog model into model that distinguishes lemons from limes and it all works fine in a notebook.

I am now looking to transform this model into Core ML for my iOS app using TorchScript and Apple official guidelines for coremltools.

Model covers but I cannot see the Preview Tab in. Xcode. Have anyone of you tried to convert to Core ML? I guess my input types are not matching with coremltools expectations for preview but I am stuck . Here is my code.

import torch
import coremltools as ct
from fastai.vision.all import *
import json
from torchvision import transforms

# Load your Fastai model (replace with your actual path)
learn = load_learner('lemonmodel.pkl')

# Example input image (you can use any image from your dataset)
input_image = PILImage.create('example.jpg')

# Preprocess the image (assuming you used these transforms during training)
to_tensor = transforms.ToTensor()
normalize = transforms.Normalize(mean=[0.485, 0.456, 0.406], std=[0.229, 0.224, 0.225])
input_tensor = to_tensor(input_image)
input_tensor = normalize(input_tensor)  # Apply normalization

# Add a batch dimension
input_tensor = input_tensor.unsqueeze(0)

# Ensure float32 type
input_tensor = input_tensor.float()

# Trace the model
trace = torch.jit.trace(learn.model, input_tensor)

# Define the Core ML input type (considering your model's input shape)
_input = ct.ImageType(
    name="input_1",
    shape=input_tensor.shape,
    bias=[-0.485/0.229, -0.456/0.224, -0.406/0.225],
    scale=1./(255*0.226)
)

# Convert the model to Core ML format
mlmodel = ct.convert(
    trace,
    inputs=[_input],
    minimum_deployment_target=ct.target.iOS14  # Optional, set deployment target
)

# Set model type as 'imageClassifier' for the Preview tab
mlmodel.type = 'imageClassifier'

# Correct structure for preview parameters** (assuming two classes: 'lemon' and 'lime')
labels_json = {
    "imageClassifier": {
        "labels": ["lemon", "lime"],
        "input": {
            "shape": list(input_tensor.shape),  # Provide the actual input shape
            "mean": [0.485, 0.456, 0.406],  # Match normalization mean
            "std": [0.229, 0.224, 0.225]   # Match normalization std
        },
        "output": {
            "shape": [1, 2]  # Output shape for your model (2 classes)
        }
    }
}

# Setting up the metadata with correct 'preview' params
mlmodel.user_defined_metadata['com.apple.coreml.model.preview.params'] = json.dumps(labels_json)

# Save the model as .mlmodel
mlmodel.save("LemonClassifierGemini.mlmodel")
mlmodel = ct.convert(
    trace,
    inputs=[_input],
    minimum_deployment_target=ct.target.iOS14  # Optional, set deployment target
)

# Set model type as 'imageClassifier' for the Preview tab**
mlmodel.type = 'imageClassifier'

# Correct structure for preview parameters** (assuming two classes: 'lemon' and 'lime')
labels_json = {
    "imageClassifier": {
        "labels": ["lemon", "lime"],
        "input": {
            "shape": list(input_tensor.shape),  # Provide the actual input shape
            "mean": [0.485, 0.456, 0.406],  # Match normalization mean
            "std": [0.229, 0.224, 0.225]   # Match normalization std
        },
        "output": {
            "shape": [1, 2]  # Output shape for your model (2 classes)
        }
    }
}

# Setting up the metadata with correct 'preview' params**
mlmodel.user_defined_metadata['com.apple.coreml.model.preview.params'] = json.dumps(labels_json)

# Save the model as .mlmodel
mlmodel.save("LemonClassifierGemini.mlmodel")

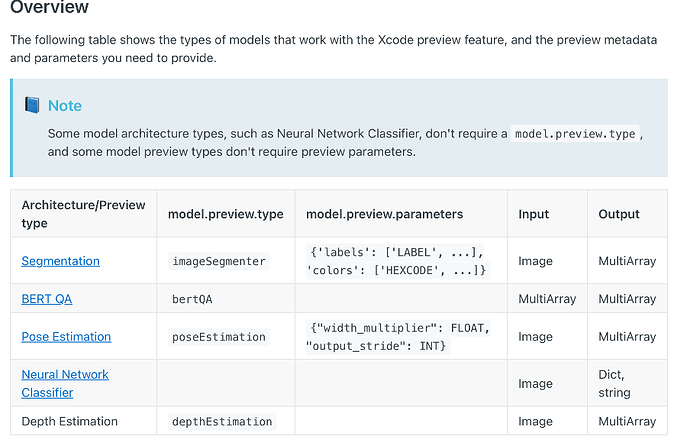
How to convert Dog vs Cat Model’s output to [Dict, String ]? Currently it outputs MultyArray but I need it to be Dict, String so that I can use Image Classifier preview pin Xcode .

Apple Link to Spec for Preview

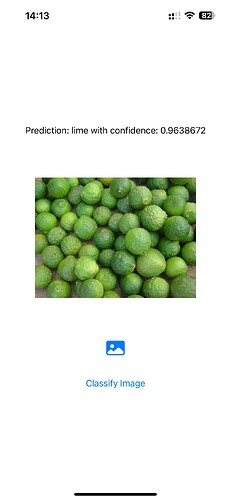
I was able to get the results with this code and with preview working but:

in preview it says “unable to retrieve results from the vision request”.

import torch
import coremltools as ct
from fastai.vision.all import *
import json
from PIL import Image
from torchvision import transforms

# Load your Fastai model (replace with your actual path)
learn = load_learner('lemonmodel.pkl')

# Set the model to eval mode before tracing
learn.model.eval()

# Example input image (you can use any image from your dataset)
input_image = PILImage.create('example.jpg')

# Preprocess the image (assuming you used these transforms during training)
resize = transforms.Resize((192, 192))  # Resize image to match model input size (e.g., 192x192)
to_tensor = transforms.ToTensor()
normalize = transforms.Normalize(mean=[0.485, 0.456, 0.406], std=[0.229, 0.224, 0.225])

# Apply preprocessing: Resize, Convert to tensor, Normalize
input_image = resize(input_image)  # Resize to expected size
input_tensor = to_tensor(input_image)  # Convert to tensor
input_tensor = normalize(input_tensor)  # Normalize with mean and std

# Add a batch dimension
input_tensor = input_tensor.unsqueeze(0)

# Ensure float32 type
input_tensor = input_tensor.float()

# Trace the model (using the batch-size of 1)
trace = torch.jit.trace(learn.model, input_tensor)

# Define the Core ML input type (image type with correct shape for Core ML)
_input = ct.ImageType(
    name="input_1",
    shape=(1, 3, 192, 192),  # Correct shape for Core ML [batch_size, channels, height, width]
    bias=[-0.485 / 0.229, -0.456 / 0.224, -0.406 / 0.225],  # Mean normalization
    scale=1.0 / 255  # Scale normalization
)

# Define the Core ML output type (we do NOT specify the shape, let Core ML infer it)
_output = ct.TensorType(
    name="output_1",  # Name for the output
)

# Convert the model to Core ML format
mlmodel = ct.convert(
    trace,
    inputs=[_input],
    outputs=[_output],  # Let Core ML infer the output shape
    minimum_deployment_target=ct.target.iOS14  # iOS deployment target
)

# Set model type as 'imageClassifier' for the Preview tab
mlmodel.type = 'imageClassifier'

# Define labels for classification
labels_json = {
    "labels": ["lemon", "lime"],  # Replace with your actual class labels
}

# Setting up the metadata with correct 'preview' params
mlmodel.user_defined_metadata['com.apple.coreml.model.preview.params'] = json.dumps(labels_json)

# Set model metadata for Xcode integration
mlmodel.user_defined_metadata["com.apple.coreml.model.preview.type"] = "imageClassifier"
mlmodel.input_description["input_1"] = "Input image to be classified"
mlmodel.output_description["output_1"] = "Classification probabilities for each label"

# Set additional metadata for the Xcode UI (optional)
mlmodel.author = "Your Name or Organization"
mlmodel.short_description = "A classifier for detecting lemon and lime in images."
mlmodel.version = "1.0"

# Save the model as .mlmodel
mlmodel.save("LemonClassifier333.mlmodel")

I’ve fixed the issue and published it to iOS. After reviewing the documentation and source code for coremltools v8.1, I realised that I didn’t need to specify the outputs – coremltools automatically handles it. :slight_smile:


i

1 Like

My First Henna Classifier Model

I’m thrilled to share my first attempt at building an image classifier using the tools from the FastAI course!

This week, I built a model that can distinguish between henna designs and forest photos—a fun and creative way to explore deep learning.

Here is my Notebook Is it Henna or Forest?

The Challenge

Initially, I ran into some issues. My model wasn’t predicting probabilities correctly—it would identify the image as “henna” but return a probability of 0.0000! This was quite puzzling and required some investigation.

How I Solved It

  1. Understanding Class Labels: I learned that the model’s class labels (learn.dls.vocab) determine how the probabilities are indexed. Using the o2i attribute, I was able to correctly map the class label (“henna”) to its index, resolving the probability issue.

probs[learn.dls.vocab.o2i[‘henna’]]

  1. Cleaning and Balancing the Dataset: I verified all images using verify_images() to ensure no corrupted files were causing issues. Luckily, my dataset had no invalid images, and I balanced the number of images between the “henna” and “forest” classes.
  2. Refining the Model: After fixing the dataset and re-training the model with ResNet18 , I achieved an error rate of 0.0000.

Excited for What’s Next

This is just the beginning of my deep learning journey. I’m excited to explore more datasets, fine-tune models, and solve real-world problems using AI.

Feel free to check out my Henna Classifier Notebook . Let me know your thoughts or any suggestions to improve it!