I was running the fastai v2 in Ubuntu w/o problem. Now I try to move to window 10 by running VS Code (since new python extension has a Jupyter server which is worth to try). But in VS Code, it always report “no module named local” when import module like “local.xxx.xxx”. problem seems be python extension used by VS Code can not find the other files is from the python file or notebook in same directory. This looks very weird. And advice? Thanks.
If you print your current directory, you will see you are in your VSCode root dircetory instead of the notebook directory (which is the normal behavior)… thus you cannot find the “local” module
1 Like
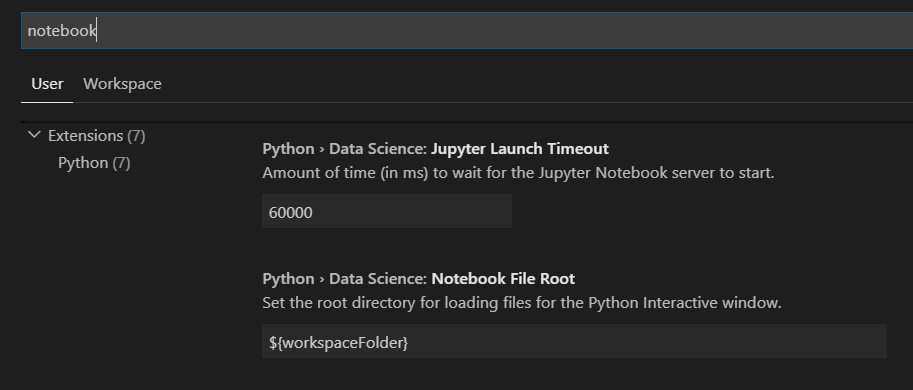
To follow up, a quick fix will be change Notebook File Root to the directory and you should be good to go.
i.e. ${workspaceFolder} -> ${workspaceFolder}/dev
I wonder if the delegated inheritance describe in https://www.fast.ai/2019/08/06/delegation/ works in VSCode Notebook.
3 Likes
I tried @nok suggestion but somehow it didn’t work. Then I tried this workaround : not very elegant! but it works.
I added this cell at the top of the notebook:
import os
os.chdir('C:\\Users\\fh\\dev\\fastai_dev\\dev')
!pwd
@nok, if you have any insight, please advice. Thank you
@faird I would expect your root directory is the repository and you have restarted the notebook after your change the setting?
Thank you @nog for your fast reply. I made the change like you suggested.
Then I closed the workspace and opened it again. Then I opened the notebook and I still have the same import error.
I noticed when I run !pwd it points to my grand parent folder (/c/Users/fh/dev). I think that’s the source of the problem.
@farid As I said, I expect your root directory is the repository, base on what you said, your root directory is /c/users/fh/, so you just need to supplement the directory accordingly. That would be {workspaceFolder} /dev/fastai_dev/dev
You may want to check out the concept of workspace for VScode, most of the directory setting are relatively to the root.
1 Like
TLDR - @fanyi just start your Jupyter notebook in the right folder (i.e. my_path_to_fastai_dev/dev and you don’t need to change the ${workspaceFolder}
Thank you very much @nog for your insight. It turns out the source of the problem that I had was related to the folder where I started my Jupyter notebook in the Windows console. I usually start it in my dev folder (i.e. C:\Users\fh\dev\) in order to conveniently open both fastai v1 and v2 notebooks plus other projects notebooks.
I now start my Jupyter notebook in the fastai_dev/dev folder (i.e.
C:\Users\fh\dev\fastai_dev-farid\dev -> where the v2 notebooks are located) and everything works well.
@nok, @farid, thanks to you guys, very helpful.
I works either add “/fastai_dev/dev” after the ${workspaceFolder} , or change the directory in notebook.
but if I just start vs code from “/fastai_dev/dev” folder, VS code ask me to install “jupyter notebook”.
Thanks again!!!
2 Likes
I got an err “Can only use .str accessor with string values” when use “load_tokenized_csv”, and then fixed the problem with changing:
out[txt_col].str.split(’ ‘)
to
out[txt_col].astype(str).str.split(’ ')
So is there any problem if we make this change in the FastaiV2?
I wanted to dive a bit deeper into the fastai2 software and code. I saw the first video and I really liked it but I’m not sure if the API of the fastai2 on that time is still consistent with the one officially released now. Can someone tell me if there is huge differences or I can run the notebooks with the official and recent installation of fastai.
Thanks
The concepts are the same, but some of the code is different.
1 Like
Many thanks. So I will continue with the playlist 