You’re correct that the transforms_side_on flips the image left and right.
However, transforms_top_down is more than just vertical flipping. It’s vertical flips + horizontal flips + every possible 90-degree rotation.
I believe the naming comes from the idea that some images you would capture from the side (like taking a photo of a cat or dog) vs some you take top-down (like satellite images, or food photos on instagram…). In the side-on case, realistic data augmentations would be flipping horizontally (except in the occasional case of the sidewise or upside-down hanging cat/dog…). In top-down imaging like with satellites, you can rotate and flip the image in every direction and it could still look like a plausible training image.
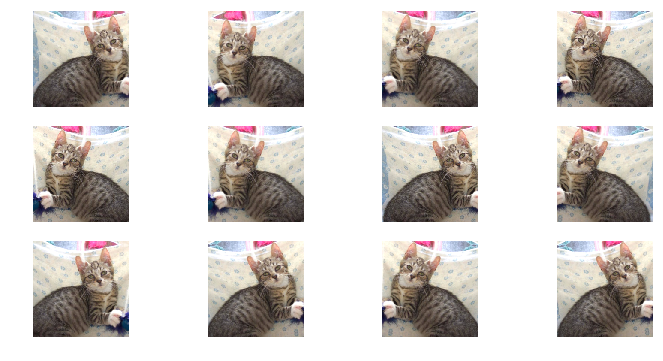
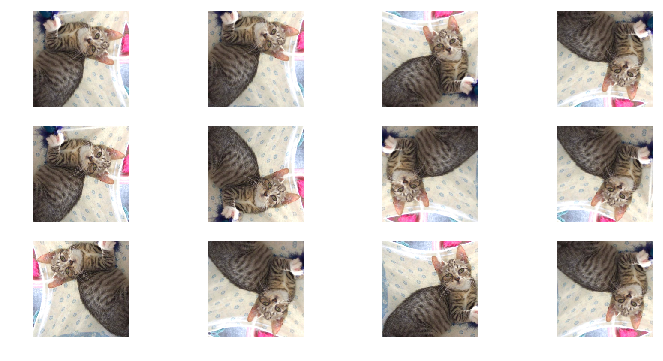
Here are some examples generated using the transform functions with cat/dog lesson1 images:
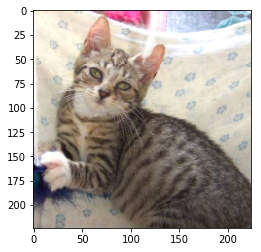
original cat image:
transforms_side_on, 12 examples:
transforms_top_down, 12 examples (note the mirror images + rotations):
Here’s a look at transforms.py:
transforms_basic    = [RandomRotateXY(10), RandomLightingXY(0.05, 0.05)]
transforms_side_on  = transforms_basic + [RandomFlipXY()]
transforms_top_down = transforms_basic + [RandomDihedralXY()]

class RandomDihedralXY(CoordTransform):
  def set_state(self):
    self.rot_times = random.randint(0,4)
    self.do_flip = random.random()<0.5

  def do_transform(self, x):
    x = np.rot90(x, self.rot_times)
    return np.fliplr(x).copy() if self.do_flip else x

class RandomFlipXY(CoordTransform):
  def set_state(self):
    self.do_flip = random.random()<0.5

  def do_transform(self, x):
    return np.fliplr(x).copy() if self.do_flip else x
Note that with both settings, there’s a bit of slight rotation and brightness adjustments included by default as well.
Yup, exactly. Slightly adjusted lesson1.py code in the augmentation section.
I changed the index from [1] to [0] to show a different cat than the original notebook. For the augmented images, switched aug_tfms=transforms_side_on and aug_tfms=transforms_top_down and the range/num of rows:
def get_augs():
    data = ImageClassifierData.from_paths(PATH, bs=2, tfms=tfms, num_workers=1)
    x,_ = next(iter(data.aug_dl))
    return data.trn_ds.denorm(x)[0]

tfms = tfms_from_model(resnet34, sz, aug_tfms=transforms_side_on, max_zoom=1.0)
data = ImageClassifierData.from_paths(PATH, bs=2, tfms=tfms, num_workers=1)
x,_ = next(iter(data.aug_dl))
ims = np.stack([get_augs() for i in range(12)])
plots(ims, rows=3)
there is a similar cell code in lessons1 (‘run if using Crestle’), but @jeremy in video said to run it if using crestle/paperspace. So I think it is rule for all non-amazon users.
without this cell I have no satellite dataset on my paperspace, so this cell also useful for me.
I can download ds from kaggle, just ask here if someone knows what to do with that error. Maybe source of this error affects on other things and I should fix it. But how
I have a question about the steps we take to train model:
Enable data augmentation, and precompute=True
Use lr_find() to find highest learning rate where loss is still clearly improving
Train last layer from precomputed activations for 1-2 epochs
Train last layer with data augmentation (i.e. precompute=False) for 2-3 epochs with cycle_len=1
Unfreeze all layers
Set earlier layers to 3x-10x lower learning rate than next higher layer
Use lr_find() again
Train full network with cycle_mult=2 until over-fitting
Why do we need to train the last layer in step 3 if we have to retrain the last layer again in the next step? wouldn’t the retrain change all the activation?
@lindarrrliu I think your #1 (or maybe the lecture’s #1) has a typo: turning on data augmentation means precompute=False (as in step #4). I think step #1 should be disable data augmentation but enable precompute.
At step #3, we’re actually only training the last layer. The idea is that the pre-trained network feeds into our little final adapter layer; we’re adapting a pretrained network in the first place because we think the features it has already learned will be a good fit for our problem. This lets us get the final layer into more or less the right place.
Once we’ve done so, we can then gently thaw the pre-trained network (with those differential learning rates) and let it get to better place too. It’s true that at this point we’re also retraining the final layer, but I think the idea is that because everything is more or less good to go already, training won’t wreck the weights we found in steps #3-#4 (assuming we haven’t goofed and reset our learning rate too high, etc.). And for that matter, as soon as you start training some layer in the middle of the network, you need to train everything afterwards too. The middle layer will start spitting out new kinds of activations, and everyone downstream will need to learn to adapt.
Thanks @cqfd! You explained well
Just rewatched week 3 video and I think I understand it more intuitively now. Before step 3, the weight of our final layer is at random. Step 3 and 4 update the weight of the final layer to a state that’s better than random. Than when we unfreeze all other layers, we further tune the last layer to adapt the change in earlier layers.
I wonder whether we could get to more or less the same place if we start out with random final layer and train all layers with lots iterations.
Question: in the lesson 1 notebook, it says “we simply keep increasing the learning rate from a very small value, until the loss starts decreasing”. Shouldn’t this be until the loss starts INCREASING? Since we are trying to minimize loss?
Does anybody know what the parameter ps is in this method learn = ConvLearner.pretrained(arch,data, precompute=True, ps=0.5)
I am also just generally having a hard time with learning about the fast.ai methods when I want to do something different since it is new and seemingly not well documented yet. Is there a place to look other than pressing shift + tab to look for more detail?
@corey
I’ve been keeping a list of the fastai terms. Whenever I can’t remember what something stands for, I go to the top of my repo fastai_deeplearn_part1 and do a search.
In this case, ps means p’s (plural, I believe) to represent the probability of dropout.
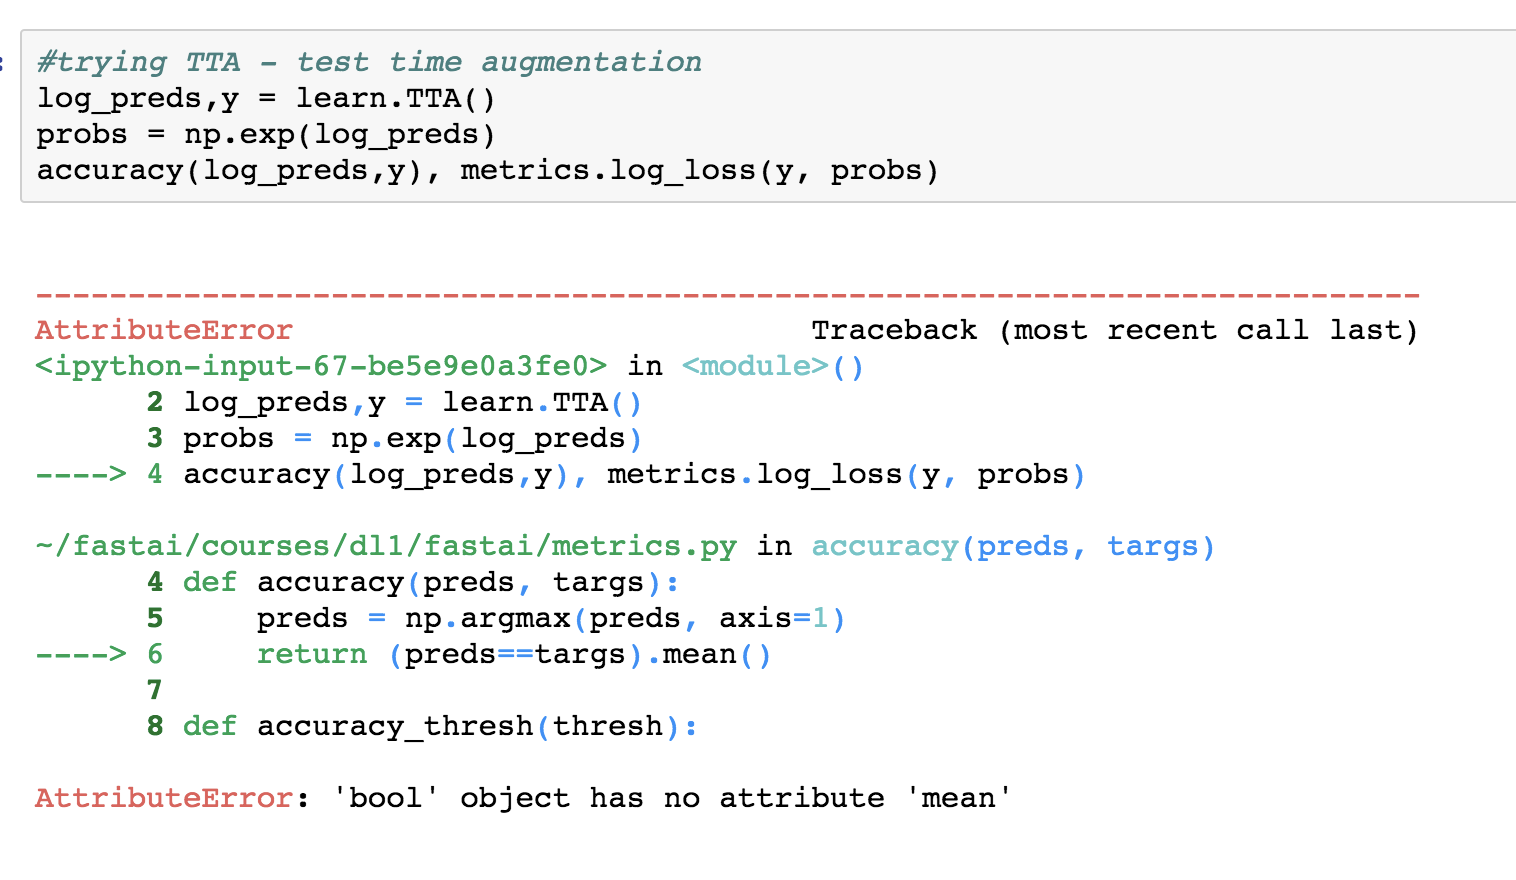
I’ve been trying to recreate jeremy 's code on the dogsbreed example in lesson 2. I have managed to get up to 1:31:08 of the youtube video but get an error when I run:
Hi
May I ask the tip been mentioned in “01:32:45 Undocumented Pro-Tip from Jeremy: train on a small size, then use ‘learn.set_data()’ with a larger data set (like 299 over 224 pixels)” is kind of data augmentation or not ?
And why the neural network can adapt to different image size dynamically / automatically ?
Thank you.
I recreated the Jeremy`s notebook Dogbreeds and got in top16% of competition. So I think changing image size works perfect))
As I understood correctly, the images with bigger size (299) like are a new images for the model. And learns again without overfitting.
About size-changing Jeremy talk in detail in Lesson3 (short answer: model changes size of original images to 224 or 299 every time they are loaded into model). So if original size of your images is very large it better to previously change size.