That’s a cool project.
Hi everyone,
I have a project ongoing about making neural networks faster and lighter in terms of parameters for fastai:
Currently, there are 3 techniques implemented:
- Neural Network sparsifying: make the network sparse
- Neural Network pruning: remove the useless convolution filters
- Batch Normalization folding, that I already explained here
I’m planning to continue to develop it and add new techniques such as quantization, knowledge distillation,… and also to make it compatible with fastai2
If anyone is interested to contribute, tell me 
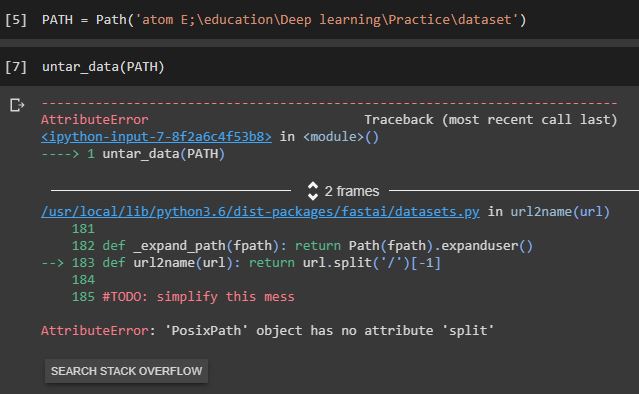
I have been trying to import the dataset into model.
Somehow I am having trouble on the path command,
can someone explain what is a posixpath and how to import an dataset,
In short, can someone explain the below picture
note: I am a newbie to this coding world, and if this question seems to basic, then its my bad.
Big thanks to @oguiza for some debugging help, here is an article on speeding up fastai2 tabular with NumPy. I was able to get about a 40% boost in speed during training! Article
- Note: bits like
show_batchetc don’t work, but this was a pure “get it to work”
Hello everyone,
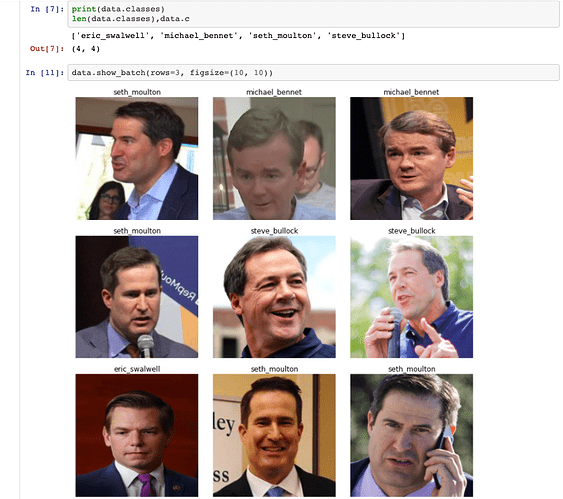
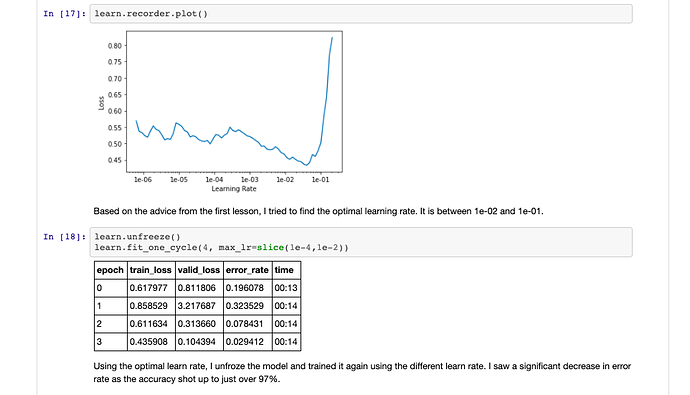
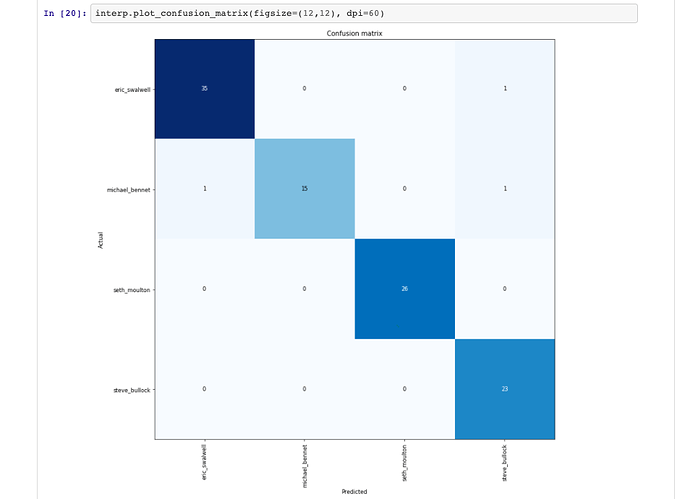
I completed the first lesson recently and started a project that uses around one hundred pictures each of four of the least recognizable democratic primary candidates to create an image classifier that can recognize them with a success rate of over 97%. I would love feedback on it! Let me know what you think. Thanks!

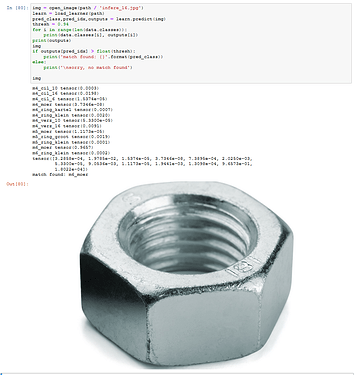
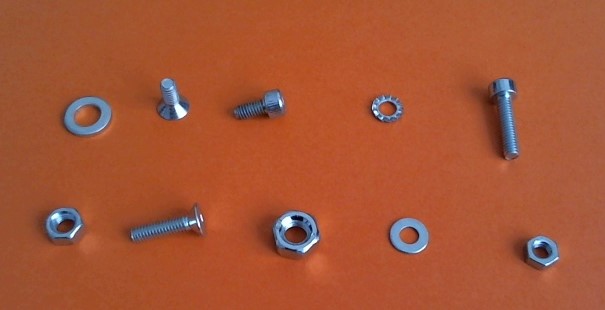
I’ve got some very good results already. Some improvements need to be made to account for scale, since taking pictures of a ‘m4_nut’ in close proximity gives me an inference of ‘m5_nut’ which is to be expected of course.
But I’m very glad with the fast success.
Thanks for all the work that got into this great library!
Best,
Bas
This is cool. Have you applied the same model to other types of reviews? Like detecting fake amazon product reviews, across different products?
Great idea for a test! I randomly picked an image from google searching on “nut”, and the inference was an M6 nut, the M6 nut is the biggest of 3 I taught the model (got M5 and M4 too).
The model recognized its a nut, but this model is not really cut out to differentiate between sizes. Since the nut is filling the picture the biggest size was predicted
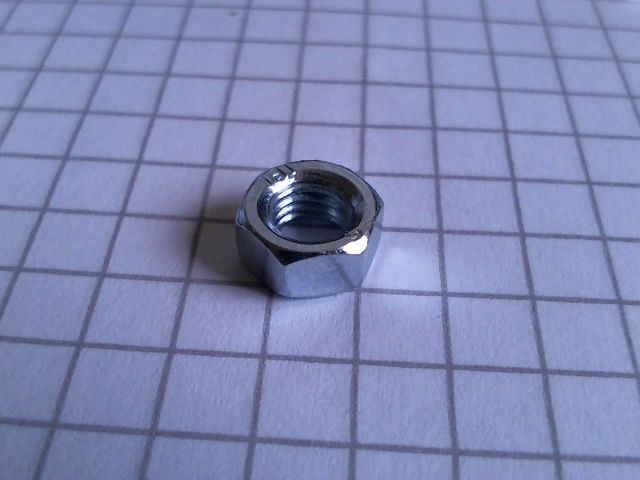
I found a solution for the scaling problem by recording the images on my paper notebook which has a 5x5 mm grid. This make that the size is detected independent of the distance I have between the webcam and a part.
Hi basdebruijn I hope you are having a brilliant day!
I read your previous post about size issues and if the graph paper doesn’t affect the accuracy of your model this appears like a great idea.
I just wondering if:
- You keep the distance between the object and camera the same?
- weather your camera has an auto focus which changes depending on the size of the object?
Am I right in thinking, to detect the size of nuts and bolts from other images, you would need them to be photographed on the same size graph paper and the factors in the previous questions kept constant?
From you experiments, it looks like the above would work very well for a manufacturing department or on a production line.
Cheers mrfabulous1 

Post deleted by user
Hi,
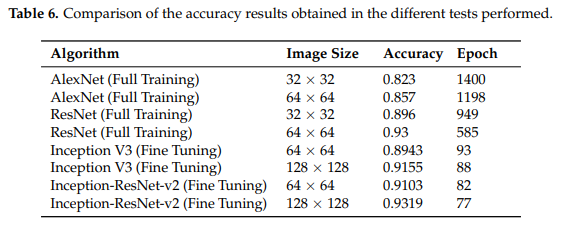
After watching Lesson 3, wanted to explore the effect on progressive resizing on the Architectural Heritage Elements image Dataset (https://old.datahub.io/dataset/architectural-heritage-elements-image-dataset ). Also wanted to compare the results to the ones presented in: Classification of Architectural Heritage Images Using Deep Learning Techniques (Llamas et al. 2017)
Link for the paper:
The results table in the paper says that highest accuracy achieved at that time was 93.19%
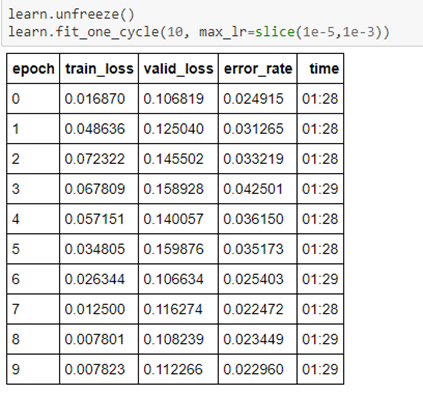
Attempted to apply ResNet50 with bs of 64 and 80/20 Train/Valid split, Image size=224 and the final error rate after unfreezing and retraining earlier layers was around 0.0229 which suggests accuracy of 97.71%.
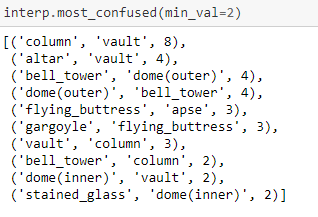
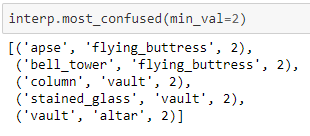
The most confused pairs looked like below:
Then attempted to apply ResNet50 with same bs and Train/Valid split but trained in three stages with different image sizes: 64, 128 and 256. Did unfreezing and retraining earlier layers on each stage. Error rate on image size 256 fluctuated a bit around 0.01 mark which suggests accuracy of around 99%.
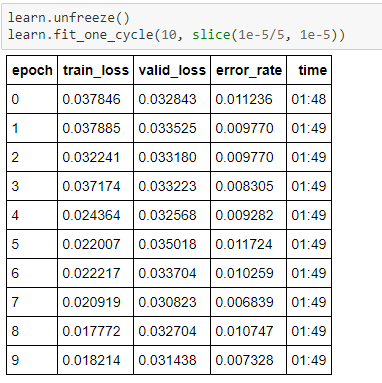
After the above, decided to reduce the learning rate a bit and train a few more epochs. Final error rate was 0.0083, which suggests accuracy of 99.17%.
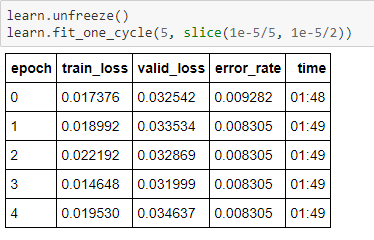
Most confused pairs with progressive resizing:
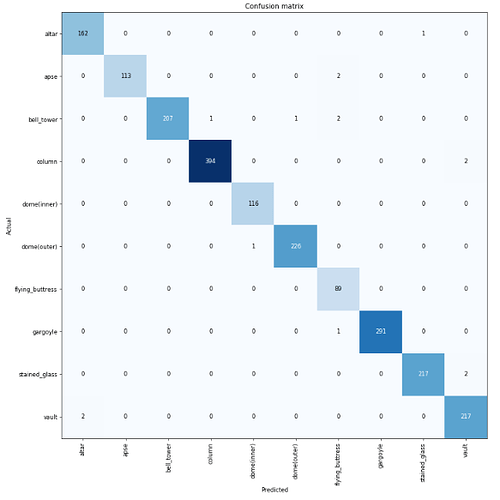
Confusion matrix with progressive resizing:
The only concern is that original image size is 128 and last stage model is applied on size 256. Was wondering if this “image expanding” is bad practice?
Have also attempted to deploy the model on: https://architectural-heritage-elements.onrender.com
Thanks! I’m glad you think it is cool 
I have not applied the model to other types of reviews yet.
But, yes, I’m planning to get a small labelled dataset for other types like amazon and test it.
There are not many labelled dataset to do so. Do you have any at hand?
Hi basdebruijn
Just a thought experiment. Can you try putting a coin (penny or a quarter of known size) next to each nut photo or any other object you want to classify in order to adjust the scale of your first linear transform? Couple of benefits are - (a) research and results can be replicated by others. (b) this can solve the generic issue for photographic scale of any photo.
Hope this helps.
hi @mrfabulous1
to answer your questions,
1: no, I do not keep the distance the same, This does make it harder to determine the size. I would probably find a more rugged solution for a real application.
2: yes, the camera has autofocus, but it sometimes goes out of focus which makes for blurry images. So instead of helping, it sometimes just does the opposite.
I think indeed that the size of graph paper needs to be the same size. As somebody mentioned, maybe a coin would work too. But I think i’d stick with the same zoom level and no autofocus if i had a choice.
hi @mjdlpro That would be an option too I guess.
Hey everyone!
I wanted to share a story I wrote on how to deploy your model with Kubernetes on Google Cloud Platform. Hope it helps!
That is awesome! I am working on something similar where I am trying to classify notes from different musical instruments. It looks like you left the X and Y labels in the files is that correct? Also, did you adjust the transform settings at all? Looks like you were able to achieve some pretty great results!
Hi guys!
I just created my first RNN for molecule generation. Sometime ago I saw a post asking for advice of how to do it in Fastai, so I decided to try.
I basically used standard Fastai with very few custom things do to it. Here’s some of the generated molecules:
My current version is returning 80-99% valid structures (i.e., OK bonds and charges) and I’m still underfitting a little! If anybody is trying that here’s what I did:
-
Molecules are represented as Simplified Molecular Input Line Entry Specification (SMILES) strings:

Each line of a text file represents one unique molecule. You can think of each molecule as a full text, and each atom as a word. -
Character-level tokenization seems to work better than splitting molecules in fragments. This notebook have a quite nice char-tokenizer.
Ps: Remember that Cl and Br atoms should be one token each. You can replace them with another code (Cl - > L) or find a way to get them directly. -
The pretrained LSTM model (AWD_LSTM) is sloooooooooooooow. Try GRU’S if you think its better. Beware that Colab may restrict your access to GPU (happened to me a few times).
-
My current version adds a start (BOS) and end (EOS) tokens to each molecule representation (e.g, BOSc1ccccc1EOS). If you are using a custom tokenizer be sure to add them to your Vocab:
ex:
unique_tokens = sorted(list({y for x in tokens for y in x}))
vocab = Vocab(itos=unique_tokens) # Unique tokens is a list of unique tokens
-
If you are using a custom Tokenizer AND including BOS tokens to your SMILES strings, its better to not include this token when you create your databunch. For instance, if your tokenizer is called MolTokenizer, you can pass a processor to your ItemList like this:
tokenizer = Tokenizer(MolTokenizer,pre_rules=,post_rules=)
processors = [TokenizeProcessor(tokenizer=tokenizer,include_bos=False),
NumericalizeProcessor(vocab=vocab)]
By default the tokenizer includes a BOS token, so set it to False if you already added one. -
Padding your SMILES to have the same length isn’t necessary. In fact, the databunch creation already deals with this problem. It splits your data into bs x bptt parts, where bs is the batch size and bptt is the sequence length.
-
I used a few papers as reference and most of them used the number of valid molecules every epoch to evaluate the performance. It is not necessary to do that, you can just do it at the ending of training. In fact, I use plain old accuracy, achieving ~84% after 15 epochs. That is enough to give you around 90-99% valid structures when you sample.
-
Beware with the predict and beam search! The standard prediction methods will keep adding characters until the size you asked. You can customize predict by adding the following lines:
  idx = torch.multinomial(res, 1).item()
    if idx != 55:              # 55 is the index of EOS token on my vocab
      new_idx.append(idx)
      xb = xb.new_tensor([idx])[None]
    else:
      break
This stops sampling when EOS token is found. It took me a few days (and very bad performances) to find out that SMILES (i.e. molecules) were being concatenated together. By using the modified sampler my performance went from 0.02% to 99%! Don’t be like me: read your code and study how Fastai does it!
There are a few things I want to try, like writing a callback to sample molecules during training and use custom models. I tried a GRU but couldn’t get it to work after using Learner(data,MyGRU). It keeps changing my hidden size. I don’t know why.
UPDATES:
The model generates 97% of unique molecules!
Hi marcossantana I hope you are having a wonderful day!
Great work, it’s always interesting to see the different ways the fastai library is put to use.
Cheers mrfabulous1 

