I appreciate re-implementing everything from scratch, I’m learning a lot. It really helps to understand but I still struggled with attention module, so I have re-implemented it in HTML/JS visual diagram I hope I did it right, it does give me the same output as nn.MultiheadAttention.
I had the privilege of presenting my Generative AI music videos at the PyData London MeetUp on 1 August 2023, sharing the stage with Paige Bailey, Lead Product Manager for Generative Models at Google DeepMind, and Peter Wang, CEO and co-founder of Anaconda
I had a look an recurrent neural networks (RNNs) after watching a StatQuest video so I wrote a blog post (part 1) about the topic implementing one from scratch. Part 2 will cover backpropagation in RNNs. Feedback is very appreciated
Hi everyone! It’s been a while since I visited the forums, and cant wait to study the stable diffusion next
For the last couple of months I’ve been working on a few NLP tasks for my job, mainly text classification/regression and item matching via item name + description. Most of the models used are small BERT or GPT related model due to hardware constraints and fast inference time. During this time I have built an end-to-end tool to do
Text processing (data loading + metadatas format + text transformation + text augmentation + …), with HuggingFace as backend (using Arrow)
Model building (to handle any cases of classification/regression/multilabel …and to train + save model with ease.
I also include the ‘LM fine-tuning’ part (mentioned in Jeremy LM guide where you can finetune the LM model (right now it’s limited to masked LM or causal LM), or even train them from scratch if you want to, so that you have the best model for your downstream classifier finetuning task.
And it’s on pypi as well; you can install it with pip install that_nlp_library
I am looking forward to any feedback as this is my first major package, and several technical aspects of this package are inspired by fastai v2 and Jemery coding style.
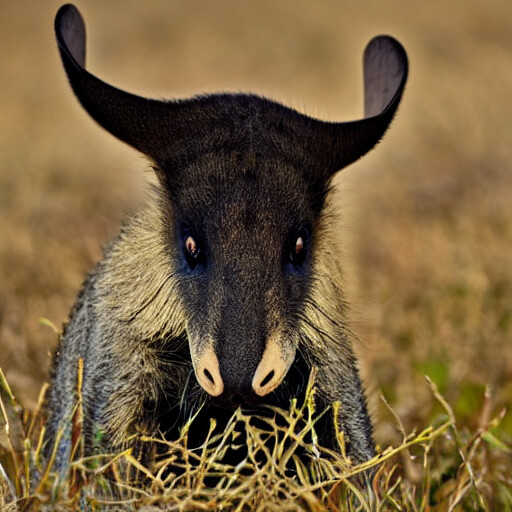
This is my revenge for banning my post with a picture of a dressed, beautiful woman Apparently, she must have not been to someone’s liking. However, I want to share my work, showing something that might be more in line with your very sophisticated tastes. It concerns lesson 9A, the technique used is the mixing of vectors embedding tokens in appropriate proportions. The picture depicts a multi-species monster:
# I suppose that one of the vector had been mixed up earlier, so this code not fully answer what it is.
text_input1 = tokenizer(["A anteater"], padding="max_length", max_length=tokenizer.model_max_length, truncation=True, return_tensors="pt")
text_input2 = tokenizer(["A leopard"], padding="max_length", max_length=tokenizer.model_max_length, truncation=True, return_tensors="pt")
with torch.no_grad():
    text_embeddings1 = text_encoder(text_input1.input_ids.to(torch_device))[0]
    text_embeddings2 = text_encoder(text_input2.input_ids.to(torch_device))[0]

# Biohacking ;)
mix_factor = 0.65
mixed_embeddings = (text_embeddings1*mix_factor + \
                   text_embeddings2*(1-mix_factor))

# Create!
generate_with_embs(mixed_embeddings)
What would your character look like if you were in GTA 5?
I played around with Jeremy’s and Johno’s notebooks in lesson 9 and implemented an image-to-image pipeline for textual inversion that lets you create your own GTA character. I used this concept dictionary for textual inversion.
Here’s what the Indian actor Shahrukh Khan would look like if he were in GTA 5:
After procrastinating forever, I have finally made my website using GitHub pages and set up my blog using Quarto. I plan on writing an accompanying blog post with each lesson of part 2, mainly to solidify my understanding. Here’s the website: https://darkknightxi.github.io. Suggestions on how to improve and write better blogs are welcome.
Cheers!
3Blue1Brown recently dropped a wonderful explainer video on the Attention mechanism. I wrote an accompanying notebook that spells out the video in code: attention/attention.ipynb at main · SuchitG04/attention · GitHub. It’s a straightforward implementation that was a good tenor manipulation exercise. I plan to write a post that adds maybe the timestamps of the video near the corresponding code.
I’ve written a blog on implementing diffedit here. I had the chance to use some cool tricks (map , partial , and matplotlib animation) shown by Jeremy in lessons 10-12. Please check it out and provide feedback
Hi all,
Playing around with the tree gif. Started with a notebook based on John’s.
Initially I had each frame conditioned only on the previous frame. This turned into very cartoonish images:
To keep the images more stable & more related to the input, I switched to conditioning on a 50-50 mix of a fixed image & the previous frame. Result is better:
From there I wanted to make it a bit less jumpy. I noticed that in some cases it didn’t seem to really be reaching prompt B when transitioning from prompt A to prompt B. So, after interpolating from prompt A to prompt B, I added in some extra frames which were conditioned on prompt B & the previous frame, to give the output frames a chance to fully “catch up” to prompt B.
I like the output a bit better, albeit it’s still not perfect.
Finally, I was curious if it was really necessary to use diffusion to generate a bunch of images with prompt interpolation – why not just generate one image per prompt and then interpolate directly between the latents?
In case anyone else was curious - this worked but the feeling of the output is a bit different. It gradually fades between seasons –
After coding along with part 2 of the 2022 course and building the miniai framework from scratch, I found myself not wanting to use anything else anymore – knowing all the bits and pieces of the training framework and being able to adapt them to exactly what I need just feels too good!
So I put all my favorite parts of the miniai framework into a notebook, and with the help of Jeremy’s nbdev tutorial turned them into a pip-installable package which I called atai for atomic AI (I’m a chemist, after all).
A few days ago, I published a Kaggle discussion post, notebook, and dataset in the context of the NeurIPS 2024 BELKA competition, which is about binary classification of whether small molecules bind to proteins. My notebook takes AtomInSmiles, a tokenization method for chemistry recently published by Ucak et al. (2023), and shows that it leads to better results on the competition dataset than standard SMILES tokenization, which people often use in sequence models for chemistry. In the notebook, I used my adaptation of the miniai framework to train a 1D convolutional network with skip-connections, kaiming-he initialization, leaky ReLUs and other tricks I learned in part 2 of the 2022 course.
# Bird Species Classifier using Scientific Names

## Links
- Live Demo: [Hugging Face Space](https://huggingface.co/spaces/HusseinSerhan/bird-species-classifier)
- Code: [GitHub Repository](https://github.com/HusseinSerhan/bird-species-classifier)

## What I Built
A classifier that can identify 7 bird species using their scientific names:
- Scarlet Macaw (Ara macao)
- Hyacinth Macaw (Anodorhynchus hyacinthinus)
- Blue-and-yellow Macaw (Ara ararauna)
- Toco Toucan (Ramphastos toco)
- Budgerigar (Melopsittacus undulatus)
- Canary (Serinus canaria)
- Cockatiel (Nymphicus hollandicus)

## Key Learnings
- Using scientific names significantly improved data quality
- Iterative data cleaning using the model's predictions helped refine the dataset
- The ImageClassifierCleaner is a powerful tool for improving model performance

## Technical Details
- Built using fastai and ResNet18
- Deployed with Gradio on Hugging Face Spaces
- Using Git LFS for model storage
I just posted a write-up of my book recommendation system
Handles warm/cold users, daily retraining, and even has a chatbot. Project thread | Live demo | Portfolio write-up