Here we go: https://twitter.com/stgiomo/status/1624784151776722944?s=20&t=CoDVn0oIElC0hKtE_q_TRw
3 Likes
BTW: quarto is awesome, but if you’re struggling to properly configure it for open-graph and twitter cards adding these lines to your _quarto.yml will solve the problem:
website:
  site-url: https://www.cynthiahqy.com
  open-graph: true
  twitter-card:
    creator: "@[your-twitter-account]"
More on this on: Cynthia Huang - Thumbnail Previews for Quarto Websites (for Dummies)
9 Likes
I’m still back at the beginning of lesson 18 so maybe this is covered later in the course, but I found dreambooth interesting so implemented a minimal version of that. I am using my version of miniai I am building for the class (AIsaac). Super similar but taken a couple different paths.
A few notes:
- Very very basic/simplified minimal version of huggingface’s dreambooth script
- My own dataset b/c I wanted validation images (friend’s dog)
- It doesn’t generate very good images at all, but it is generating images of the correct dog. Lots to improve on, but a good starting point!
- Good example of more “advanced” training as a callback using accelerate below!
class DreamBoothTrainCB(AccelerateCB):
    def before_fit(self, trainer):
        '''Wraps model, opt, data in accelerate'''
        trainer.model,trainer.opt,trainer.dls.train,trainer.dls.valid = self.acc.prepare(
            trainer.model, trainer.opt, trainer.dls.train, trainer.dls.valid)

        trainer.noise_scheduler = DDPMScheduler.from_pretrained(pretrained_model, subfolder="scheduler")
        trainer.vae = AutoencoderKL.from_pretrained(pretrained_model, subfolder="vae", revision=None)
        trainer.vae.to(self.acc.device, dtype=torch.float16)

    def before_batch(self,trainer):
        trainer.batch = fc.L(trainer.batch)
        trainer.batch.append(trainer.vae.encode(trainer.batch[0].float().to(dtype=torch.float16)).latent_dist.sample() * trainer.vae.config.scaling_factor) #latents 2
        trainer.batch.append(torch.randn_like(trainer.batch[2]).float()) #noise 3
        trainer.batch.append(torch.randint(0, trainer.noise_scheduler.config.num_train_timesteps, (trainer.batch[2].shape[0],), device=trainer.batch[2].device).long()) # timesteps 4
        trainer.batch.append(trainer.noise_scheduler.add_noise(trainer.batch[2], trainer.batch[3], trainer.batch[4])) # noisy latents 5

    def predict(self,trainer): trainer.preds = trainer.model(trainer.batch)
    def get_loss(self,trainer): trainer.loss = trainer.loss_func(trainer.preds,trainer.batch[3])

    def backward(self,trainer):
        self.acc.backward(trainer.loss)
        if self.acc.sync_gradients: self.acc.clip_grad_norm_(trainer.model.parameters(), 1.)

    def zero_grad(self,trainer): trainer.opt.zero_grad(set_to_none=True)
Here’s the notebook so far with all the code: AIsaac - Dreambooth
7 Likes
We didn’t cover DreamBooth in detail so this is great to see! Looks like you are getting some promising results!
4 Likes
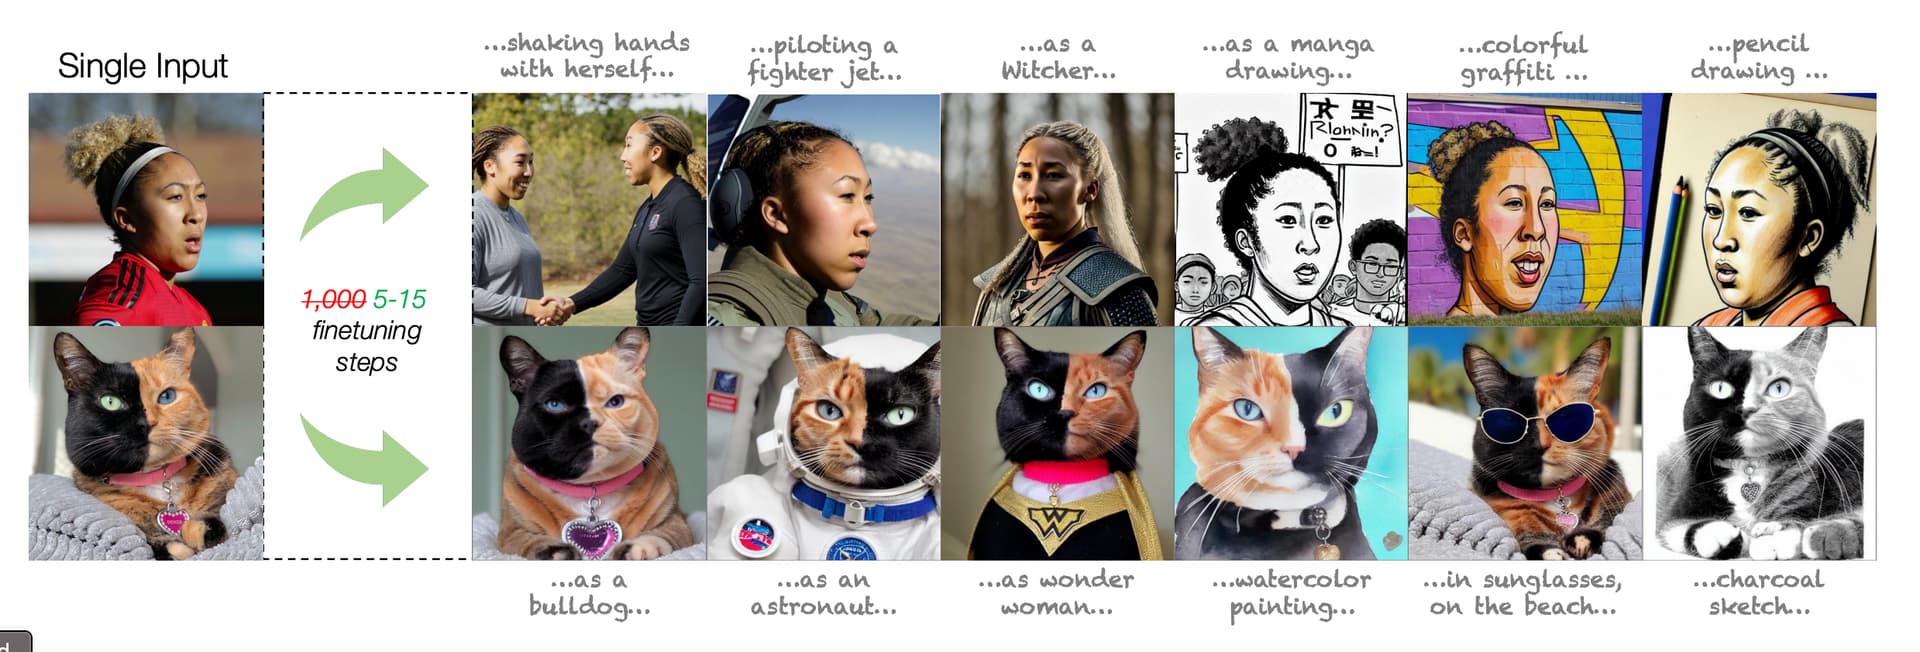
Yes, results are good so far. I plan to build it out a bit more and see how a more tuned version does, and then compare to the new paper that just came out a couple days ago which alleges only needing 1 image with 5 training steps!
Really cool results visual for fine tuning on a single image from the paper.
6 Likes
Who is teaching the Alians???
So @willsa14 and I have been hacking away at learning how to deploy an NLP model. The good news is that we had successfully built our first model where we fine_tuned GPT2 with a custom hip-hop lyrics database we scraped off a hip-hop website.
The goal was to create a text generation which we were able to do, and from a basic hip-hop structure, it works! However, as a proud New Yorker who grew up during the birth of Hip Hop. The model is an illustration of the worse stereotypes of the genre.
With that said, this project made me truly appreciate how ML can have bias built into its model as a default. Decerning bias in ML is not just about the code, it’s about everyday people getting outside of their bubbles and trying to understand other perspectives.
And that my friends is a function of the golden_rule().
Thank you @jeremy for putting me on this journey!
Ohh… Here is the model!!!
5 Likes
Guess what! Made the Context Length from 150 to 500 and my AI Ghost writer got a whole lot more respectable!
3 Likes
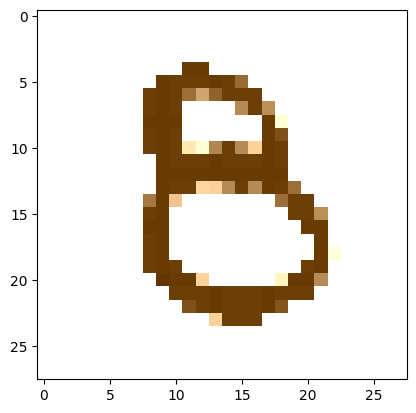
A few comments made by Jeremy early on in lesson 9 made me think maybe it might not be too hard to put together a little working demonstration of the core principle at work in what we do with diffusion models: i.e. updating an image based on some gradients derived from how close or not our image is to some desired kind of image.
For this tiniest of prototype POCs, I trained a model to detect handwritten ‘8’ digits (using standard fastai), then switched over to raw PyTorch to generate random noise, then get the derivatives with respect to the probability that our random noise was a number eight.
Surprisingly, the iterative process was successful in that it updated the pixels such that the model thought that the image was an ‘8’, but unsuccessful in that it did it in a way that was basically imperceptible. Which is to say, the process was a way of creating a sort of chimera image.
It didn’t work with the random noise such that you could magically watch the ‘8’ emerge from the noise (as I was hoping), but I suspect that has to do with how much we’re updating the pixels. We probably want to initially update the pixels a lot, and then as we continue onwards reduce the amount we’re updating. For now, I wrote up the process and I’ll keep going with the part two lessons ![]()
A fun experiment and many thanks to those who popped in to chat and unblock me in the discord ‘live-coding’ room on Saturday and of course to the Delft FastAI study group who properly unblocked me today.
(and the code here in case you’re interested in tinkering)
13 Likes
This is similar to what I had done with
Where I trained an image regressive model to recognize head poses and used that to guide diffusion to generate heads with a given pose by steering the diffusion process with that model.
Something that you might want to try…
I trained my model with “noisy” (random amounts of noise) on the head pose images. (Pretty much a form of augmentation/regularization) that helps the model to recognize head poses that are just starting to emerge from the noise… The diffusion process will be steered more effectively and earlier in the denoising process and will be more gently guided into the right latent space…
You might want to try something similar… In the beginning of the diffusion process, nothing will look like an 8 (even something well-aligned to being denoised into an 8).
If you’re doing this with stable diffusion rather than your diffuser you can use SD’s unet to predict what a fully denoised image at each step will look like and use that (predicted denoised) image with your classifier… JohnO does that in his video coherence notebook here,
This is also pretty much what controlnet is doing with stable diffusion as well… ie using other models to provide guidance to the diffusion process…
8 Likes
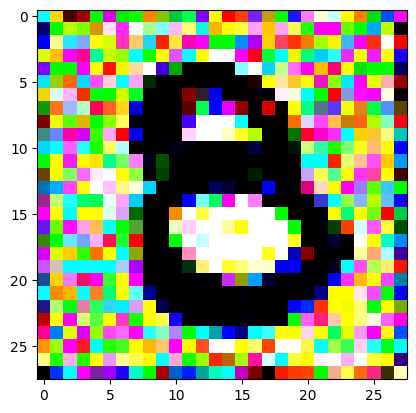
Spurred on by discussions in our weekly fastai study group, I tried out perceptual loss as a way of updating the values so as to generate the eight. As @ste said, it’s sort of ‘cheating’ since you’re using the target image to guide it and of course our classifier is no longer involved, but I’ll tell you it was really nice to see the ‘8’ emerge out of the random noise FINALLY.
8 Likes
Kudos @strickvl - now it’s time to wipe out the noise ![]()
3 Likes
Moreover it’s interesting to see that the new 8 is “similar” but not identical to your target_image: looking forward to see what will happen using perceptual loss with Gram matrix like Johnston Whitaker did in lesson 20!
3 Likes
Hello ML practitioners,
I am asking for your help to solve a machine learning problem that I am unable to make progress on. This is in the “Share your work here” topic, but in this case it’s share where you are stuck.
About three years ago, I volunteered to clean up the damaged video of an organ recital. Some of the scenes had been recorded on a faulty memory card.
To give you a sense of the problem, here is the link to a short clip (2 Mb mov):
http://cssw.biz/download/scene17.mov
I had just read the paper,Temporal Source-Reference Attention Networks for Comprehensive Video Enhancement] (https://dl.acm.org/doi/10.1145/3355089.3356570), where the authors repair and colorize old videos. Their model removes hairs, scratches, and various blips and glitches that accumulate on old films. It seemed perfect for this task! And their model was public. I thought I could use their trained video repair section and the repair would be easily completed. And I would be a machine learning hero! I stripped their model down to just the repair section, got the raw footage from the performer, and ran it through.
But - you guessed it - it did not work. The damage was improved but not removed. I think that this video damage is not the same as the type of damage particular to old films. So the video repair failed.
The B/W video is of the organist’s hands playing a keyboard. The storage card in the camera that sees the organist’s hands was defective in some way. The resulting video artifacts are randomly overlaid onto the source video, square, fixed spatially, fade in and out over about 5 frames, and usually contain a few completely black and completely white pixels (plus many in between). My eye can easily detect them and compensate for the hand and key movement they lie over. You would think that a trained ML network ought to be able to learn to do the same.
I next tried several other approaches, rabbit holes like bottlenecks and anomaly detection. None worked well enough. I wrote back to the organist, saying that I had failed at the task. When my understanding of ML got better and the whole field progressed, it might yet be accomplished. So now, three years later, I am asking for help.
The essential issue is that there is no ground truth. I do not have an undamaged version of the particular video, much less an undamaged video of the organist’s hands playing any kind of keyboard. So the usual decrappifying techniques of the fastai lessons do not apply. The video artifacts themselves are non-reproducible - they differ depending on what lies behind them. I cannot overlay them on an undamaged video and train them out.
Today there are new approaches like infilling and style transfer of videos. After all, the video artifacts do not belong in a normal frame, clearly to my eye, and my eye can see what lies underneath them. It should be possible to repair the video.
What I have tried:
-
Using code from the paper, adapted to B/W, removed the colorization section, leaving only the video repair model. The model trains 3-d convolutions in space and time. The trained repair model partially removes the artifacts. But the authors’ model was not trained on these particular artifacts, so it does not know how to remove it.
-
One help is that the video camera and keyboard are fixed. I tried averaging across all frames of a scene, which blurs out the artifacts and moving hands. Then thresholding and subtracting out the fixed parts leaves a video of the artifacts alone.
-
I have a video the feet playing pedals, undamaged, which is closest to hands on the keyboard. I added the above artifact video to it and decrappifed. Promising, but still leaves visible artifacts when the newly trained model is applied to the keyboard video.
-
Using PyTorch directly, I wrote code that can reliably zero out the damage. It also zeros beyond the edges of the damage in space and time.
-
I can extract undamaged frames that may be useful for style transfer.
I would like to find a technique that makes use of the time continuity of the video, rather than cleaning up a frame at a time. Something like zeroing the damage and in-filling, or transferring the style of an undamaged frame to the damaged ones.
Any ideas or advice or encouragement? I’m open to any suggestions.
P.S. I have not been on the forums for a while (hanging out in the Yúcatan jungle), so this may have been said already. It seems that the training of these generative visual models is finding the “ground truth” of the entire visual world, rather than of a single photo. So maybe it’s possible to remove “noise-like stuff” that should not be in the frames.
Thanks for your help!
Hi everyone! I’d like to share a jupyter magic I created to reverse the traceback. I often find myself scrolling down to see the relevant part of the traceback when I run into an exception in jupyter notebooks. This is especially common with deep learning code. I thought it would be more convenient to have the traceback start from the most recent error and go backwards. I hope you find this useful, and I would love to hear your feedback and suggestions on how to improve it! ![]()
5 Likes
Been messing around with VAE’s and trying to get audio out of them.
This is sampling from latent space from a vae trained on breakbeats: Audius
I will do a blog post or something.
Been a month since I started the fast ai course, and to get results this quality this quickly. I’m really thankful for all the hard work that’s gone into this course, super empowering.
I actually started this work hacking around on a vae tutorial based on mnist digits before part 2 came out. Would be a fun blog post. “Hacking mnist digit tutorials to create audio.” Or how to be an idiot and still get results ![]()
I will give the fast ai vae a go maybe 2moro, as learning rate is bottoming out here, even with more training it’s not going down, so I need to figure out what’s happening.
Also that was just pure vae, and basically turning sound into a picture and feeding that into a normal image vae. Idk why, but it works. Little bit of hacking here and there.
Would be cool if I could do diffusion with these latents.
2 Likes
Just went through your post and thought this medium article will help.
https://www.google.com/url?sa=t&source=web&rct=j&url=https://shubhamsaboo111.medium.com/prompt-engineering-the-career-of-future-2fb93f90f117&ved=2ahUKEwjPg9_ci6j-AhUFxgIHHTxVBBwQjjh6BAgVEAE&usg=AOvVaw1vOxNQ9Fw29dbxYAgnN20y
I used simple ReLU layers to model non-linear transformations, i.e. a 2d parabola. I find the visual results much more intuitive and convincing than a mathematics argument.
Take a look and let me know how you think!
1 Like
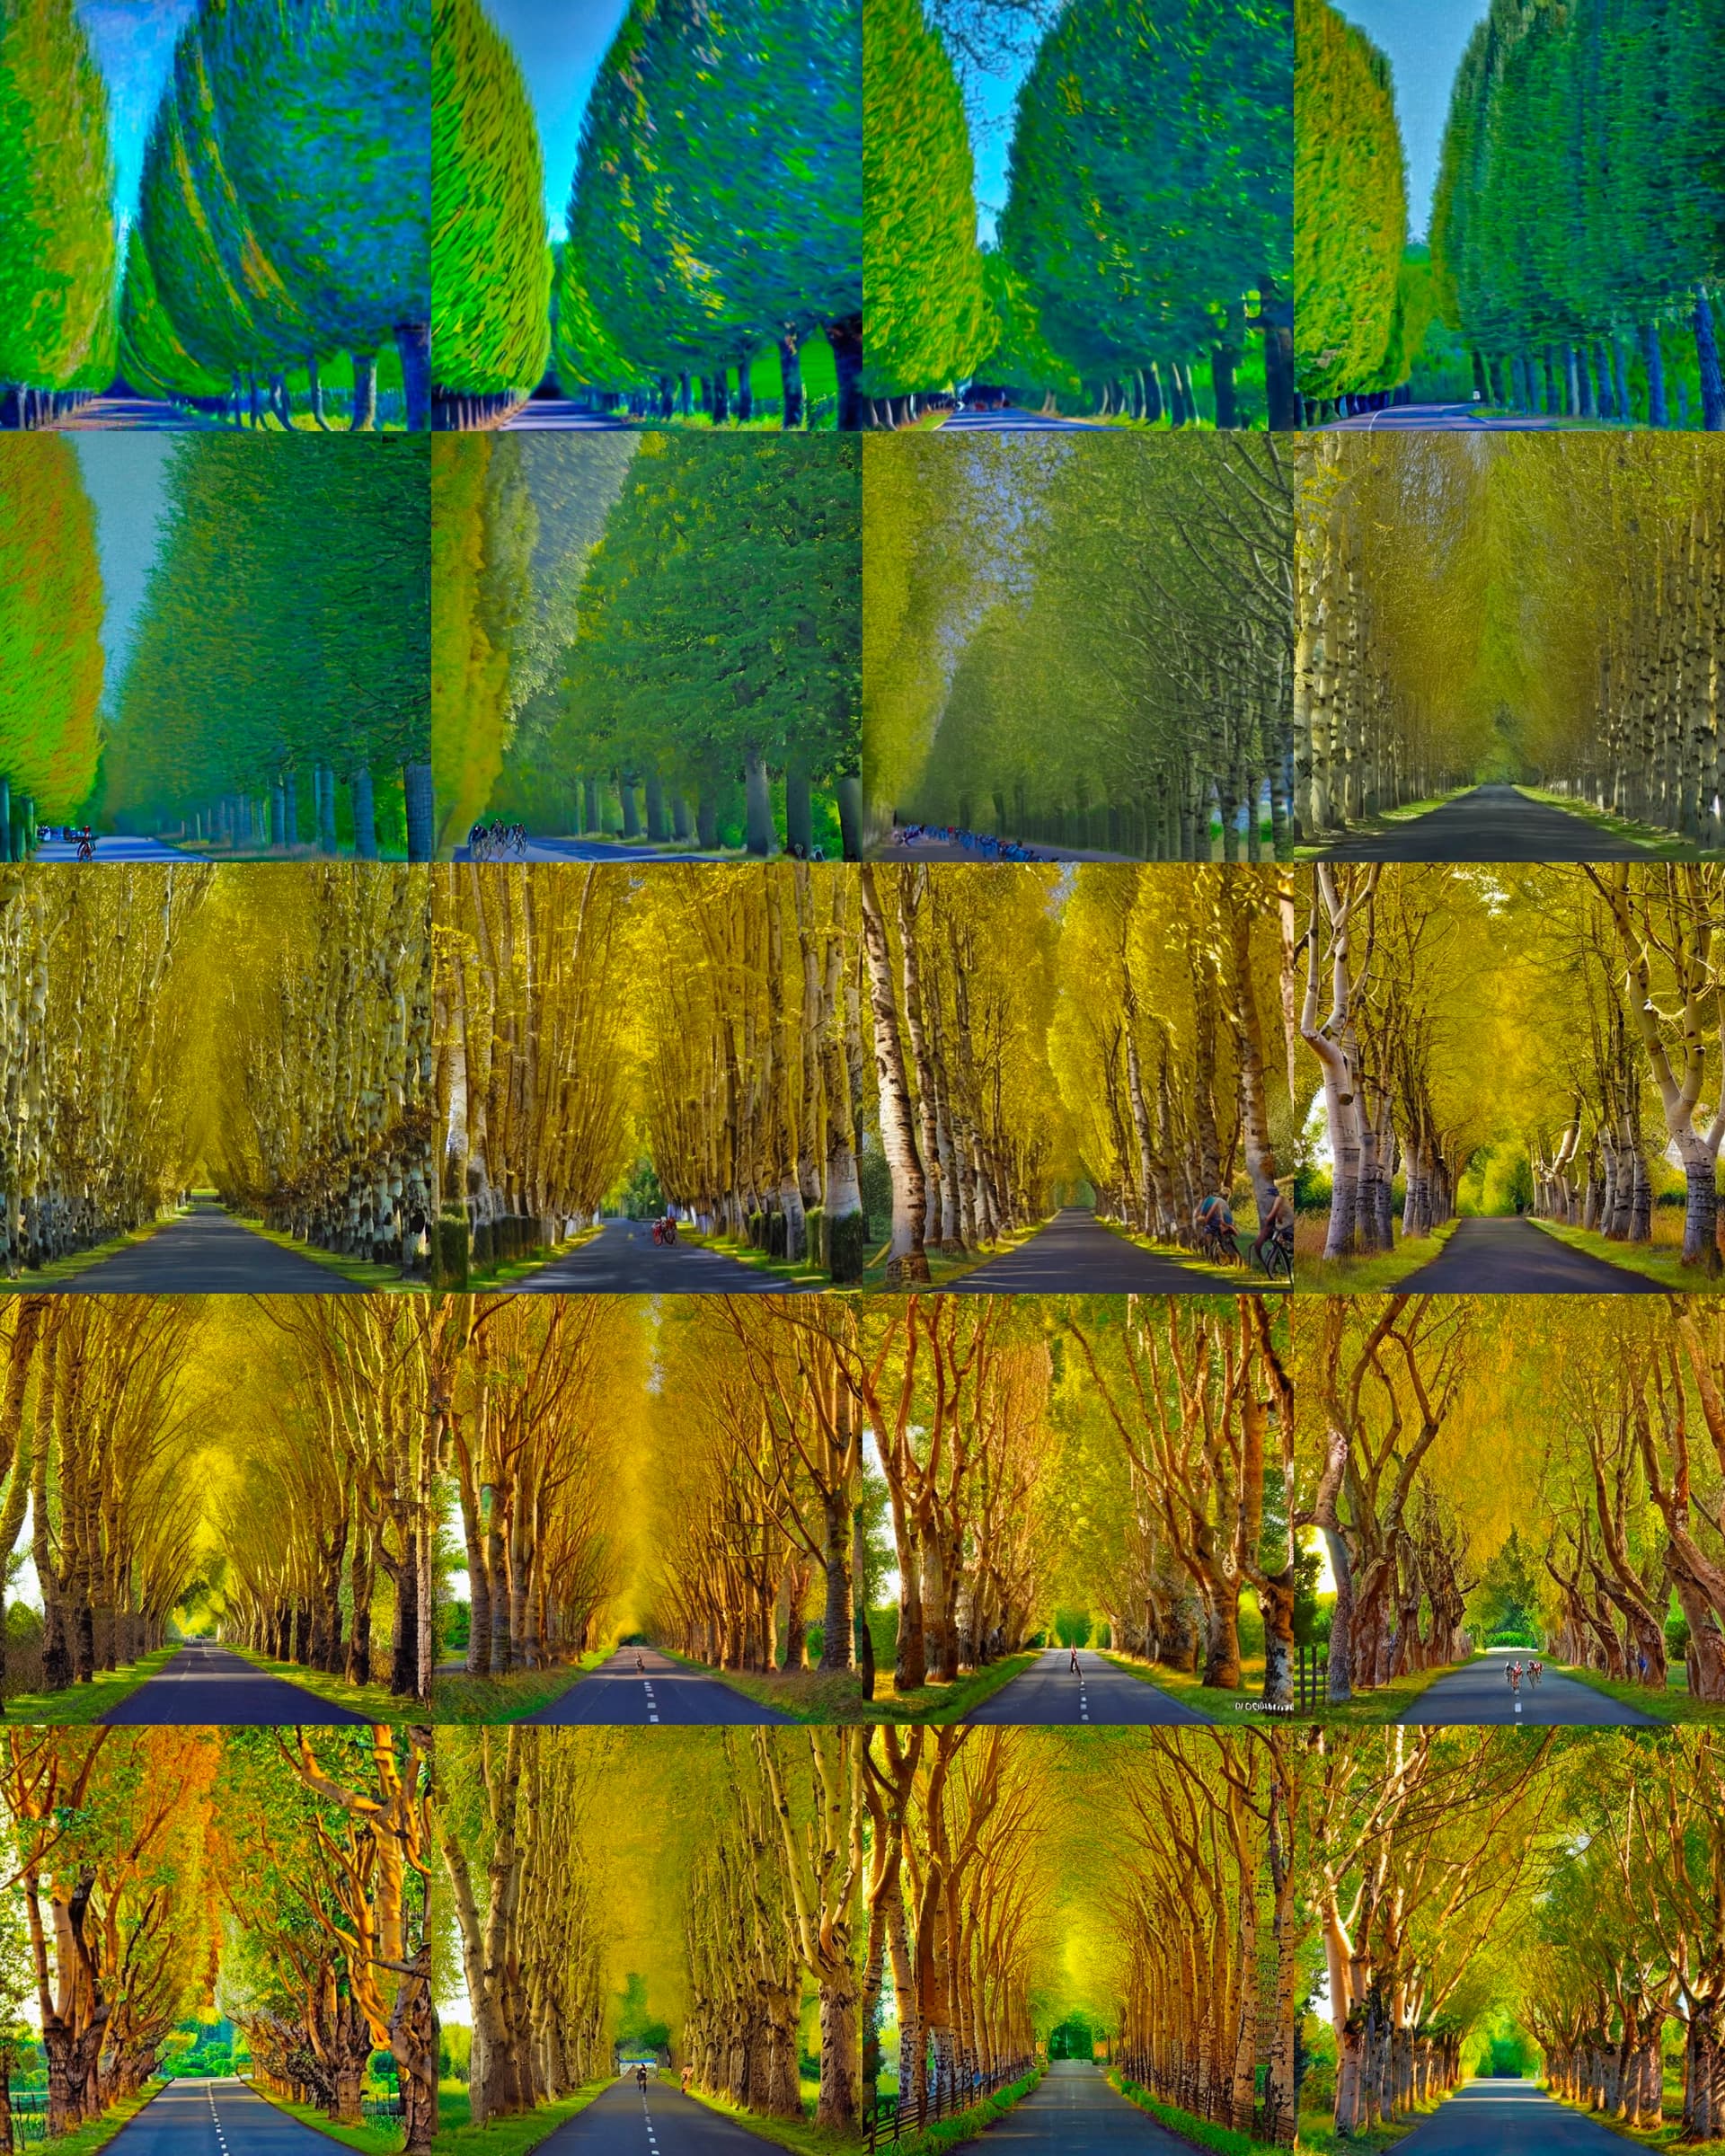
I created some interesting dreamlike animations using an image-to-image pipeline, by repeatedly feeding a zoomed-in version of the previous output. This is described in my blog Dreaming of the Giro – Science4Performance
3 Likes
Excited to announce my first public PyPI package developed with #nbdev: testcell.
The Python cell magic %%testcell executes a cell without polluting the notebook’s global namespace. This is useful whenever you want to test your code without having any of the local variables escape that cell.
Simple use case:
# Install
pip install testcell
# Import
ìmport testcell
# Annotate
%%testcell
a = "'a' is not polluting global scope"
a
# Verify
assert 'a' not in globals().keys()
nbdev use case
If you annotate your cell containing tests with %%testcell, all the functions and variable defined there will be forgotten after its execution.
%%testcell
def create_fixture():
  return ['Hamel','Stefano']

for n in create_fixture():
  test_eq(say_hello(n), f"Hello {n}!")
Links
- PROJECT PAGE: GitHub - artste/testcell: testcell stops your testing code from polluting the global state
- DOCUMENTATION: testcell
- PYPI: testcell · PyPI
- COLAB DEMO: testcell_demo.ipynb
- KAGGLE SAMPLE NOTEBOOK: introducing_testcell | Kaggle
Blog post
4 Likes
I’ve started making music videos on YouTube using Stable Diffusion