The hope is that this will allow to automate some of the manual data creation of lesson 8 / 9 and will make the core educational content (model / loss creation, visualization) stand out more. Also, this should make working with other datasets quicker and less error prone.
Please find the gist here.
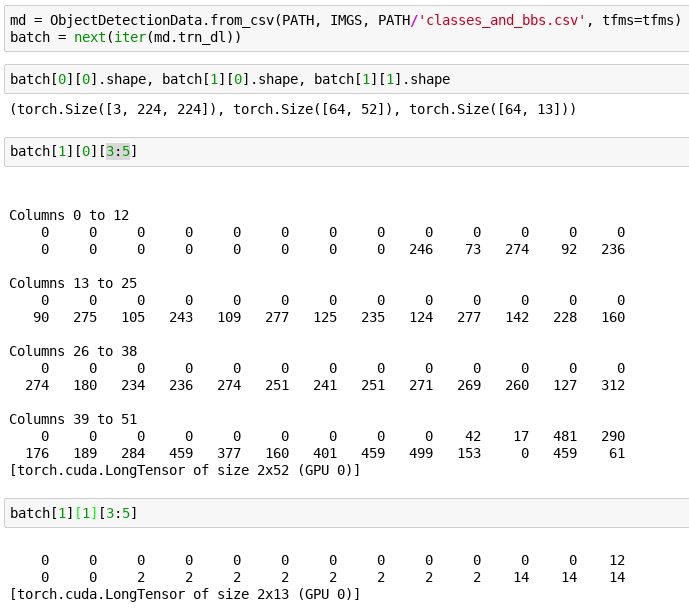
We feed the class a csv of the following format (header optional):
file_name,bbox_coords,category
000012.jpg,96 155 269 350,car
000017.jpg,61 184 198 278 77 89 335 402,car person
It gives us a data object that does the following (effectively what we need for the detection model from lesson 9 but I have only done minimal testing thus far):
This is an early version and I tried to keep the functionality together for easier discussion. Among other things, we might want to take a look at how / if we can integrate the reading of the csv with what the ImageClassifierData is already doing.
I also would like to see if I can extend this in a nice way to one hot encode labels for localization (single object per image like we did for the largest bb in lesson 8).
This is not completed yet by any means but wanted to share nonetheless in case this might be useful to someone and to kick off the discussion as per Jeremy’s suggestion on github.
The next steps that I am going to take take will be to integrate this into the notebooks and continue to test / add functionality / refactor.
This works with the current version of the library but I think the work that @piotr.czapla is doing can make this much nicer. I will follow what he does to see how we can use proposed changes in managing transforms for giving us greater flexibility in creating datasets. Hopefully we will be able to get rid of concat_datasets_for_detection and make the ConcatDataset into something nicer and more useful across a broader spectrum of applications.
You can find the branch for this here.
BTW this uses the method proposed by @binga for working directly with the dataframes which ends up being quite concise and probably easier to read than falling down to Python primitives. That was a neat gist you shared with us @binga 

EDIT: Here is a notebook using the new functionality that reproduces what we did in lesson 8.
 )
)