I created a GitHub project with CloudFormation scripts to setup the SageMaker notebook instance. All you need to do is select the AWS region closest to you and click the Launch Stack button. Click through the options of the CloudFormation page then wait till the stack is created.
Works for both the new version of fast.ai (v1.0) as well as the older version (v0.7) by passing the version number as an input parameter to the CloudFormation stack and downloads the notebooks for the course too.
Launch by following the instructions from the README page found here.
Very cool @matt.mcclean! So nice to see the AWS gurus here in our little forum too.
Did you include the extra change from @avishalom (post immediately above yours) that ensures everything is set up correctly when launching an existing instance?
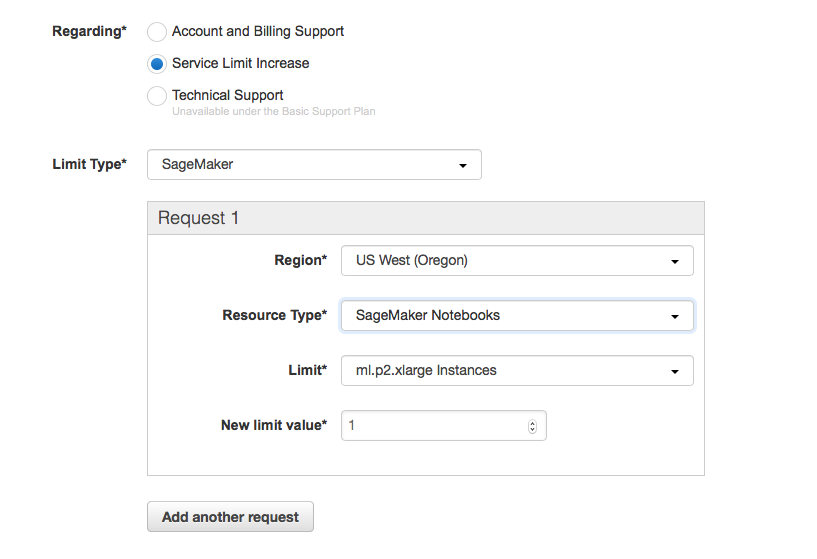
I can confirm that the Sagemaker tutorial doesn’t show how to properly request for increase in limits. The other tutorial is for EC2 instances, and AWS separates this out. However, now I have a question - which Resource type should I choose ? See the following picture:
Hi @jeremy. Yes, it installs the fastai ipython kernel each time the notebook is started to ensure everthing works even after stopping and starting a notebook. It also installs the fastai libraries only when the notebook is first created as it saves the libs to the separate EBS volume mapped to the /home/ec2-user/SageMaker folder (i.e. conda env is ~/SageMaker/envs/fastai). The EBS volume is persisted and reattached to the notebook when stopping and starting so no need to reinstall the libraries in the OnStart script.
Installing the fastai libs and dependencies takes around 3.5 GB leaving around 1.5 GB spare on the EBS volume. There is also around 25 GB free on the root volume. Hopefully there should be sufficient space to run the lessons as the models and data are saved to the~/.fastai and ~/.torch directories which are mapped to the root volume. This does mean however that students will have to download the data and models again after restarting the notebook instance
@matt.mcclean that’s way better than what we’ve currently got in our setup tutorial. If you happen to have the time and interest, we’d love a docs PR for our setup and update instructions:
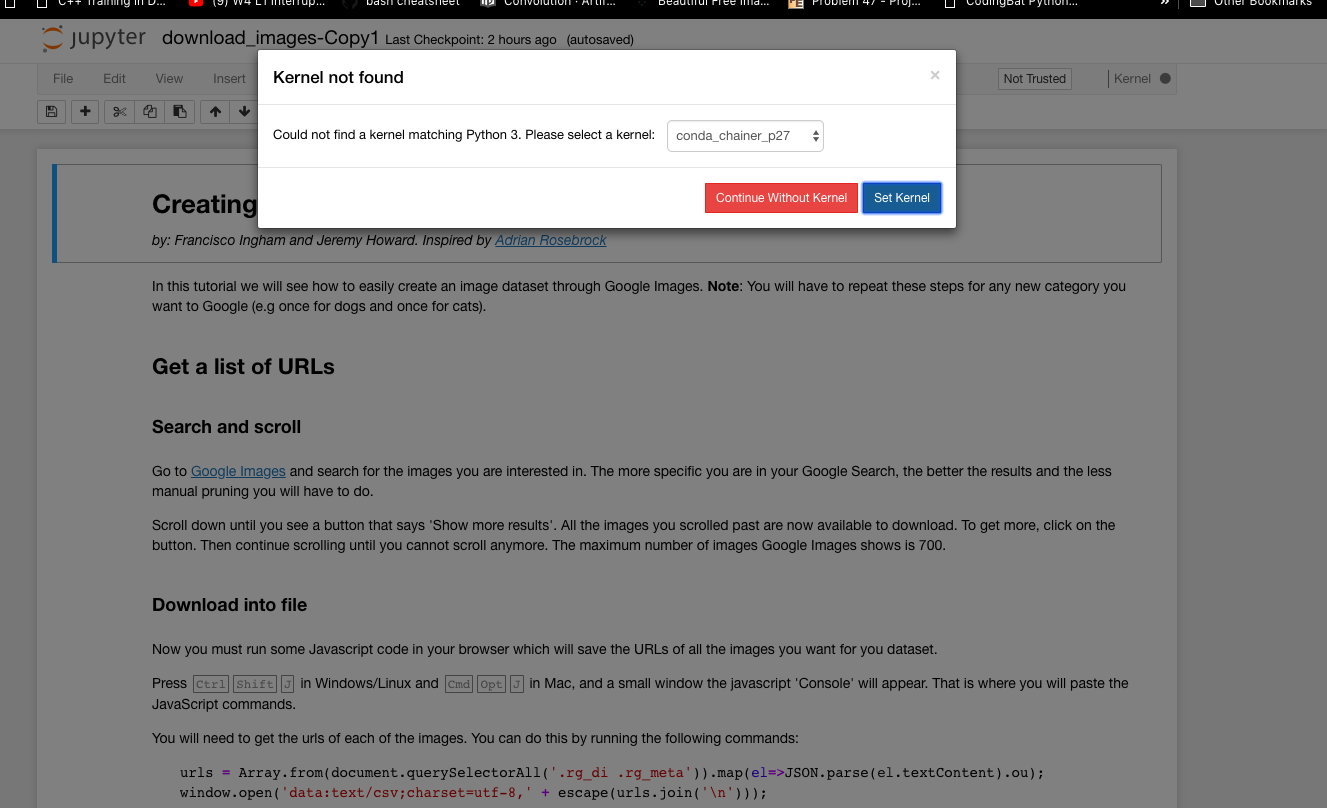
It took me a while to understand how to use the fastai env in sagemaker. It’s somewhat implicit in the scripts share in this thread but I wanted to call it out for beginners like me.
These are some useful troubleshooting steps in case you are having trouble getting it to work:
You need to source activate Sagemaker/envs/fastai to activate the conda env.
After you source activate register your conda env in ipython using ipython kernel install --name 'fastai' --display-name 'fastai' --user
Select the kernel with the ‘display-name’ you entered above
Otherwise you get errors while executing the import statements and it becomes confusing to see a lot of kernels but not the fastai one.
The space restrictions get annoying too. I think we have 5GB only and 20GB of /tmp storage that is not persistent. How are people getting around that? EFS?
You can simply use the kernel selector in jupyter notebook - only reason to activate the conda env is if you need to do stuff with it in the console. The env is already registered for you by the scripts.
@Kaushikjais , if you follow what i pasted above you will get the kernel you need.
if you don’t want to add a startup script, you can just open a shell and run
@jeremy I think we are going about this all wrong
I just had a chat with an amazon engineer, and he suggested that running a notebook on a p2 is a waste of resources.
the notebook instance should be a t2, and the training job should be sent to p2 when you train (because a notebook will be on 3 hours for every few minutes the training runs)
I realize that this is specific to the sagemaker architecture, but maybe you know someone on AWS who might be willing to work through this .
 So nice to see the AWS gurus here in our little forum too.