My apologies in advance for the crudeness of this post, but I wanted to provide some setup instructions to those who intend on running the fastai code without using the cloud options. I know Jeremy has recommended that new users focus on learning the deep learning methodologies over troubleshooting a local installation, but the instructions below should be easy enough to follow. We are coders, right?
They will show how to get fastai versions 1 and 2 up and running independently with access to both the notebooks in course v3 and v4. My intent is create a blog post using fastpages sometime in the future but with the course just started last night, I wanted to get the information out there as soon as possible. If you do not want or need the fastai version 1 code or the coursev3 notebooks, you can skip steps 3 and 4, and run step 5 later in conjunction with step 8.
The steps below were done using a clean Ubuntu 18.04.4 LTS server install. This install is actually running inside of a Virtual Machine within UNRAID with GPU passthru. I will post a blog/topic later on how to set that up as well. My GPU is an Nvidia 1080Ti. If you run bare metal Ubuntu, then you can use these instructions. If you run a Virtual Machine that enables GPU passthru, then you can also run these instructions.
1. Install the Nvidia drivers for your GPU:
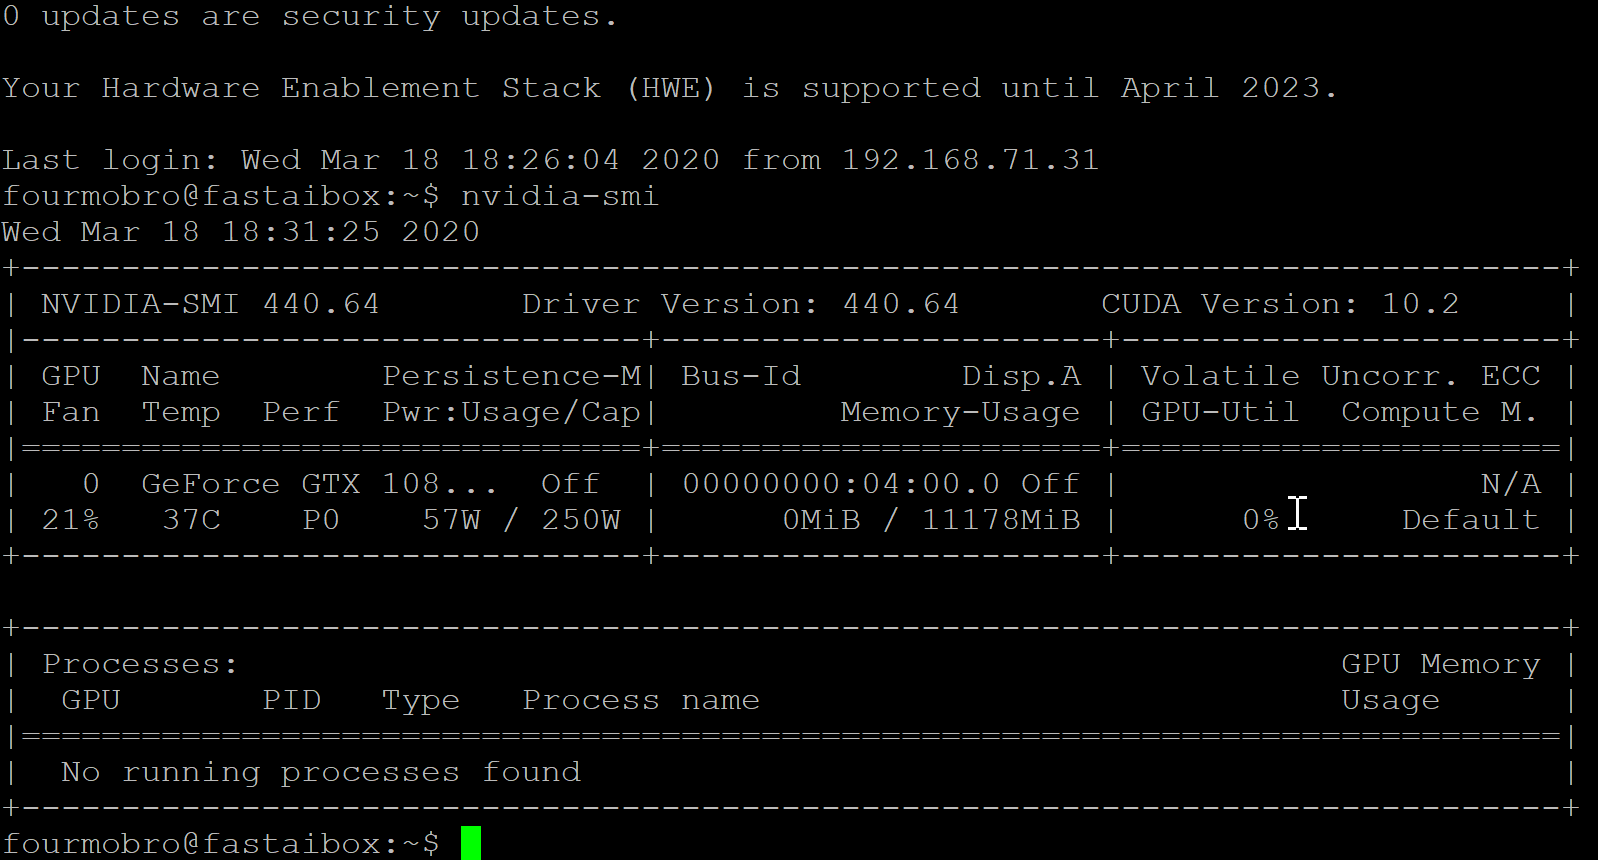
The first thing needed for Ubuntu are the drivers for the video card. You can easily check to see if your drivers are installed by executing the nvidia-smi command at the command line. As I had a clean install, there were no drivers installed. For this setup, I chose the version 440 drivers. Version 440.64 is what was installed using these commands:
sudo add-apt-repository ppa:graphics-drivers/ppa
sudo apt update
sudo apt install nvidia-driver-440
After a reboot, running nvidia-smi should show an image like the following
Do not proceed until this screen can appear.
2. Install Anaconda
With the GPU recognized by Ubuntu, we can now install Anaconda. Get Anaconda using this command
wget https://repo.anaconda.com/archive/Anaconda3-2019.10-Linux-x86_64.sh
Extract and install the download using
bash Anaconda3-2019.10-Linux-x86_64.sh
You will have to press ENTER and space a few times to accept the licensing agreement. The install will need a new shell access, so exit out and get a new terminal.
3. Create an environment for fastaiv1
Execute the following commands to create the fastaiv1 environment.
conda create --name fastaiv1
conda activate fastaiv1
Run these commands to install fastaiv1 and any dependencies. Click y or yes or whatever as needed to add the items (from fastai github readme)
conda install -c pytorch -c fastai fastai
conda uninstall --force jpeg libtiff -y
conda install -c conda-forge libjpeg-turbo pillow==6.0.0
C="cc -mavx2" pip install --no-cache-dir -U --force-reinstall --no-binary :all: --compile pillow-simd
conda install jupyter notebook
conda install -c conda-forge jupyter_contrib_nbextensions
4. Get the coursev3 data
I like to keep all my cloned data in a sub directory called “repos”. The instructions will reflect this.
mkdir repos
cd repos
git clone https://github.com/fastai/course-v3.git
5. Test the version 1 installation
For my setup, running Ubuntu server, I do not use a browser on the Ubuntu machine, so I do not start Jupyter notebook with one. I also port forward 8889 on the Ubuntu machine to my local host as port 8888. So the following command takes that into account:
jupyter notebook --no-browser --port 8889
Once the server is running, I can copy the link shown and paste it into my browser.
I will need to change the port number as shown below:
…and will be presented with the Jupyter Notebook screen
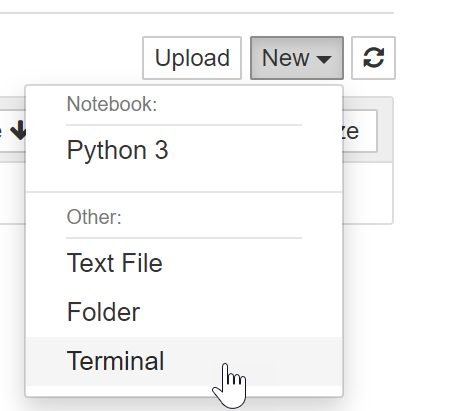
With the notebook server running, access to the terminal can be had by clicking New>Terminal as shown

Enter the following command if you would like to watch how the GPU is used during training of our models
watch -n 1 nvidia-smi
I suggest now opening the course-v3/nbs/dl1/lesson1-pets.ipynb notebook and run a few cells to verify the code is working
Once you get to the training part…
…you can switch over to the terminal tab to see if the GPU is being used by looking at the memory consumption
With fastaiv1 working with the exisiting notebooks, we can shut down the server and work on the fastaiv2 portion. Deactivate the fastaiv1 environment using
conda deactivate
6. Create the fastai2 environment
While still in the “repos” directory (create it if you did not do step 4) execute the following commands (from the fastai2 github page)
git clone https://github.com/fastai/fastai2
cd fastai2
conda env create -f environment.yml
conda activate fastai2
7. Install fastai2 and its dependencies (from the github page)
Run the following commands:
pip install fastai2
pip install nbdev
nbdev_install_git_hooks
conda install pyarrow
pip install pydicom kornia opencv-python scikit-image
8. Test the fastai2 installation
Start the jupyter notebook. Since this is a different environment, you will have to enter the key/password like before. You should see the new fastai2 folder like shown below.
Open the notebook as shown below from the fastai2 folders. This is a similar notebook to the one tested before.
The key difference is that some of the learn commands use the .to_fp16() option. My 1080ti card and I believe the 20 series cards can use this method, but other 10 series cards cannot, so be careful just running these notebooks as is.
9. Get the course v4 notebooks
With the fastai2 installation validated, you can now get the notebooks being used in version 4 of the course. Stop the server and change back to the “repos” directory. Run the following command:
git clone https://github.com/fastai/course-v4
Trying to run the first notebook in the repo will result in some errors. You will need to install a few more dependencies (credit to @zerotosingularity ):
pip install graphviz
pip install azure
pip install azure-cognitiveservices-vision-computervision
pip install azure-cognitiveservices-search-websearch
pip install azure-cognitiveservices-search-imagesearch
pip install "ipywidgets>=7.5.1"
pip install sentencepiece
pip install scikit_learn
You should be able to restart the notebook server, and see the new directory. The first notebook should now run without errors.
I hope this helps people running a local installation.


