Hello @kshitijpatil09 Thank you! for your response. Is it possible to use the saved model and test it on Images that were not used in the training. I was studying the inference learning. How do I go about this process
I’m not well versed with fastai v1. Could you be specific about which version you’re using ?
Im going through Practical Deep learning for Coders v3, yes I believe this is fastai v1
Yes you’d use Inference Learner. It’s covered in the second lesson, Jeremy shows an example but the key steps are:
learn.export('mymodelname.pkl)learn = load_learner('mymodelname.pkl)learn.predict('SomeFileName.jpg')
If we presume an image model
2 Likes
Thank You! Last question. In this lesson(image segmentation) you can see the prediction of the single image that you want the prediction for. Also in the training you can see the metrics. On a new test set using the loaded model is it possible to determine the accuracy of the prediction of the new image. I can visualize the metrics but what is the process of determining its specific accuracy
How do I get these images to show up in the notebooks? Thanks! 
Here’s an example from 00_notebook_tutorial.ipynb:

I was also not able to show them up in colab. Have you tried specifying the full path instead of absolute? Like /content/images/notebook_tutorial/add.png
Also, try replacing it with the html tag:
<img src="/content/images/notebook_tutorial/add.png" alt="add">
Hi deep-learner hope all is well!
Not sure how you loaded the notebook, but image directories often don’t get loaded automatically.
Have you checked the images are actually in that location by using the !ls -al command.
On Colab you can drag images into the correct directory and double click them to view them to confirm they are there.
cheers mrfabulous1 
Its better to first change the directory using !cd /content/drive/My Drive and then download the data
1 Like
did you get the solution? I’m facing the same issue
Hi! I have an “error” when running Lesson 2’s code.
I’ve copy and pasted the code into a new document and everything is fine except when I run the code to find the learning rate.
I run: learn.lr_find() and I get: 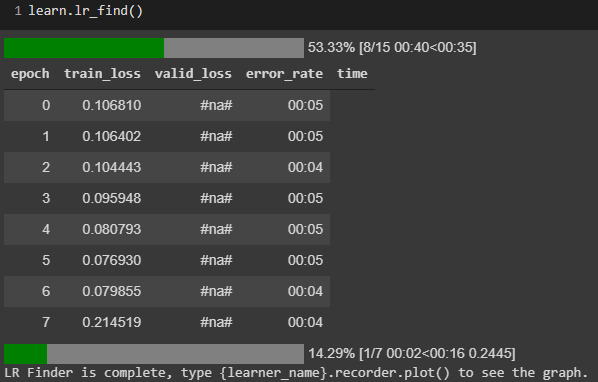
It’s just a bunch of #na#'s
The graph looks normal: 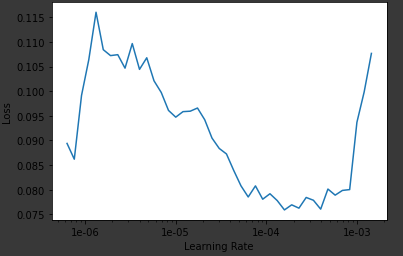
Is there something wrong with the code? Everything seems to be working fine except for the #na# part.
Thanks!
Hi joegold Hope your having a jolly day!
It is my understanding that the validation loss is not calculated when using lr_find() hence #na#.
Cheers mrfabulous1
1 Like
Heads up for Colab users:
To use PyTorch 1.6 in colab, you need to do the following (and when installing fastai):
!wget 'torch-1.6.0+cu101-cp36-cp36m-linux_x86_64.whl'
!pip install 'torch-1.6.0+cu101-cp36-cp36m-linux_x86_64.whl'
(then of course pip install fastai2, etc)
If you’re running CUDA 10.2 then you will need to replace the whl link (and filename) with:
https://download.pytorch.org/whl/cu102/torch-1.6.0-cp36-cp36m-linux_x86_64.whl and torch-1.6.0-cp36-cp36m-linux_x86_64.whl
3 Likes
This is no longer needed.
All that is needed in Colab is:
!pip install fastai2
(Colab now comes with PyTorch 1.6.0)
2 Likes
I guess until today it is still recommended, because some Colab instances still have “old” torch-1.6.0-cu101 that causes
Tesla T4 with CUDA capability sm_75 is not compatible with the current PyTorch installation.
Although PyTorch team has fixed it, the fixed binary (wheel) seems not being sufficiently replaced on Colab yet.
Hi there!
I had the same error when I cloned the git repo into my Google Drive and run the notebook in colab. It is because the images are stored in a different folder. You could mount your drive in colab and change the path. Or you can run the notebook from the git repo folder by using %cd in colab.
1 Like
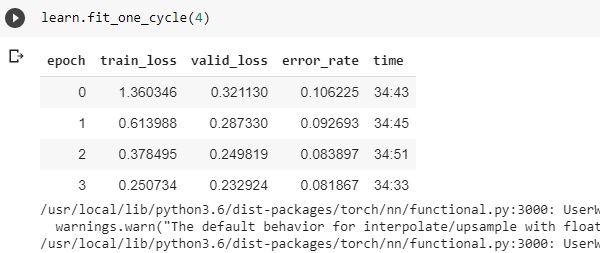
Hi guys,
I am using Colab, and it took about 34 minutes to train the model. I wander why?
You didn’t turn on GPU. Runtime->Change runtime type->GPU.
[quote=“jeremy, post:1, topic:28161”]
To spin up your server, run setup_colab and pass in your server token.
what should we do exactly?
i signed up on ngork , im seeing the token , i have signed up for colab too , i ran those two fns, how should i pass the token ? which is the token ?
setup_colab(1gGlGEsmDy6s2wabDL2vguRXvp7_5nKrNWbkKGgeeyXPCm4KT) i tried this on colab but im getting error
that’s really old. you don’t need that. it’s best to go by the server setup section at the start of the course.
i use this as the first cell in each notebook on colab.
!curl -s https://course.fast.ai/setup/colab | bash

from google.colab import drive
drive.mount('/content/drive')
drive_folder = "FOLDER_NAME"

from pathlib import Path
drive_root = Path("/content/drive/My Drive/")
drive_path = drive_root/"fastai-v3"/drive_folder
drive_path.mkdir(parents=True, exist_ok=True)

import warnings
warnings.filterwarnings('ignore')

import torch; assert torch.cuda.is_available(), "Turn on GPU"
- the first line makes sure everything is up to date.
- change drive_folder to a lesson or project name and it’ll give you somewhere to save models and other files so you don’t lose them when the runtime gets recycled.
- the warnings filter is for a pytorch issue which generates lots of warnings you can ignore, you won’t need that next week when fastai 2 comes out.
- the assert at the end makes sure you don’t forget to turn on gpu
3 Likes