Keeping existing (and relevant content with the discussions) here.
Basic steps
You can create a Azure Data Science VM with fast.ai either using the Azure Command Line Interface (CLI) or on the Portal. The Data Science VM has a host of preconfigured tools and GPU drivers to provide an easy startup experience. The CLI option also automatically installs fastai library, the fast.ai book and course notebooks.
Azure CLI
A simple script to create an Azure Data Science VM on NVidia K80 GPU and automatically install the fast.ai v2 library and notebooks has been created. You can tweak the script to choose other GPU types and Azure regions. The steps to follow are:
Click on the “Launch Cloud Shell” button below and follow any prompts to start an Azure Cloud Shell (Bash)
Press SHIFT-INSERT in Cloud Shell to paste the command and execute it. Follow the prompts.
If you want to customize the script you can find it on Azure’s Github repo here.
Now you can access the VM either through SSH or via Jupyterhub (https://[[Public IP Address of VM]]:8000. When you login to Jupyterhub, you will find the course-v4 directory, which contains the lesson notebooks for the fast.ai 2020 course.
Install fast.ai library and the fast.ai course notebooks. You can use this script as a reference.
Model Deployment and Serving
There is a separate topic describing how to deploy models to Azure as web services. Specifically the sample shows how to deploy to Azure Functions, the serverless infrastructure service.
Does Azure provide free credits for students?
– If you are a full time student and meet the eligibility you can signup for Azure Student account and get free credits (no credit card required).
Can I use subscription credits to pay for VMs?
– Not for Spot priced VMs, but you can use subscription credits such as the ones that come with Visual Studio subscriptions towards either full price or promo VMs
NOTE: The steps below have been incorporated into a basic script and the main instructions (top of this page) has been updated with steps to use script (which in turn uses Azure CLI) to spin up a GPU VM pre-installed with everything needed to run fast.ai v2 and the course notebooks. Keeping the post below in hope it will be useful to understand the rough steps.
You can also use Azure CLI to create a Spot VM on Azure (Step 1 of basic steps above). You can run it on your PC if you have Azure CLI or open Cloud Shell on Azure portal (first icon to right of the search box) and run the following 3 commands.
az group create --name fastai2 -l westus2
az vm create --name fastai2 -g fastai2 --image microsoft-dsvm:ubuntu-1804:1804:latest  --priority Low --size Standard_NC6 --eviction-policy Deallocate --storage-sku StandardSSD_LRS --admin-password "[[REDACTED]]"
az vm open-port --name fastai2 -g fastai2 --port 8000
You will see the public IP address to which you can SSH into OR connect to Jupyterhub (https://[[ipaddr]]:8000) pre configured on the Data Science VM. PS: I have redacted the password in command above. Please chose a password. The login to the DSVM will be user name on your PC.
We create a K80 GPU VM (Standard_NC6) in the command above. You can change the parameter if you want a different kind of VM type (CPU, more powerful GPU etc).
Hi, it might be a good idea to include instructions for Azure-ML (rather than DSVM) for those who want an experience that is more similar to Google Colab.
Thanks for the feedback. Will share with the team.
BTW - Azure ML is an End to end ML platform and not a direct comparison with Colab (beyond notebook support). The Jupyter notebooks functionality is available on both DSVM and Azure ML Compute instance out of the box and pre-configured. DSVM is unmangaed in the sense that a VM with preconfigured software for ML and data science is provided when you spin up an instance. Once you spin up the VM you have full administrative control over the VM and responsible to manage the configs and updates etc. One additional benefit of DSVM is that you can use Spot (or preemptable) instances which are much cheaper but you may be preempted with a few minute notice if there is demand from customers paying dedicated VM prices (your main disk state is preserved and you can pick backup later when a VM instance is available to be allocated).
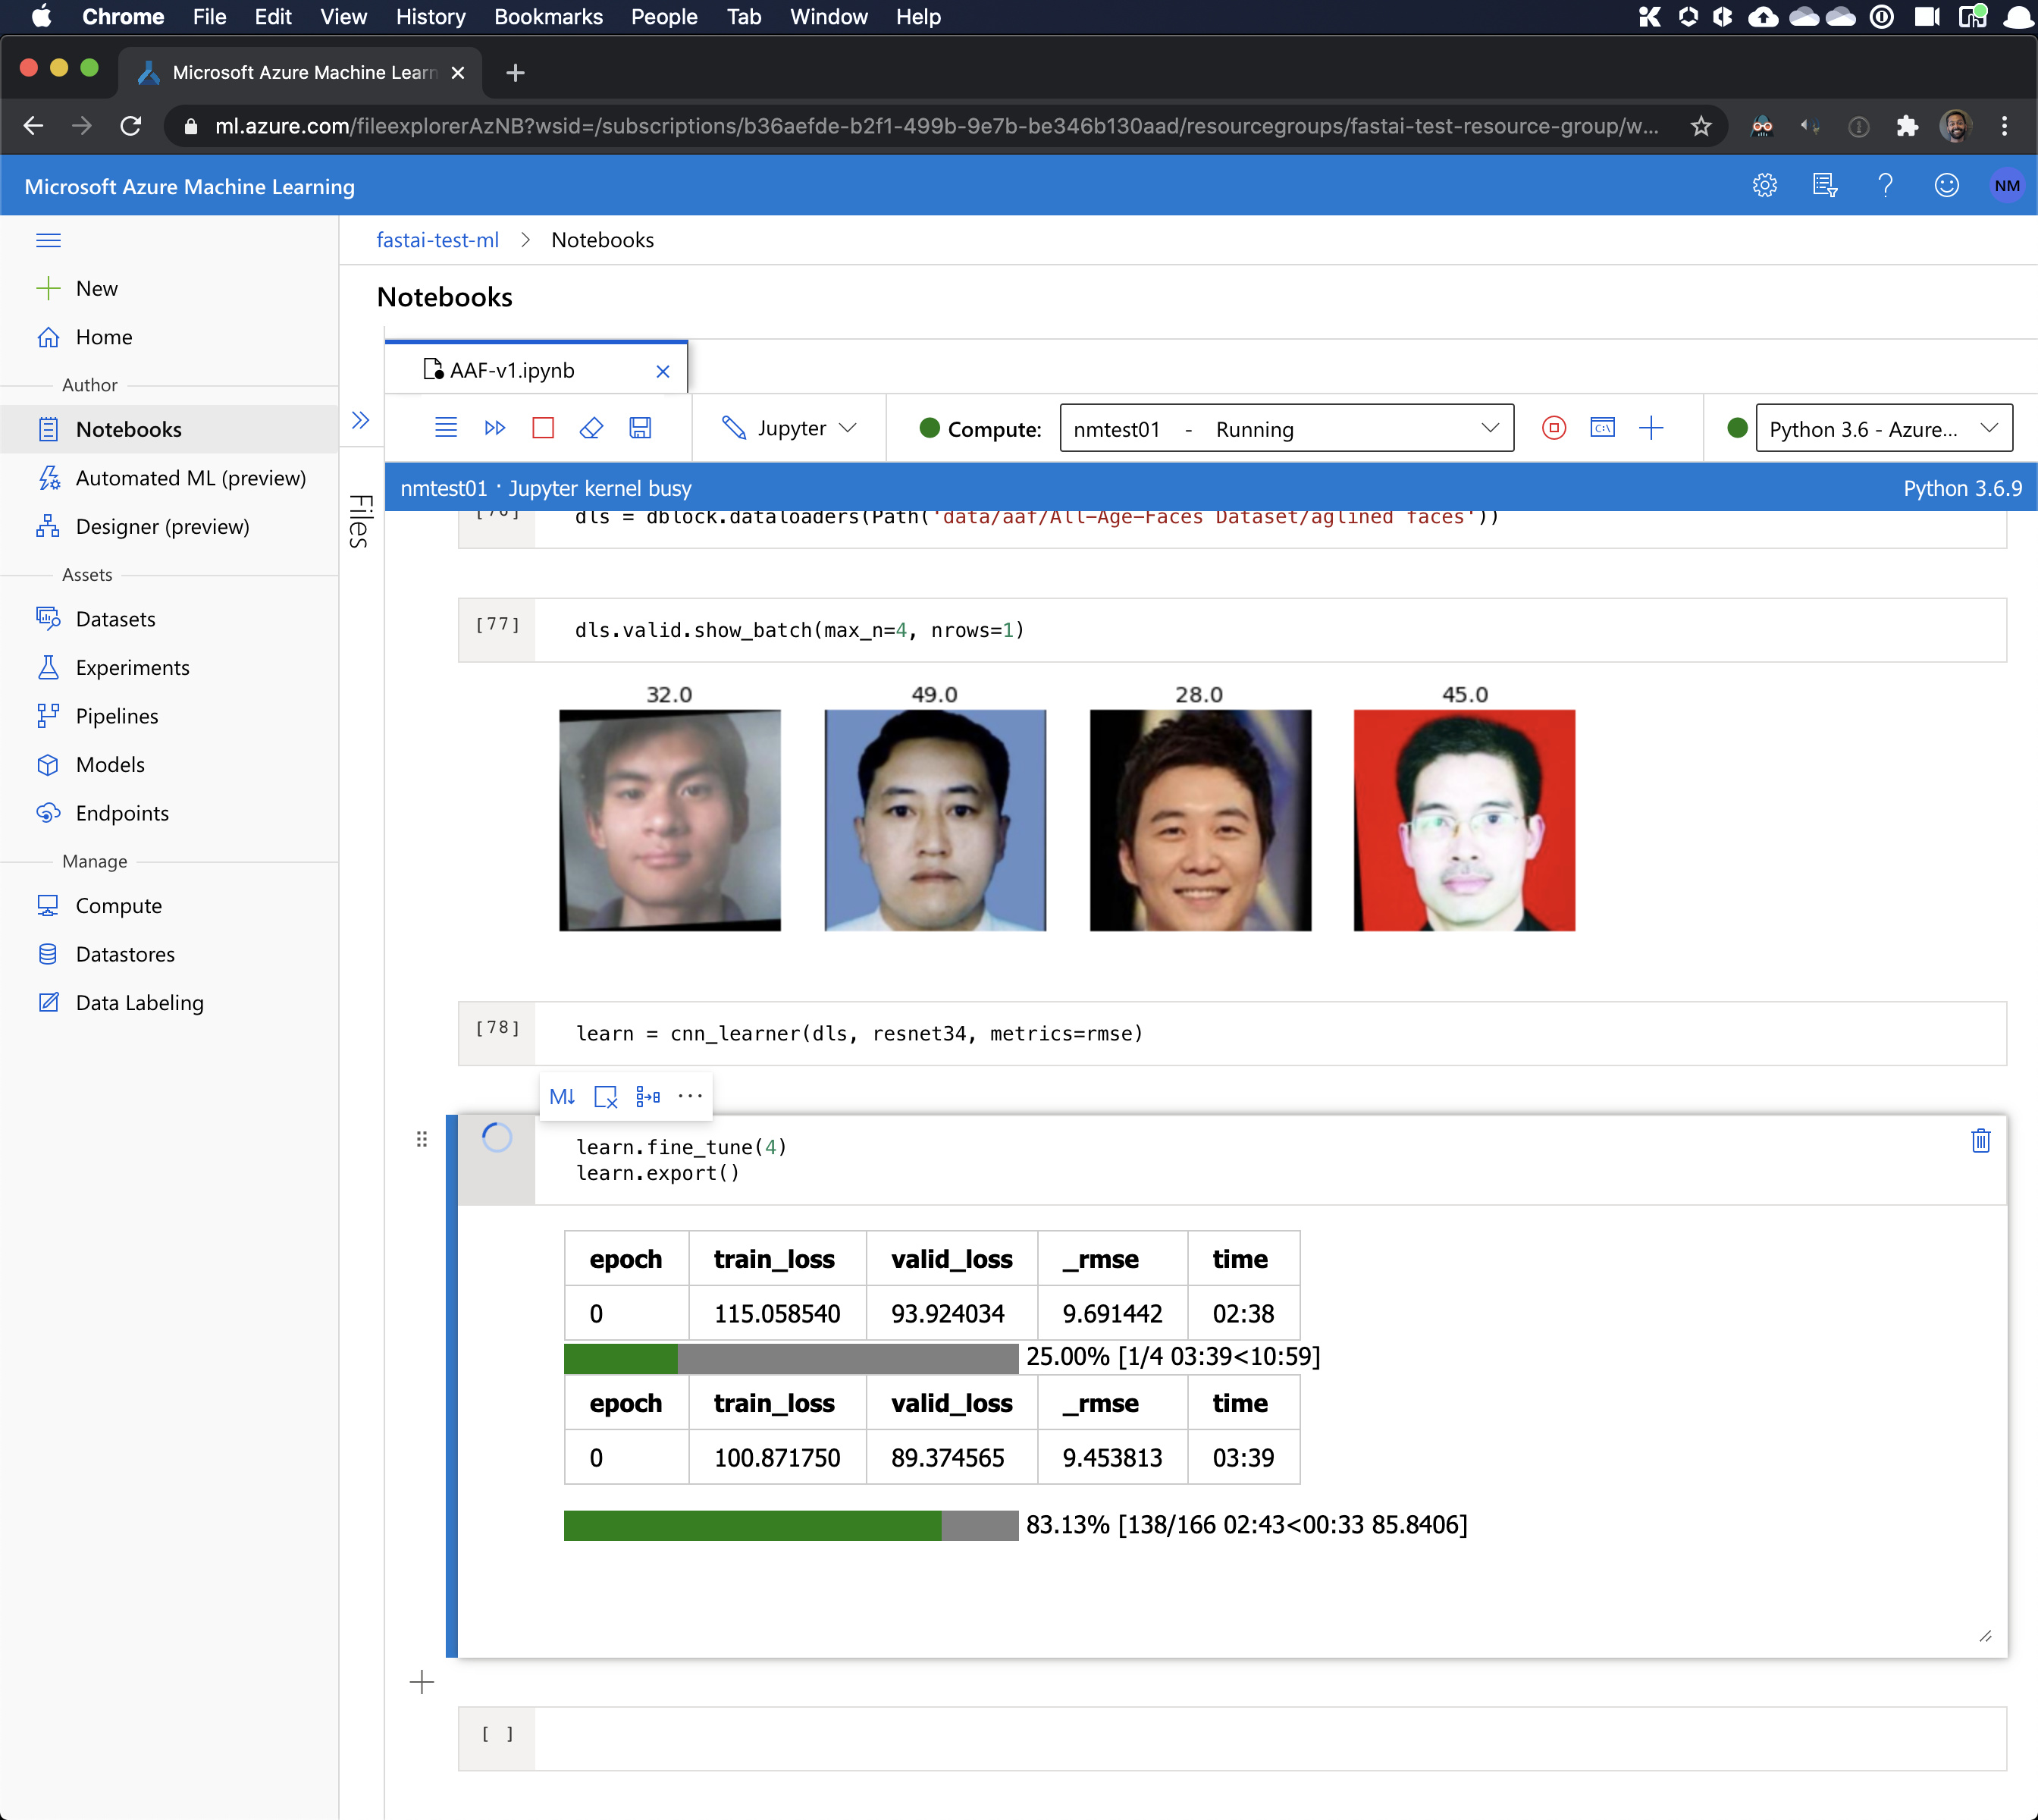
I keep running into this problem with Azure ML where my learning job gets stuck in the middle. I’m trying to train on a large-ish dataset of 10,000+ images. Here’s what I’m observing:
Execute the cell with learn.fine_tune() - see screenshot.
Observe the fastai progress bar making progress for a minute or so.
Step away from the browser for an hour or so.
4.a. Come back to observe that the fastai progress bar is stuck, but the wheel next to the Jupyter cell is still spinning and it says “Jupyter kernel busy” (see screenshot).
4.b. Come back to observe that the Azure ML session timed out and it says “Jupyter kernel idle” (sorry, don’t have a screenshot of this one).
Thanks in advance for any suggestions on how to debug this problem!
@jeremy - The instructions above use the Spot (Preemptable) instances that are considerable cheaper and available across different GPU families. The Promo instances is only for K80 GPU. Yes. For non Spot K80 instances Promo save quite a bit of money.