@zenlytix and @danielsc are official Microsoft representatives - but please don’t at-mention directly unless your question is specific to them individually, not to the service more generally (see the FAQ for details on this etiquette.)
Note that this is a forum wiki thread, so you all can edit this post to add/change/organize info to help make it better! To edit, click on the little pencil icon at the bottom of this post. Here’s a pic of what to look for:
Hi there - it seems the latest instructions for setting up a VM via Azure are out of date (i.e. the screen shots don’t align with the screen interfaces at azure, currently (15.2.2019). These are the instructions I’m referring to: https://course.fast.ai/start_azure.html
Is it possible to find that a new set of instructions that align to azure 2019?
Thanks @LikeMind. We will update the doc in the next few days. It should not have changed much as we captured all the screenshot 2-3 weeks back. Which specfic screenshot on that page did you notice the discrepancy.? In the meantime, let me know if the you have problem creating a Data Science VM.
For AWS: files are missing (I get errors stating "no such file or directory " when I run through the setup steps);
For Azure - the computer option is not available (I am in Australia, so perhaps that is the issue). And the costs are massive for the options that are available (e.g. $300 - $900 a month);
Next, I try Paperspace, but the notebooks don’t work either - I get errors stating “no such file or directory” when I run the lesson code (lessons 3 and 4);
I then tried Crestle. In the first attempt I could only get lessons 1 & 2. I opened up a new account and tried again, though, it seem Crestle now has quite a different folder structure to that from the set up instructions (e.g. courses-v3 doesn’t exist, rather it is just courses). Also, when I run the code in the notebook (lesson 4) I get the same errors as with alternative cloud providers: "no such file or directory ". Also with Crestle when I run the conda update (from the instructions) it states in the terminal “command not found”.
To that end is there another place to Crestle, Paperspace, Azure, AWS, etc. where I can get Fastai to work?
Alternatively, is there a new set of instructions that will be produced soon (assuming the instructions are out of date)?
Did you try in Australia East for Azure? There NC series of VM family is available. You can pick NC6 and for lower cost try preemptible instances. Also you can shutdown the virtual machine from portal (not just on the guest OS) when not in use. Billing is by minute of usage. Hope this option works.
Hi,
I’m using a Linux DSVM on Azure and everything went well until when, for lesson 2, I decided to update fast.ai library as indicated on “returning to work” section. Everything looks correct for the update but once on the notebook I obtained an error message: Import error: No module named ‘fastai’. I restarted all (kernel, vm) I rerun the update… nothing changed. Could you help on this issue? If not I will delete and recreate the vm but… Thank you and by the way, I really love this course
Hi Dan,
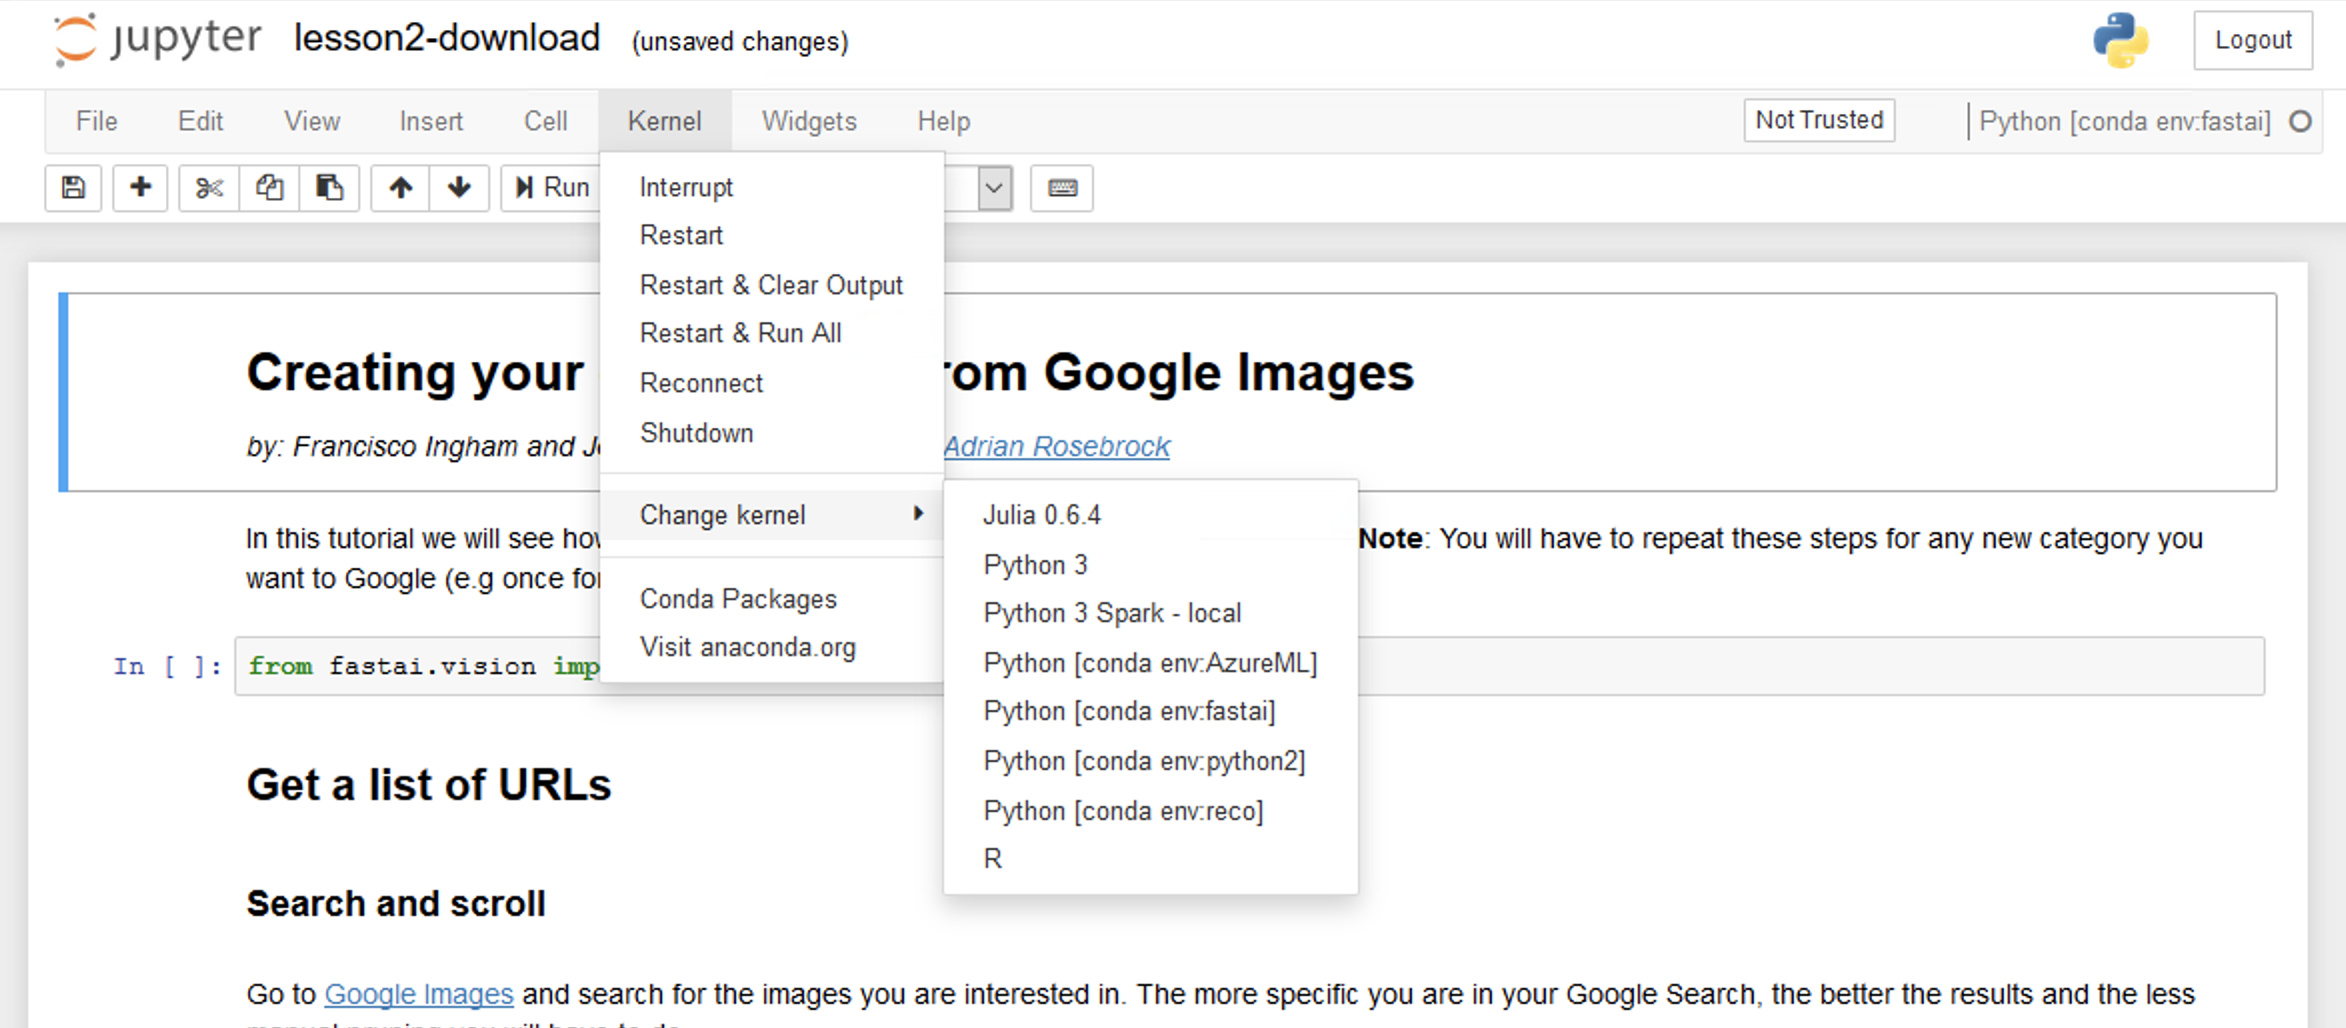
When you step through the notebook, are you seeing [conda env:fastai] in the top right? If not, please select the fastai kernel from the Kernel/Change kernel menu.
One more thing to note - if you refresh the notebooks, the metadata in the .ipynb file which stores which Jupyter kernel to use is lost. When we create the fastai environment on the Azure Data Science VM, we edit the metadata of the .ipynb to point to the correct kernel.The script used while provisioning the VM is on our github repo.
When I created my VM, there was no such kernel as fastai. In case anyone else is facing the same issue, I wrote this guide, which sets up a new fastai kernel. Here are the steps:
Setting up fastai on azure
First create an instance of Standard_NC6, (this is well documented in the docs). Make sure you choose username password as the authentication mechanism, otherwise, you’ll have to do some port-forwarding to use the jupyter notebooks, or you’ll have to enable authenticated access for them.
Ssh into the box: ssh your-username@your-azure-ip
You will land up in /home/your-username directory. (Check with pwd command).
I installed python3.7, since it was not installed by default, and fastai’s vision module does not work otherwise. (Correct me if I am wrong here. I couldn’t import fastai.vision on python3.5 after doing pip install fastai from a python3.5 venv):
First, install libffi-dev: sudo apt-get install libffi-dev If you don’t install this, you’ll get some errors later on.
Download python: cd /usr/src && sudo wget https://www.python.org/ftp/python/3.7.2/Python-3.7.2.tgz
Change version of python 3.7.2 with whatever is the current one.
Extract the tar: sudo tar xzf Python-3.7.2.tgz
Compile python source: cd Python-3.7.2 sudo ./configure --enable-optimizations sudo make altinstall
Check python version: python3.7 --version
After python3.7 is installed, it is time to make a virtual env. I am gonna do it in folder called python-envs (mkdir python-envs), and name it fastai.
Activate the environment, and install fastai: source ~/python-envs/fastai/bin/activate (To deactivate it, just enter the deactivate command) pip install --upgrade pip pip install fastai
At this point, your fastai is set up. Now for jupyter notebook.
Notebook setup
First, ensure that you have activated the fastai virtual env.
Install ipykernel. This will be used for registering a fastai kernel. pip install ipykernel
Create a fastai kernel. I name mine to fastai. ipython kernel install --user --name=fastai
On your browser, go to https://«ip address»:8000
Now, when you try creating a new kernel, you’ll see fastai in the options.
Getting fastai notebooks: Use cuRL to download them from their repository
You are absolutely right, I did not click the link to the template. I thought that I was just required to create a Standard NC6 instance, and then set it up on my own. Feels like the above template could have saved an hour.
On the bright side, at least I now know how to set it up from scratch, so that’s something
i tried setting up the fastai virtual machine as the docs say, but couldnt get it to work so far. I can get the server running etc, but starting the RDP or the notebook does not work at all. It seems that the VM does not have a GUI installed (?). I did use the dsvm provided in the tutorial though. Are there any additional steps that must be taken, so that the jupyter notebook is usable?
The Jupyterhub service is running by default on the DSVM on Port 8000 (https only) and pre-configured . You can access the jupyter on DSVM by connecting to the jupyterhub port from a browser from anywhere.(like your PC / laptop).
I was able to get a machine set up following the Tutorial linked in the original post. I set up a preemptable linux VM using the template, which worked AFTER I changed to a Pay-As-You-Go subscription (noted in the tutorial, but I missed it the first time - under the free trial you can’t get a GPU or greater than 4 CPU cores and template system has 6). The error messages before I made that change were pretty cryptic, so I’m posting this in case it helps someone else.
I can’t seem to confirm the price of $0.18 per hour, but if that holds then this is a great option.
I have used the template link (Linux version), however I receive an internal server error (500) when logging in via the browser (https://<external-IP:8000). Login is succesfull but then I receive an internal server error. Any suggestions guys?
There is wierd bug(or feature!) where jupyterhub Auth will return a 500 error if your username has uppercase alphabets. You can SSH to the machine and create another user with only lowercase. Password can have mixed cases.

 Thanks!