The following is a guide for setting up a Jupyter notebook for the fast.ai course v4. It assumes you already have an AWS account setup. If you do not then follow the instructions here to create and activate your AWS account.
- Launch Jupyter notebook instance with AWS CloudFormation
We will create a SageMaker Notebook Instance providing us the Jupyter notebook to run the course exercises by using AWS CloudFormation. To launch the CloudFormation stack click the Launch Stack link for the closest region to where you live in the table below.
| Region | Name | Link |
|---|---|---|
| US West (Oregon) Region | us-west-2 | Launch stack |
| US West (N. California) Region | us-west-1 | Launch stack |
| US East (N. Virginia) Region | us-east-1 | Launch stack |
| US East (Ohio) Region | us-east-2 | Launch stack |
| Canada (central) Region | ca-central-1 | Launch stack |
| Asia Pacific (Tokyo) Region | ap-northeast-1 | Launch stack |
| Asia Pacific (Seoul) Region | ap-northeast-2 | Launch stack |
| Asia Pacific (Singapore) Region | ap-southeast-1 | Launch stack |
| Asia Pacific (Sydney) Region | ap-southeast-2 | Launch stack |
| Asia Pacific (Mumbai) Region | ap-south-1 | Launch stack |
| Europe (Ireland) Region | eu-west-1 | Launch stack |
| Europe (London) Region | eu-west-2 | Launch stack |
| Europe (Frankfurt) Region | eu-central-1 | Launch stack |
You should see a screen like the following. Select the Instance Type you want (ml.p2.xlarge has a single Nvidia K80 GPU or the ml.p3.2xlarge with the Nvidia V100 GPU). You can also customize how much disk space you want. The default setting is 50 GB.
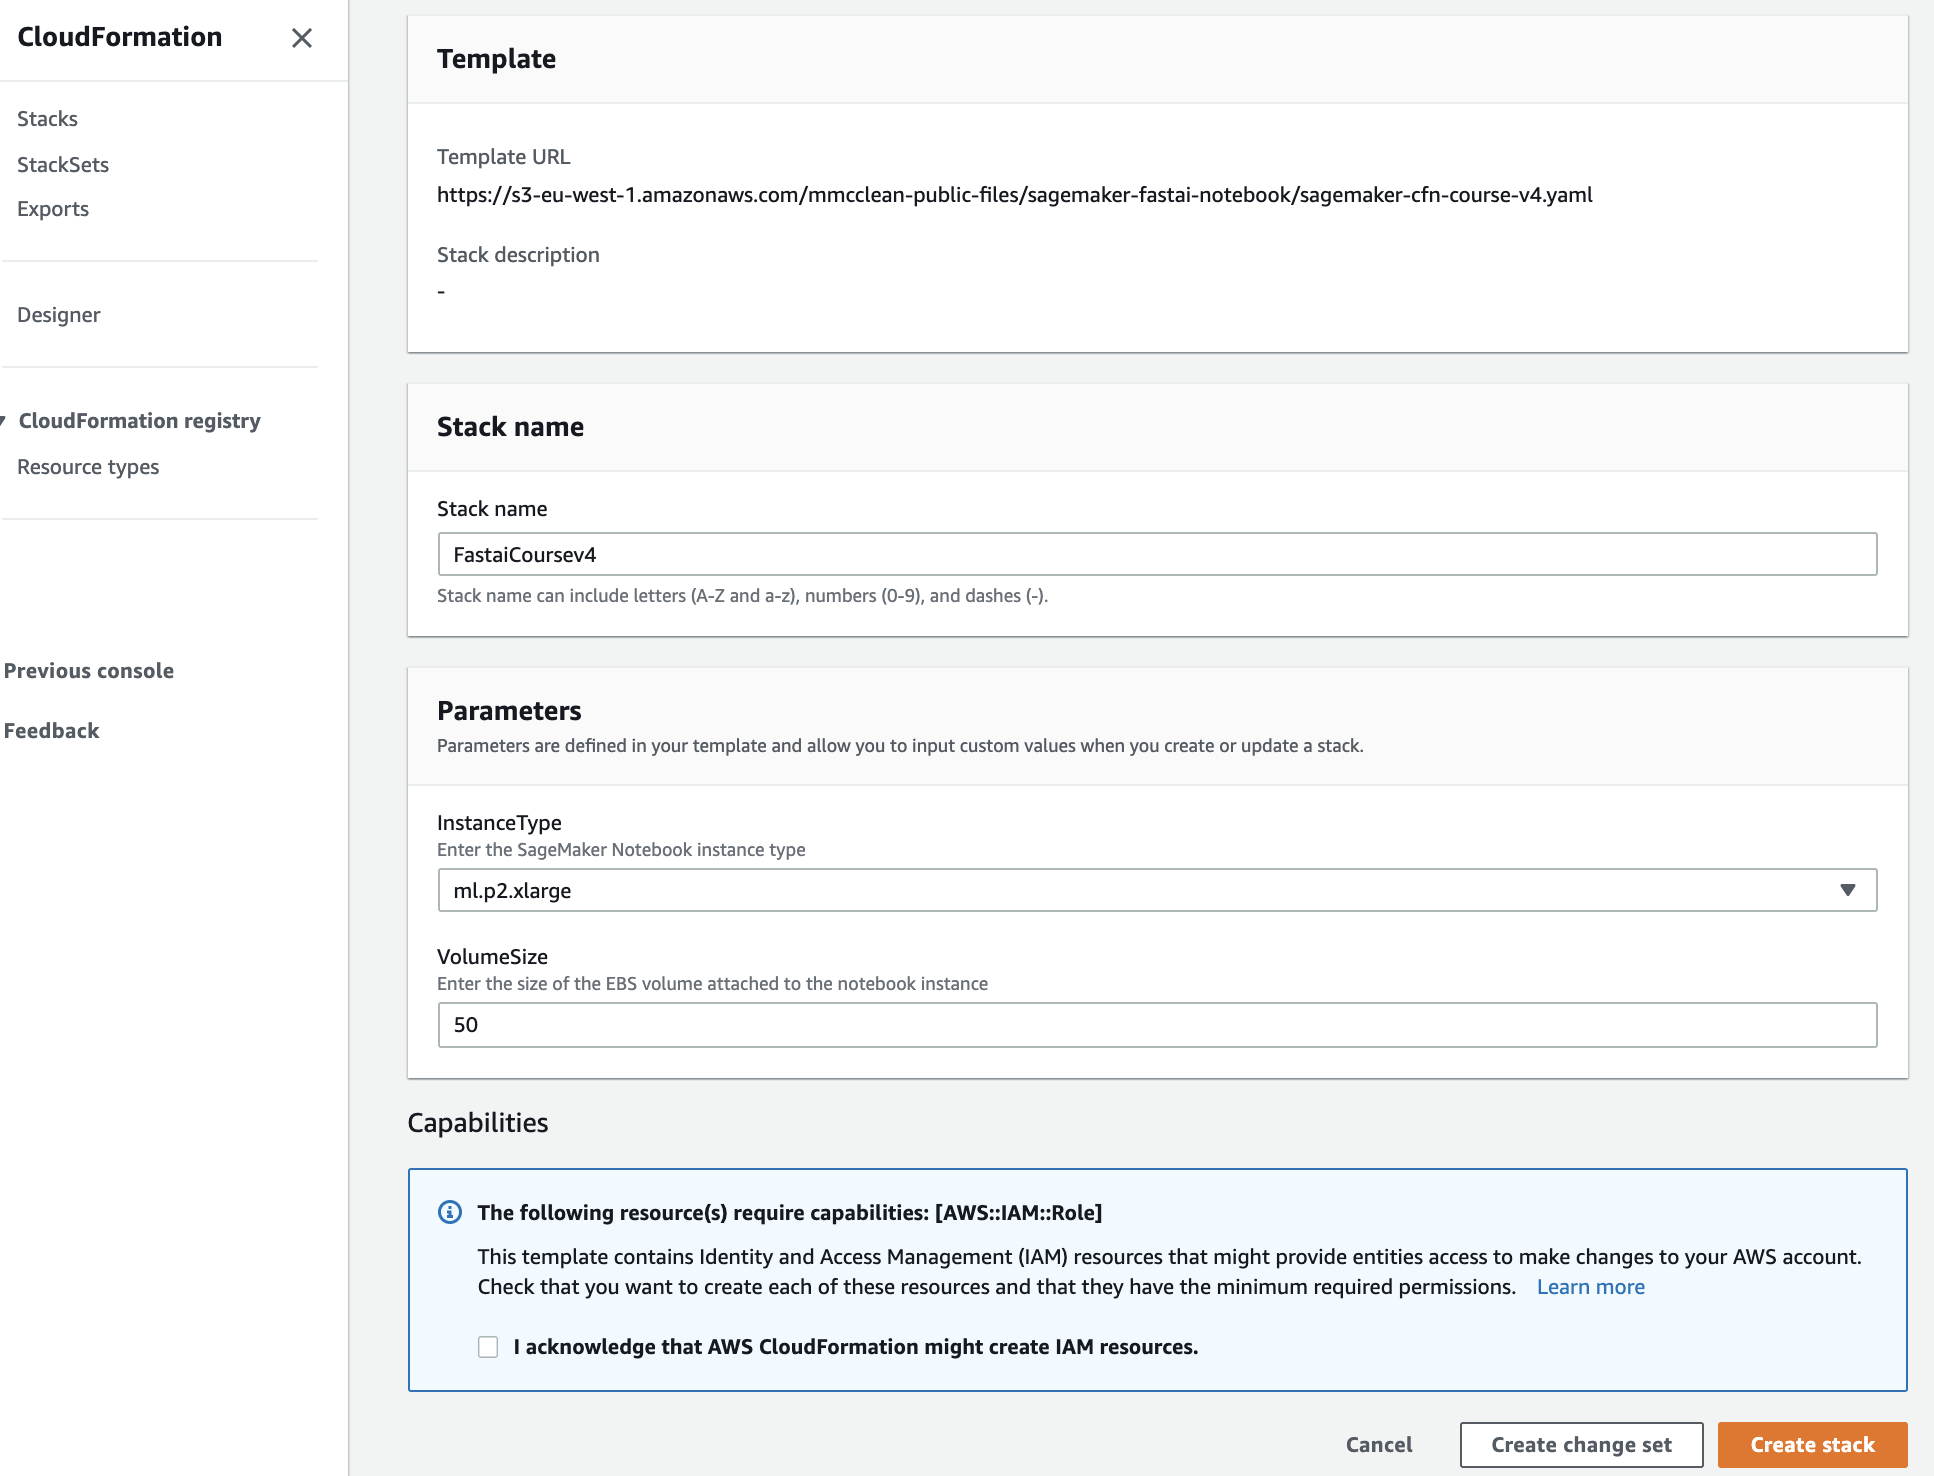
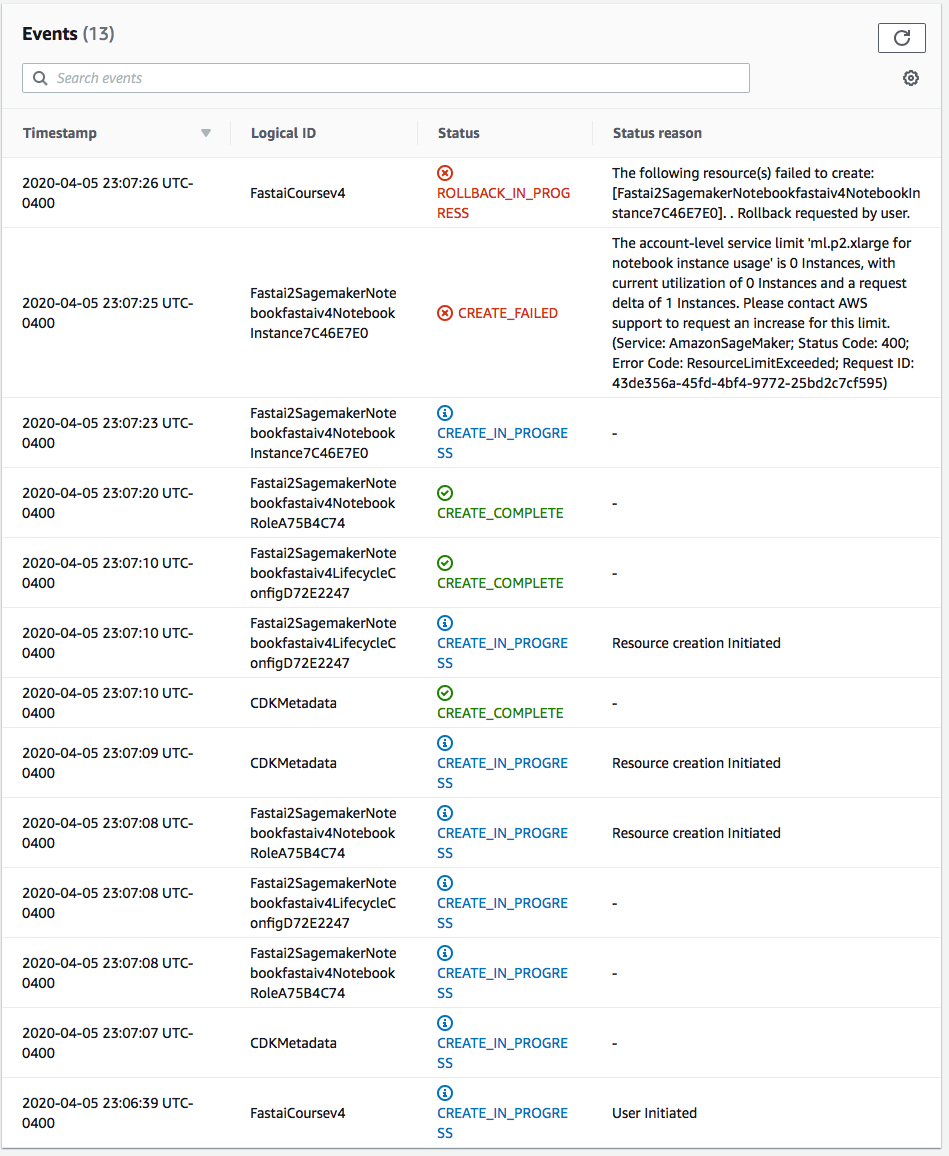
Check the tickbox I acknowledge that AWS CloudFormation might create IAM resources. and click the Create stack button to provision the needed resources. You should be taken to the CloudFormation page where it shows that the stack status is CREATE_IN_PROGRESS. Wait for the stack status to change to CREATE_COMPLETE.
- Open the SageMaker web console
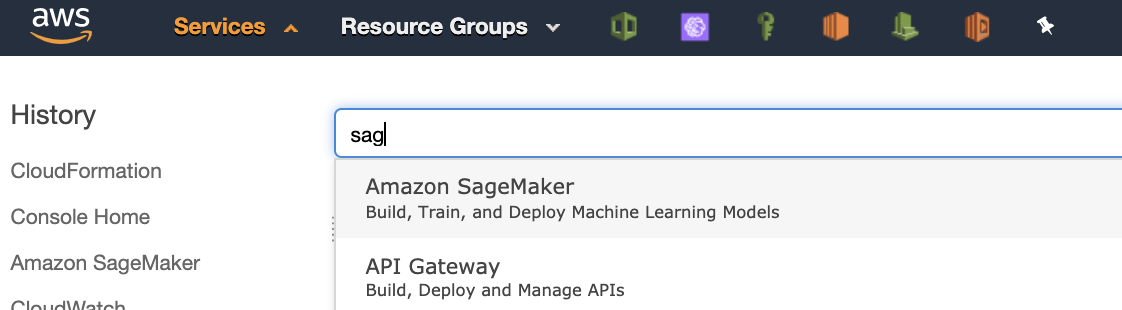
Open the SageMaker web console by selecting the Services menu item at the top left hand side of your AWS web console and entering the text “Sage” and then selecting the option Amazon SageMaker like the screenshot below.
- Open the Jupyter Notebook
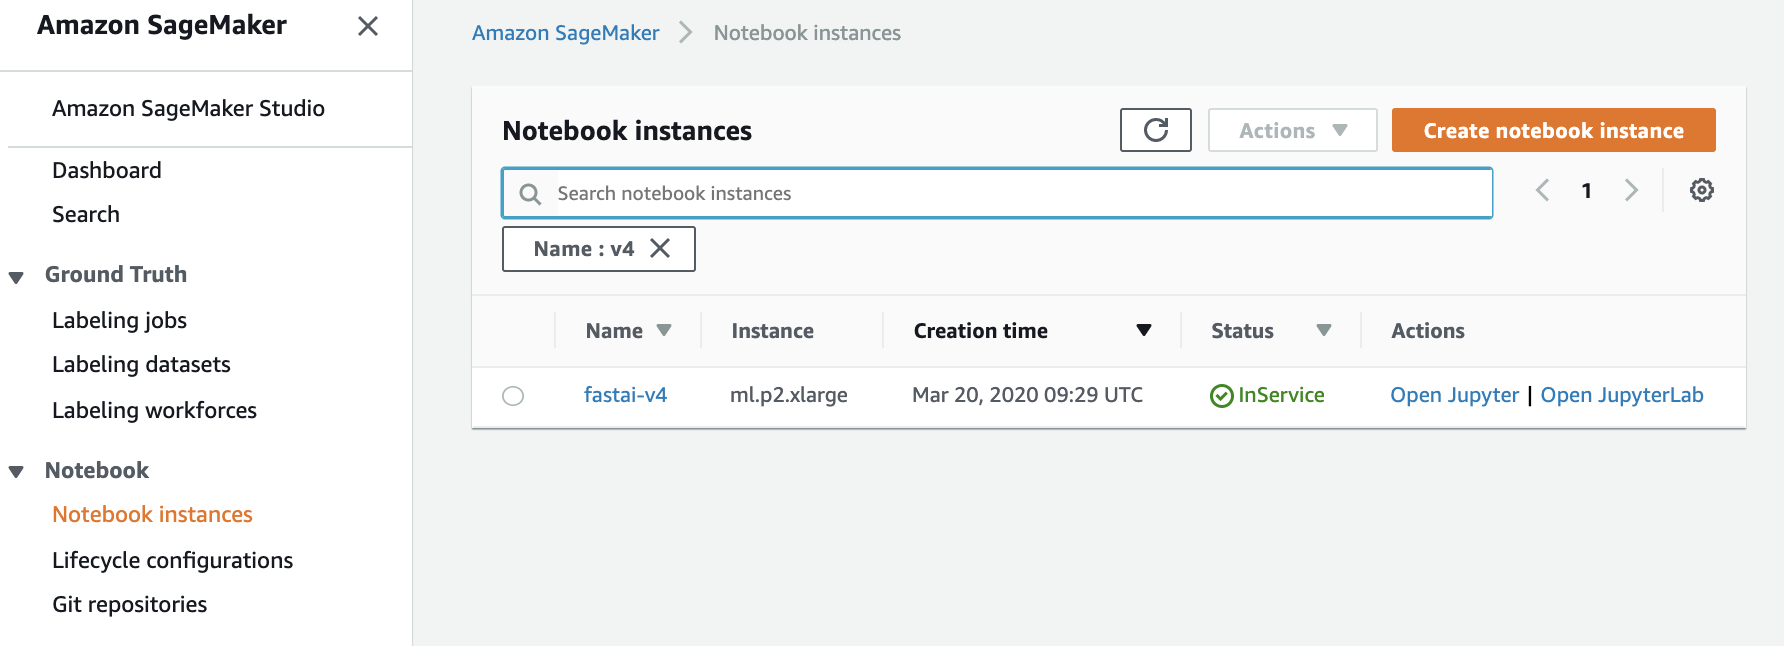
On the left navigation bar, choose Notebook instances. This is where we create, manage, and access our notebook instances. You should see that your notebook instance named fastai-v4 status has the status InService as per the screenshot below. Click the link Open Jupyter link.
The first time the notebook instance is created it will install all the fastai2 libraries and dependencies which can take around 10 min.
- Open fastai v4 course notebooks
Once you click the Open Jupyter link you will be redirected to the Jupyter notebook web interface with the course notebooks already installed.

The first time you open any of the notebooks you will be asked to select the Jupyter kernel. Select the kernel named fastai2 in the drop down selection like the screenshot below and click the Set Kernel button.
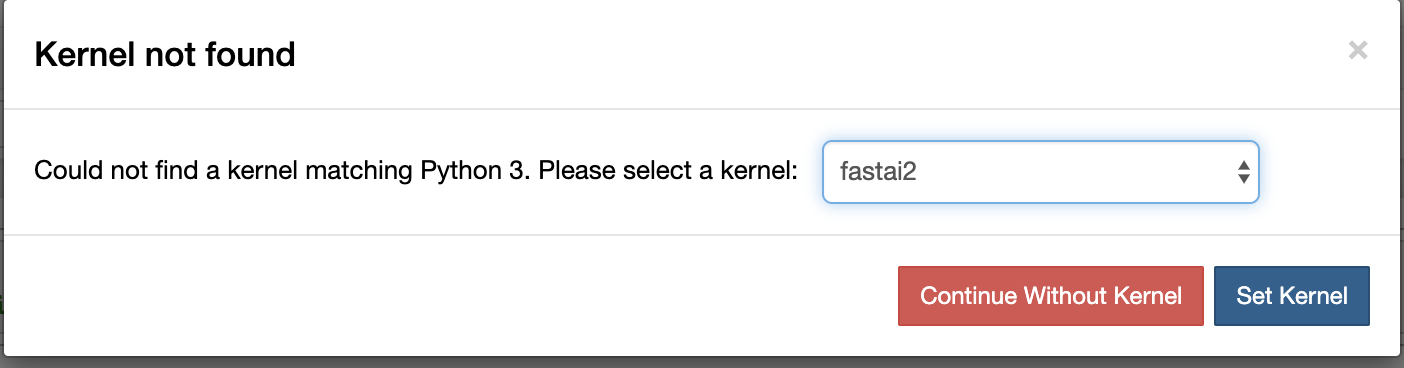
If you do not see the option fastai2 then the fastai libraries and dependencies have not finished installing. Wait up to 10 min for this to complete, refresh the page and try to select the fastai2 kernel.
- Stop notebook instance when finished exercises
Please remember to stop your notebook instance when you have finished running the course notebooks as you will be charged by the hour if they are running. To do this select the notebook instance and select the Stop action like the screenshot below.

- Restarting the notebook instance
When you want to go back to the notebook exercises just select your notebook instance you can select the action Start, wait a few min and pick up where you left off. It will take less time to setup as the fastai libraries have already been installed and the notebooks will be saved.