#CUDA 8.0 using CuDNN 6.0.20 on Python 3.6 on Ubuntu 16.04 LTS
Please find below the complete package build-out for PYTHON 3.6 using a GPU, using anaconda3, assuming Ubuntu 16.04 LTS on a clean install. This is now more an interactive build-out for a home server not AWS, I have removed a lot of unrequired pieces just to get you going. I have not spun this up yet on the modified Py3 code but it throws out all the usual messages expected of an operating CUDA GPU build that I can see. For any amendments please notify me I will change it. I didn’t have much to say on the jupyter notebook section, its quick and simple, no fancy sha hash keys or certs etc.
###Install Ubuntu 16.04 LTS on your machine running a Nvidia GPU then…
###Open terminal and copy n paste linux commands.
###INSTALL SSH OPENSERVER
sudo apt-get install openssh-server
sudo service ssh status
###ctrl-c to get out
###locate your ip address and write it down to use on your PC/Mac to login to lab remote.
ifconfig
###log into your lab machine using a e.g. PC and ssh to lab machine i.e. ssh your-remote-name@your remote-ipaddsress
e.g ssh fred@192.168.1.5
###ensure system is updated and has basic build tools as below.
sudo apt-get update
sudo apt-get --assume-yes upgrade
###install Anaconda3 for Python3 for current user (interactive)
cd downloads
curl -O https://repo.continuum.io/archive/Anaconda3-4.3.1-Linux-x86_64.sh
sha256sum Anaconda3-4.2.0-Linux-x86_64.sh
###Check SHA256 key
https://docs.continuum.io/anaconda/hashes/Anaconda3-4.3.1-Linux-x86_64.sh-hash
###Follow the prompts…
bash Anaconda3-4.3.1-Linux-x86.sh
source ~/.bashrc
sudo apt-get --assume-yes install software-properties-common
###download and install CUDA and GPU drivers
wget “http://developer.download.nvidia.com/compute/cuda/repos/ubuntu1604/x86_64/cuda-repo-ubuntu1604_8.0.61-1_amd64.deb” -O "cuda-repo-ubuntu1604_8.0.61-1_amd64.deb"
sudo dpkg -i cuda-repo-ubuntu1604_8.0.61-1_amd64.deb
sudo apt-get update
sudo apt-get -y install cuda
sudo modprobe nvidia
nvidia-smi
###Download the cuDNN 6.0 from nvidia developers website https://developer.nvidia.com/1, you will need an account, sign up. Obtain the files for Linux cuDNN 6.0 for CUDA 8.0 and place that in your ~/Downloads folder.
#INSTALL cuDNN 6.0
tar -zxf cudnn-8.0-linux-x64-v6.0.tgz
cd cuda
sudo cp lib64/* /usr/local/cuda/lib64/
sudo cp include/* /usr/local/cuda/include/
###reboot system
###Check CUDA…
cd /usr/local/cuda/samples/1_Utilities/deviceQuery
sudo make
./deviceQuery
###…prints output of your nvidia GPU card
###configure theano to use GPU
echo “[global]
device = cuda0
floatX = float32
[cuda]
root = /usr/local/cuda” > ~/.theanorc
###Modify keras.json to use Theano by changing ‘tensor flow’ to ‘theano’
cd ~
nano .keras/keras.json
{
“floatx”: “float32”,
“epsilon”: 1e-07,
“backend”: “theano”,
“image_data_format”: “channels_first”
}
###We better test this rig….
python
Python 3.6.0 |Anaconda custom (64-bit)| (default, Dec 23 2016, 12:22:00)
[GCC 4.4.7 20120313 (Red Hat 4.4.7-1)] on linux
Type “help”, “copyright”, “credits” or “license” for more information.
">>>import keras"
Using Theano backend.
WARNING (theano.sandbox.cuda): The cuda backend is deprecated and will be removed in the next release (v0.10). Please switch to the gpuarray backend. You can get more information about how to switch at this URL:
https://github.com/Theano/Theano/wiki/Converting-to-the-new-gpu-back-end(gpuarray)
Using gpu device 0: GeForce GTX 1080 Ti (CNMeM is disabled, cuDNN 6020)
/home/sl/anaconda3/lib/python3.6/site-packages/theano/sandbox/cuda/init.py:631: UserWarning: Your cuDNN version is more recent than the one Theano officially supports. If you see any problems, try updating Theano or downgrading cuDNN to version 5.1.
warnings.warn(warn)
ctrl-z
###configure jupyter notebook and prompt for password and remember it!
jupyter notebook --generate-config
###make a password
python -c “from notebook.auth import passwd; print(passwd())”
###we will start jupyter notebook as follows on the local and remote machines
Do this from the Local first ( the machine with the GPU running the labs):
jupyter notebook --no-browser --port=8889
###Do this from the remote machine say PC or MAC - you will need to modify the name and ip address to suit
ssh -N -f -L localhost:8888:localhost:8889 remotename@remoteipaddress
If you have strange issues check the ports are not in use by another process on your MAC e.g.
ps aux | grep localhost:8889
###if you have used the remote machine before for ssh you will need to get into the localhost file on the PC or MAC and erase the SHA keys against previously used local machines IP addresses.
###on your pc or mac open a browser and type:
localhost:8888
…OK now you will run the NBS course Lesson 1. Keep in mind this is now Python3 and it will throw code errors due to differences between the lesson 1 notebooks that used Python2 and Python3 which need modifying. There are a few posts on this from @Robi @EricPB @kzuiderveld etc.


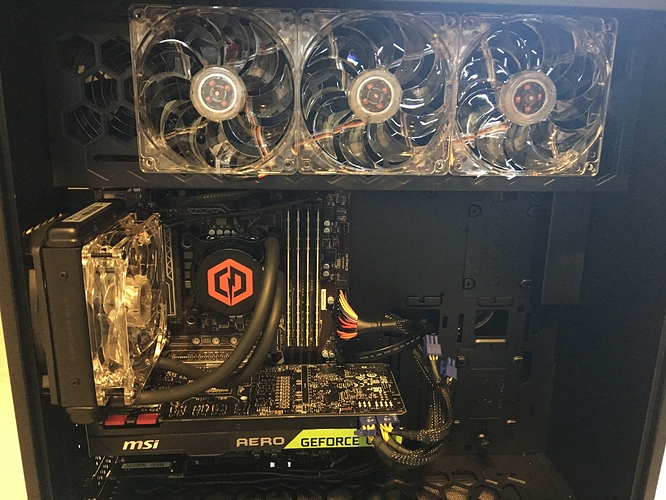
 I could then later go for a custom build server. This would be for learning deep learning and perhaps do some kaggle competitions for fun.