Today is June 21, 2018,
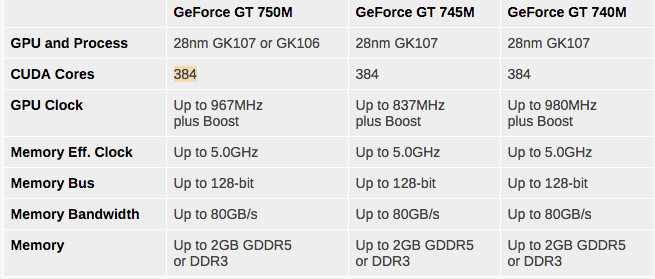
I’d like to have the environment installed in my MacOSX, which has the NVIDIA GeForce GT 750M, which has 384 CUDA Cores… according to this: https://www.anandtech.com/show/6873/nvidias-geforce-700m-family-full-details-and-specs/2
Then when executed the command: conda env up, the error shown was
ResolvePackageNotFound:
- cuda90
Did a google search found this page seems like FastAI does not support MacOSX, according to the @jeremy https://github.com/fastai/fastai/issues/84
Honestly is quiet frustrating not be able to run this locally having the hardware capable… I haven’t give up yet… keep search on CUDA for MacOSX and found this
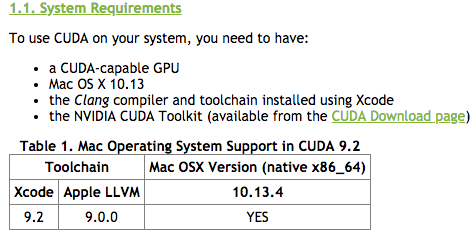
https://docs.nvidia.com/cuda/cuda-installation-guide-mac-os-x/index.html
The guide shows how to install the CUDA for MacOSX for C/C++ development after all the hardware is CUDA capable
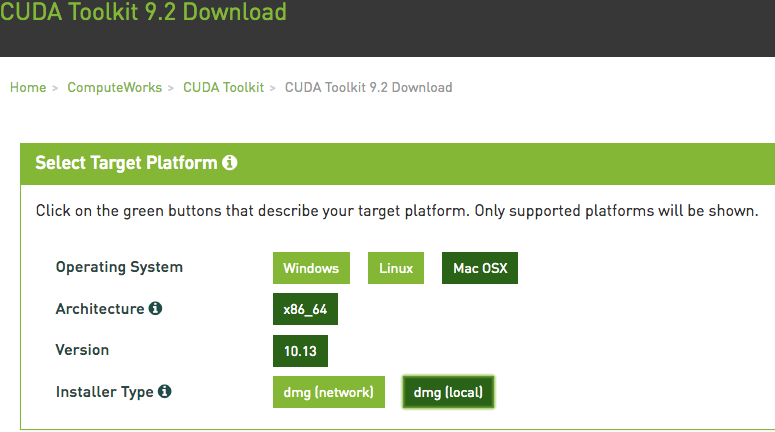
Here you download the CUDA toolkit for MacOSX
https://developer.nvidia.com/cuda-downloads
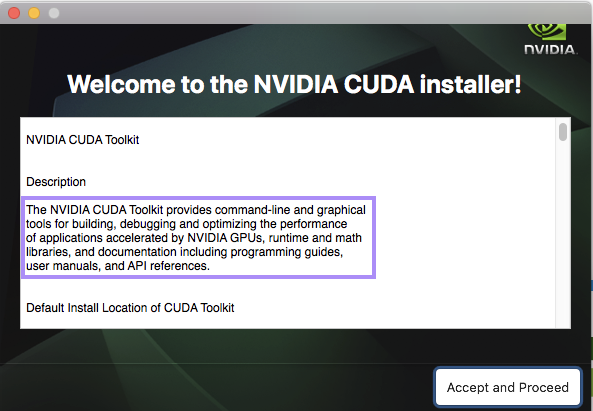
Installation screen of CUDA Toolkit on MacOSX
It is possible to make use of the CUDA Cores on MacOSX at least from C/C++, I think that what we are missing is the Python library that leverages the NVIDIA CUDA Toolkit libraries and tools for MacOSX version
My wonder right now is… Why hasn’t been release this Python Cuda90 library for MacOSX?
I keep searching on google: cuda python development on mac and found this:
NUMBA Project
http://numba.pydata.org/
Through this approach using http://numba.pydata.org/, Numba from their mainpage: “Numba works by generating optimized machine code using the LLVM compiler infrastructure at import time, runtime, or statically (using the included pycc tool). Numba supports compilation of Python to run on either CPU or GPU hardware, and is designed to integrate with the Python scientific software stack.”
Then I think the first comment by @piotr.czapla is no longer valid, MacOSX with capable GPU Cuda capable exists today… and is possible to have Python to rely on Cuda using Numba project… although is another story for how to integrate this into FastAI infrastructure any time soon… but the idea I’m trying to transmit is that this bridge is feasible… but not sure how to approach… maybe @jeremy can give more advise up to date with this?
Thank you.
UPDATE:
I haven’t get an answer and haven’t give up.
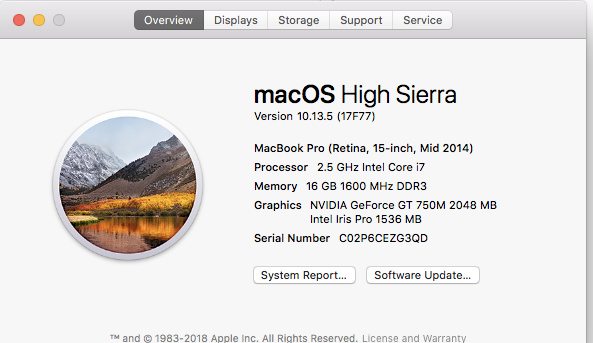
I have managed to compile pytorch for my computer in the hope of get CUDA support. I followed all the instructions for MacOSX detailed here: https://github.com/pytorch/pytorch to compile from the cloned git repo, and I was able to compile, without error. the compilation took around 45 minutes on my Machine specs:
If you manage to go to this page:
http://www.nvidia.com/Download/index.aspx?lang=en-us to Download the Drivers for the Video Card… it seems like they are unavailable for MacOSX , ahh!!!
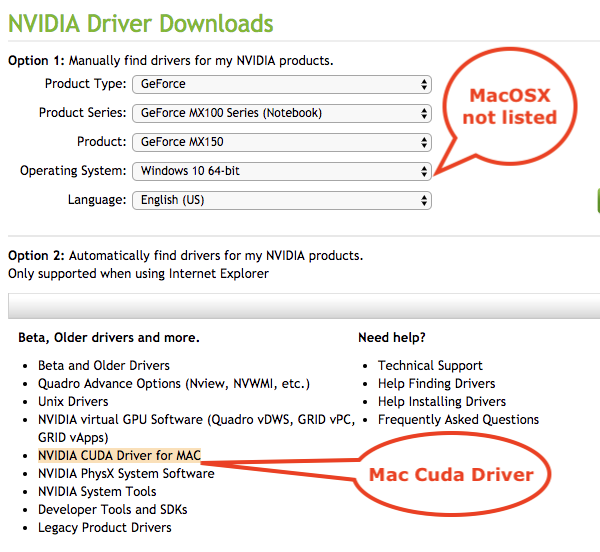
Then go to the NVIDIA CUDA Driver for MAC Link shown…
http://www.nvidia.com/object/mac-driver-archive.html
Then click on the last version
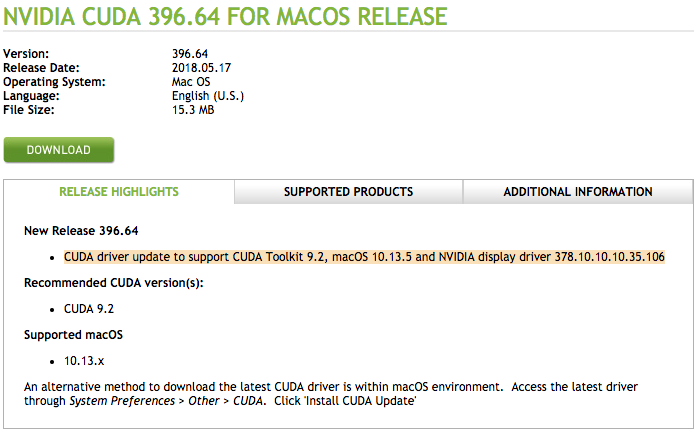
After install on my machine I’ve got this “nice” update required splash screen, which is shown every time you reboot:
The driver for the CUDA is installed but the driver for the video GPU is outdated …
Then I keep searching on google following term: geforce gt 750m driver mac, found this link:
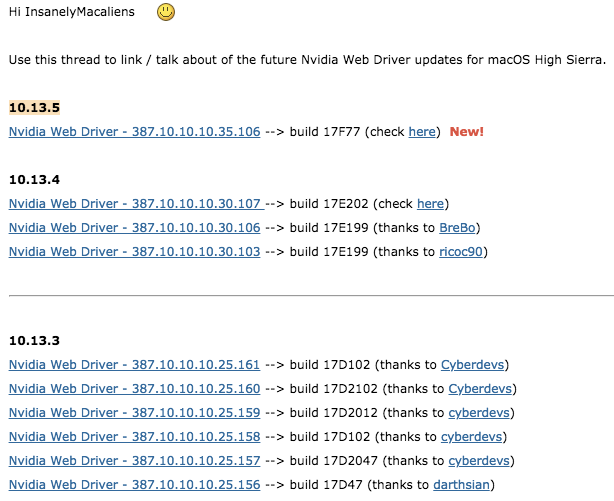
My MacOSX version 10.13.5 this link is the direct download page, which is this
http://www.nvidia.com/download/driverResults.aspx/134834/en-us
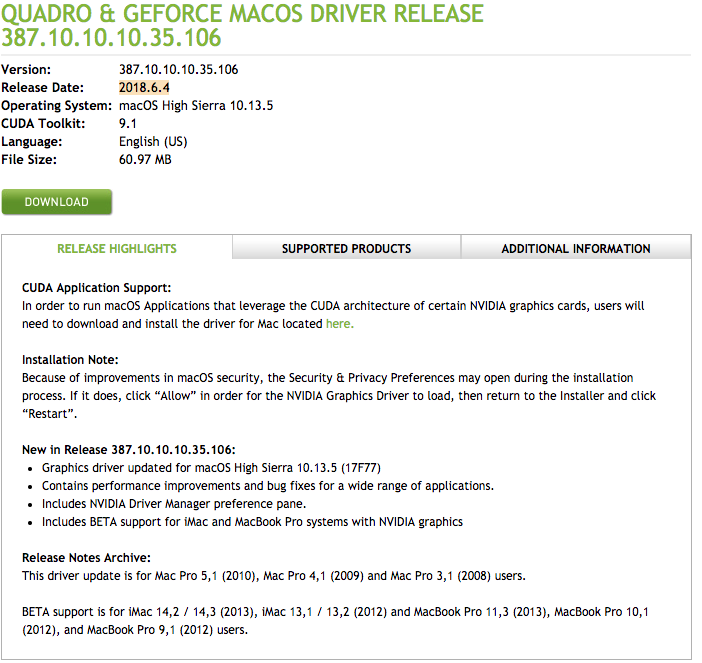
Released this month after install a reboot is required… and the update required is no longer shown
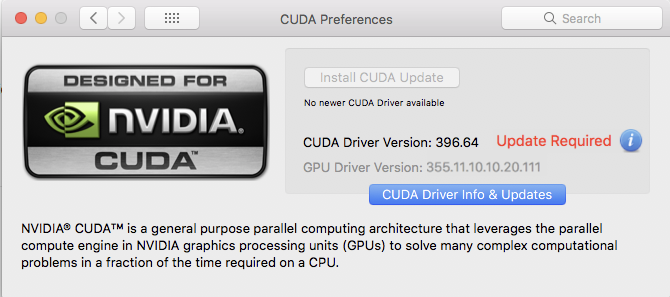
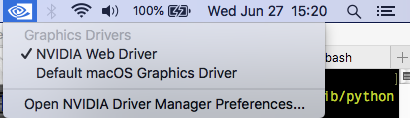
Also gets the menu
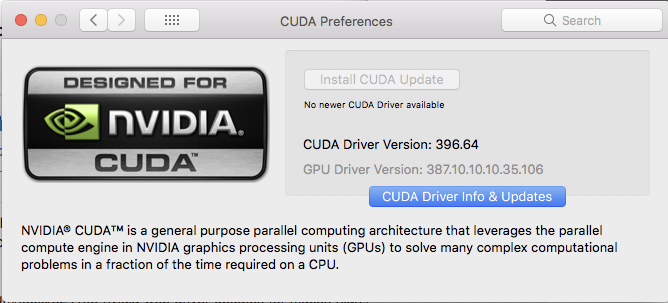
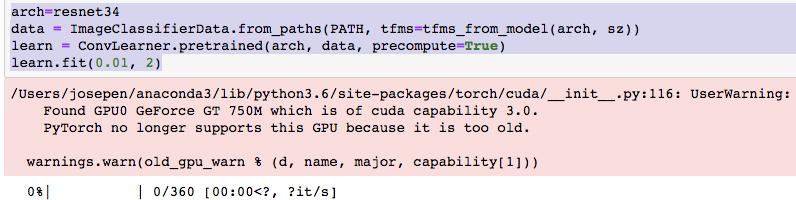
When executing this line:
torch.cuda.is_available() returns true
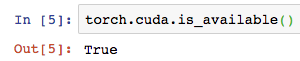
Previously it didn’t… so far so good…
Now I face another error
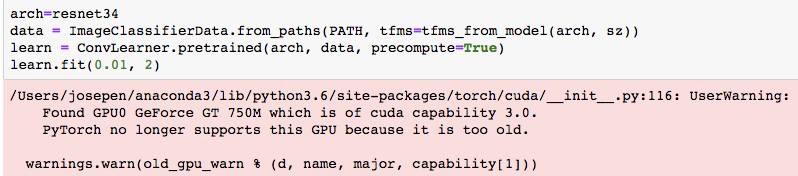
and a long stack trace that ends with

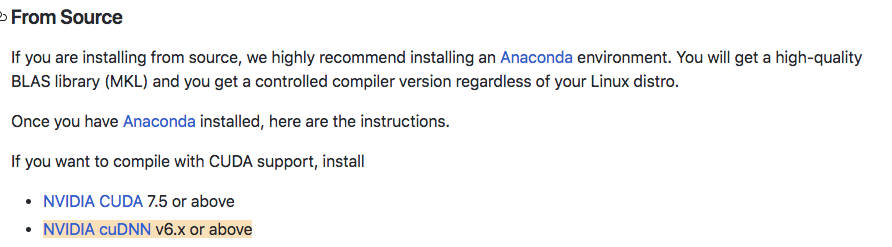
When compiling pytorch there is one step I skipped the installation of: NVIDIA cuDNN v6.x or above
Leads you here
then here
https://developer.nvidia.com/rdp/cudnn-download
and the direct link to the file…
https://developer.nvidia.com/compute/machine-learning/cudnn/secure/v7.1.4/prod/9.2_20180516/cudnn-9.2-osx-x64-v7.1
And the installation instructions very important for MacOSX
https://docs.nvidia.com/deeplearning/sdk/cudnn-install/index.html#install-mac
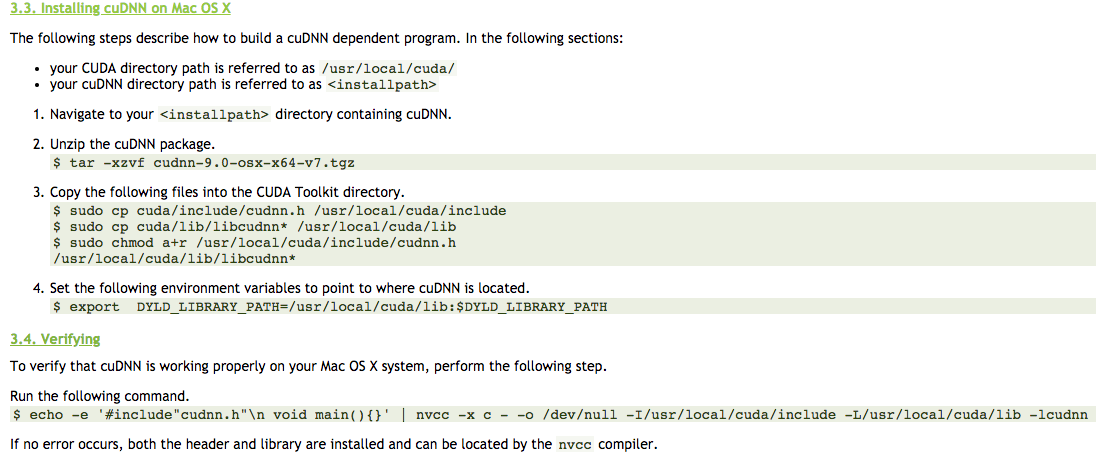
After verifying

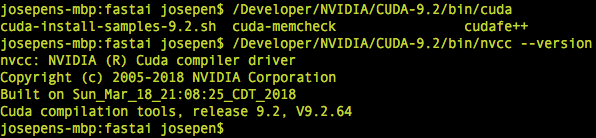
To Recap:
Cuda Development Tool Kit installed on my computer at /Developer/NVIDIA/CUDA-9.2/
Then my hope is recompiling again pytorch after install NVIDIA cuDNN…
UPDATE2
I finished compiling pytorch without errors, but when executing these lines my computer becomes unresponsive ahhh!!! I had to force reboot: COMMAND, CONTROL and POWER buttons.
I have to research this explicit pytorch message…
Also prior to compile pytorch I set these variables:
export CUDA_HOME=/usr/local/cuda
export DYLD_LIBRARY_PATH="$DYLD_LIBRARY_PATH:$CUDA_HOME/lib"
export PATH="$CUDA_HOME/bin:$PATH"
And this was the line to compile:
MACOSX_DEPLOYMENT_TARGET=10.13 CC=clang CXX=clang++ python setup.py install
Changed the target OSX
I’m reviewing the output of the compilation to see if I’m able to recognize any error, warning message worth of research or report… 
This is the log, if you want to check out with me.
pytorchWithCudaInstallationOutput.pdf (104.7 KB)