I know how you feel I got to that exact point and was stuck since I couldn’t figure out how to binarize the image to get a black and white mask … Then @aayushmnit posted his masking code (post above) and I just took a look at that and that helped me see how it could be done.
But I did have another thought about a different approach today (haven’t tried it out yet though …) what if I used image segmentation to identify the horse and simply made the mask that way? It’s not quite the same method as DiffEdit, but it might be easier to get a better mask for the whole horse that way?
For everyone exploring this, it is worth noting there is a version of stable diffusion trained specifically for inpainting (filling in within a mask) now that might work better: runwayml/stable-diffusion-inpainting · Hugging Face
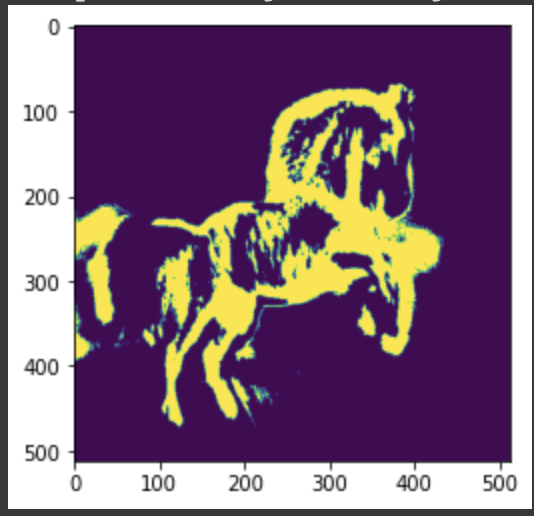
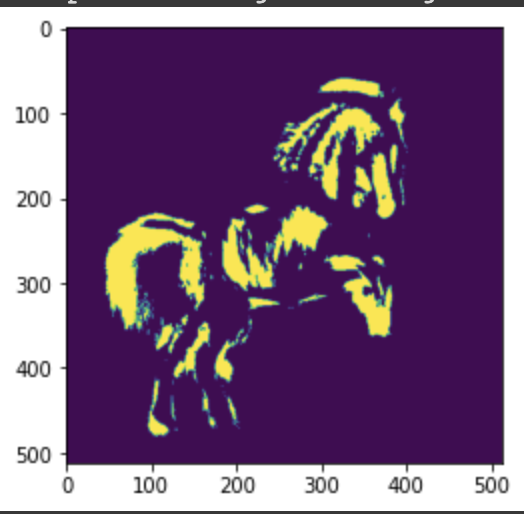
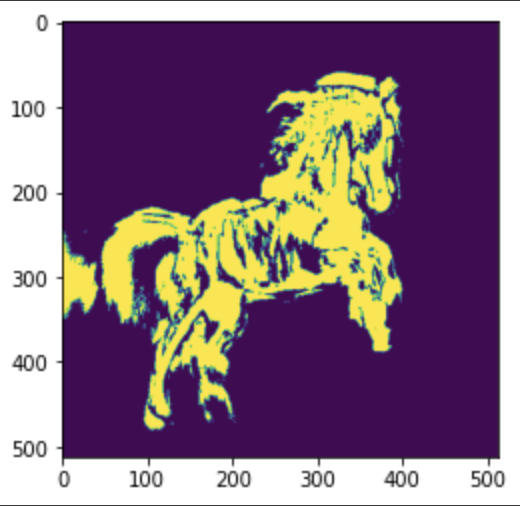
To construct the mask, we take the difference between the denoised latents using the reference prompt and the denoised latents using the query prompt:
(reference_noisy - query_noisy)
What if we introduce a hyperparameter (e.g., alpha ) to amplify the differences we care about:
alpha * (reference_noisy - query_noisy)
In my experiments, it tends to work well. You can experiment with setting alpha > 1 and see what happens. Then, play with the threshold parameter when you binarize the mask.
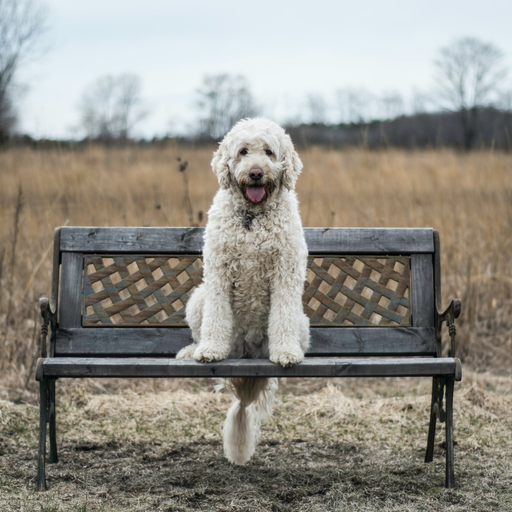
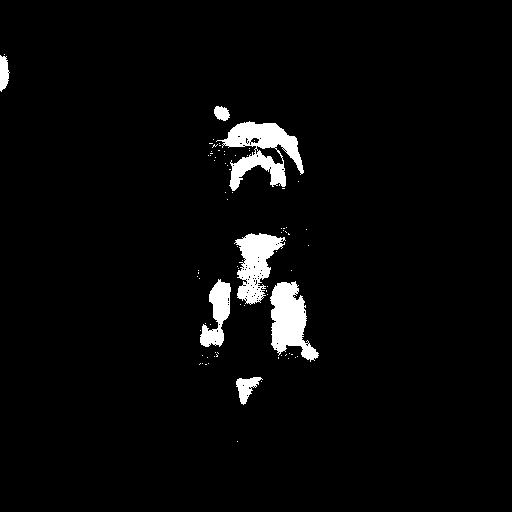
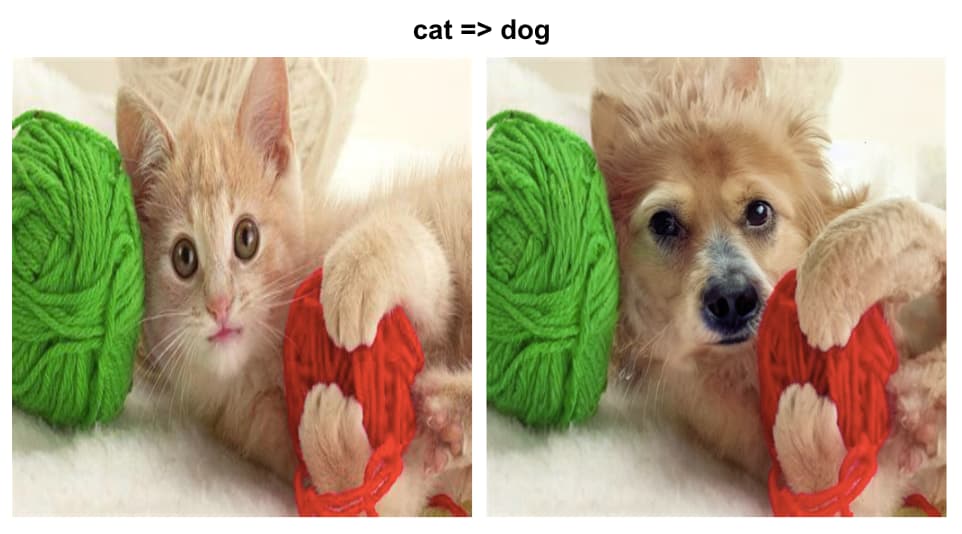
Here is the binarized mask I extract when I try to replace the dog in the picture with a cat (still not great, but I’m working on it):
When Jeremy defines the numba-decorated code for calculating the dot product, one of the lines has a . after the zero:
from numba import njit

@njit
def dot_product(a, b):
    result = 0.
    for i in range(len(a)):
        result += a[i] * b[i]
    return result
What is the dot after the zero doing? Is this a numba thing? Or are we specifying that we want the result to be a float? (How can zero be a float, though…?)
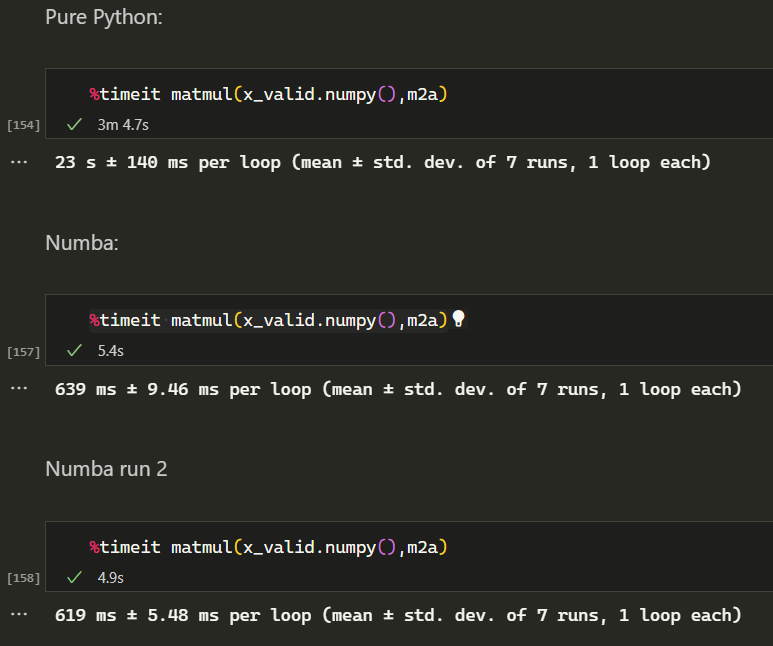
I also noticed that the mega speed bump (from 450 ms down to 45 microseconds etc) that we saw in the lecture works well when you have trivial arrays of 2x2 etc, but that when you do it with our 5 sample images multiplied by the random weights you basically get no speed bump at all. Why is that the case? Am I running up against some kind of memory or throughput constraint that numba is powerless to help with?
I played with this a bit and cannot confirm this. While the differences get smaller (as a percentage) with increased computation requirements, the Numba compiled functions are consistently faster.
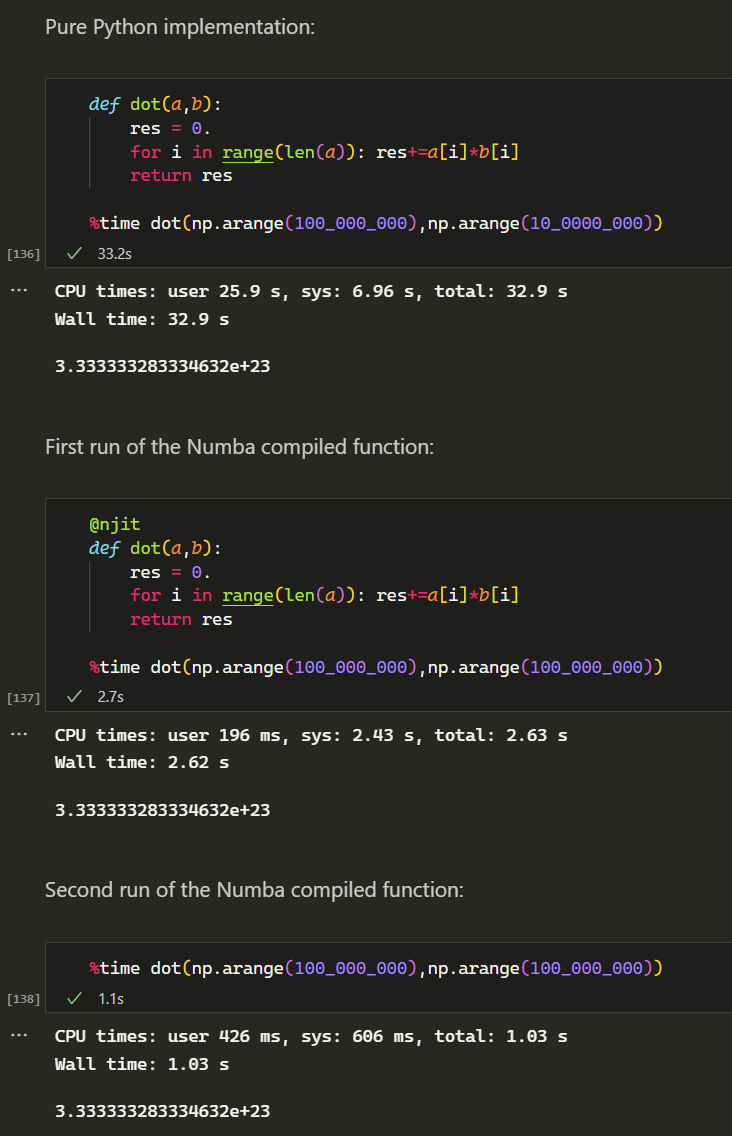
Here is my comparison between a pure Python function, the first run of the Numba version of that function, and the second run of it. The vectors have a size of 100 million. The Numba version is still ~30 times faster than the Python version. Would be interesting to check that systematically for different kinds of functions and data sizes
Are you running on a machine with a GPU? I tried this on an older-gen MacBook (CPU-only), and in a GPU-enabled cloud environment and it took 4 seconds more or less exactly in both environments.
I think I saw the speedup when just calling dot as you do in your example as shown. I seem to lose the speedup when calling dot as part of the bigger matrix multiplication over many values.
I tried this (CPU only again) with the matrix multiplication for the 10.000 validation images - for me, there is no difference between the first and the following Numba runs, but a large difference to the non-compiled version.
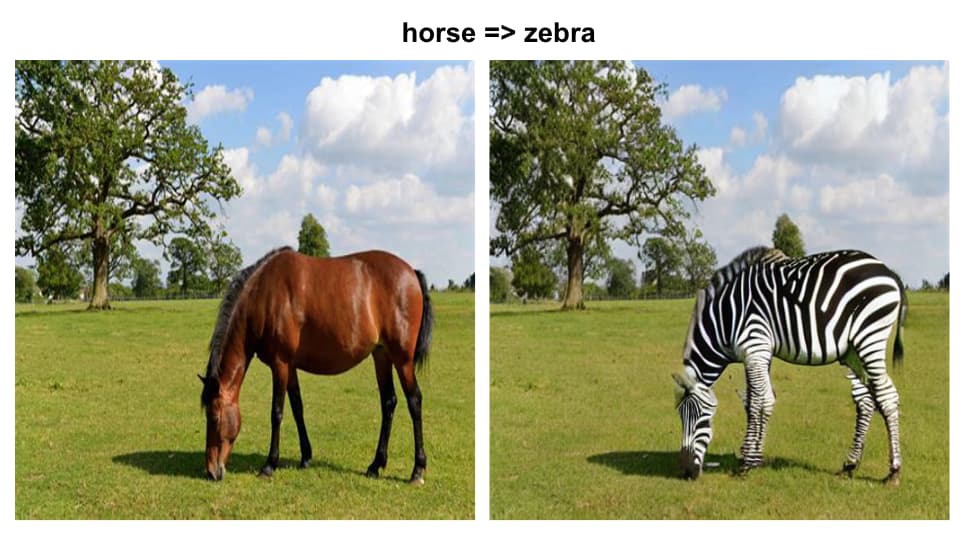
For anyone interested in semantic in-painting ClipSeg + the stable diffusion in-painting model shared by @johnowhitaker earlier today work pretty well (for basic cases at least).
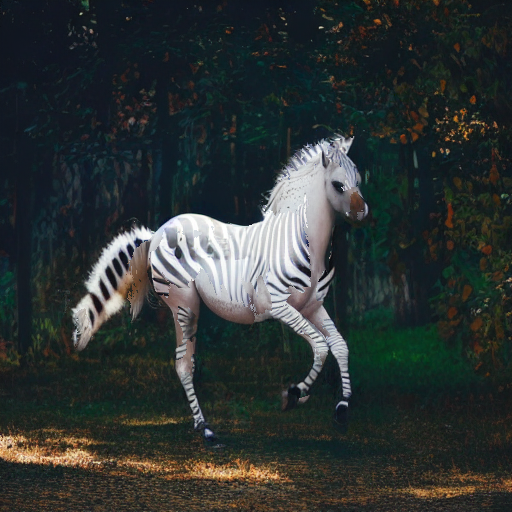
ClipSeg automatically creates the segmentation mask from a src image and a prompt (e.g. horse).
Then you simply pass the src image, mask image and insertion prompt (e.g. zebra) to the in-painting model.
Thanks @johnowhitaker for pointing to the stable diffusion in painting pipeline and @tommyc for sharing your code.
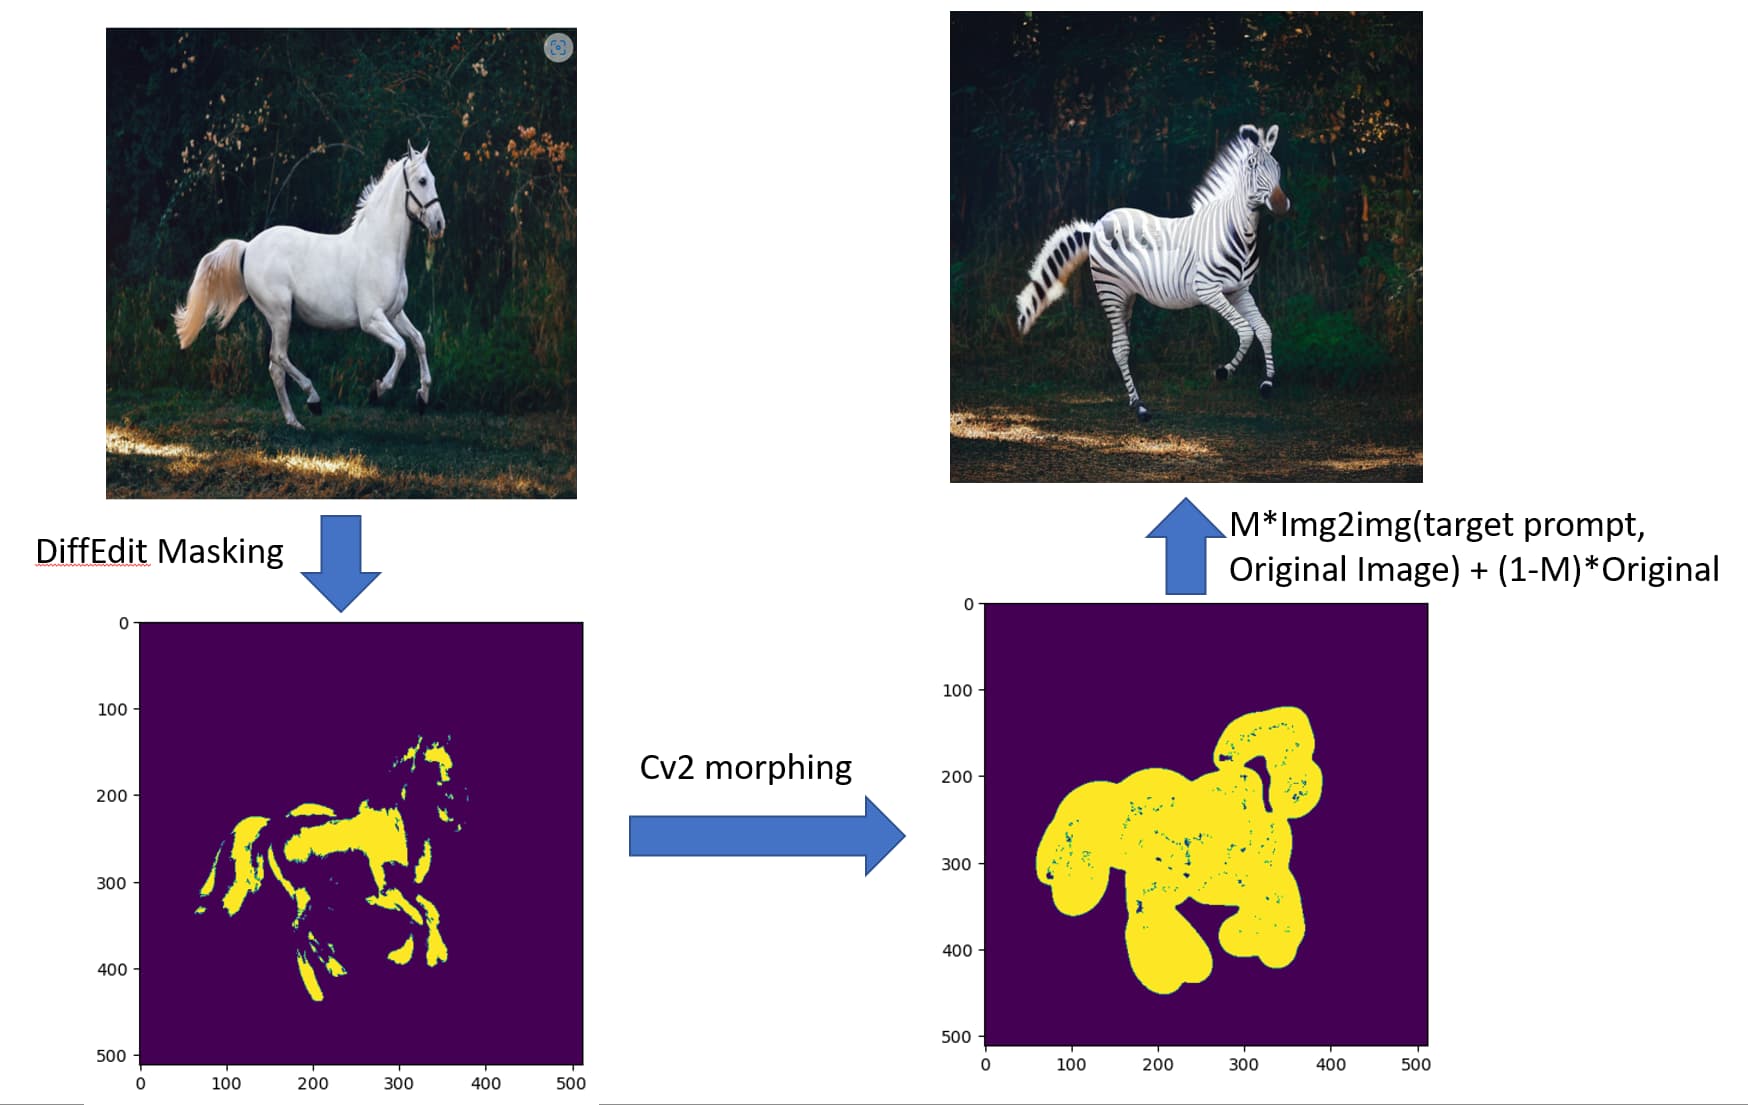
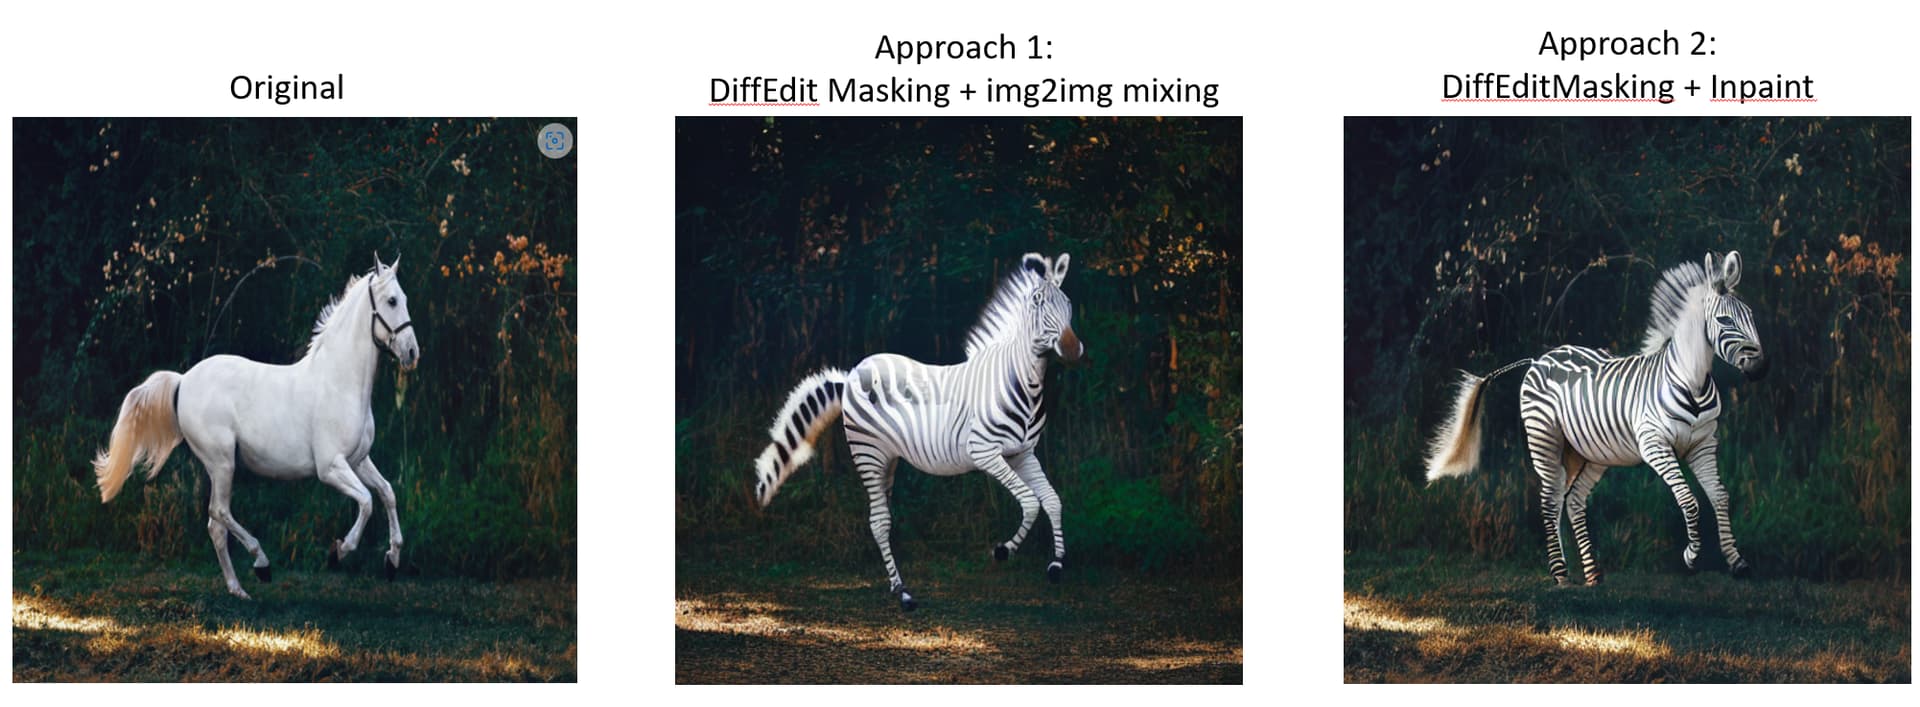
I tried two approaches -
Approach 1 - So, I built on my last shared notebook, I improved masking by adding a OpenCV trick and then generated a new image using img2img pipeline. Then I mixed original image with the new image using masking. Like below -
You’re welcome, John And if you’re interested, there’s a separate thread where we (at least try to) collaborate on the DiffEdit paper. We are hoping to collaborate on future papers too so that everybody can learn from each others’ efforts …
That looks good! I got distracted from DiffEdit by switching over to the 1.5 model but I hope to get back to that today and I was going to do exactly what you did for approach 1 till @johnowhitaker mentioned the inpainting pipeline yesterday and I was like “Doh, how could I have forgotten that?” since I spent a lot of time creating a method to do easy masking for a GUI I did so that the image can be used with the inpainting pipeline — I guess tunnel-vision can really get you
But I do want to try out both approaches. If I do get to it, will post results.
Hey everyone!! Been staying off this forum for a few days to make sure some kickass implementation doesn’t discourage me from making my own implementation of the DiffEdit paper
I’ve written up a Jupyter notebook that documents my attempts at implementing step one - making a mask based on the query text (I’ll allow you to be the judge!). I thought I’d put it on GitHub and render it on nbviewer, but it’s 93MB in size and GitHub has a 25MB size limit. If anyone has any ideas on how I can show my work without having to cut it down, please let me know
GitLFS? If it’s just hitting the limit around large files, that’d be one way. Or can you just host the file somewhere in cloud storage and have people download it to their own machines?
What is the part that is taking up all that space? images?