do you mean how it runs inference on HD images?
do you mean how it runs inference on HD images?
Yes. The app easily handles 16MP (mega-pixels, 4,096 x 4,096) images.
The app is clearly running some variation of pre-trained “fast style transfer” (Jeremy talks about such model here: Lesson 7: Deep Learning 2019 and here: http://Lesson 14: Deep Learning Part 2 2018.
What is surprising is that it appears to be able to handle large images on the phone! In colab I get out-of-memory errors even on 2,000 x 2,000 when using lengstrom’s fast style transfer, but they manage to handle 4x more pixels just fine on the phone! It does not appear that they scale the image down and scale it up. Any ideas what may be happening?
2 Likes
this is a very interesting point. no clue tbh.
I’ve just realised that I linked to the older post about Copista app, the one I meant to link is this: https://medium.com/@tinyline/copista-on-device-high-resolution-image-style-transfer-3a34377a8a2d
2 Likes
@olivia_rose any progress on this? I previously tried to split a big image into smaller chunks and independently feed them to the network, but that did not yielded good results.
But there is another problem that rises when you do inference on image sizes that are much bigger then the images you trained on, the style details becomes smaller and smaller, to the point that if the image is to big the style becomes mostly colored noise. You also need to be able to train on bigger image sizes.
Btw, I gave up with my personal attempts as I could not figure out what was wrong with my (plain PyTorch) code.
The results were not satisfying and it was really hard to pinpoint an exact issue, so (in desperation  ) I forked the official
 examples's PyTorch repo, added some fast.ai magic (lr_finder and fit_one_cycle) to give it a personal twist, and productionized the results with AWS Lambda over here.
The post accompanying the project is here instead.
I am now diving a bit into explainable AI (simply amazing stuff, super recommended!) for a couple of weeks and then I will get into Deep Painterly Harmonization. I’d like to translate Sylvain’s notebook into Apache MXNet and productionize that too, to give people the opportunity to experiment with it!
2 Likes
I’m still working on this. I am somewhat shocked how hard fast style transfer actually is! I was following similar path to Francesco, but instead of forking PyTorch I am trying to diff every numerical issue that might be happening. Might be a waste of time, but it also might end up with finding some property which is broadly missed and worked for people who published “by accident”. I’ll post on my progress. Awesome to see that I’m not the only one on Earth interested in this in 2020 
4 Likes
Hi FraPochetti hope your having and artistic and fun day!
I like the your approach of getting it working without getting bogged down with which code to use.
I tried your app today, with two or three jpg files of between 1 and 10k. however all I got was a colored blank screen. Do you think you could paste a picture here of an image you used that worked well?
Cheers mrfabulous1 
1 Like
@mrfabulous1 thanks for checking the app out!
I tried your app today, with two or three jpg files of between 1 and 10k. however all I got was a colored blank screen.
Really? This is super weird.
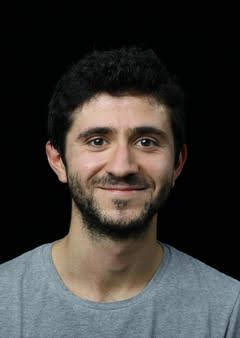
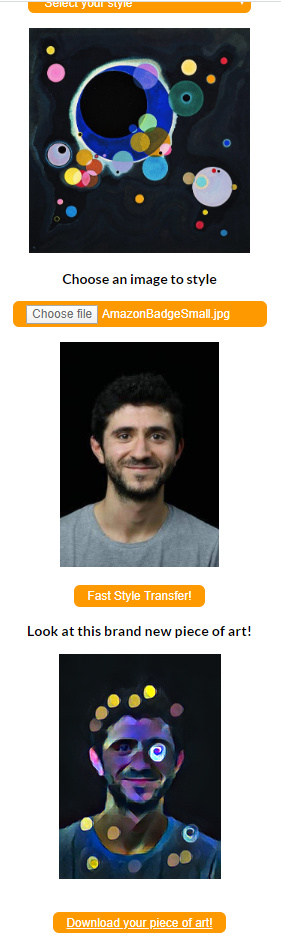
I just tried with a pic of myself and it works fine (bottom).
Are you testing this one? http://visualneurons.com/fast.html
Also, can you please try it yourself with the same I used (following)?
Now I am wondering I might be the only one getting something out of it
1 Like
Hi FraPochetti
That worked fabulously in Safari - see image below.
Security settings could be why the following happens in the browsers I use below!:
Selection boxes in Chrome displayed but no images.
Blank screen in Firefox
A dark colored box for the artwork in Tor.
Great app though!
Cheers mrfabulous1!
1 Like
I’ve tried to run the notebook on both GCE and Colab, but got the same error: ‘DataBlock’ object has no attribute ‘databunch’. Was it due to latest changes in fastai2? Would appreciate any hint how to address it…
Yes, you now need to call .dataloaders.
You also need to move your transforms from the previous .databunch to DataBlock itself.
Thank you, it worked great!
1 Like
Style transfer is a fascinating topic, after a bit of procrastination I decided to get my hands dirty with nbdev and build a library for that, faststyle!!
I tried to put all the knowledge I learned with the amazing fastai library into this project to make it as modular as possible, it took me a while to start grasping how to really exploit callbacks and type dispatch but I think I’m getting there!
The library is far from complete and the general architecture is still very far away from the fastai standards, but I think it’s already at a good enough stage to share with you guys 
Feel free to send me a PM if you have any questions, and goes without saying that contributions are very welcome!
Note: The library was originally intended for being used with fast style transfer only, but (thanks to fastai) the modularity is so high that you can use it for any arbitrary Image to Image (e.g. putting hats on cats) task with very few lines of code.
6 Likes
This is an awesome job man! Congrats!
The hat-cat thing made my day
1 Like
This is really a great post on style transfer in fastai!
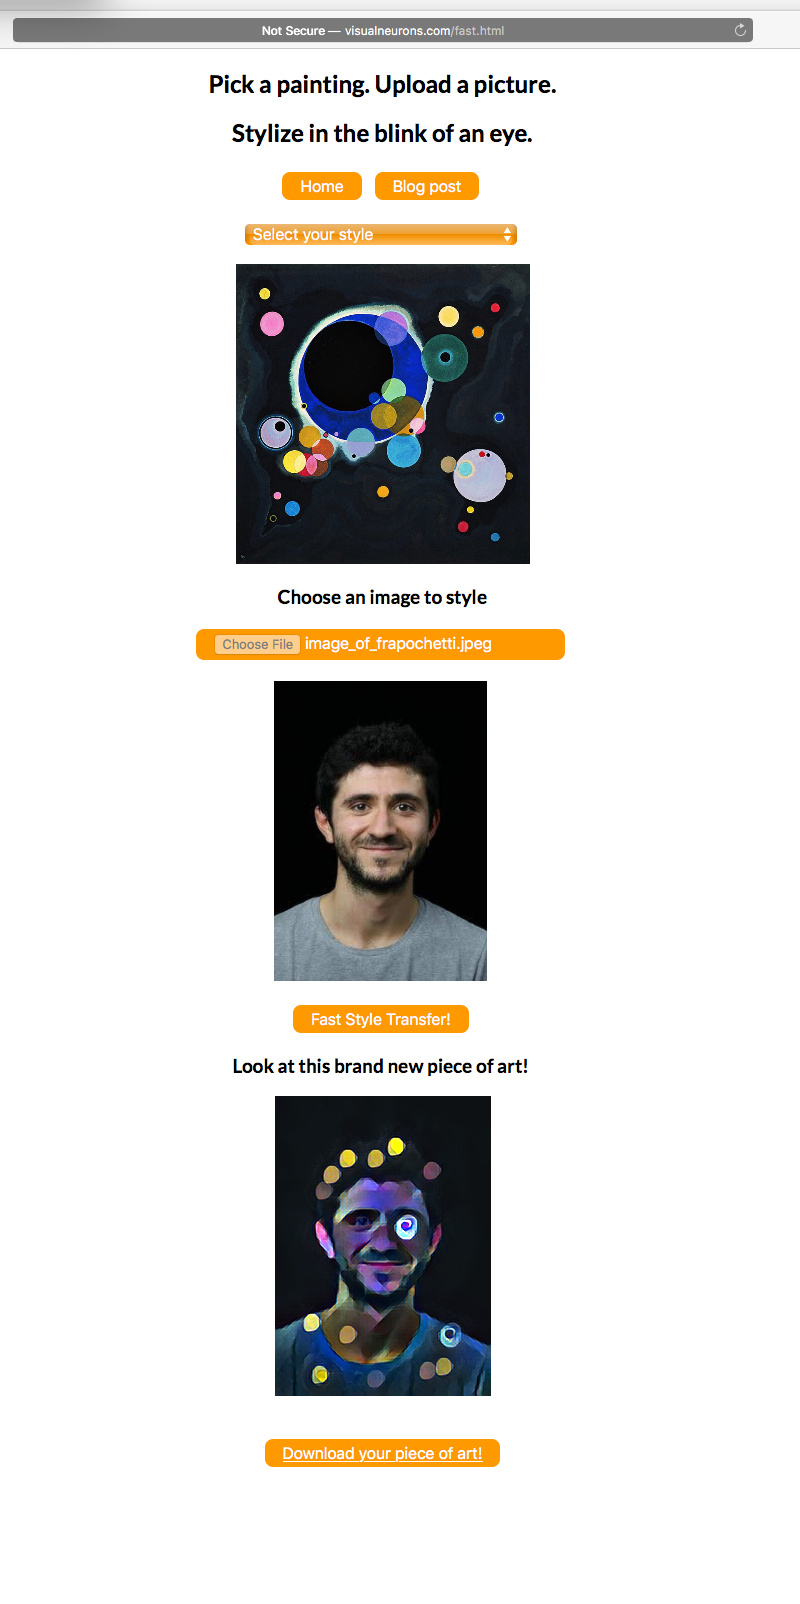
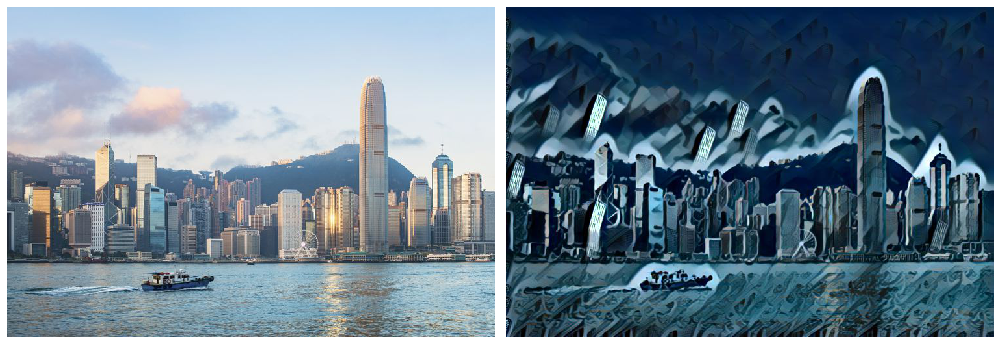
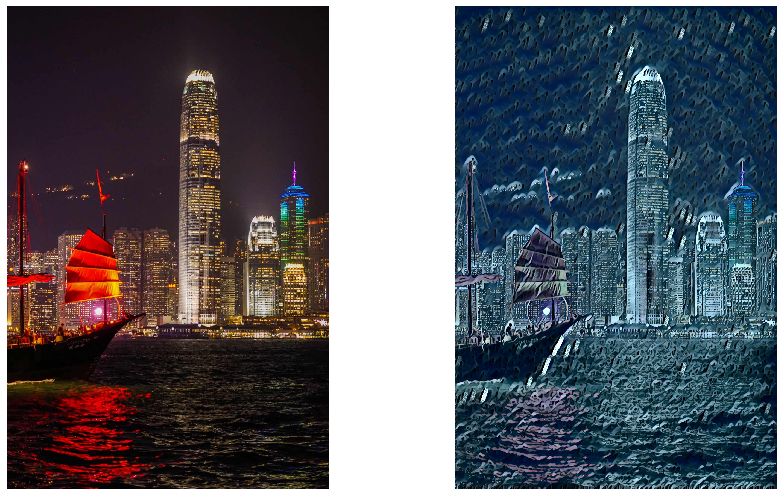
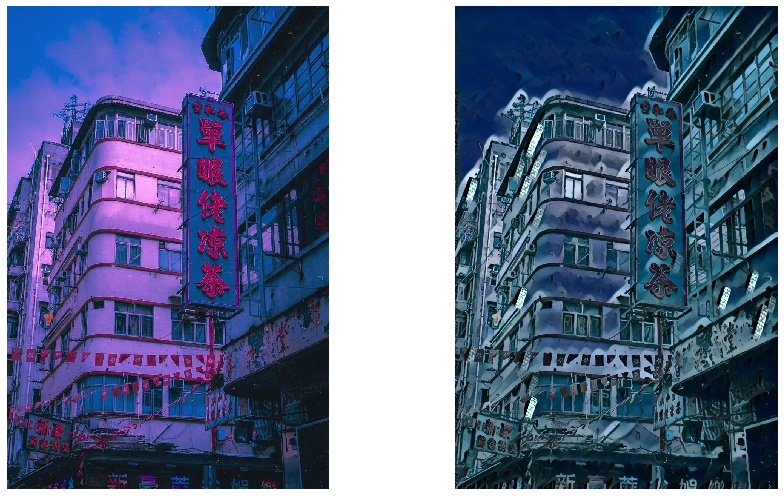
I am also implementing neural style transfer in fastai (v1 currently). The aim is to practice writing custom callbacks and hooks, and hope to get some amazing results. I mainly take reference from the official pytorch codebase. Below are the results I got with my first attempt.
Things that would like to explore as next steps:
- try mixed precision callback to see how fast it can train (right now it takes ~150 mins for 2 epochs on COCO dataset).
- implement a tensorboard callback to keep track of the gram matrix evolution (could make a gif to show how gram matrix evolves over iteration).
- Right now, I am using a torch.Dataset and embed it into Databunch, but I feel like it’s not a clean implementation, would also look at how to implement the data part in native fastai way.
- Further improve the stylisation quality.
Style Source (a work from HK artist Cuson Lo)
Stylised Samples
3 Likes
Wanna mark down my current progress, and see if any fellows could give me any feedbacks.
I am still continuing my project and right now I am figuring out ways to improve the model performance. Specifically, I want to improve two things:
- smoothen the texture of the stylised image
- improve the content preserved by the stylised image (at least the transformer shouldn’t mistakenly convert a cloud into a building, as shown in an example in my post above)
For part 1, I saw from a very insightful blog post that total variation loss could help with the issue. I am going to try that out.
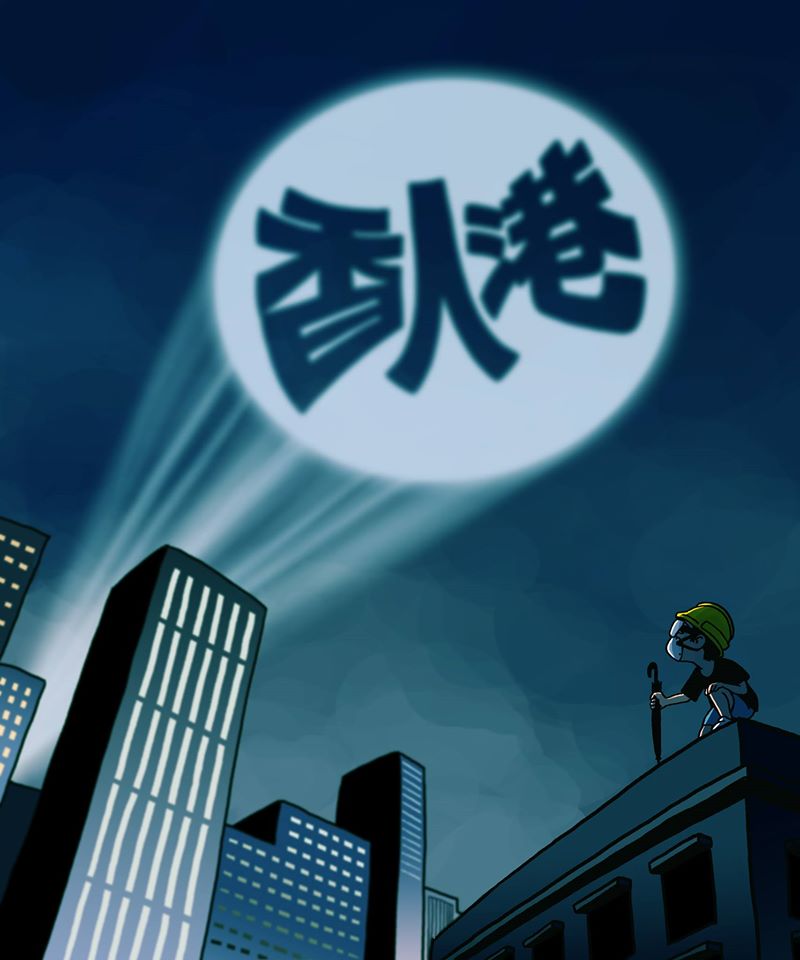
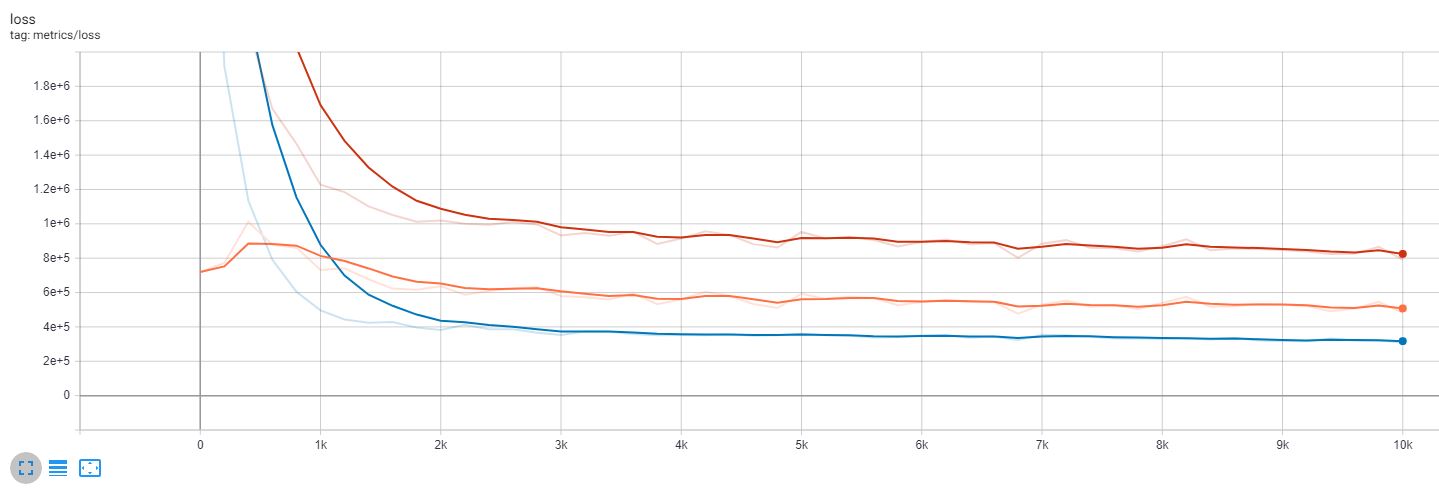
For part 2, I suspect it has something to do with the content loss. And I notice from the (training) loss curve that the content loss doesn’t gain any significant reduction at all. First thought is that it is related to the VGG layer I am using for content loss. Would like to try if using a shallower VGG layer would help. Other than that, may also be related to the content weight. (Any fellows encounter this issue before?)
Red: total loss, Blue: style loss, Orange: content loss
I agree it is worth a shot, even though it never had a huge impact for me. I’d fiddle around with different combinations of layers at different depths. Composing those wisely generally has an effect on the smoothness of the final result.
If you don’t start from white noise, but from the content image itself, I’d say it is ok if the content loss does not change much. How are you scaling the content+style losses?
1 Like
The original implementation use a combo of VGG layers on style loss, but only one layer on content loss. Did you find a combo of VGG layers on content loss helpful?
Not sure if I get it right, but right now I am sticking mostly to original implementation, so I guess it starts from white noise instead of content image. Would like to know how I could start with content image. Content weight is 1e5, style weight is 1e10. (It actually makes the loss scale pretty weird i.e. loss looks so high even after 2 epochs on COCO dataset, I also gonna downscale it so long as the scale doesn’t impact much on model performance)
I did the same thing as yourself, e.g. one layer on content loss and a combo on style loss. What I was referring to is that the combo you use for the style part has a big effect on the final rendering. So you might think you don’t have a smooth result because of something wrong with the content but it is actually the style leading the game. Just something to check out.
Yes, the original Gatys et al implementation starts from white noise. It is just an image with random pixels though. It should be easy to switch your initial starting point (e.g. the picture to optimize) to a copy of the content image. If you do that then your optimization loop basically reduces to adding style on top (e.g. the weight of the content loss can we lowered dramatically). Does this make sense?
1 Like