如何一步一步做pull request
为什么以及前提要求
This is a visual guide to do a pull request (PR) on fastai library document source files (ipybn), which will walk you through every step of pushing a PR.
I learnt to do PR from fastai PR guides and branch update, but more importantly I can’t get here without tons of help and support from @stas Stas Bekman on Documentation improvements. Many thanks to @stas ! This visual guide is one of my little contributions back to fast.ai community.
Before you start, you should first take a few minutes to learn the very basics of terminal and git. You can learn it from the terminal guide on fastai course site. Then you are free to move on.
Step 1 Get idea support from the forum
Step 1 Get idea support from the forum
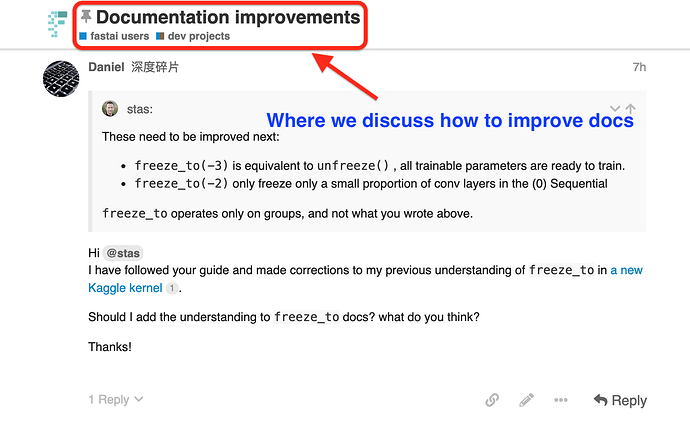
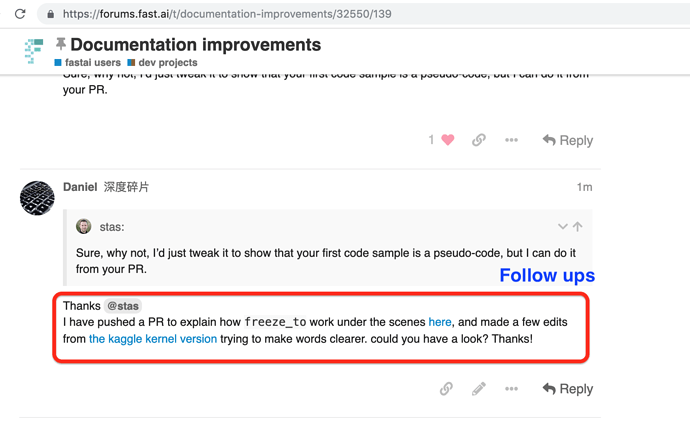
When you have an idea on PR, please go to Documentation improvements to share your thought and get support.
Step 2 Fork and download repo
Step 2 Fork and download repo
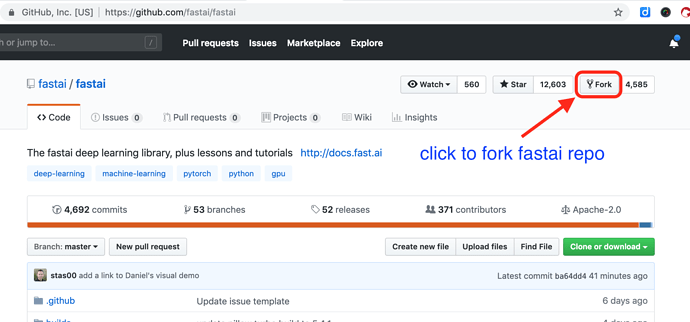
Click to fork the official repo as shown in the visual instruction below.
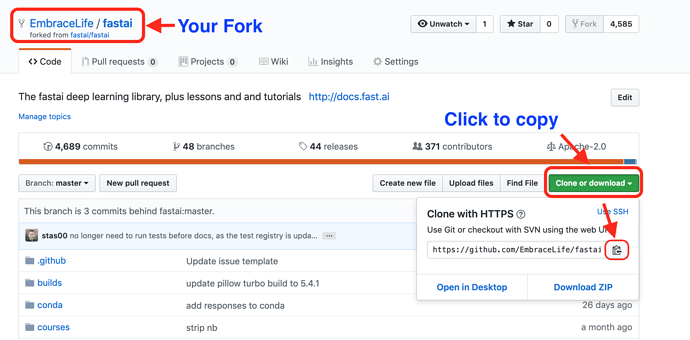
Then on your fork repo on github, copy the link.
The last step to clone fastai repo to your local computer is to run the following code in your terminal.
cd your-fastai-fork-directory
git clone paste-your-copied-link-here
Step 3 Sync your fork and local repo with official repo
Step 3 Sync your fork and local repo with official repo
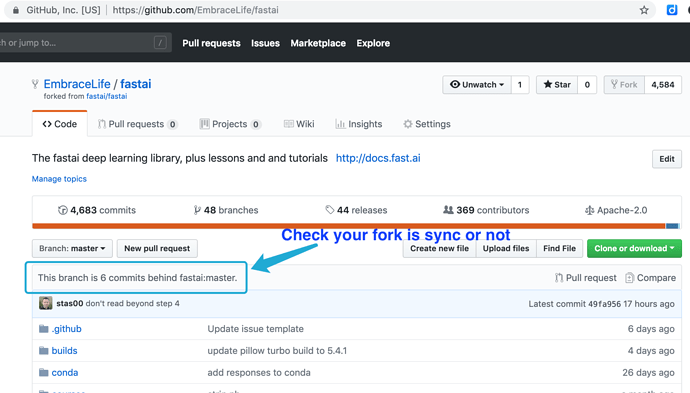
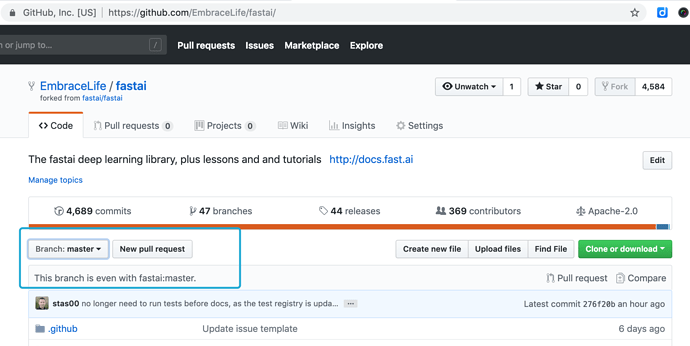
First, go to your fork on github to check whether it is updated. If not (seen image below), then you need to sync.
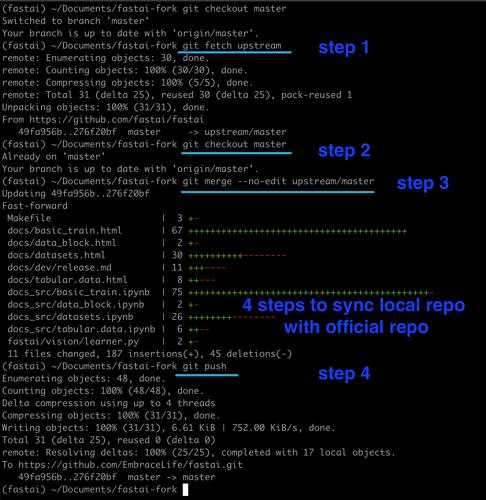
Then you can go to your terminal and step into your local repo directory (fastai-fork, in this visual example), and sync your local repo and official repo by following the steps in the image below.
You can sync your repo with official repo using the following codes:
cd my-cool-feature # your fastai fork clone directory
git fetch upstream
git checkout master
git merge --no-edit upstream/master
git push --set-upstream origin master
See my demo below
Then you can go to your fork to see whether the sync is a success or not.
Step 4 delete and create branches
Step 4 delete and create branches
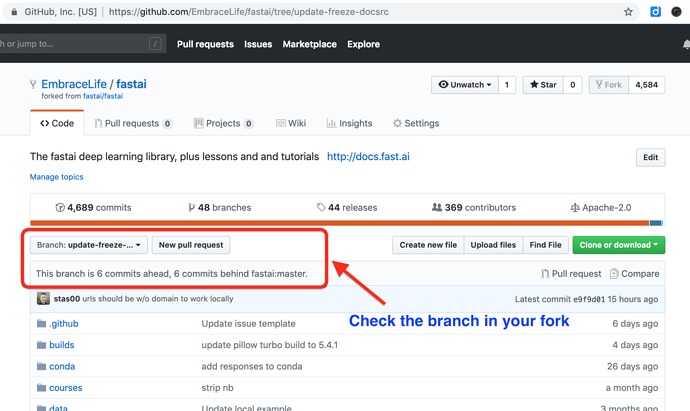
If you have done PR before, you may want to delete your previous branch locally and on github. In this example, I have a branch called update-freeze-docsrc (see the blue box in the image below).
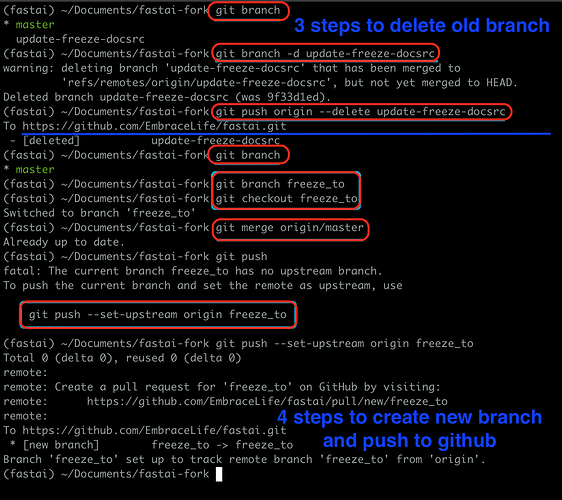
You can delete this branch locally and on github by following the first four steps in the image below.
git branch # to see which branch you are in
git checkout master # make sure to step out of the branch you want to delete
git branch -d branch-you-want-to-delete
git push origin --delete branch-you-want-to-delete
see my demo with ‘update-freeze-docsrc’ as the branch to be deleted.
To create a new branch for your PR, you can run the following code in your terminal
git branch your-new-feature-branch
git checkout your-new-feature-branch
git merge origin/master
git push --set-upstream origin your-new-feature-branch
see my demo with ‘freeze_to’ as the branch to be created.
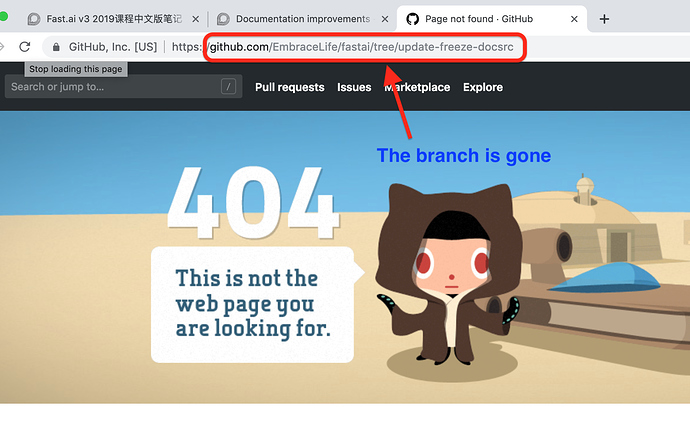
If you refresh the previous branch page on github, it won’t be found.
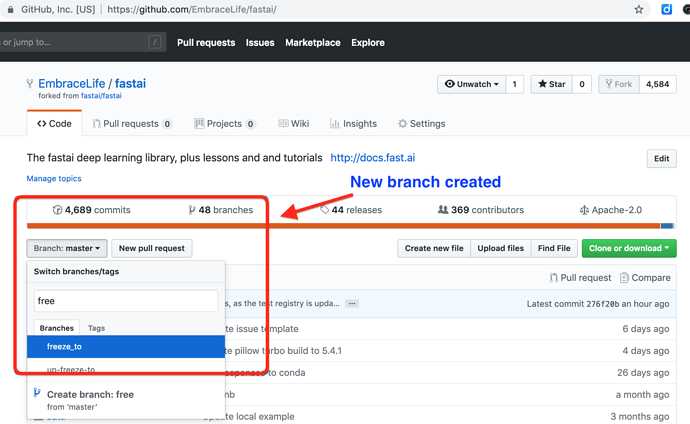
Also you will find a new branch created on your fork, see the box below.
Step 5 Make your edits
Step 5 Make your edits
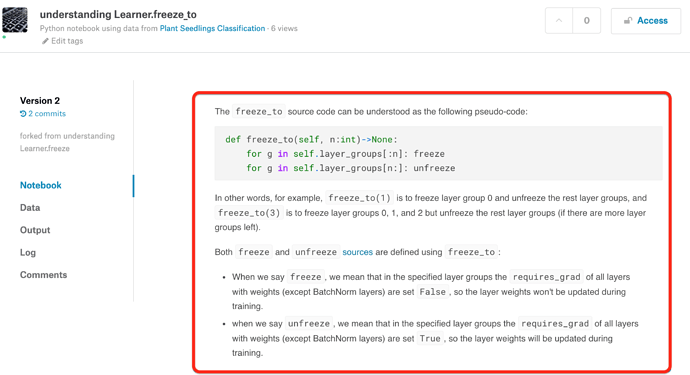
You can make your edits of documentation and make it public with Kaggle kernels, so that people on Documentation improvement thread can see and give suggestions.
If you finally decided to make it a PR, then you can proceed to copy the changes onto the original ipynb file in your local repo.
Step 6 Push the changes
Step 6 Push the changes
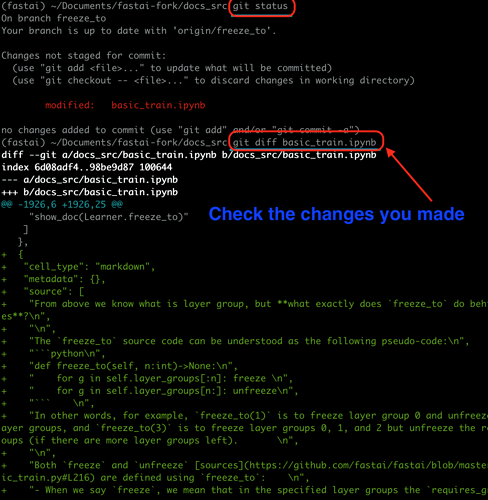
You can check the changes you made to the original doc source ipynb by running the two lines of codes below.
git status
git diff the-file-you-edited
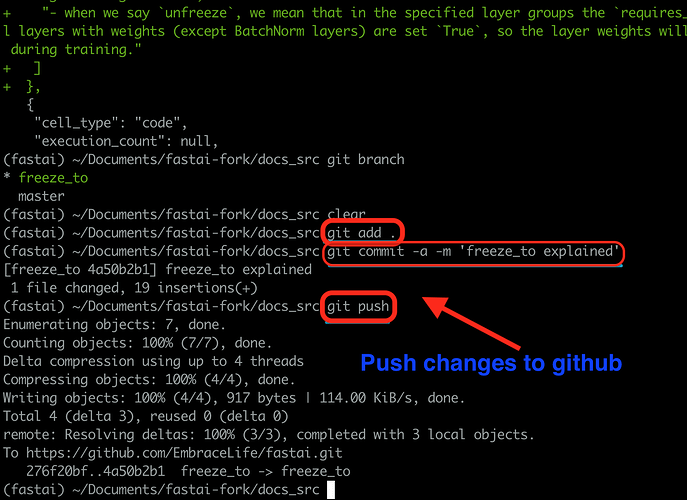
Then if the changes seem ok, you can run the following three lines of codes to push the changes to your fork.
git add .
git commit -a -m 'your message'
git push
Step 7 Make a PR
Step 7 Make a PR
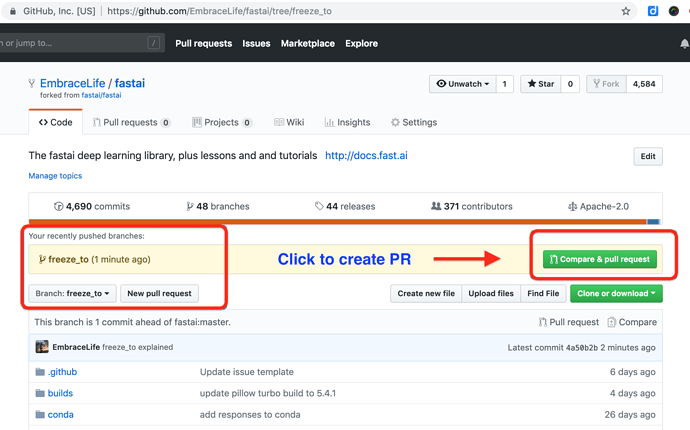
On your fork in github, you can see your push and click the blue box on the right to make a PR.
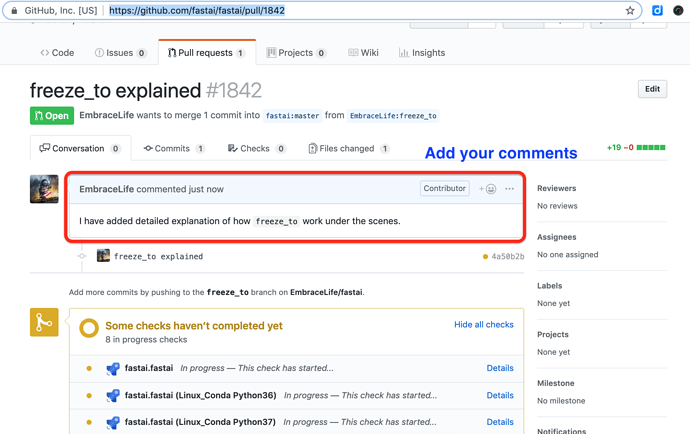
You can also add some notes to your PR.
