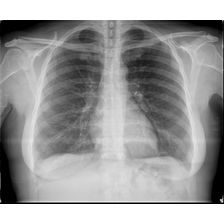
I loaded the chest x-ray images (a sample below) (3,224,224 size)
using the following code
src = (ImageList.from_folder(‘dataset’).split_by_folder().label_from_folder().add_test_folder())
data = (src.transform(tfms,size = 224).databunch(bs=16)).normalize(imagenet_stats)
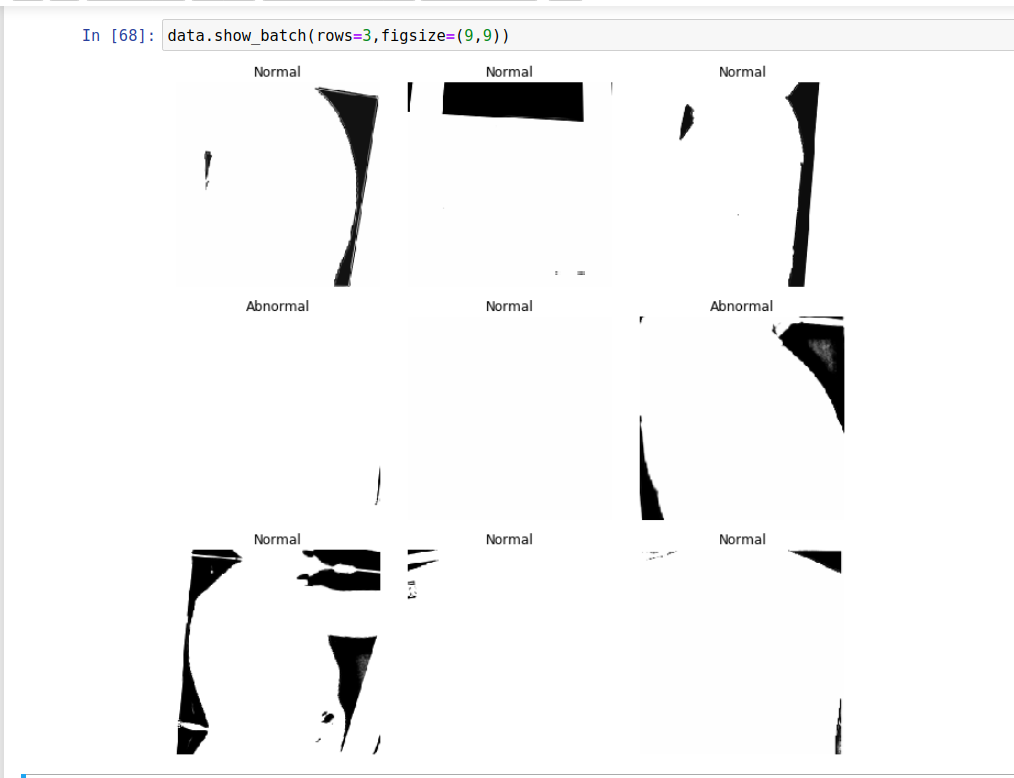
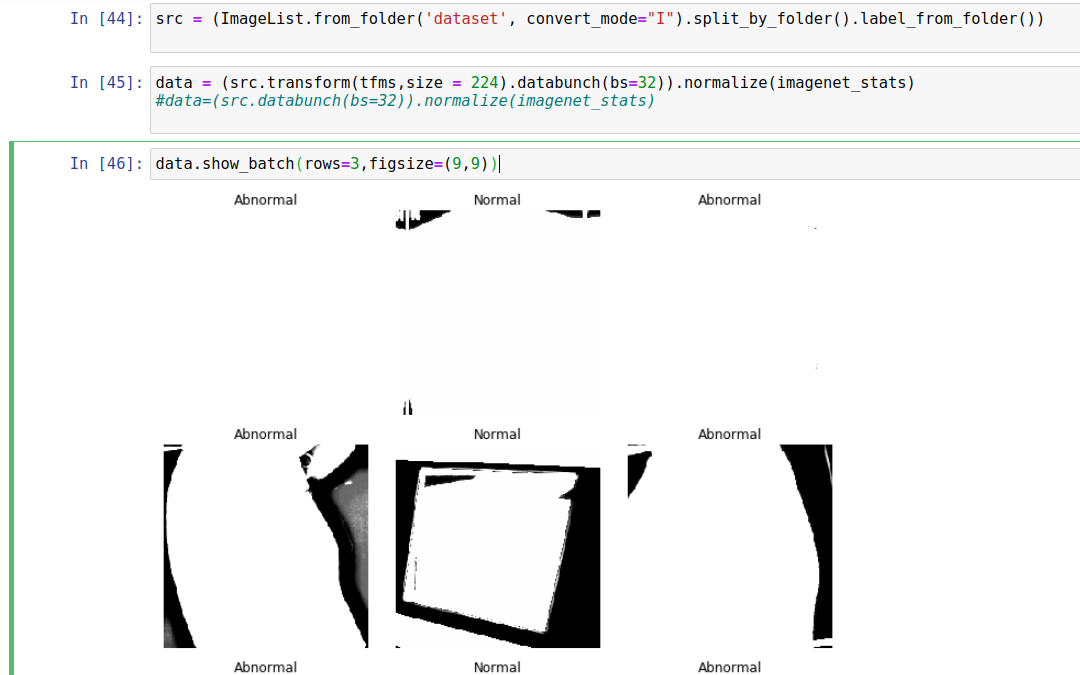
if I call show_batch, it looks like below. It retains the
(3,224,224) shape but why does the image lose its clarity?. Is there a default convert_mode from ImageLoader ruining the quality.?
Lim, Thanks for the reply again.
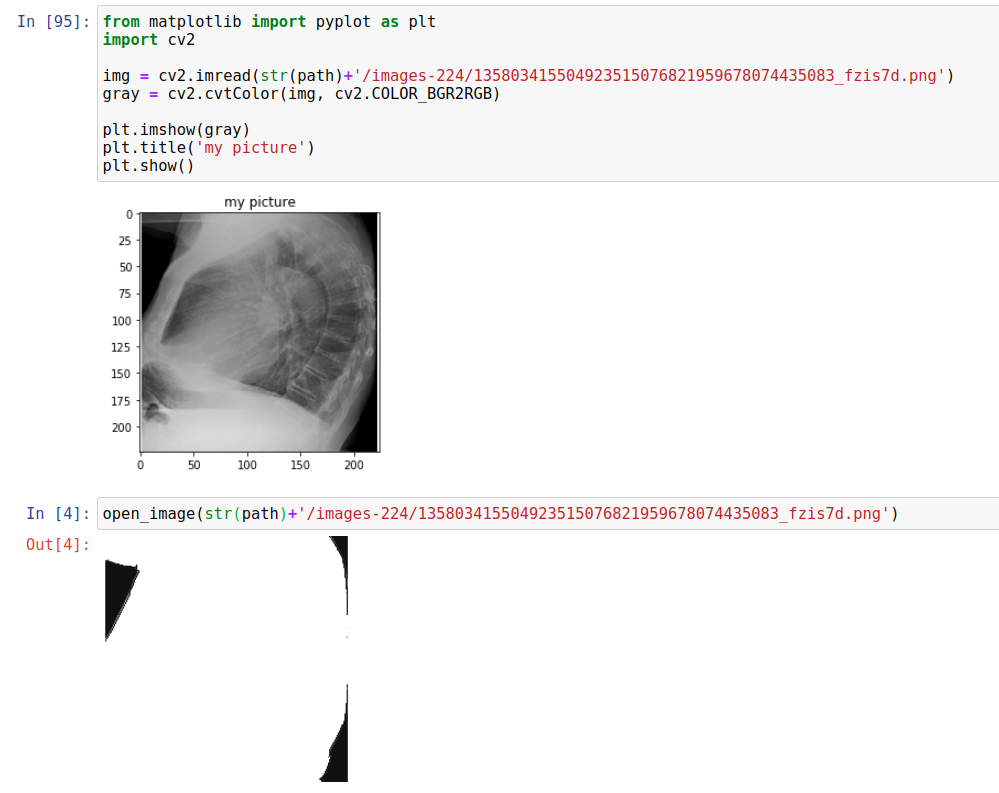
It is the PNG file. Looks like the open_image converts or display the picture as lines
Here is the OpenCV output and open_image output. What would be the convert_mode should i use to
retain the original image. Is it only a display problem or Does it make any difference in NN training?
I am not sure what is causing your problem.
Do you need the convert_mode()? To me, it seems like the issue is with something else than convert_mode()
Also, have you tried without the normalization?
And maybe try to open the image with show_image()?
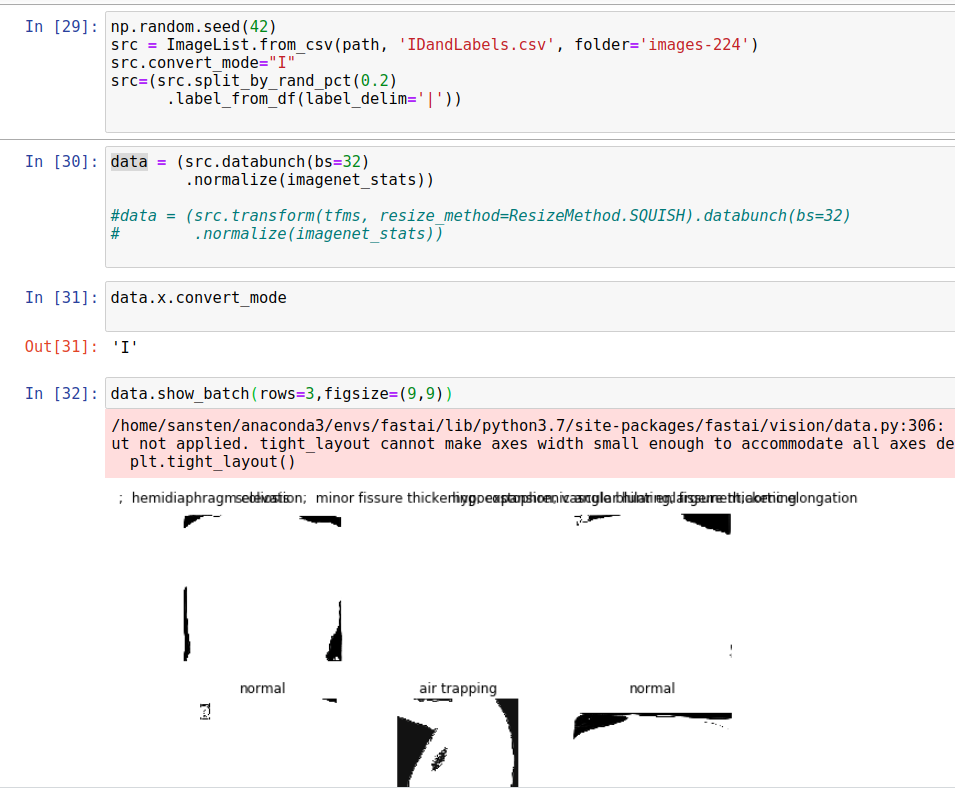
ImageList save convert_mode as an attribute when it is instantiated by __init__ (i.e. self.convert_mode). But when you wanna instantiate it by method from_folder, it seems your argument (i.e. convert_mode) couldn’t properly propagate to the right place (i.e. self.convert_mode)
As a work-around, I think you can try to manually change the attribute src.convert_mode by the following:
Yes i tried that now. I do not see any difference. It looks like the RGB is already applied by the time we set self.convert_mode=“I”. so “” is over on top of “RGB” hence the image quality is lost.
As I looked closer to the source code, I found that src is an instance of LabelLists instead of that of ImageList. Changing the attribute convert_mode right before src is converted to LabelLists can solve the issue. You can try the following:
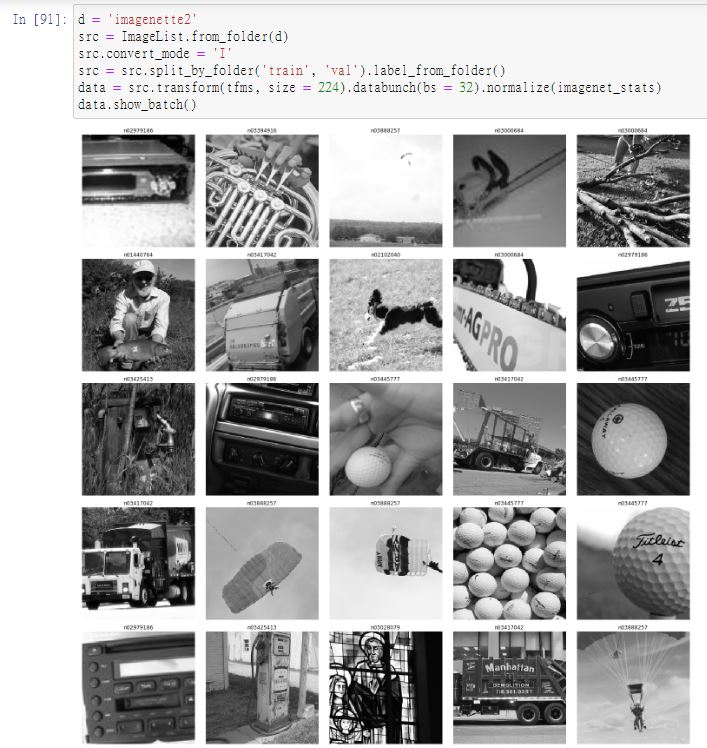
By doing so, your ImageList instance will read image as 1-channel (i.e. convert_mode = 'I'), and that property will propagate to show_batch of your ImageDataBunch. (Note that in ImageDataBunch, the image data are expanded to 3-channel)
Examples
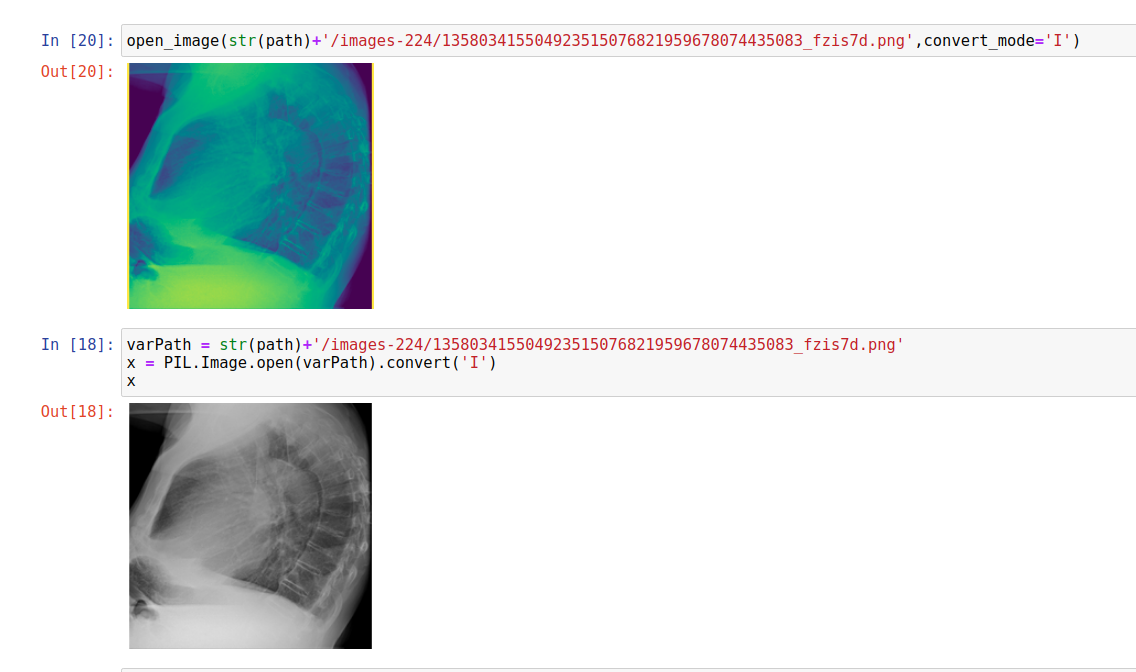
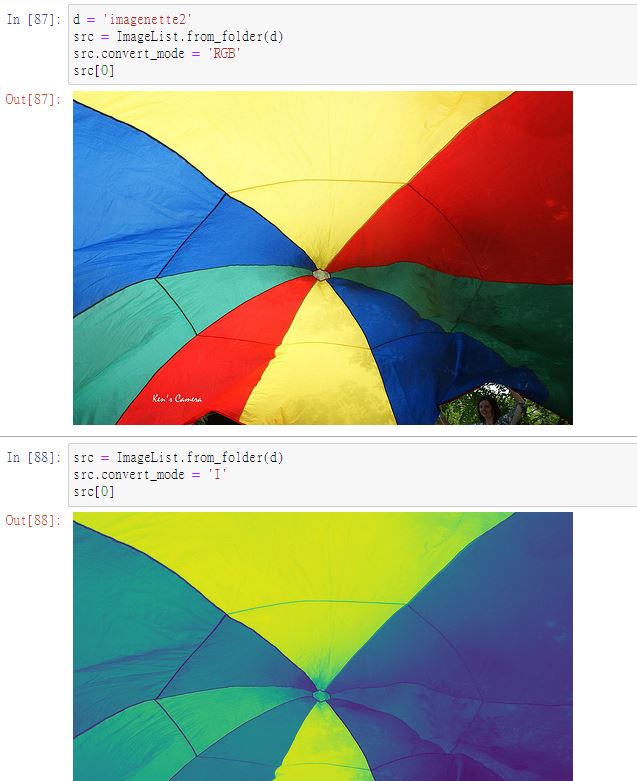
1. Setting different convert_mode ('RGB v.s. ‘I’) for ImageList
Remarks
Notice the color tone is slightly different between ImageList.__getitem__ (green color) and ImageDataBunch.show_batch (gray color), I think it is caused by the fact that in ImageDataBunch.show_batch, the batch data (list of Image) are represented as 3-channel. For ImageList.__getitem__, the image data (of class Image) are represented as 1-cahnnel.
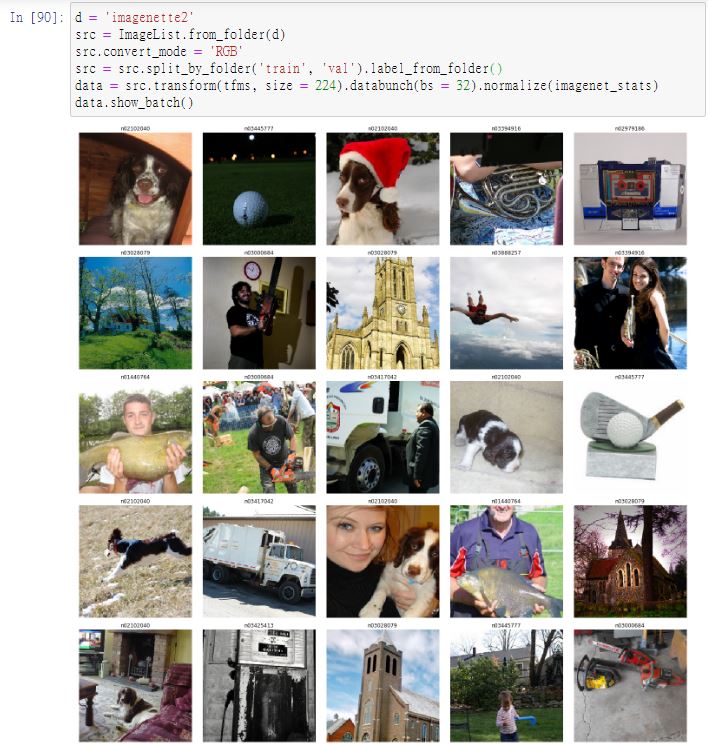
Having said that, you can get the image clarity you want now
Thanks for the reply. I tried the options still no good. I am okay if only show batch is causing the problem but the ImageList holds the right data for training. I will give a try in PyTorch.
However, I still do not get why some kind of png files show the grayscale image when show_batch executed and other kinds show only line graphs. @sgugger : Could you shed some light or move this to broader forums someone can answer this?
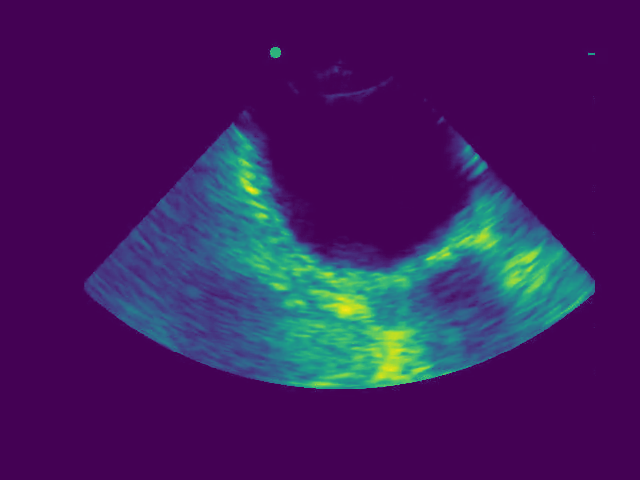
@tamilselvan, I’m also working with medical data and running into weirdness moving from gray-scale looking PNGs to converted gray scale images. When I use the convert_mode = 'I' strategy, I end up with images that look like:
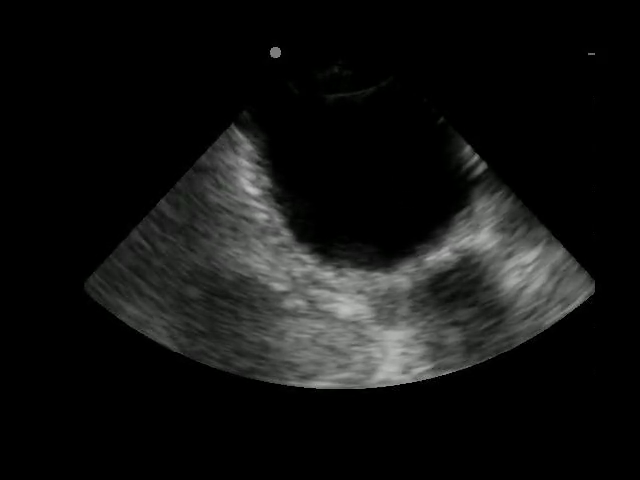
instead of what they normally show up as with 3 channels:
I’m trying to find my way to something that has a single gray-scale matrix that represents black to white, but this is an oddly complex problem. Have you found an effective solution to avoid this blue-green looking image?
I am basing this on v2 and assume the same applies to v1. By default the ‘viridis’ colormap is used hence the blue green image. You have to change the color map to ‘bone’ to get get the desired colormap for this use case.
Try adding matplotlib.rcParams['image.cmap'] = 'bone' to your notebook
I have a couple of medical imaging blogs here for more info.