Wiki: Lesson 1

Download the fast.ai repository on your local computer and use conda to set up the environment…

Repository is on GitHub…

Same thing. I can’t find the V2 notebooks anywhere. Does anyone know where to find them?

http://nbviewer.jupyter.org/github/fastai/fastai/tree/master/courses/dl1/

Notebooks are in the repository hosted at Github…

Hi,

I am getting an error like this when I try to train the classifier

What could the reason be for this?

  • A full traceback helps…
    It probably means that you have some files in your directory which shouldn’t be there…

Hi, I have run into another error:

data.val_y returns array([1,…,1,2,…,2])

data.classes returns [’.ipynb_checkpoints’, ‘elephant’, ‘mouse’]

ipynb_checkpoints_pdf.pdf (234.9 KB)

I’ve tried this

and looked into

but there has not been a solution

Thanks ecdrid for the help before!

1 Like
The previous error was solved?

Being on Windows, you need to manually delete the .ipynb notebooks…

Use the command prompt or go manual…

Which directory are you working in?

Yeap the thread helped.

I’m running the classifier on cloud so I am not certain how to do it on windows.

This is what I have

and my .ipynb file is further down below

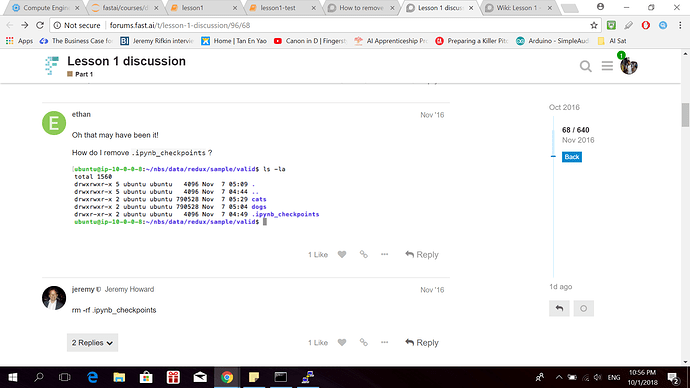
Have a look where .ipynb checkpoints are being created…
They are the culprit actually…

Looking inside the concerned data’s directory had helped me…

Most probably it’s inside the training folder of dogs cats…

Hi everyone! I have trouble running lesson 1 on my machine because ConvLearner.pretrained consumes too much RAM.
When I set sz=64 instead of sz=224 it’s works well, but the accuracy is lower – about 0.88, because images are smaller now (only 64x64 pixels).
How can I decrease memory consumption without results degradation? I’m fine if model will be trained longer.
I tried to set batch size like this but it’s seems not helping:
data = ImageClassifierData.from_paths(PATH, tfms=tfms_from_model(arch, sz), bs=8)

P. S. I found a solution. If your PC freezes due to the lack of RAM (I am not talking about GPU memory!) you need to specify num_workers=2 or even num_workers=1 in the ImageClassifierData.from_paths function (default is num_workers=8). Batch size only decreases video memory consumption, as far as I understand, which is not a problem in my case.

1 Like

Ok after wasting my time around with all the links posted in the wiki ie Nielsen’s book and other blog posts and watching the video of Lecture 1 again, I have developed much better understanding of the workflow. Also I understood why some of the model wasnt working in a similar way earlier with my Tiger Zebra dataset.

So my Tiger - Zebra dataset had around 150 pictures each in the training set. But in the first run in the jupyter notebook, batch size isnt mentioned so it goes to the default batch size of 64. However, when I explicitly reduce my bs=32, the model gives me 100% accuracy. Also I made a mistake earlier. I assumed that we used sz to set batch sizes. Rather I understand now if I set sz=32, it just picks up 32x32 cropped image. so brought it back to sz=224.

I know its not a big deal but it is a great moment for me that a model which clearly seemed to breakdown for me last week started working when I did a couple of tweaks. There is only one picture it misclassified and when I looked at it, turns out it was a picture of deer (masquerading as a tiger in the folder :slight_smile: )

My learning rate scheduler still doesnt plot. Is it because, my data set is small (175 pics each) or is it that I already achieve 100% accuracy

I am going to try couple of more data sets because I really didnt get a chance to see the improvements of augmentation and SGDR.

5 Likes

Actually Learning Rate Finder, runs on the training data, not on the validation data. So it will take the number of samples from your training data lets say 150, and it will divide by batch_size, lets say 5. So in the end you will have a plot with learning_rates vs number_of_iterations = 30 (<-150/5). And each iteration will display the learning_rate computed for the specific mini_batch of size 5.

1 Like

Hello everyone!

I’m trying to follow Jeremy’s advice and I look at the source code of some of the functions/methods appearing in this notebook. I looked at the source code of resnet34 with ??resnet34 and it all rests on some other function called ResNet. But when I do ??ResNet I obtain ``Object ResNet not found."

hey lukebyrne, Here it is some bash script that I have used to create a sample data set from a regular dataset. You can get inspired in order to build your own. You just need to shuffle and move some samples from train folder into valid folder. 20% of your examples should be in validation folder. The other folders are created/updated by fast.ai fw.

The test folder is usually used for kaggle competitions. This folder contains samples with no labels - on which you run your model, you get the predictions and you post them on the kaggle in order to get a feedback.

2 Likes

Congrats on the progress! Just to clarify, it scales the image’s largest dimension to 32, then center crops.

3 Likes

Hi,

resnet34 is a PyTorch model imported from torchvision.models, so the class constructor ResNet you are referring to it’s not part of the fastai library.

For the sake of reference, you can find the source here: https://github.com/pytorch/vision/blob/master/torchvision/models/resnet.py

If you want to use the ?? operator to obtain the source code, you should import ResNet first:

from torchvision.models import ResNet
5 Likes

Hi,

Is it ok to use ubuntu through virtual box instead of working with windows PC? I have a PC with windows 7 and I am getting lot of errors while running fastai

I’m running the fast.ai library on my own ai box. In case anyone runs into the following error:

error rendering jupyter widget. widget not found model_id...

Try upgrading to ipywidgets 7.0
conda install -c anaconda ipywidgets

2 Likes

Hi wallace,

Looks like your im attribute is none, which is that image is not defined.
Maybe you can check dimensions of the image you are training?

Shape Numpy Docs

Note that the changes outlined here: Change to how TTA() works affect this notebook.

I found changing

probs = np.mean(np.exp(log_preds),0)

to

probs = np.exp(log_preds)

fixed this. It would be great if someone could verify this is correct.

1 Like