Great lecture today! Thank you!
Location for imagenet subset (I forgot where the data was located, took me a few mins to search for where it was)
That’s an important question. You can do a pixel-wise or activation nearest neighbors search and visually check a few. I believe there are recent papers that consider GAN testing more deeply, but don’t have links right now…
@jeremy : I was going to ask about adversarial examples and proper testing of models before deploying to production. Are there any guidelines/recommendations that can be a ready reckoner for practitioners? Thanks.
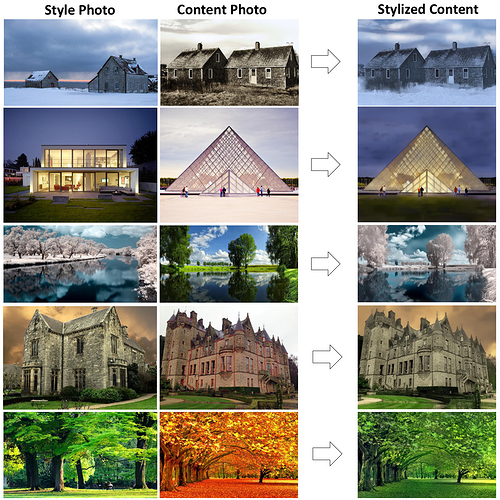
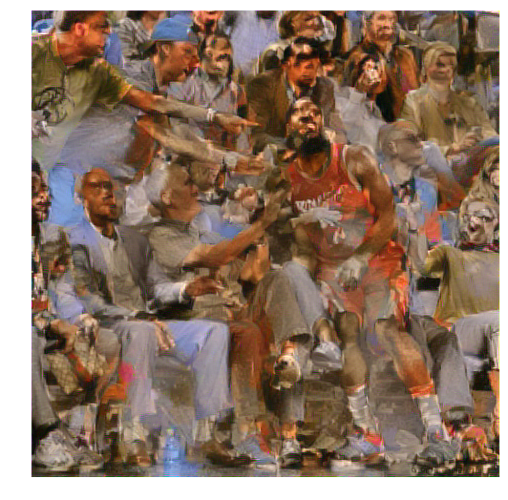
One of the most interesting implementations I’ve seen recently of style transfer came from NVidia:
They have a paper out on photorealistic style transfer complete with a pytorch implementation. It’s definitely worth a read if you’re interested in the subject.
So currently when we do transfer learning, we use gradual unfreezing, starting from the head and moving in.
Suppose we knew where in the pretrained network the weights started to be too overfit to say, imagenet, and we’re trying to classify pneumonia in chest x-rays (or something). Wouldn’t we get better results if we were to unfreeze that layer and begin retraining from this point towards the head? (As opposed to gradual unfreezing / retraining until loss stops improving, from the head in)
So, if that’s the case, or there’s another reason to pinpoint the layer where our pretrained network begins overfitting to imagenet, I’d like to propose an approach.
If we were to put a forward hook on, say, the output of all ReLUs in a network and freeze the network: we could do a bunch of forward passes on both samples of imagenet and samples of our desired dataset (e.g. chest x rays), capturing outputs of activation layers.
If we use mse to compare the average of the outputs of each activation layer of imagenet samples to the average of the outputs of each activation layer of our input dataset (e.g. chest x-rays)- couldn’t we pinpoint where overfitting began?
Maybe this one? https://arxiv.org/abs/1711.10337 Are GANs Created Equal? A Large-Scale Study
It does both - it’s like a more general version of matrix multiplication.
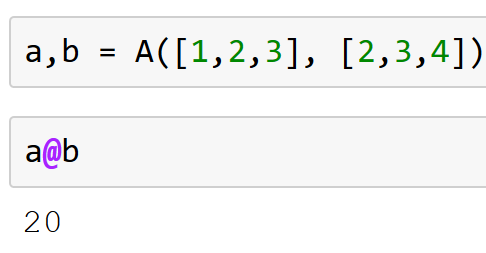
The details are here: numpy.matmul — NumPy v2.1 Manual
Style Transfer with Style:
If you’re running the same version of the matplot libraries (which I think are the current ones) that I am, then instead of getting this warning before each plt.imshow(x.)
Clipping input data to the valid range for imshow with RGB data ([0..1] for floats or [0..255] for integers).
It will just crash,
so Remember to add this line before each plt.imshow()
x=np.clip(x,0,1)
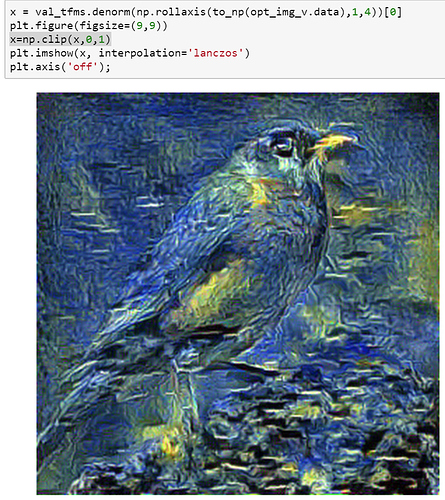
and if you need the starry night, this link will get you one the right size
and then you’ll have this:
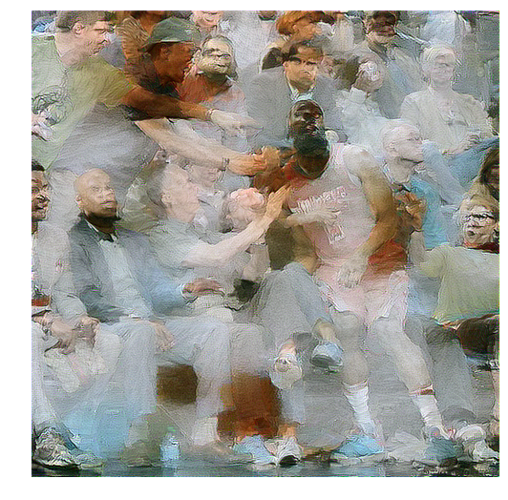
Inspired by this tweet I decided to try the style transfer techniques on the Harden picture to look more like a Renaissance painting:
Michelangelo:
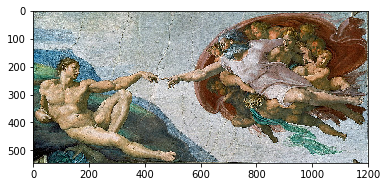
Result:
Veronese:
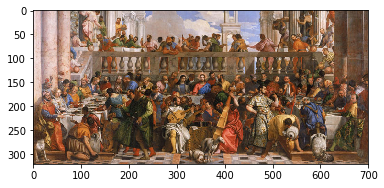
Result:
Interesting to see how it is attempting to match the similar colors from the two images.
I wonder if it would do better if you just had the crowd in your second image, It is definitely trying to match the sky, I bet it would be better if you just cropped it to a subset of the image that doesn’t include the background.
After playing with this stuff all day and having a TON of fun  it seems to produce a rough map of colors to areas, based on the gradients it’s computed for those conv layers. What’s interesting is reducing the number of conv layers it uses seems to actually get you closer to matching a more detailed style, like Van Gogh’s self portrait. I have some horrible examples, but I don’t want to give anyone nightmares.
Thank you!!
Is there a way to show the weights of different layers of the model? I want to look at what my embedding vector actually has on my project I’m working on to see if I can see what it looks like when I graph it.
Edit: Figured it out I think. I had to take learner.model[0].weights and it gives me this:
 -1.5571  16.8977  24.2306 -11.7408 -14.7333 -20.7895  20.9006 -11.9498
 -1.5568  16.9241  24.2124 -11.7413 -14.7220 -20.6807  20.8758 -11.9391
 -1.0238  -1.3052  -0.9938  -0.1421  -1.8265  -1.8094   0.1040   3.1077
  3.3347  -0.9030  -0.9301   1.7737   0.6338  -0.3185   1.8379   0.2591
  0.1894   2.6489  -1.8980  -1.3987   3.1159  -0.9233  -1.1485   0.5976
  1.3118   1.9862  -2.9543   0.7456  -1.1740   1.6253   1.4328   0.2394
  2.9578   1.1885   0.6827   1.4640   1.9298   1.2773   1.3667   3.1289
  0.4544  -0.5213   0.5065  -2.7157   3.5788   2.0279   1.1429   0.5424
 -0.6042   0.7339   1.0127  -0.7863  -0.1487   2.5978  -2.1344  -2.1136
 -1.5413   0.8695   0.8680   4.2525   0.4281  -0.6128  -1.8711  -0.4838
 -0.9232  -1.3716   1.2201   3.1258  -2.0689   0.8698   0.4367  -2.0193
  3.1688  -1.5285   1.7532   0.8469  -0.2120  -0.8519  -1.0341  -3.4555
 -1.5573  16.8506  24.1900 -11.7967 -14.7098 -20.6965  20.9128 -12.0175
[torch.cuda.FloatTensor of size 13x8 (GPU 0)]
This makes sense because my embedding width was 8. Not 100% sure where the 13 is coming from though. My total corpus size is 12,
[’_unk_’, ‘_pad_’, ‘one’, ‘two’, ‘three’, ‘four’, ‘five’, ‘six’, ‘seven’, ‘eight’, ‘nine’, ‘zero’] I think they are possibly adding in an “other” here is what pdb is showing me when I dig into it I figured it out, I had made an example earlier to show that “ten” shows up as unk, but that was added to my stoi because of that. Since it never showed up, it basically did the same thing as pad and unk!:
|322  |    def __call__(self, *input, **kwargs):|
|---|---|
|323  |        for hook in self._forward_pre_hooks.values():|
|324  |            hook(self, input)|
|325  ->|        result = self.forward(*input, **kwargs)|
|326  |        for hook in self._forward_hooks.values():|
|327  |            hook_result = hook(self, input, result)|
|328  |            if hook_result is not None:|
|329  |                raise RuntimeError(|
|330  |                    "forward hooks should never return any values, but '{}'"|
So I check what is in result and I get:
(Pdb) result
################################CORPUS(modeldata.nt)################################
(Variable containing:
Columns 0 to 7
-62.5366 -62.5360   0.0212   6.1734   0.7226   1.6220   2.9401   1.0329

Columns 8 to 12
 -2.8944   0.6314   0.2226   2.6705 -62.4733
[torch.cuda.FloatTensor of size 1x13 (GPU 0)]
######################Hidden Activations (nh)#######################################
, [Variable containing:
(0 ,.,.) =

Columns 0 to 5
   7.6159e-01  1.1618e-19  3.8969e-08 -2.7346e-18  1.0000e+00 -9.6941e-12

Columns 6 to 11
  -4.8120e-13  2.2680e-20 -9.0172e-01  1.7551e-13  9.9999e-01 -2.4922e-02

Columns 12 to 15
  -3.8679e-03 -7.6159e-01 -1.1401e-23 -3.1159e-11
[torch.cuda.FloatTensor of size 1x1x16 (GPU 0)]
, Variable containing:
(0 ,.,.) =

Columns 0 to 5
   9.9987e-01  1.0725e-07  3.8746e-01  3.2255e-10  2.0743e-05  4.3124e-07

Columns 6 to 11
   1.8442e-07 -7.6086e-01  2.6484e-23  5.8412e-17  8.8344e-12 -1.0000e+00

Columns 12 to 15
   2.5143e-16 -1.2146e-11 -3.1901e-08 -7.6053e-01
[torch.cuda.FloatTensor of size 1x1x16 (GPU 0)]
, Variable containing:
(0 ,.,.) =

Columns 0 to 5
   7.6089e-01 -9.9998e-01 -1.0000e+00  7.5268e-01  7.6159e-01  3.0271e-09

Columns 6 to 7
  -7.9472e-03  7.3556e-06
[torch.cuda.FloatTensor of size 1x1x8 (GPU 0)]
], [Variable containing:
(0 ,.,.) =

Columns 0 to 5
   7.6159e-01  1.1618e-19  3.8969e-08 -2.7346e-18  1.0000e+00 -9.6941e-12

Columns 6 to 11
  -4.8120e-13  2.2680e-20 -9.0172e-01  1.7551e-13  9.9999e-01 -2.4922e-02

Columns 12 to 15
  -3.8679e-03 -7.6159e-01 -1.1401e-23 -3.1159e-11
[torch.cuda.FloatTensor of size 1x1x16 (GPU 0)]
, Variable containing:
(0 ,.,.) =

Columns 0 to 5
   9.9987e-01  1.0725e-07  3.8746e-01  3.2255e-10  2.0743e-05  4.3124e-07

Columns 6 to 11
   1.8442e-07 -7.6086e-01  2.6484e-23  5.8412e-17  8.8344e-12 -1.0000e+00

Columns 12 to 15
   2.5143e-16 -1.2146e-11 -3.1901e-08 -7.6053e-01
[torch.cuda.FloatTensor of size 1x1x16 (GPU 0)]
, Variable containing:
(0 ,.,.) =

Columns 0 to 5
   7.6089e-01 -9.9998e-01 -1.0000e+00  7.5268e-01  7.6159e-01  3.0271e-09

Columns 6 to 7
  -7.9472e-03  7.3556e-06
[torch.cuda.FloatTensor of size 1x1x8 (GPU 0)]
])
So columns 0-12 are what I’m looking at. The first two are _unk_ and _pad_ that are really low (this makes sense because I never have those two predictions, then a lot of reasonable predictions and then at the end, another really low value “ten” which is also never used.
Probably would. Based on the paper there should be a way to keep sharp features of the picture as well as the painting. Need to dig into it more.
This is a little bit off-the-topic, but, finally, PyTorch 0.4 has been released today! Make sure to read the release notes, they’ve changed quite a few of their core concepts (0-dim and grad-tracking tensors, the API is more NumPy-like etc.)
Hi, I am trying to implement the style transfer and wanted to find what these commands meant
m_vgg = to_gpu(vgg16(True)).eval()
set_trainable(m_vgg,False)
conceptually it looks like we are making a copy of vgg16 and making it non trainable. It would be get to good links to find documentation on the same.
