Found this through twitter(a tool to assist in reading papers), you could highlight some text from the paper and get some explanation for it. You could also ask further questions regarding the highlighted text. I am not sure about the quality of the results, but any way sharing this here:
Here is the twitter post from the developer of the tool if you are interested:
What sorcery is this?! I just uploaded a paper on historical linguistics, and it does a really good job of explaining it! (Occasionally it misfires, though, and provides an explanation for something the authors could have said, but didn’t.)
I’m playing around with DiffEdit and I want to implement the paper, but I am not sure where I should start.
I figure “Step 1: Compute Mask” is probably a reasonable starting point, but I am having troubles starting. My understanding on what we have done up to this point is that the U-Net is being used to estimate the noise in our pictures so it seems like maybe I should use the U-Net, but I’m wondering if I need to also include the VAE in order to bring the picture down into latent space.
My current plan is to use the diffusion-nbs as a starting point, but just wanted to see if I am on the right track with doing that or if I should be going a different route.
I am starting to answer some of my own questions. Here is what the paper says (section 4.1 under “Diffusion models”):
Since these models operate in a VQGAN latent spaces (Esser et al., 2021), the resolution of our masks is 32 × 32 (ImageNet) or 64 × 64 (Imagen and COCO).
So, it does use the VAE and the normal stable diffusion pipeline.
The next thing I looked at is section 3.2 Step 1:
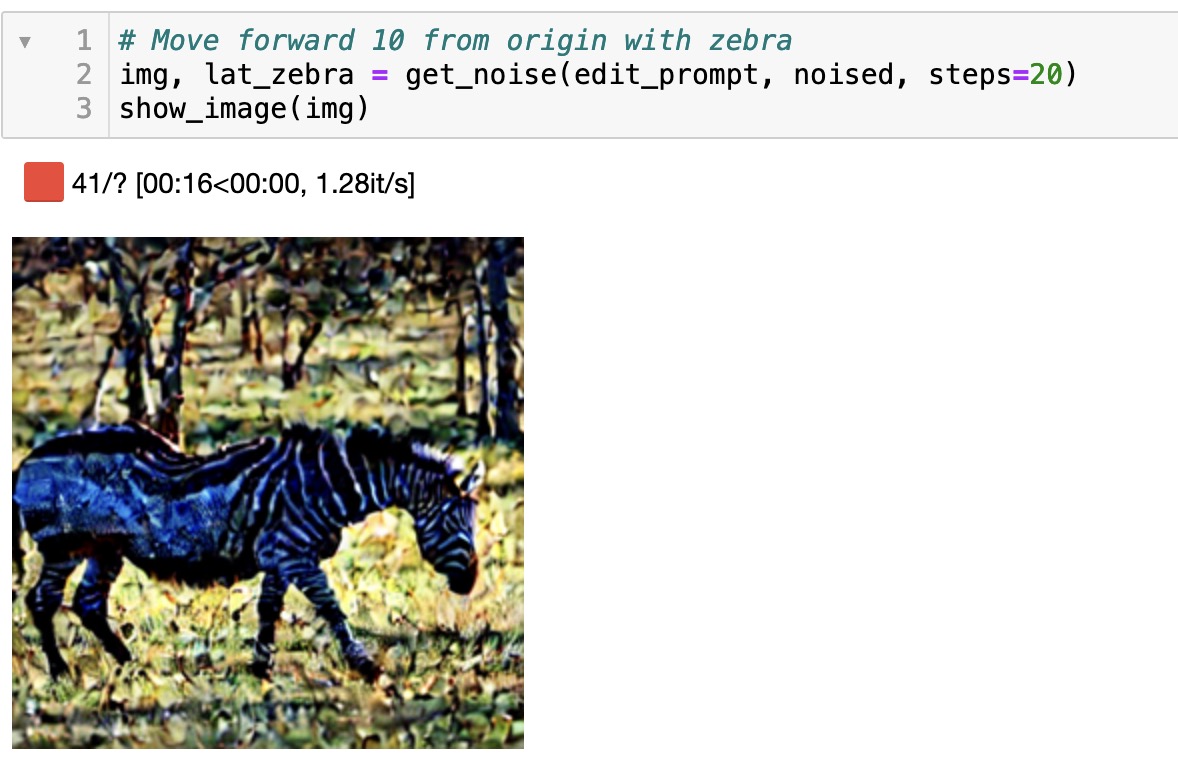
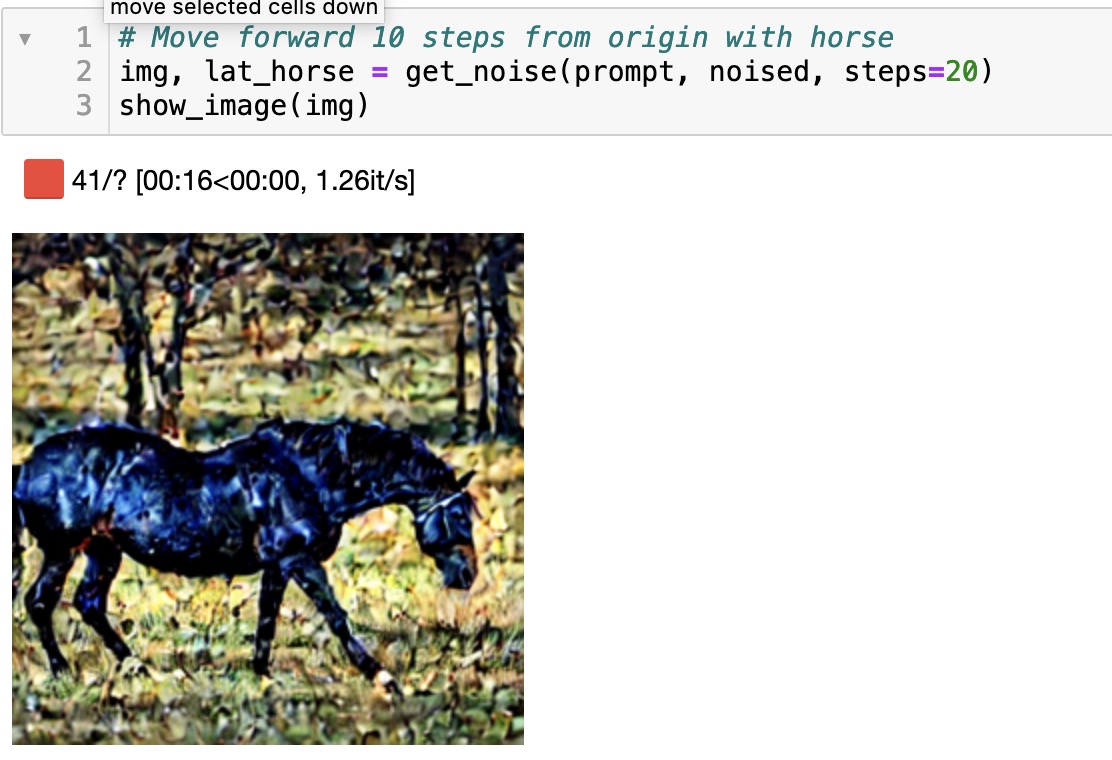
Step 1: Computing editing mask. When the denoising an image, a text-conditioned diffusion model will yield different noise estimates given different text conditionings. We can consider where the estimates are different, which gives information about what image regions are concerned by the change in conditioning text. For instance, in Figure 2, the noise estimates conditioned to the query zebra and reference text horse1 are different on the body of the animal, where they will tend to decode different colors and textures depending on the conditioning. For the background, on the other hand, there is little change in the noise estimates. The difference between the noise estimates can thus be used to infer a mask that identifies what parts on the image need to be changed to match the query. In our algorithm, we use a Gaussian noise with strength 50% (see analysis in Appendix A.1), remove extreme values in noise predictions and stabilize the effect by averaging spatial differences over a set of n input noises, with n = 10 in our default configuration. The result is then rescaled to the range [0, 1], and binarized with a threshold, which we set to 0.5 by default. The masks generally somewhat overshoot the region that requires editing, this is beneficial as it allows it to be smoothly embedded in it’s context, see examples in Section 4 and Section A.5.
The last thing I’ve found so far which is helpful is back in the diffusion section where it says:
We use 50 steps in DDIM sampling with a fixed schedule, and the encoding ratio parameter further decreases the number of updates used for our edits.
This all seems helpful, but I’m still working on putting it all together!
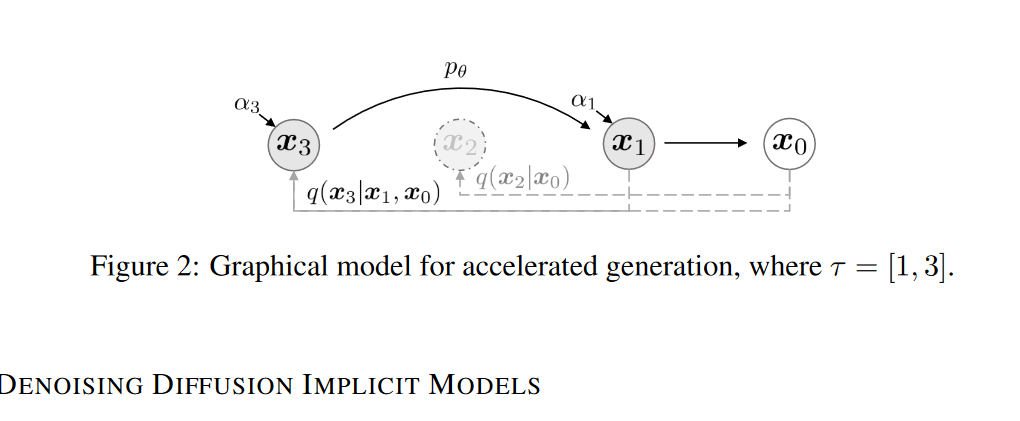
Is DDIM just the thing where we can skip forward a bunch of steps when denoising? So instead of having to do one step at a time, we can skip a bunch of steps in the middle? I skimmed the paper and that’s the process I think it describes?
Our key observation is that the DDPM objective in the form of Lγ only depends on the marginals2 q(xt|x0), but not directly on the joint q(x1:T |x0). Since there are many inference distributions (joints) with the same marginals, we explore alternative inference processes that are non-Markovian, which leads to new generative processes
Not only that, but also DDIM is completely deterministic unlike DDPM. DDPM has some noise at each x update step while DDIM doesn’t. But yes DDIM allows for super fast sampling like just 50-100 steps.
Definitely seems like it’s an important detail from the paper. So, is the best way to go about finding a DDIM to just look for one on Huggingface or what do people do when they get here? I’m expecting that my input is going to be a noisy image and my output will be a cleaned image. But I guess does this just replace the VAE?
Yeah code-wise that is the best place to check. DDIM is effectively a different sampler/scheduler so that is what you change in your code. You’d use DDIMScheduler
I played around with this a little bit last night but didn’t get very far … Rather than switching to DDIM, I simply used the current code we had from Lesson 9 with LMSDiscreteScheduler and simply modified the code to go step by step up to the number of steps I wanted … seemed faster to go that way
I basically generated an image with a prompt till I got one that I liked, and then used the seed for the version I liked to start a new image for a certain number of steps. Then I took the noise at that point and used that to generate a few more steps with both the original prompt and the edited prompt separately so that I got two separate latents for each prompt. I then subtracted one from the other …
That’s as far as I got last night since I wasn’t sure how to go about extracting a mask from the result. I think I was doing it wrong but it was late I decided to tackle it today …
If it helps, I’ve uploaded my notebook with work done so far and you can take a look at it:
This might not match the DiffEdit approach totally but I thought it was kind of in the same direction. If anybody sees any issues or have any feedback/comments on this approach, I’d be interested to hear about it as well