fastai v2 now under development
During the in-person part 2 of course v3 (that will be released as a MOOC in June), we focused on building the library from scratch (starting with matrix multiplication, and up to training a state-of-the-art ImageNet model) which allowed us to have a second take at how we did things when we built v1. We built a better and more flexible way to have a training loop with callbacks, and an easier to use data block API. That lead to the development of v1.1 to integrate those changes.
We soon realized however that, even if we don’t want to change the high-level API from v1, it meant rewriting the core modules, and in turn all the other modules need to be adapted, so we’re on an almost complete rewrite. Calling it a v1.1 would be a bit of a stretch so we’re building v2, hopefully to be released in a few weeks. Below is the roadmap for what we’re doing, and the breaking changes you can except (mostly in the data block API or the way callbacks are written).
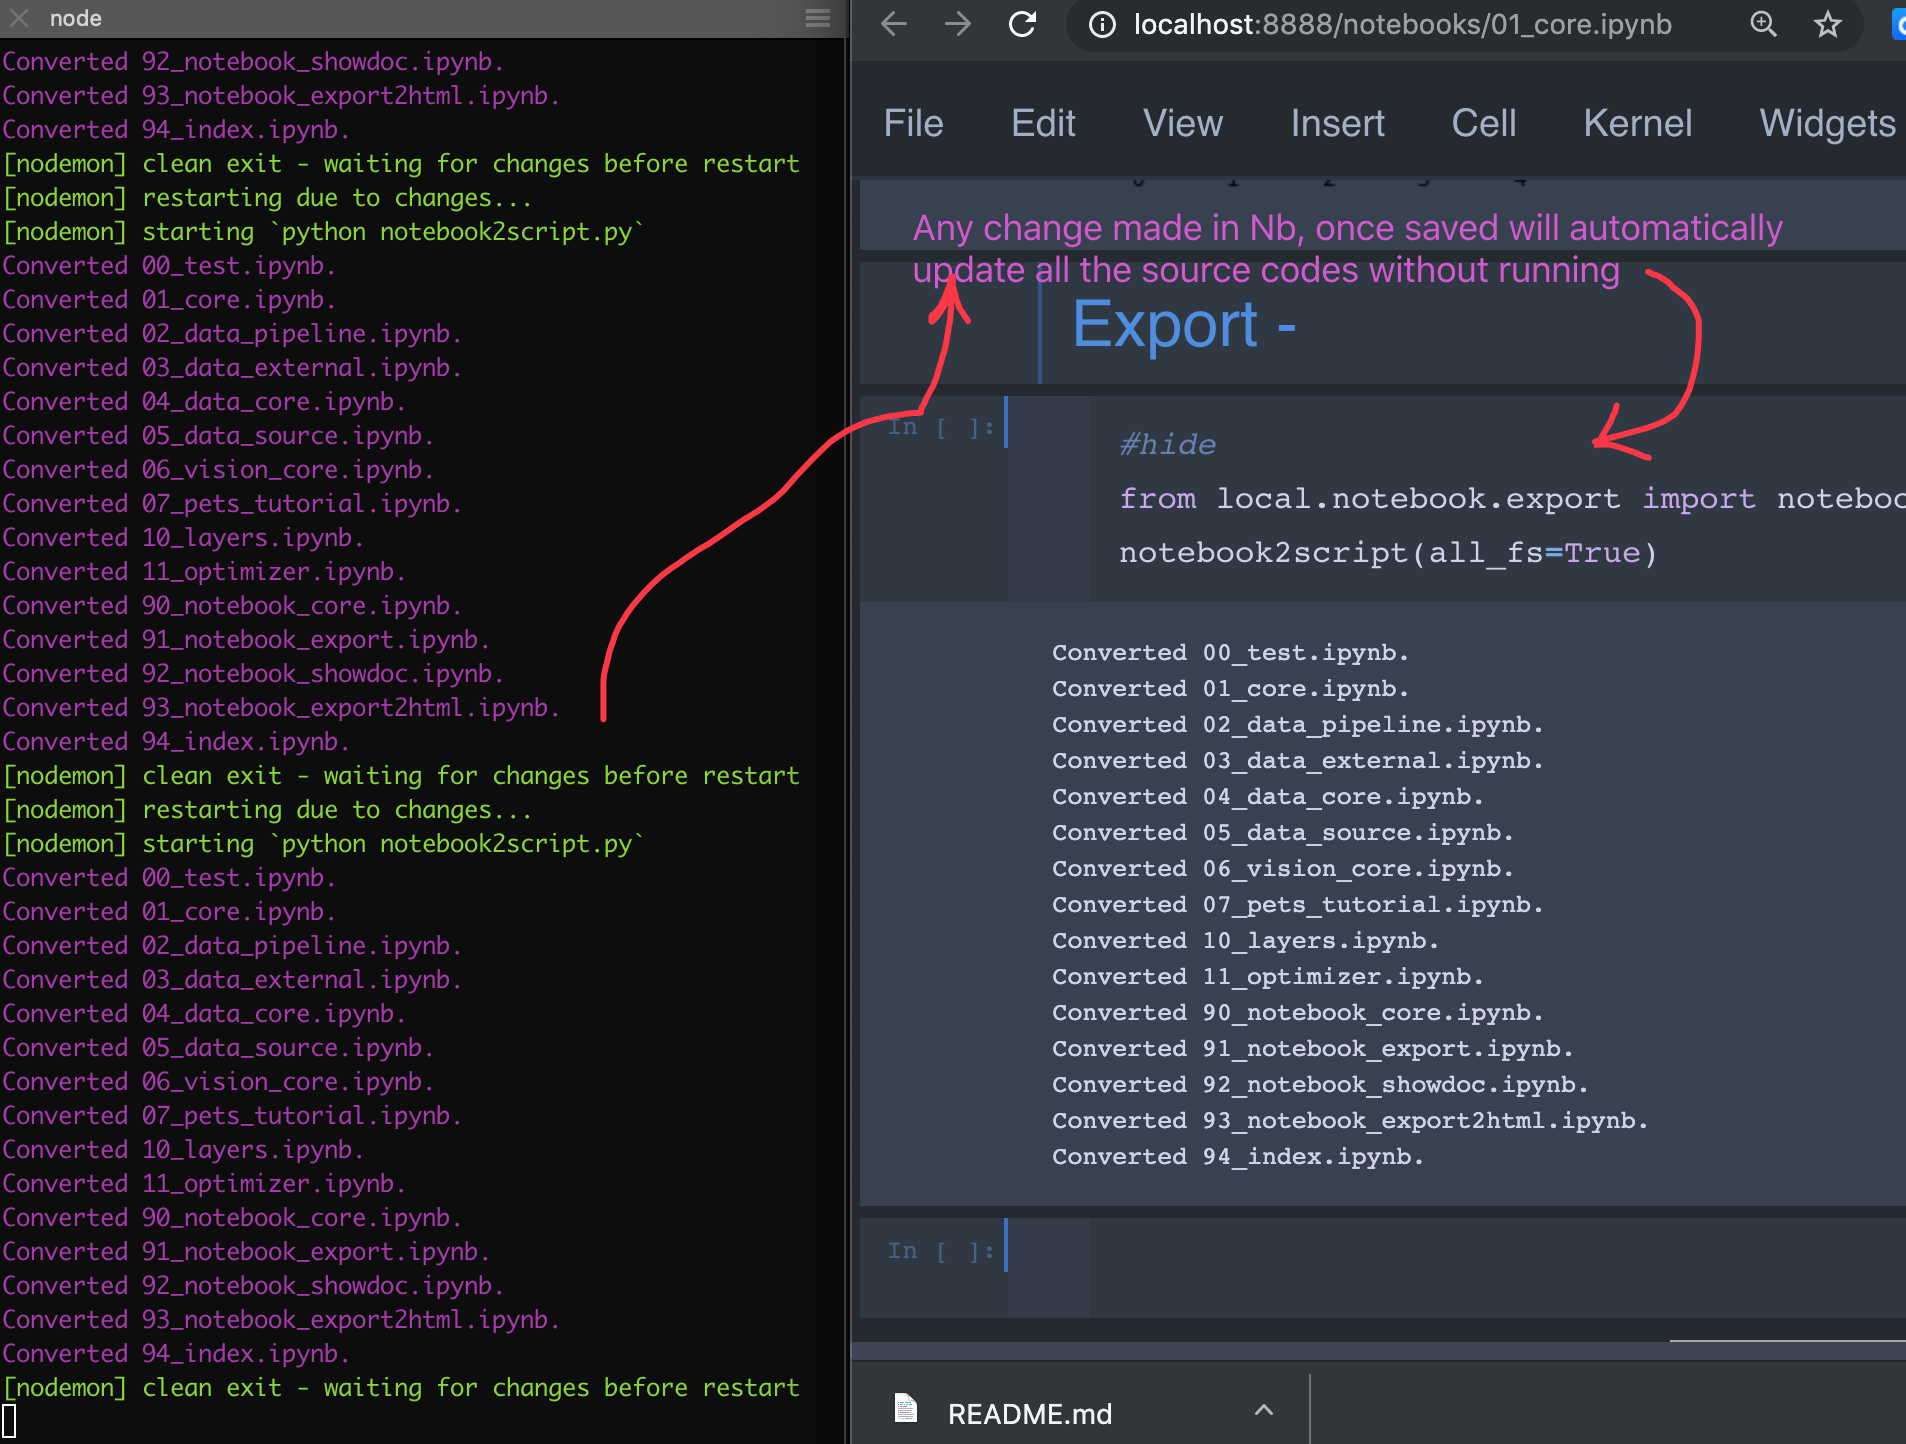
The most interesting part isn’t the features we’re adding but the way we settled in developing it. After the initial process of prototyping v1 entirely in notebooks, then the second part of the course that did much the same, we have greatly improved our scripts. The idea is that v2 will really be entirely developed in notebooks. The library will be created by an exporting script, and all the PRs, whether for bug fixes or new features will have to be done in the proper notebook.
Why? Well as you know notebooks are interactive. And we’re not just leaving the code cells: each function is followed by documentation (if more is needed after the 1-line docstring) and some unit tests. So if you’re fixing something, you can add a unit test that failed without your fix super easily and check the intended behavior isn’t broken by running the cell just below the code.
The script that builds the documentation hides the source code of the functions in the module, and shows the definition of the function with the docstring in its place, to give docs like you’re used to in v1. The unit tests that are of interest to users will be left, as they’re useful to understand what the function is supposed to do (adding a test link in v1 to all the docs was a feature a lot of people were excited about). We’re working hard to write tests that are as clear and informative as possible.
You can find examples of this process in the dev repo.
Important
There will be one last release of v1.0, which will then live in a separate branch for bug fixes. v1.0 will continue to be maintained, and there will be a separate v1.0 docs site. So you don’t have to migrate if you don’t want to.
Once we’re ready, the notebooks that build v2 will be exported on master, so master will be a bit unstable while we test everything is working properly and convert the course notebook to v2 (the v1 version will still be available). Once it seems to be working OK we’ll do a release as v2.
Roadmap to v2
Data block API supercharged
The data block API will be completely reworked to make it easier for users to plug in at every level they want. The high level API will look something like this (on the pets dataset):
class PetsData(DataBlock):
    types = Image,Category
    get_items  = get_image_files
    split_func = RandomSplitter()
    label_func = RegexLabeller(pat = r'/([^/]+)_\d+.jpg$')
But every step of the way will be more easily accessible. If you like writing your own Dataset in PyTorch for instance, you can just explain how to get your inputs and targets from the filenames in one transform:
class PetTfm(Transform):
    def __init__(self, items, vocab=None):
        super().__init__()
        self.items = items
        self.labeller = RegexLabeller(pat = r'/([^/]+)_\d+.jpg$')
        if vocab is None:
            vals = map(self.labeller, items[train_idx])
            self.vocab = uniqueify(vals, sort=True)
        else: self.vocab=vocab
        self.o2i = {w:i for i,w in enumerate(self.vocab)}

    def encodes(self, i):
        o = self.items[i]
        return resized_image(o), self.o2i[self.labeller(o)]
where resized_image is a function that opens and resizes the image (for batching). If you want to use all the visualization tools the library offers, you’ll just need to add to that transform a decodes (takes the output of encodes an returns what you want to display) and a show method (explain how to display the output of decodes).
    def decodes(self, o): return o[0],self.vocab[o[1]]
    def shows(self, o, ax=None): show_image(o[0], ax, title=o[1])
New callback system
One of the highlights of v2 will be the new callback system developed in the part 2 of the course. This will be a breaking change for anyone having custom callbacks (they’ll need to rewrite them with the new API) but shouldn’t impact the high-level API much. There’ll be more events and more flexibility, and it will be easier to use and understand. Stay tuned for tutorials showing how this will work if you haven’t followed the part 2 of the course.
Data augmentation
We won’t keep the current pipeline, instead allowing you to mix between:
- transforms of single image byte tensors on the CPU with PIL
- transforms of single image float tensors on the CPU with pytorch (i.e. similar to v1.0)
- transforms of batches of images on the GPU once the resize is done.
We’ll be encouraging most data augmentation to be done on the GPU, resulting in quite a boost of performance.
Customizable Optimizer
On top of the PyTorch optimizers, we’ve developed an optimizer that is entirely customizable and built with blocks that you can mix and match. Implementing the new LAMB optimizer with it took just 8 lines of code.
def lamb_step(p, lr, mom, mom_damp, step, sqr_mom, sqr_damp, grad_avg, sqr_avg, eps, wd, **kwargs):
    debias1 = debias(mom,     mom_damp, step)
    debias2 = debias(sqr_mom, sqr_damp, step)
    r1 = p.data.pow(2).mean().sqrt()
    step = (grad_avg/debias1) / ((sqr_avg/debias2).sqrt()+eps) + wd*p.data
    r2 = step.pow(2).mean().sqrt()
    p.data.add_(-lr * min(r1/r2,10), step)
    return p
lamb_step._defaults = dict(eps=1e-6, wd=0.)

lamb = partial(StatefulOptimizer, steppers=lamb_step,
               stats=[AverageGrad(dampening=True), AverageSqrGrad(), StepCount()])
NLP preprocessing
Tokenizing won’t be done with a preprocessor anymore, but with helper functions that will return something similar to your inputs, but tokenized (so files in a folder architecture like your input files, or a new dataframe, or a new csv file). There’ll be a slight gain of speed but mostly, the memory usage will be greatly reduced for files or csv, as we won’t load the entire dataset in memory anymore.
There will also be a SentencePieceTokenizer if you have installed SentencePiece (it won’t be a dependency of the library).