I have a question regarding the loss function in 06_multicat.ipynb chapter.
The loss is stated as:
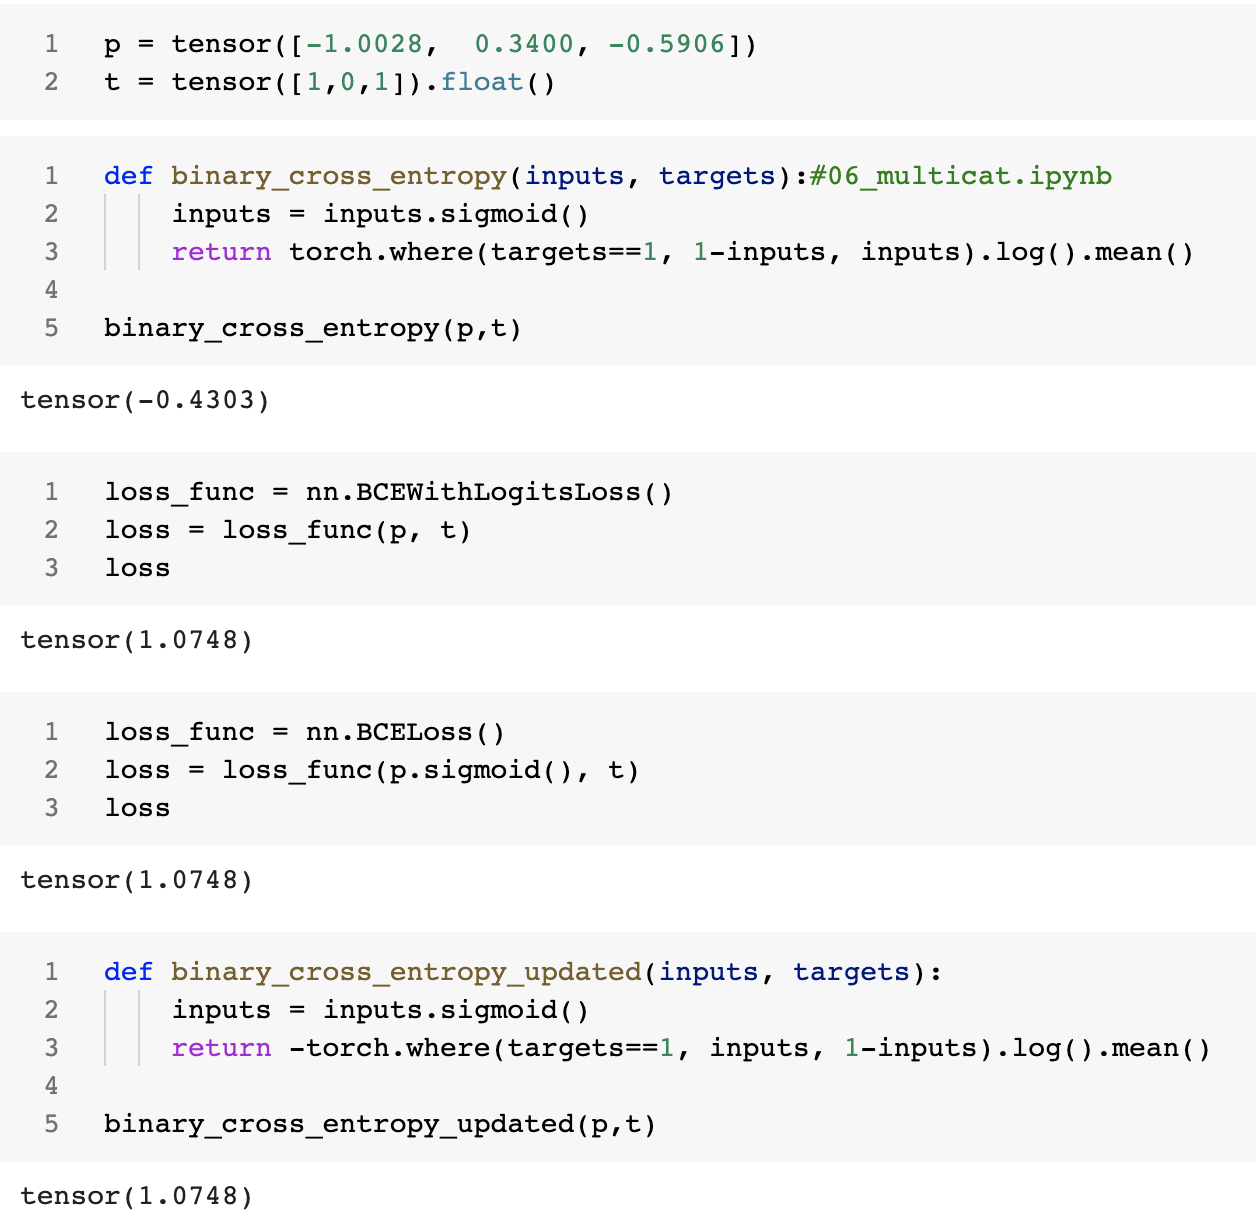
def binary_cross_entropy(inputs, targets):
    inputs = inputs.sigmoid()
    return torch.where(targets==1, 1-inputs, inputs).log().mean()
shouldn’t it be
def binary_cross_entropy_updated(inputs, targets):
    inputs = inputs.sigmoid()
    return -torch.where(targets==1, inputs, 1-inputs).log().mean()
two changes were:
1)the -ve sign
2)inputs and 1-inputs were interchanged in the torch.where