Be careful if you follow too rigorously what @jeremy says to do, you’ll have a risk to be 2-3 years earlier than everyone else. That is probably the story of his life.
7 Likes
As the lessons go on the “do this” type advice is becoming more specific and specialized. I’ll keep updating this thread as I complete lessons, but the meat is in the advice in lessons 1 and 2. Most of the stuff I post from lesson 3 forward can be found in the (really awesome) lesson notes that have been made available in the forum.
Lesson 4
-
If you’re doing NLP stuff, make sure you use all of the text you have (including unlabeled validation set) to train your model, because there’s no reason not to. Lesson 4: A little NLP trick
-
In response to “What are the 10% of cases where you would not use neural nets”. You may as well try both. Try a random forest and try a neural net. Lesson 4: How to know when to use neural nets
-
Use these terms (parameters, layers, activations…etc) and use them accurately. Lesson 4: Important vocabulary for talking about ML
4 Likes
Lesson 5
-
The answer to the question “Should I try blah?” is to try blah and see, that’s how you become a good practitioner. Lesson 5: Should I try blah?
-
If you want to play around, try to create your own nn.linear class. You could create something called My_Linear and it will take you, depending on your PyTorch experience, an hour or two. We don’t want any of this to be magic and you know everything necessary to create this now. These are the things you should be doing for assignments this week, not so much new applications but trying to write more of these things from scratch and get them to work. Learn how to debug them and check them to see what’s going in and coming out. Lesson 5 Assignment: Create your own version of nn.linear
-
A great assignment would be to take Lesson 2 SGD and try to add momentum to it. Or even the new notebook we have for MNIST, get rid of the Optim.SGD and write your own update function with momentum Lesson 5: Another suggested assignment
3 Likes
Lesson 6
-
Not an explicit “do this” but it feels like it fits here. “One of the big opportunities for research is to figure out how to do data augmentation for different domains. Almost nobody is looking at that and to me it is one of the biggest opportunities that could let you decrease data requirements by 5-10x.” Lesson 6: Data augmentation on inputs that aren’t images
-
If you take your time going through the convolution kernel section and the heatmap section of this notebook, running those lines of code and changing them around a bit. The most important thing to remember is shape (rank and dimensions of tensor). Try to think “why?”. Try going back to the printout of the summary, the list of the actual layers, the picture we drew and think about what’s going on. Lesson 6: Go through the convolution kernel and heatmap notebook
2 Likes
Hey ! It would be great if you could tell us how to upload your own dataset using the data bunch factory methods.
Lesson 7
- Don’t let this lesson intimidate you. It’s meant to be intense in order to give you ideas to keep you busy before part two comes out.
Parts 2-5 come from a great speech towards the end of the lesson. I’d highly recommend revisiting here: Lesson 7: What to do once you’ve completed Part 1
-
Go back and watch the videos again. There will be bits where you now understand stuff you didn’t before.
-
Write code and put it on GitHub. It doesn’t matter if it’s great code or not, writing it and sharing it is enough. You’ll get feedback from your peers that will help you improve.
-
It’s a good time to start reading some of the papers introduced in the course. All the parts that say derivations/theorems/lemmas, feel free to skip, they will add nothing to your understanding of practical deep learning. Read the parts where they talk about why they are solving this problem and the results. Write summaries that will explain this to you of 6 months ago.
-
Perhaps the most important is to get together with others. Learning works a lot better if you have that social experience. Start a book club, a study group, get involved in meetups, and build things. It doesn’t have to be amazing. Build something that will make the world slightly better, or will be slightly delightful to your two year old to see it. Just finish something, and then try to make it a bit better. Or get involved with fast.ai and helping develop the code and documentation. Check Dev Projects Index on forums.
-
In response to “What would you recommend doing/learning/practicing until the part 2 course starts?” "Just code. Just code all the time. Look at the shape of your inputs and outputs and make sure you know how to grab a mini-batch. There’s so much material that we’ve covered, if you can get to a pointwhere you can rebuild those notebooks from scratch without cheating too much, you’ll be in the top echelon of practitioners and you’ll be able to do all
of these things yourself and that’s really really rare. Lesson 7: What to do/learn/practice between now and Part 2 Bonus: This is lesson 7 and the clip starts at t=7777!
5 Likes
@MadeUpMasters Suggestions: I learned about this cool summary tool on this platform, I suggest that you can edit the top post to make it look better organised
If you do [details="Title displayed]
And then close the [details] <-Put a slash ‘/’ before details here to create this:
Ex:
[details="Lesson 1"]
Ideas here
[/details]
gives:
Lesson 1
Ideas here
It creates a drop down based menu for details.
You can even nest it by:
[details="Lesson 1"]
foo
[details="Point 1"]
bar
[/details]
[/details]
gives:
Lesson 1
foo
Point 1
bar
6 Likes
Done! Thanks for the suggestion. One weird thing is I can’t get the titles to be bold. Not a big deal but if you have a quick fix let me know.
main point
sub point
Thanks! this sub-nest is very cool!
2 Likes
@init_27, I took the liberty to edit your post to show what’s behind the rendered output by simply adding``` ``` around it, it’s much easier to see how to do it that way.
I’m not sure the nested one works well, as it doesn’t indent the nesting, so it’s just confusing. It doesn’t look like it’s meant to be nested: https://developer.mozilla.org/en-US/docs/Web/HTML/Element/details
1 Like
Many thanks!
I think it might be a personal preference, keeping everything else collapsed allows me to focus on just one open tab, hence I suggested that.
I didn’t realise it doesn’t indent/display the nesting, thanks for pointing out.
1 Like
Hi much appreciate Robert and following your advice:
- silly question from Lesson 1
I cant seem to get the
create new cell
reset kernel
Shortcuts to work?
Thanks heaps ; )
dgrl
Hey, not a silly question at all. What have you tried and what happened?
There are a number of ways to create a new cell. You can press ‘a’ or ‘b’ to create a new cell above or below your current one (while in command mode so cell is labeled blue and no new text appears when you type). Also hitting shift-enter when in the last cell in the notebook (in command or control) will execute the code and create a new cell below.
Restart kernel should be pressing zero twice (also in command mode). There will be a warning box that pops up.
If you already tried those and it didn’t work then please post here with details. Cheers.
Thanks heaps Robert!,
i was trying on colab, the shortcuts dont seem to all work there:
https://colab.research.google.com/github/fastai/course-v3/blob/master/nbs/dl1/00_notebook_tutorial.ipynb
My Progress so far:
Ive got a desktop install of juypiter notebook sort of running now on
http://localhost:8888/tree#notebooks
It seems to have the colors and the command as you kindly mentioned or I would have been lost.
It seems to open the files/folders of the C: drive.
So I guess I will need a local copy of the lessons.
Where is best if that is right?
I cant figure out how to get it open on the D: drive either yet
this DIDNT seem to open the D: drive for me either =>
jupyter_notebook_config.py
c.NotebookApp.notebook_dir = "D:"
Thanks for your help.
dgrl
Hey, glad it helped. Wish I could help more but my knowledge of stuff like this is limited. You should try posting in the Google colab thread here: Platform: Colab ✅.
Also the lessons mostly won’t work for you locally unless you have a gpu and have set it up properly which can be hard. A local jupyter notebook is an awesome place to experiment and write code that runs on a cpu, but won’t work for deep learning unless you have a special setup.
Whatever you do though just stick with it. The first month of every class is filled with these initial setup type headaches and frustration. I hadn’t used jupyter 9 weeks ago and was frequently stuck, now I love it and feel like I know almost all the tips and tricks.
1 Like
Did you try CTRL-M then B for insert before cursor and CTRL-M then A for inserting after where your cursor is at?
I have not tried command shortcut for “reset kernel”, tbh, I want to manually do something catastrophic like resetting the kernel that could kill my work, so I avoid even setting the shortcut for that because I could very easily mistype something and kill a perfectly good session.
Thanks for your patience Mike
For some reason I missed the CTRL + M !!
Thanks Robert for the good advice also.
dgrl
1 Like
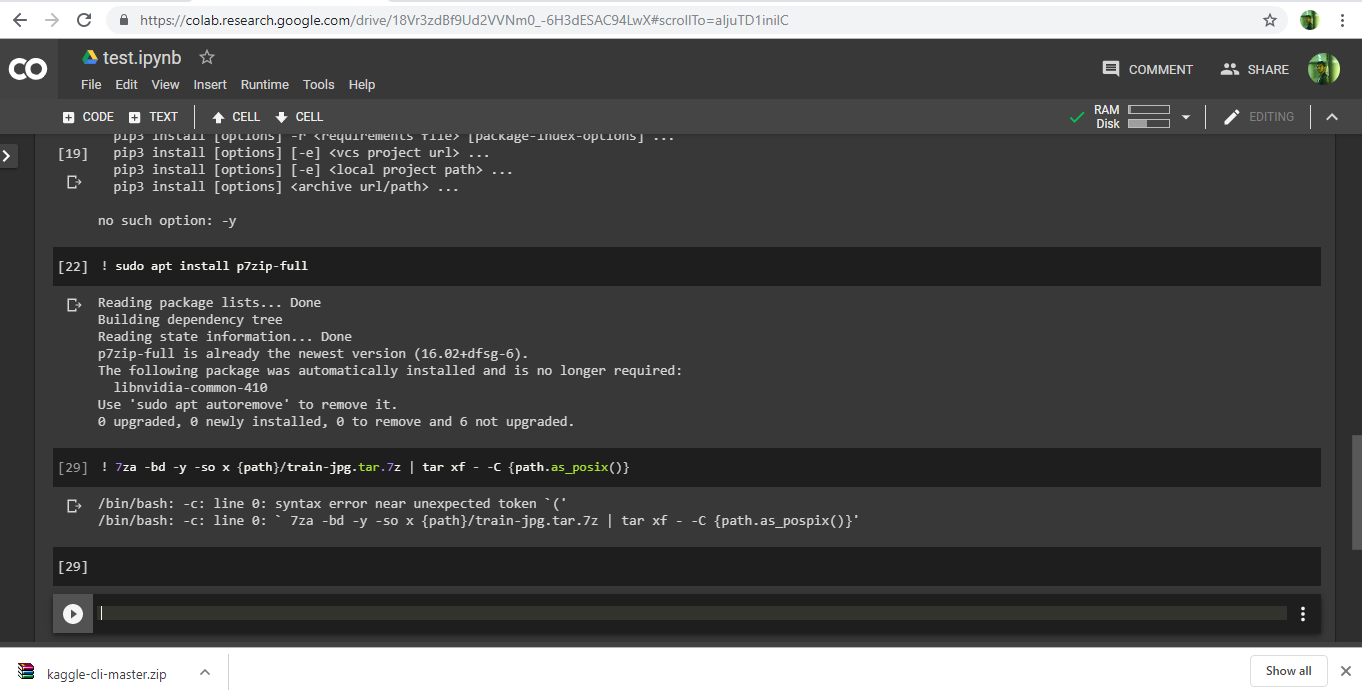
Hi, I’m in lesson-3, downloading Planet dataset from kaggle.
I’m able to download the dataset but unable to unzip.
I get a syntax error when i tried running this code(as in the lesson notebook).
! 7za -bd -y -so x {path}/train-jpg.tar.7z | tar xf - -C {path.as_posix()}