Are you looking for something like this
Dreambooth
yess something like that thank you.
@descobar7 I believe the folks behind https://dreamfusion3d.github.io/ explored “from the back” “from the side” prompts to deal with the so called “Janus” problem, where you’d get 2+ front-facing forms on the 3d image.

After all these years of wringing our hands at the black boxes of neural nets…we can just tell them what we want with plain, natural language (rendered in octane, 8k, and trending on artstation, that is!)
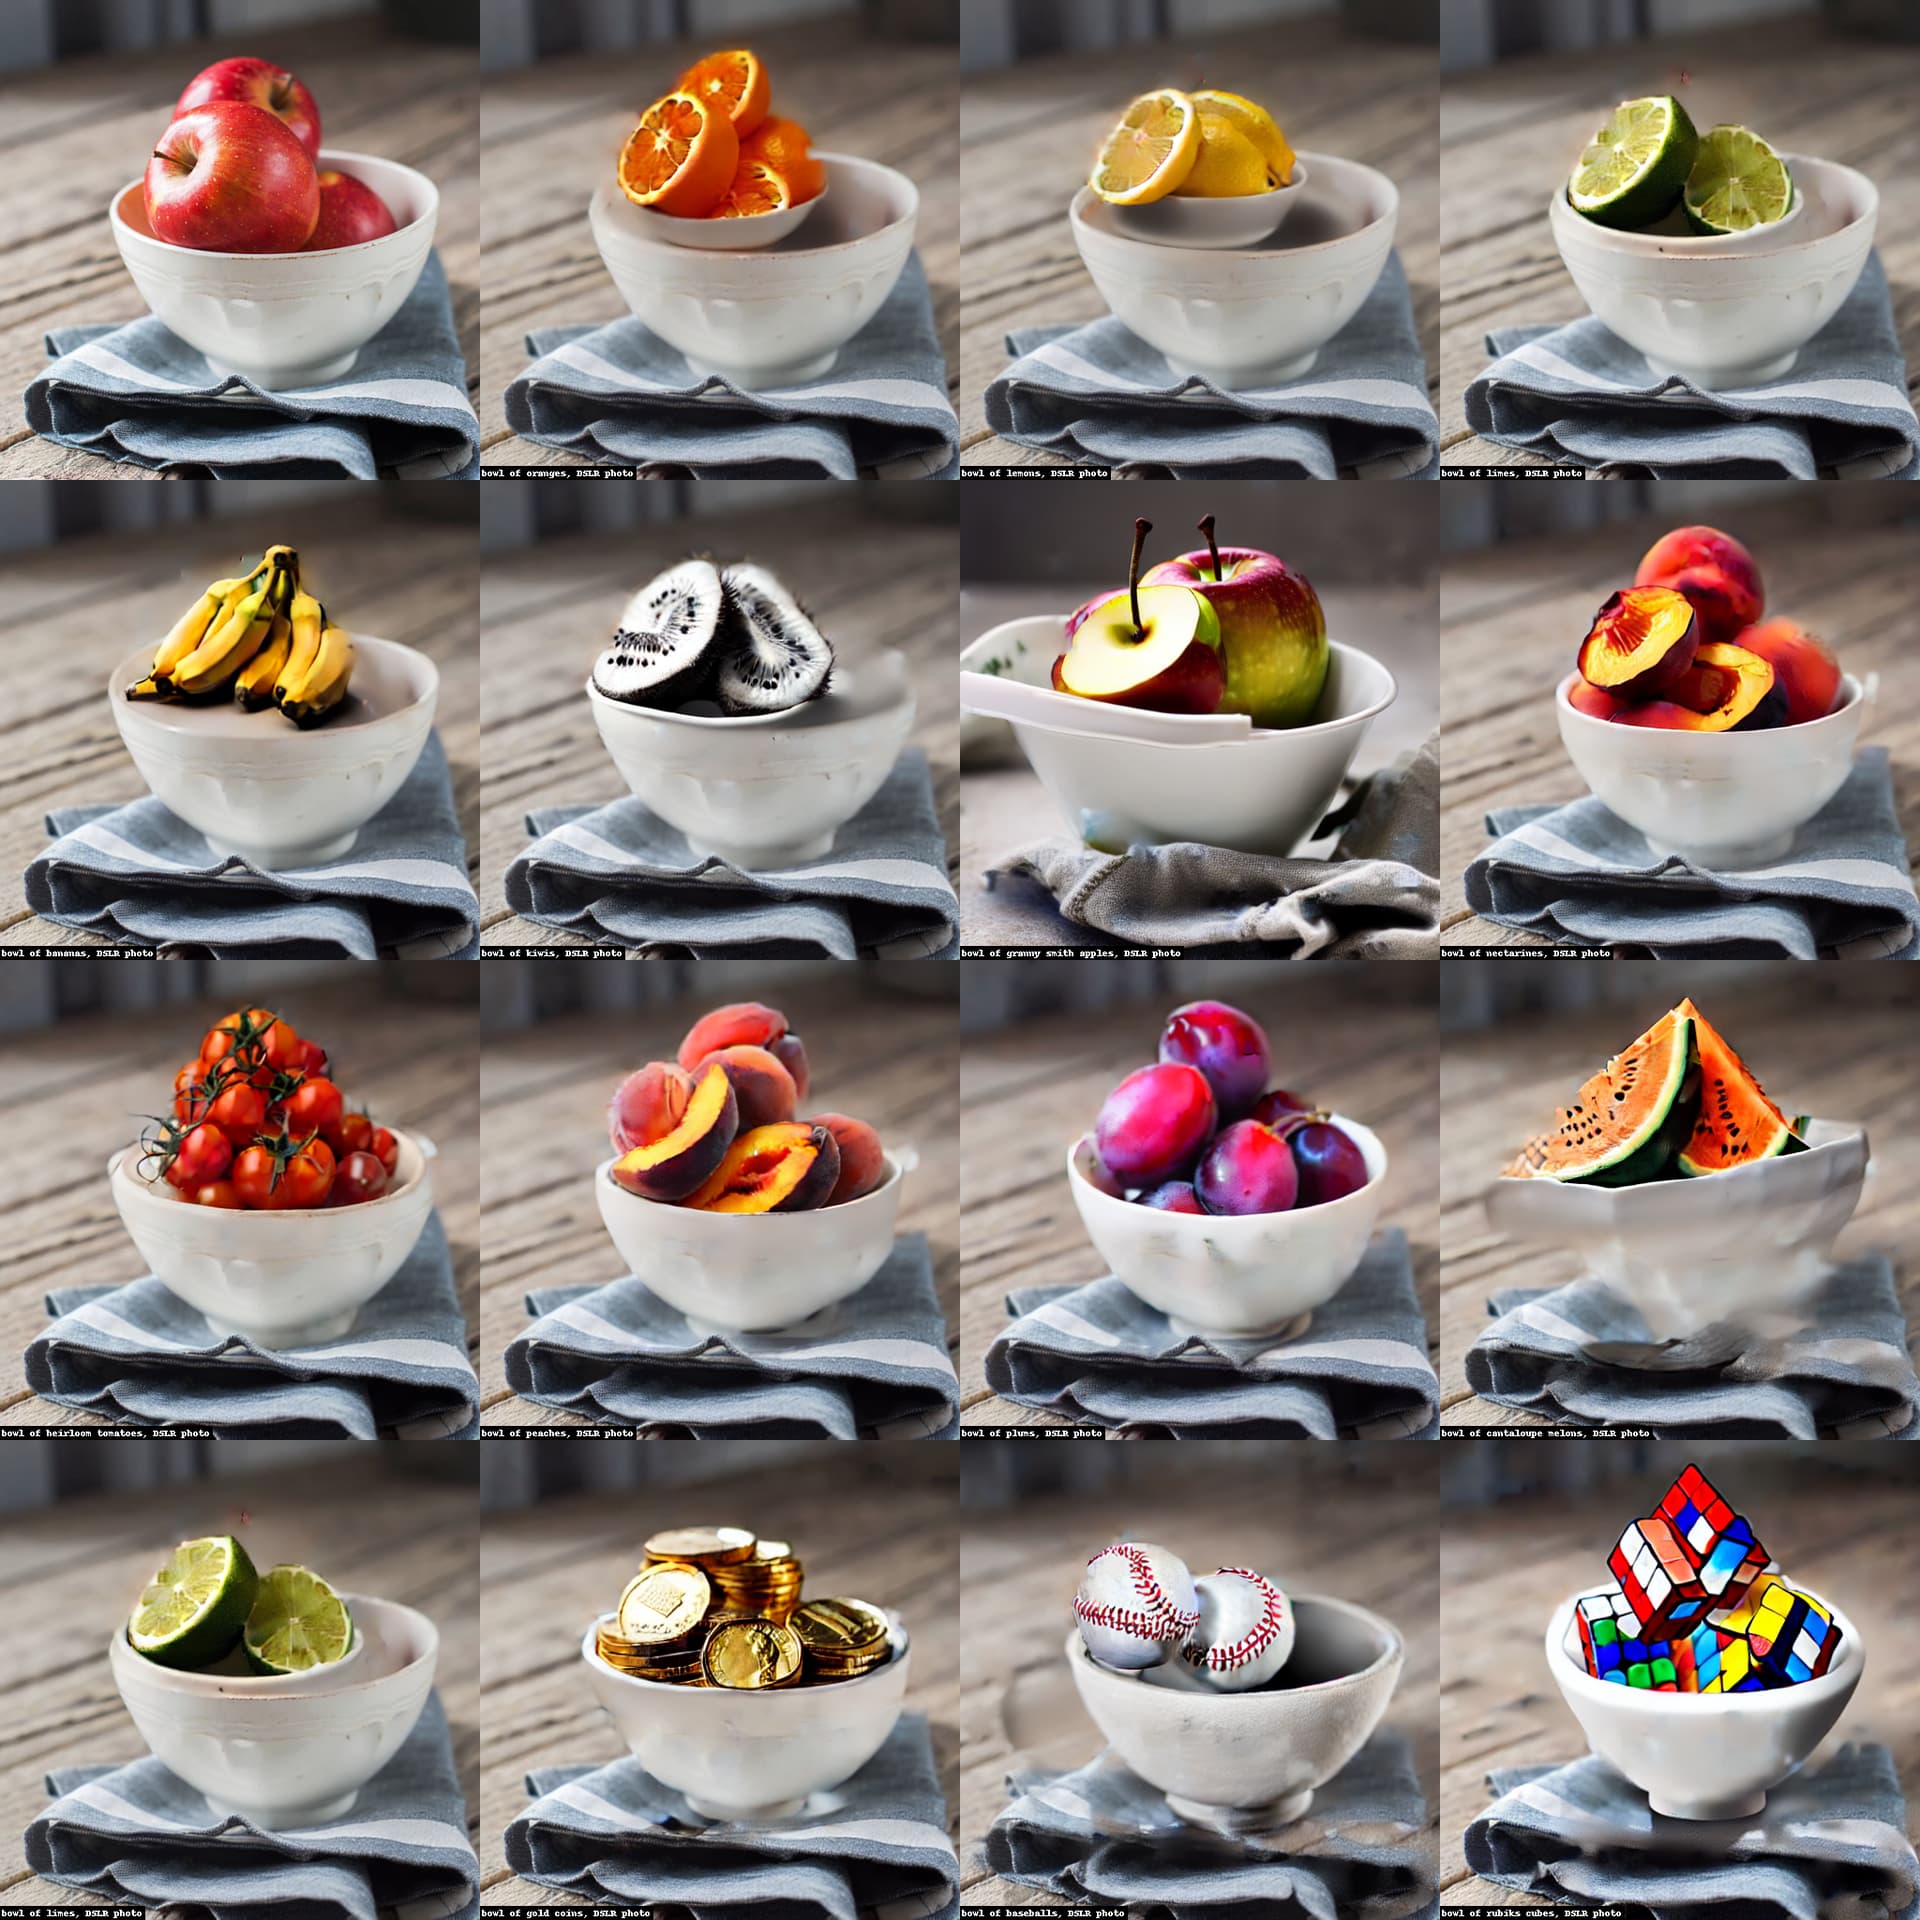
I’ve made some headway DiffEditing but I think I’ve got some bugs. I’m not quite sure the correct formulation for the latents in the masked-out background. I’m definitely seeing the model being much better at masking than sensibly filling in the masked area – are other folks seeing this? I’m a little surprised that hte model thinks it should fill in one area and then only really fills in a subset. In any case, sometimes it’s good enough – here’s a successful example:
One effect you’ll notice is a preference for centered-ness – some of the results have bowls within the original bowl, because the model wants to have a perfectly squared-up shot.
And here’s a … less successful example…
(Originals in upper left)
(edit: I later had more success – fixing bugs and better-exploring the hyperparameters got much improved quality – shared on twitter here: https://twitter.com/bigblueboo/status/1585761916718383110)
This is really great! I didn’t get as far as you with DiffEdit so far — I got stuck on figuring out the mask since I couldn’t get a good difference between the two state (original prompt vs edited prompt) and then got distracted by other experiments.
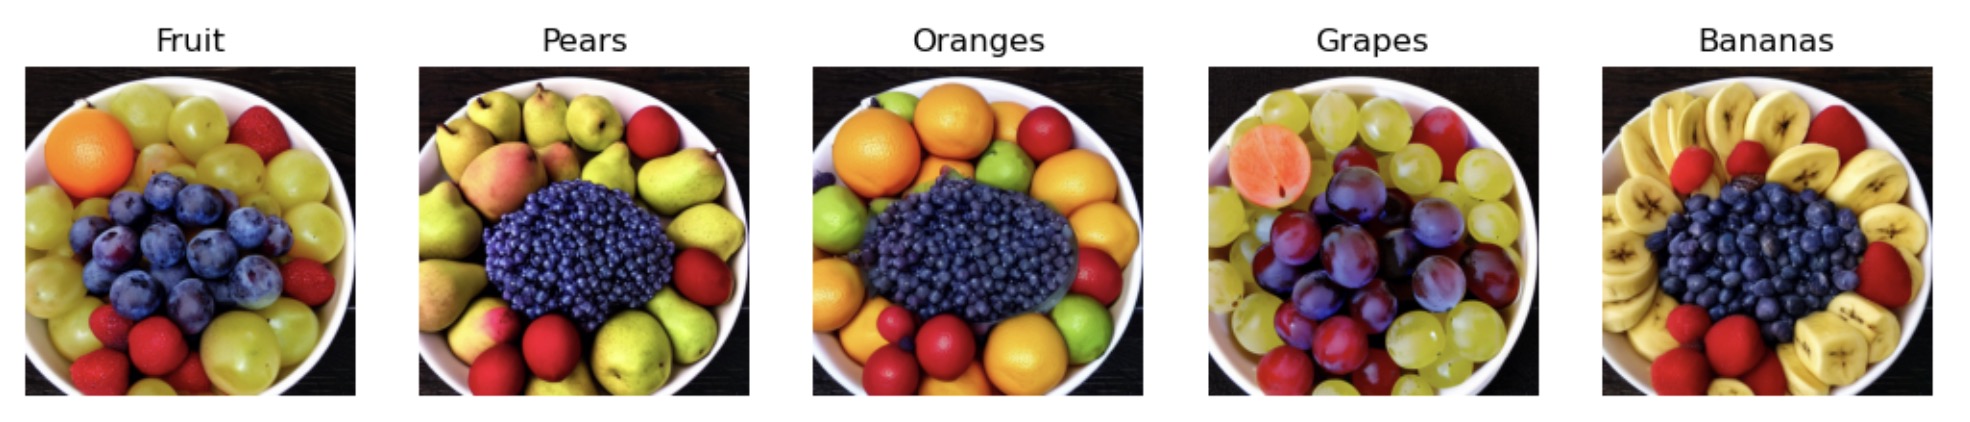
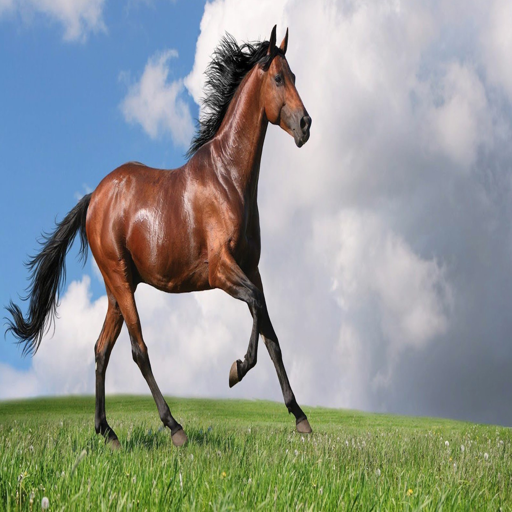
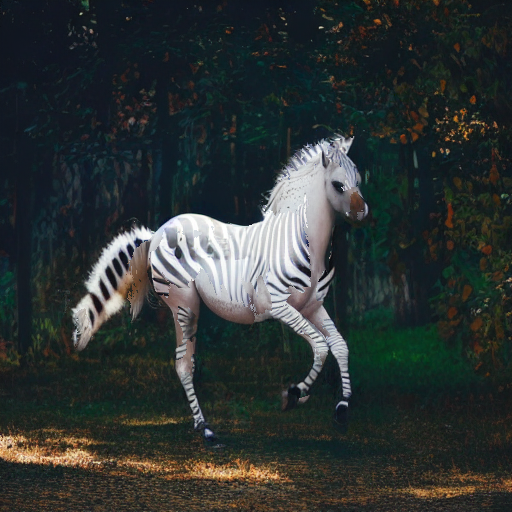
But I have a different approach (which wasn’t using the DiffEdit method) for which I’m keen to try out your set of “bowl of fruit” prompts … I didn’t think to try that with my approach though I did have success turning a horse into a zebra. So thank you for the idea ![]()
I tried your approach of doing different fruits with my non-DiffEdit image replacement and the results were interesting … I don’t get a full replacement of all the fruit, but I do get a majority for the type of fruit I specify … Now I’m keen to try and get DiffEdit working and try the same seed to see how that behaves ![]()
I tried to implement the first part of masking of DiffEdit - here is a sample result -
Hope this might help people to implement DiffEdit fully - Here is the notebook.
@charlie Sorry about so many replies to your post, but I’m not exaggerating when I say that I learnt so many things from just this one post ![]()
I learnt that I wasn’t testing my theories enough. You had such a great test set that I borrowed it. Hope you don’t mind …
I learnt that I should have more faith in my own approaches … and test more to make sure that the faith is justified ![]()
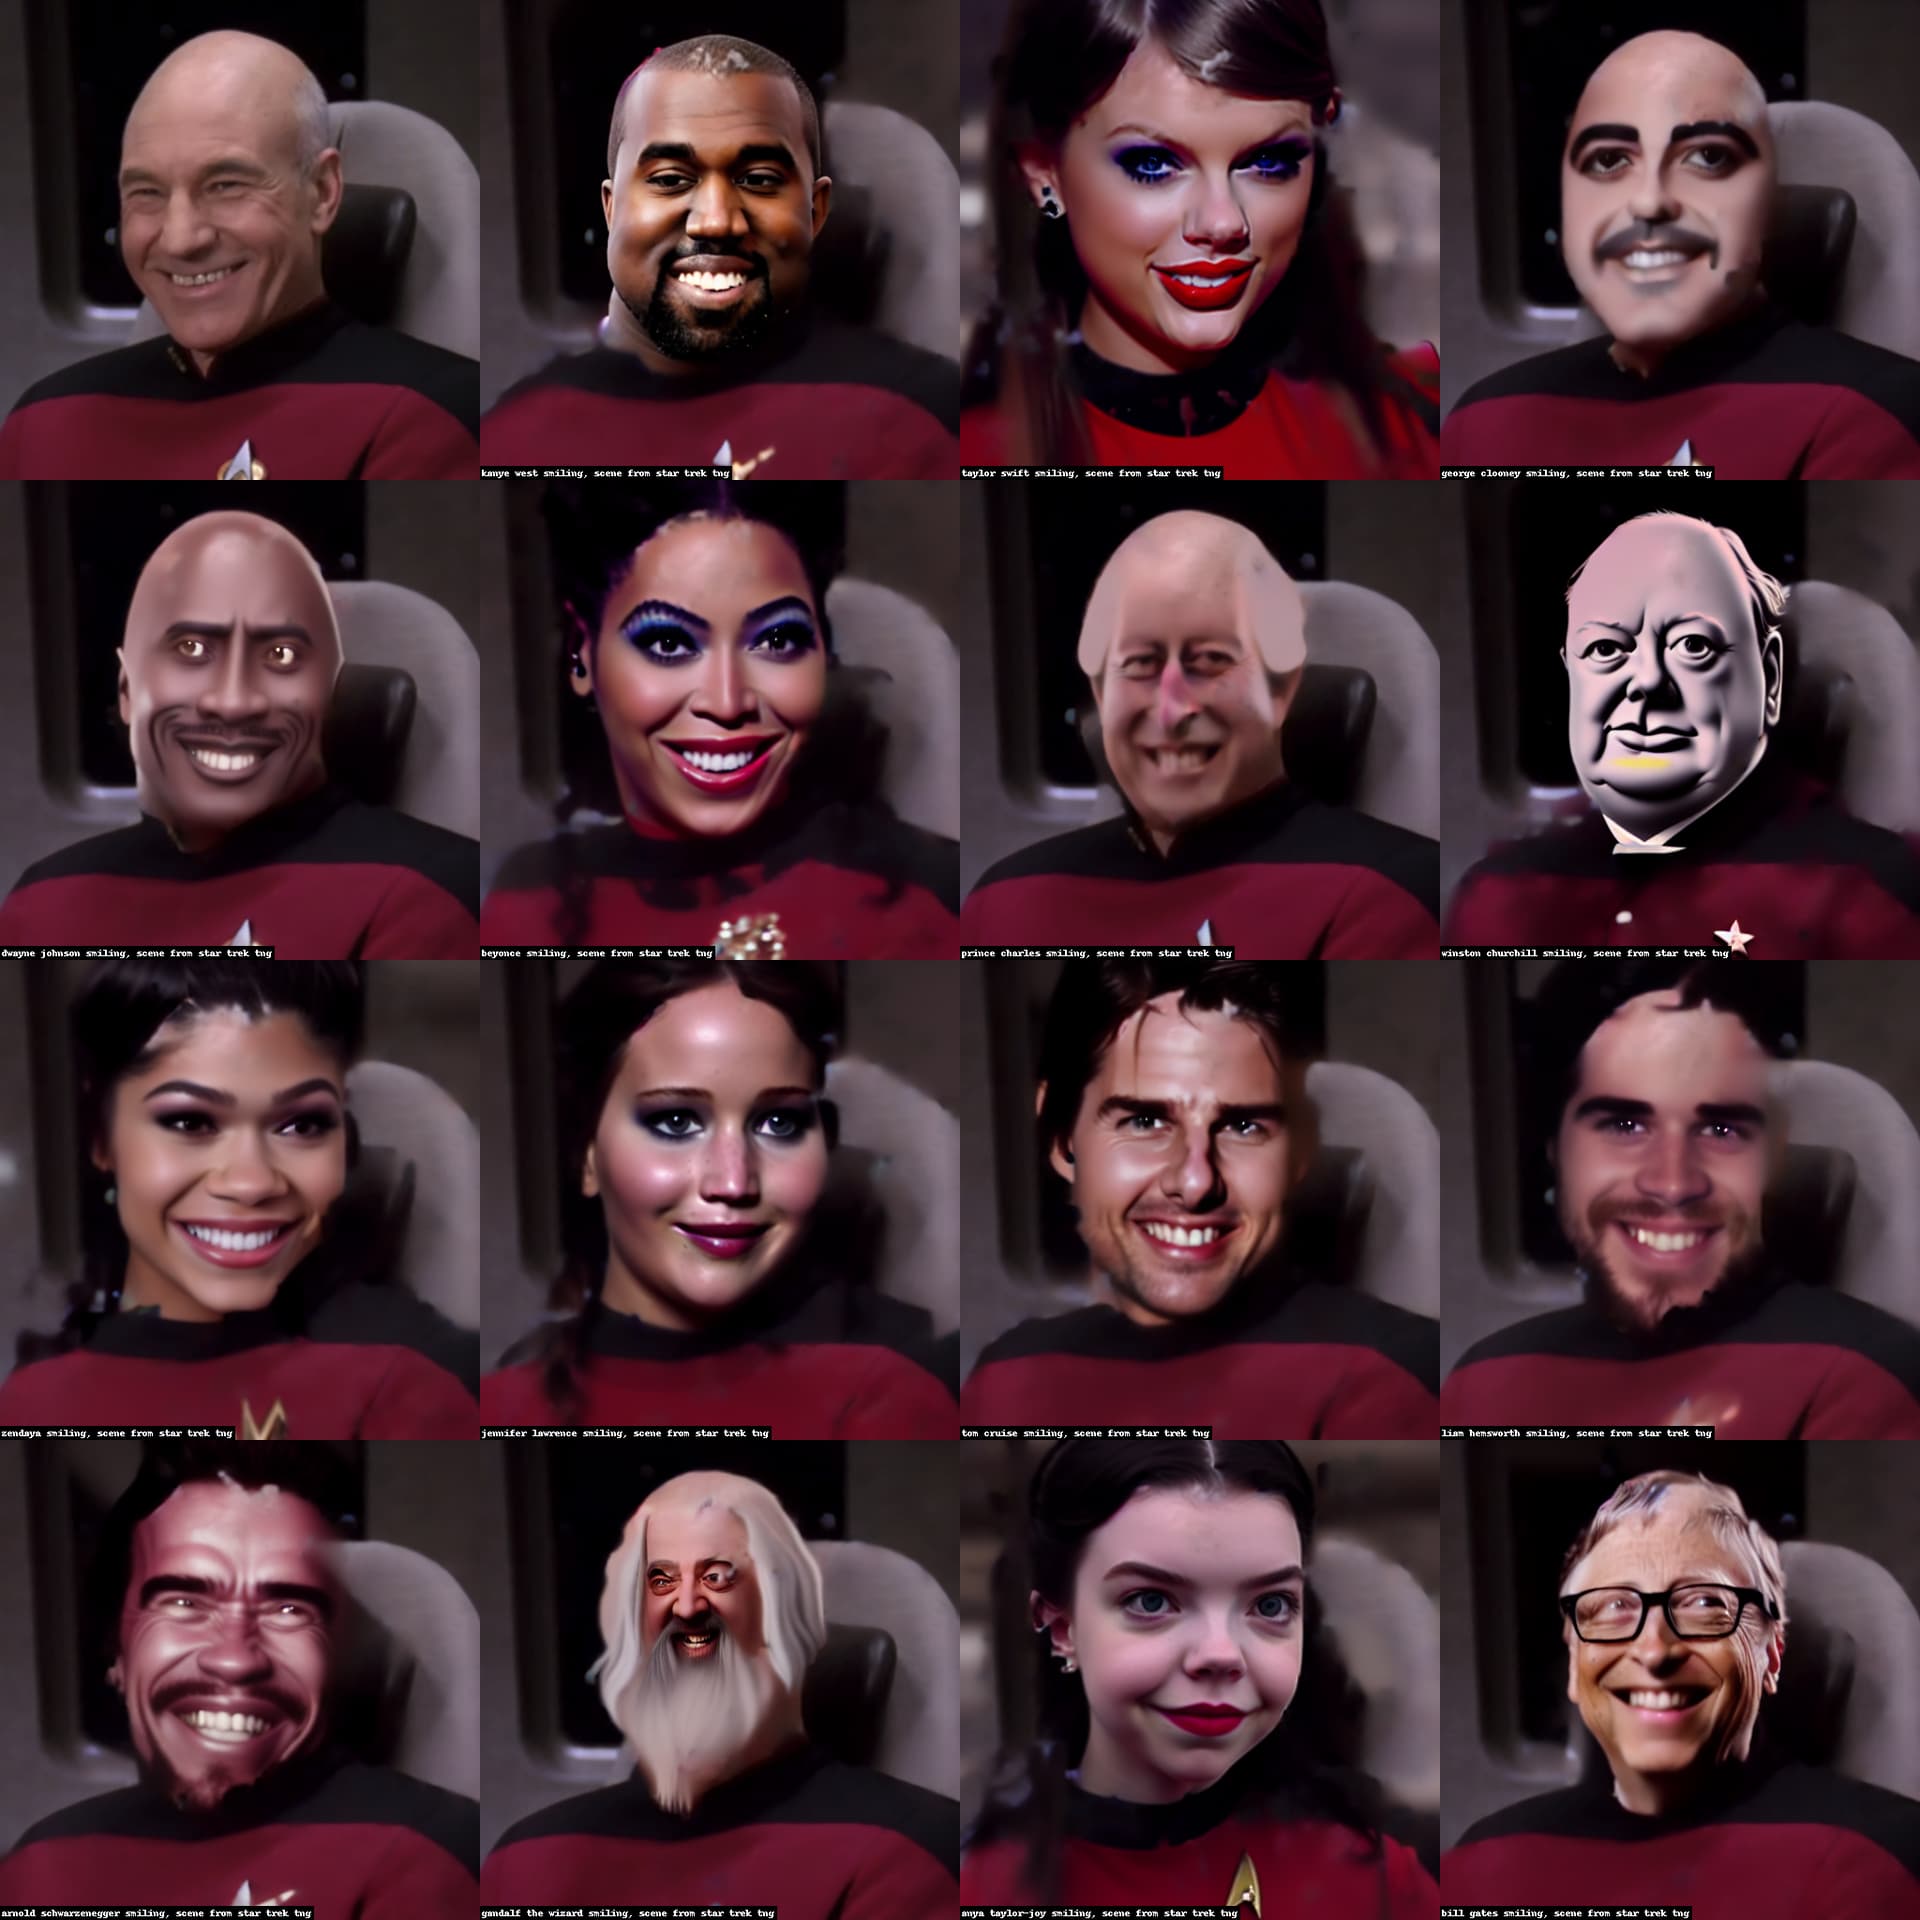
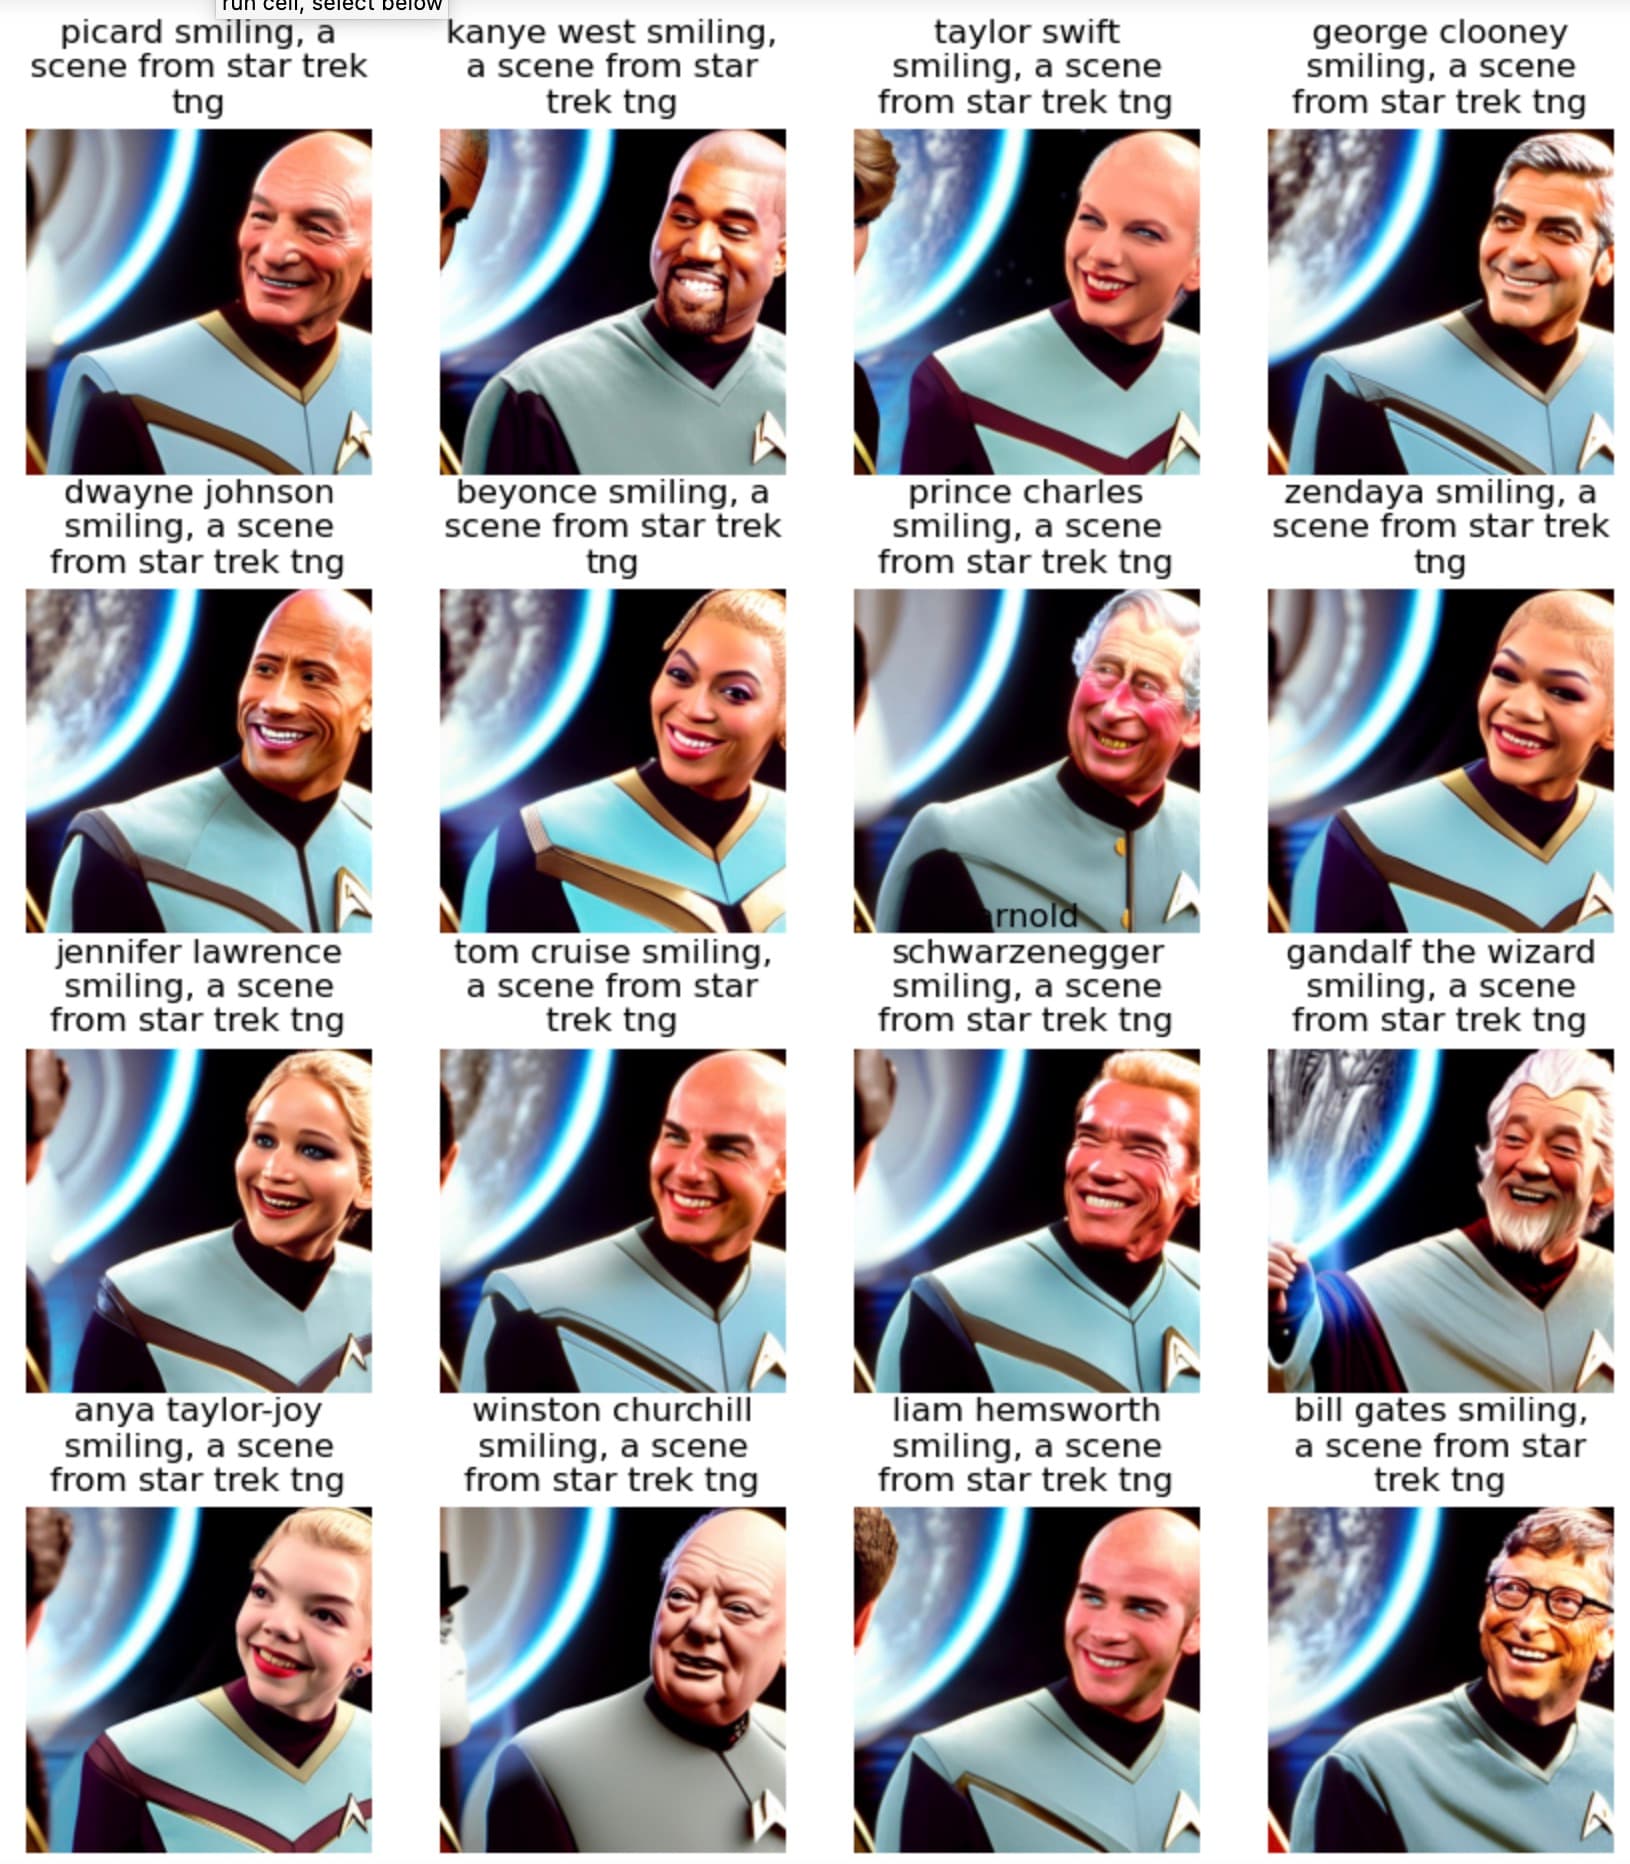
Test, test … test … Your test data really drove this home for me. I can’t explain why (maybe because I love SF and so the Star Trek image resonated? Who knows …) but thank you for making me realize this important fact ![]()
So based on the insights I gained from your post I used your test prompts to test my prompt editing method (which just to clarify is not using DiffEdit) and here’s what I got for the TNG prompt:
I’m pretty chuffed at the results and think that my approach might be a good approach at least for some use-cases. So thanks again for helping me realize it!
Your mask looks way better than the results I got ![]() I’ll definitely be taking a look to see if I can borrow your masking method. Thank you!
I’ll definitely be taking a look to see if I can borrow your masking method. Thank you!
If you need a quick refresher on how matrices are multiplied together Jeremy shared http://matrixmultiplication.xyz/ in a previous course.
I couldn’t watch the lesson live and am going through the “from the foundations” part now, playing around with matrix multiplication. On my machine, the test_close test fails when comparing the result of the naive, Python-only multiplication with the Numba/PyTorch versions. I tested this with various new randomly filled matrices, and it happens most, but not all of the times.
So I dug into it a little bit but am no wiser. The default value for eps that the test_close function uses is 0.00001 or 1e-5. (The test checks if two values are within eps of each other.)
The values that don’t match are - depending on the randomly generated weights - between around 2 and 50. The dtype of the Tensor is torch.float32. Even for the worst case, after checking out Wikipedia, the precision for a number between 32 and 64 should be 2^-18 so 3.81e-06.
So why is 1e-5 too precise and the test only is successful when setting eps to 1e-4? Is it because of the 784 multiplications and additions that happen for the dot product? Do those imprecisions add up and you can just get unlucky, when a lot of the rounding errors are in the same direction? Is this deterministic or can it depend on the hardware?
In general, how many digits of precision would one expect for fp16 operations?
Working my way through the DiffEdit paper I have a couple of questions. Thanks for the suggestions in the posts above but if somebody could help clarify a couple of things that would be great. Firstly in the paper it says to start with a noise of 50% and then denoise to create a mask corresponding to a specific prompt, then to change the prompt and repeat. My questions how many steps are people denoising over and how are the timesteps being managed (I see the unet needs the timestep as an input, but if we want to control the noise and progressively reduce it over several steps then this implies to me that the default scheduler steps would need changing. I guess as an alternative I can seed the image with 50% noise and then “inject” it into the process at say step 10 using the DDIM scheduler. In the absence of any other suggestions I will try this and see how it works.
Your work on the mask helped me get a handle on creating a mask at my end. Thank you!
My notebook is here if you’d like to see how things are progressing …
I simply set up a break point for the timesteps loop so that instead of going to a specific step, the loop would iterate over each step till it got to a specific step and then break. Or, for the second stage where you want to start from some noise, skip over some steps and then start looping … Seems to work but I didn’t use the DDIM scheduler. Just the LMSD one we’ve been using so far …
My notebook is here if you’d like to take a look …
Really impressed by how far some have you are getting on DiffEdit.
I am still trying to do step 1 which is to create the mask.
Im trying to not look at anyones code yet and see how far I can get on my own.
Im just using the same old scheduler LMSDiscreteScheduler we used in the notebook lesson 9 deep dive. Adding a little bit of noise and getting the two noise predictions for the two text prompts.
The input image looks like this:
and the difference of the noises (noise1-noise2) looks like this
I know I need to now normalize this or something and binarize it and make it white and black. Ha, sounds so simple but Ive been stuck on that part lol.
I know how you feel ![]() I got to that exact point and was stuck since I couldn’t figure out how to binarize the image to get a black and white mask … Then @aayushmnit posted his masking code (post above) and I just took a look at that and that helped me see how it could be done.
I got to that exact point and was stuck since I couldn’t figure out how to binarize the image to get a black and white mask … Then @aayushmnit posted his masking code (post above) and I just took a look at that and that helped me see how it could be done.
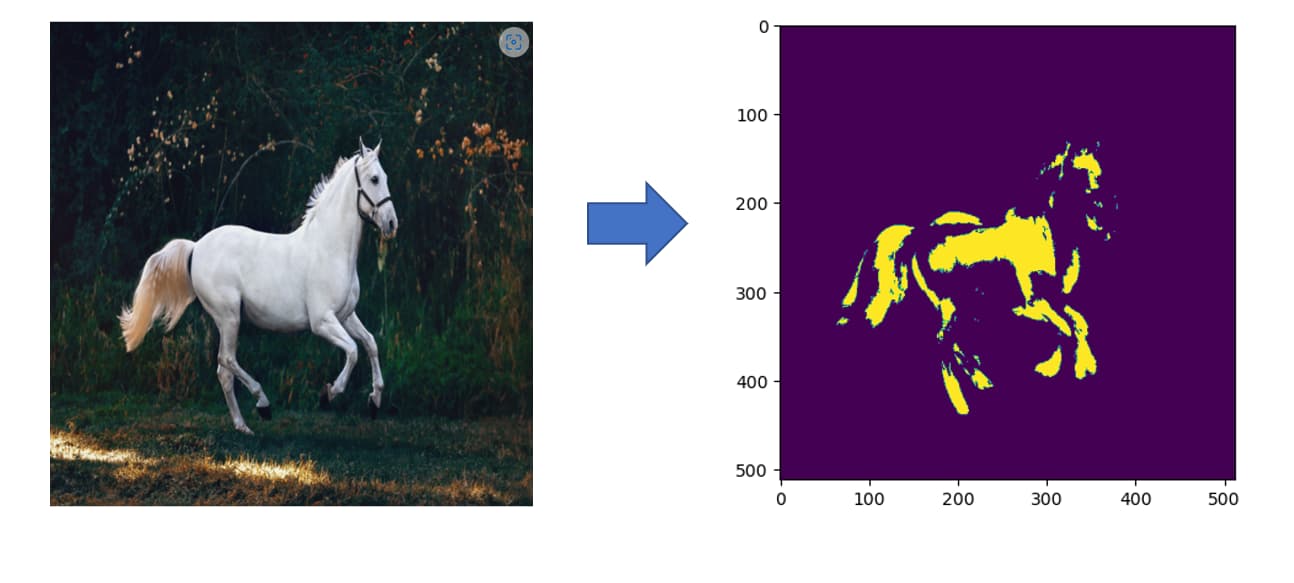
But I did have another thought about a different approach today (haven’t tried it out yet though …) what if I used image segmentation to identify the horse and simply made the mask that way? It’s not quite the same method as DiffEdit, but it might be easier to get a better mask for the whole horse that way?
I have pushed some update to my notebook. Here are some interim result -
I think the only trouble in implementing the paper is how to apply mask over vae encoder images. Maybe some one can find my notebook helpful - diffusion_playground/4_DiffEdit.ipynb at main · aayushmnit/diffusion_playground · GitHub
For everyone exploring this, it is worth noting there is a version of stable diffusion trained specifically for inpainting (filling in within a mask) now that might work better: runwayml/stable-diffusion-inpainting · Hugging Face
To construct the mask, we take the difference between the denoised latents using the reference prompt and the denoised latents using the query prompt:
(reference_noisy - query_noisy)
What if we introduce a hyperparameter (e.g., alpha ) to amplify the differences we care about:
alpha * (reference_noisy - query_noisy)
In my experiments, it tends to work well. You can experiment with setting alpha > 1 and see what happens. Then, play with the threshold parameter when you binarize the mask.
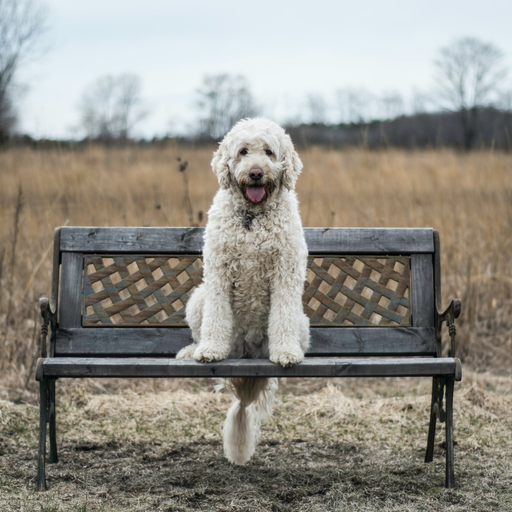
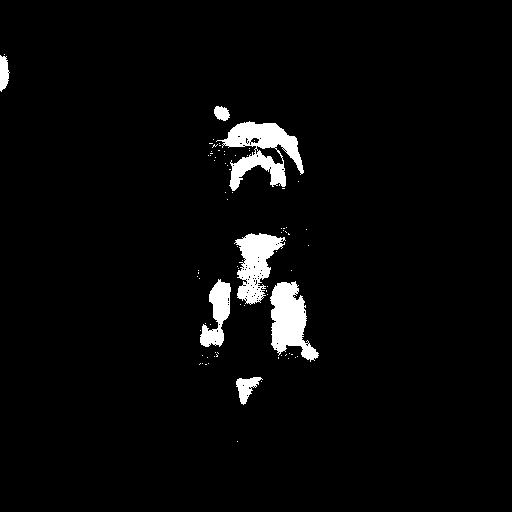
Here is the binarized mask I extract when I try to replace the dog in the picture with a cat (still not great, but I’m working on it):
When Jeremy defines the numba-decorated code for calculating the dot product, one of the lines has a . after the zero:
from numba import njit

@njit
def dot_product(a, b):
    result = 0.
    for i in range(len(a)):
        result += a[i] * b[i]
    return result
What is the dot after the zero doing? Is this a numba thing? Or are we specifying that we want the result to be a float? (How can zero be a float, though…?)
I also noticed that the mega speed bump (from 450 ms down to 45 microseconds etc) that we saw in the lecture works well when you have trivial arrays of 2x2 etc, but that when you do it with our 5 sample images multiplied by the random weights you basically get no speed bump at all. Why is that the case? Am I running up against some kind of memory or throughput constraint that numba is powerless to help with?
I think it’s just saying result should be float so that a[i] * b[i] can be stored as floats.