Video | Notes
Fastai v2 daily code walk-thrus
Fastai v2 chat
Hey there. Just wanted to share my notes with you I did while watching Jeremys first code walk-thru. The notes are pretty detailed - partly because there were lots of new things for me there and partly because I am understanding things better when I write them down 
I hope they are helpful to you if you want to look something up you missed while watching the walk-thru (at least this is often the case for me). If you find any mistake or want to add some details: I am grateful for every reply  (Note: Jeremy turned this into a wiki, so feel free to add anything!) I made several screenshots during the video for a better understanding of my notes.
Here is the original post by Jeremy:
Fastai v2 daily code walk-thrus
and the YouTube video from walk-thru 1: fastai v2 walk-thru #1
Topics overview
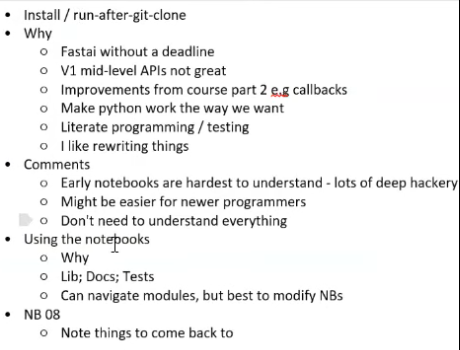
- fastai v2 is a rewrite from fastai v1 from scratch
- Why v2? (More detail available in this post)
- Always deadline pressure for v1
- Course v3 part 2 -> rewriting parts of fastai during the course
- Mid-level APIs not great: creating own stuff like datatypes is not that good
- Good experience with literate programming -> using Jupyter Notebooks more
- Note: If you are interested in literal programming, here is some background
- Powerful python core -> taking better advantage of that
- Understanding v2
- Might be harder for intermediate programmers, though easier for newer programmers
Code can be found here
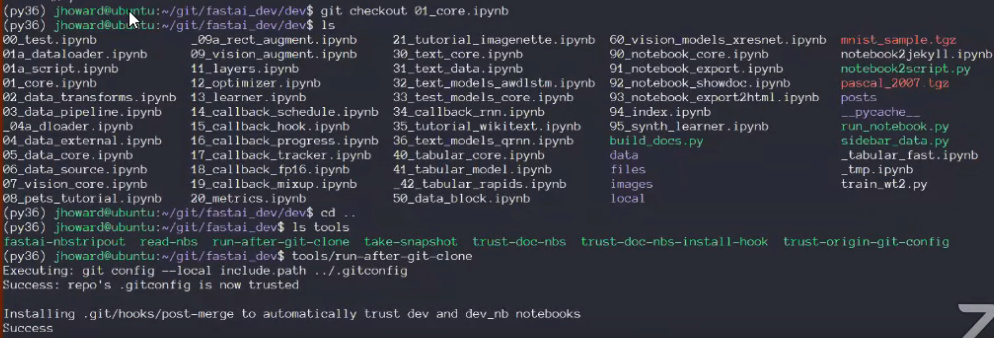
Git cloning:
- There is a bunch of notebooks in the "dev" folder
- Step one: git clone that
- In the root folder "fastai_dev", there is the "environment.yml"
- You can use that to create a conda environment
- Alternative: follow the README
- PyTorch must at least be version 1.2.0, Python 3.6 or 3.7 (safest)
After cloning:
- In "tools" run "run-after-git-clone" once
- Installs a git hook: everytime you push or pull, it will run a little python script
How usable is the library at the current stage?
- Quite good, but still in an early stage -> if you experience some problems with the library, talk about it
- Active development: commits every day
Once it is done, there will be a O’Reilly book (Deep Learning for Coders with fastai and PyTorch: AI Applications Without a PhD) about it!
- Important: Once the book is out, the API has to be somehow consistent with it
- But: it won’t freeze the API
- Deep Learning changes fast, so fastai has to adopt to it
- If there is a need for really big changes, there will be another version 3 of fastai
Swift
- Swift development is separate to this
- Swift is waiting for some things to change for swift for TensorFlow
- Still gonna be a while until swift is ready for a good fastai version
How to start working through v2?
- If you are tempted to start with notebook “01”, then don’t would be too enthusiastic! It is the most complicated one because this sets up python to be in the right way for fastai
- Sets up metaclasses, decorators, type-checking, context managers, monkey-patching
- Though it is a great resource for learning advanced python tricks
- Instead, start at the tutorial notebook "10"
10 Pets Tutorial
How do the notebooks work in general?
- They start with a bunch of imports, all coming from "
local.bla"
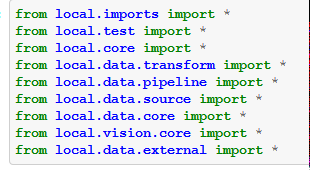
- Could be simplified, if ".all" would be imported (e.g. "
local.data.all import *") - Why local? There is a local directory:
Example: Notebook 07
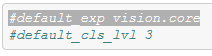
- This means, notebook 07 creates an autogenerated python module called "local/vision/core.py"
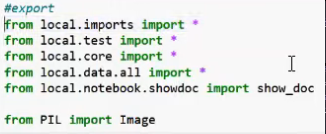
- The thing that creates python modules from notebooks knows that "local" is special and that "local" refers this local repositorys version of fastai_v2. In order to export a proper set of modules it has to replace "local" with appropriate relative module paths (therefore "…").
- On the whole, most of the time when you see something "#export" you will see it in the exact same way in the
.py-file


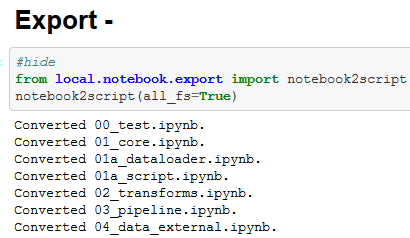
- In the notebooks you will find cells with "#export" in it and at the bottom of the notebooks, there is something that calls "notebook2script". When you run this cell, it converts all the notebooks. This actually creates all these python files.
- This is done so that you can use your editor of choice the normal way and treat all these things just as normal python modules. But most of the time, you should just read, edit and use the notebooks -> they have notes, pictures, outputs etc. to help you see what’s going on.
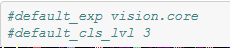
- "
#default_cls_lvl 3" is not really important. Here, the documentation is created automatically from these notebooks- There you can see, these notebooks are turned into hyperlinked documentation. "Class level" refers to the heading level in the html-doc-file.
- One way to see the output of something, like an image, would be to just type "
im" to get an output within the notebook. But you will see those "test_" cells in the notebooks which have the purpose of- Telling you in the docs, what the result of the expression will be
- Creating a test to see whether it is working correctly

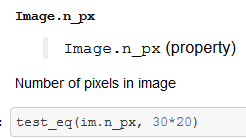
- In the Github repo, there is a README telling you how to run all notebooks as a test.
Back to Notebook 08

First thing is "local.imports import*"
-
This is special: it is the only python module not created by a notebook. It is just a bunch of imports as well as 6 functions
-
local.testis the test notebook "00_test.ipynb" which has all the test functions in it. -
Core has all the core functions that Jeremy wishes to be in PyTorch but isn’t. “
local.data.bla”: the data modules all have to do with stuff like transformations, pipelines etc. The other things like “vision” have to do with the different applications like vision, text, etc.
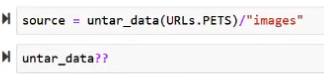
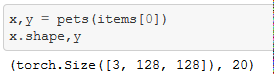
You might still be familiar with “untar_data” from fastai v1. Remember, that you can always use??to see the sourcecode.Untar_datawill download from URLs.PETs, untar it and then will retrun a path-object (default location is still like in v1 “fastai/data/”.)

get_image_files: super fast way to grab a bunch of files. This just calls “get_files” and loads in a bunch of image_extensions and therefore gets a subset of all files by extension. “get_files” is pretty much the same as in v1 and as well a fast way to (optionally recursively) grab all files in a directory. -
Trying to use only the lowest level functionality from fastai and do most of the things by hand:

-
Looks like a class, but actually it’s something that returns a function. This function will return a random bunch of integers of some size. Here
split_idxhas two things in it: the indexes of the training set and the validation set. (Note: later Jeremy said, it is the training and the test set?)
Why capital letters (which are normally used for classes only)?
- everything that returns something, from which you still have to call things, will have capital letters.

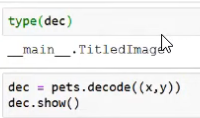
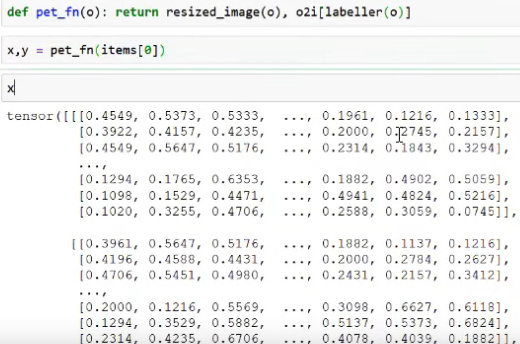
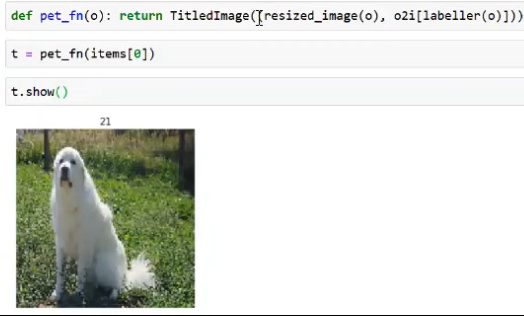
- This function opens images, resizes the images to some fixed size and then turns them into a tensor (with the channel axis first) between 0 and 1.
Show-Method

- This class has a method "show" which can display images with a title.
- -> Datasets will be returning tuples: x will be the tensor containing the image, y will be the name of the class.
- Why do we have this class and show-method?
- This is the first new part of the API
- Every Class that has a show-method is something which can be used by the whole fastai-transformation-system.
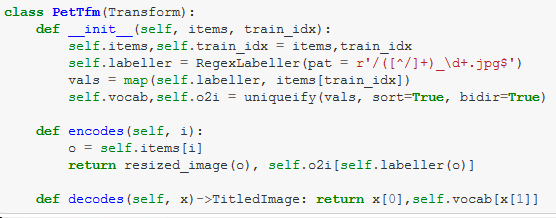
Transform Class:
- Big difference between v1 and v2
-
PetTfmis a Transform which returns a type annotation. - Type annotations are used a lot in v2.
- Not for type-checking, but to make certain behaviours happen.
- A transform is a reversible function.
- It can "encode"/turn a path "o" into a tuple of an image and a label
- Or the opposite direction "decode": going from a tuple of an image and a label into a
TitledImageobject. Actually, it is not returning theTitledImageobject, but a tuple: the return type annotations in fastai transforms actually cast the data into this type.
- Python normally does not behave this way, but this will be very useful for making short much simpler, shorter and less buggy.
- Example: you could do
- Problem with this is: x or y have no semantics. The type of y is just "
int" and x is just a tensor. In fastai v2 these semantics, that are missing in PyTorch, are being added. - Changing this to a
TitledImageis getting closer to what we want:
- –> we can add types to things/give things functionality so that we can make use of the library and always use ".show"/".flip"/".rotate"/etc
- –> Next step: knowing from where we came from and be able to get back to there. The Transform subclasses know how to take some input data and convert it into something to get you closer to model something with it. This always means losing some information and we no longer can display and understand it and therefore these subclasses also know how to reverse it.
- Problem with this is: x or y have no semantics. The type of y is just "


- In the init of creating
PetTfm"vocab" (a list of all possible pet types) and "o2i" (reverse mapping object to integer) are passed in - Regular expressions are used with the function "
RegexLabeller" to convert a path (like in "items[0]") into the particular pet - These are all the 3 things you need to create a
PetTfmobject:- Step 1 labeller: Create a function that labels path into a type of pet-string
- Step 2 vals: Label everything in the training set (which is in
split_idx[0]) - Step 3: create vocab and reverse mapping
- Step 4: pass those 3 things to
PetTfm
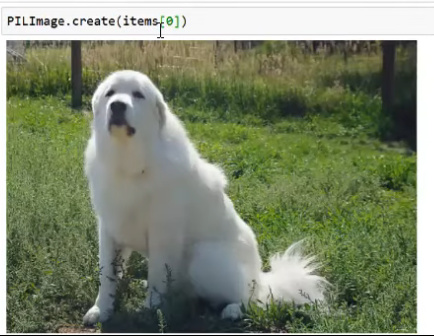
pets(items[0])calls "encodes" fromPetTfmand pets.decode((x,y)) calls "decodes"
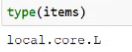
What is items?

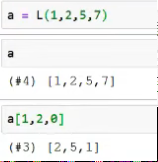
- Does not behave like normal lists -> own List-creation for fastai
- Anywhere where you can write "list", you can also write L
- You can index into it like into a normal list
- But: unlike normal lists, you can index into it with lists and with masks and don’t have to put everything in “[ ]”
Appending things to L-lists is much easier:
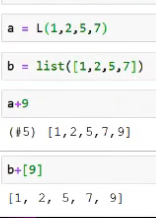
And you can also add things to the front of the list with “9+a”
Try 2: do everything internally
- This time only passing in the list of path names and index of the training set

- Creating everything inside: not new functionality, only nicer design for Transform
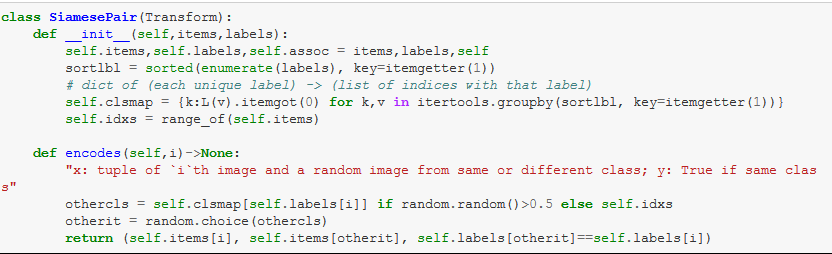
Doing a number of steps with Pipeline class

- Pipeline let’s you do a number of transforms in order and composes them together for you
- Here the input is a list of paths and list of labels (what breed is each one)
- Then, labels are sorted and a map is created
- In "
encodes": randomly decide 50% whether or not the second image is of the same breed as the first image - Returns a tuple of both images and a boolean
- Interesting part: this is followed by another transform "
OpenAndResize"- Takes the path, converts the images to the same size
- To do both things in order, the Pipeline is used (which contains first the
Siamese-Transform and then theOpenAndResize-Transform)- Then, you can use the pipeline (here with [0]) and you get the tuple of x,y,z (first and second image and the boolean) back
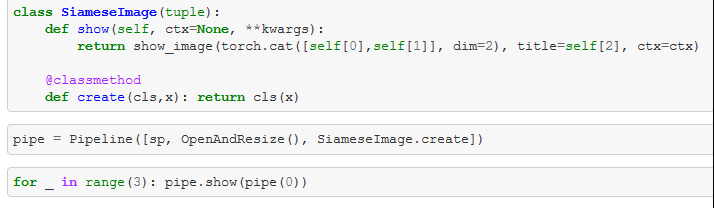
- Now with a Method to show these tuples, you can have another pipeline which takes all these 3 things:
Looking at L(v).itemgot(0)
- This basically does the first two steps at once:
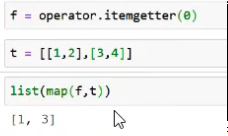
Also has got "attrgot" which handles defaults for things that are missing etc
Looking at the returned tuple of the SiamesePair Transform:
- The tuple has two pillow-images and a boolean -> first thing in the pipeline
- Next thing in the pipeline has a functions which resizes the images -> how does this work for the tuple?
- The answer is the little trick with the type annotation ("parameter annotation")
- This tells the transform system that this particular "
encodes" only works on Paths - If it gets a tuple of different types, the function is only applied to elements of the type Path
- Very handy for transforms to different types!
- This tells the transform system that this particular "
Using TfmdDS to transform items into datasets
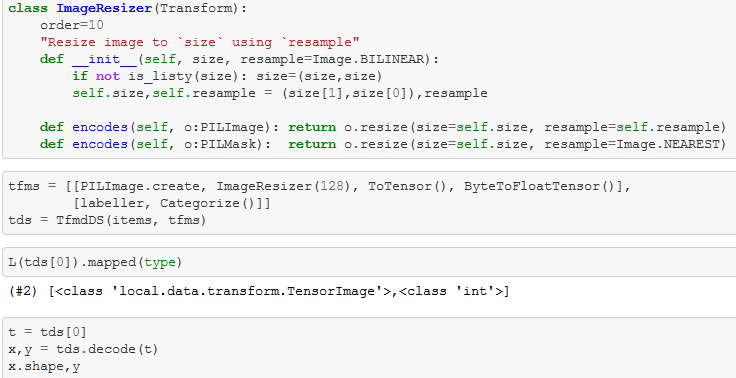
- Remember: ‘
items’ is just the list of Paths, tfms is a list of transforms - ‘
tds = TfmdDS(items, tfms)’- Takes the list of paths and the list of transforms and the transforms are lazily applied to the items
- ‘
items[0]’ is a particular pet - ‘
tds[0]’ is this particular pet with the list of transforms applied to it
- Actually ‘
tfms’ a list of list of transforms- This is because in Deep Learning, you will almost always have at least a dependent and independent variable
- List number 1 defines the transforms in the pipeline to create your independent variable
- List number 2 is the transforms in the pipeline to create your dependent variable
- You can have more than that!
.create methods
- Most of the fastai v2 types will have this class method to create one of those things
- Example:
That’s it for the first code walk-thru 