Lesson 1 discussion

I’m in the lesson1.ipynb.
I’m at the cell that is 'Downloading data from http://files.fast.ai/models/vgg16.h5
and was wondering how to modify vgg16py so that it grabs vgg16.h5 and future files like it from my local disk. Because I already have them on my local disk.

I figured this was a useful problem to know how to solve, eliminating redundancy and all, but after many hours of changing code, searching the web, and trying to put the file where I think the downloaded file would be (like in the root folder env of the notebook), no luck.

It seems to be grabbing through a script in Keras but I can’t figure out what exactly is calling it to do this.
In vgg16py: I commented out line 46 and merged it with line 57,
then I tried to get line 140 to look at the local dir alone within model.load_weights()

Hi @irshaduetian thanks so much for responding!

I tried a smaller and a larger learning rate, as well as turning off shuffle, augmenting the data, removing dropout (to deliberately try and overfit to at least get some convergence) and a few other things.

My hypothesis is that either there’s just way too little data, or my weights are initialized in a really bad way. But I really don’t know!

Here is my Jupyter notebook: https://www.dropbox.com/sh/u3p21a8hhi7kwr8/AADXLRkjedxe-bsowbXZvvjXa?dl=0

Note that the data folders don’t contain any of the images, because that’s too much to download. Just unzip the cats and dogs archive and things should work. I use tensorflow backend and dimension ordering, but I can always modify it to use theano.

I really appreciate your help, thank you again!

Your assumption is right, VGG model is too big to learn good features from the small amount of data (cats and dogs) in a few epochs. Unfortunately, I didn’t have an environment to run your notebook otherwise I would have tested it myself.
My recommendation would be to run this model on the Mnist dataset and see if you can get a good accuracy out of that in around 30 epochs.

You can consult the mnist.ipynb in fast.ai course repo.

Let me know if you need further help

@irshaduetian I tried it on MNIST (I had to remove some conv2d layers since the inputs are smaller) and was able to get high accuracy after less than 1 epoch! However I’m worried there’s some problem with my network design or how I’m loading data, since I get the exact same results for every epoch. So each epoch ends with identical error and accuracy metrics - I would have thought it at least changes randomly a bit!

I’m currently downloading all of image-net to try training myself - although it seems like it might take a few months to download at the moment :frowning:

Hello Haroun,

I’m looking to go through the lessons without the p2 instance because I have a machine that matches your specs.
Would you be willing to help me setup the configuration the lesson 1 Jupyter notebook.
I’m getting really confused, but I really wanna learn machine learning!!
Anything would help, thank you and good luck in future endeavors!

If you really wanna Machine Learning then you are in the wrong thread : stuck_out_tongue:
Here is the new course about Machine Learning Another treat! Early access to Intro To Machine Learning videos

1 Like

Hi,

It did not work for me. My error is below. Can you advise a solution?

Thank you Irshad :slight_smile: super excited to start this over the next few days!!

How can i copy the files on my mac into crestle?

Hi,

I had the same. Somehow image was created at an intermediate state. If you follow the recommendation and run it, it will solve the issues.

Good luck

Sipi

Was just looking for a tmux cheatsheet. Thanks so much!

Ok, I’m finding these forums a little confusing in terms of organization, and I hope this is the right place to post, but if it’s not, I’d appreciate it if someone would point me in the right direction.

So, I’ve created a new directory structure from the kaggle images downloaded with kaggle-cli. What I did was: I put them all in a folder called ‘train’, and then divided them into two directories (cats, dogs) according to their filenames. Then I made a cross-validation directory in the same folder where I put ‘train’, and I called it ‘valid’. I put about 20% of the images from ‘train’ into ‘valid’, using the crude method of ‘mv *3.jpg …’, ‘mv *4.jpg …’ to get that division of images. This allowed me to train vgg on those images (in a copy of the original Lesson 1 notebook), and the training went as expected. So far so good!

But I was a bit stumped at the next step. I copied some of the images from the test set into a directory called ‘smalltest’ (‘cp [0-9].jpg …’, copying 10 test images to make a small test), and then I tried to get predictions for those images, but that’s where I faltered. I looked at the example code, and it seems to want to use vgg.predict() on images being fed to it. That seems straightforward, except that I can’t seem to find a way to feed the predict() method images from ‘smalltest’ that doesn’t throw errors!

I even tried:

small_batch = vgg.get_batches(path+'smalltest', batch_size=2) #I used 2 because I keep getting a 'modulo by zero error and I thought lower batch values might fix it, but the error seems independent of this value
for img, label in small_batch:
    plots(img, label)

In order to try to have any idea of how to get vgg to take these images in, and of course this fails. It looks like the predict() method should work straightforwardly if I can feed it data in the way it’s expecting, but I am not sure how to do that.

Edit:
I forgot to mention that I’m on a p2 server. I looked around in this forum again and decided to try the test() method as described above. Like this:

batches, preds = vgg.test(path + 'smalltest', batch_size=batch_size)
out = []
for img_path,pred in zip(batches.filenames, preds):
    out.append([img_path,pred])
print(out)

(Printing them out as an initial sanity check)
I again got the same error:

Exception in thread Thread-6:
Traceback (most recent call last):
  File "/home/ubuntu/anaconda2/lib/python2.7/threading.py", line 801, in __bootstrap_inner
    self.run()
  File "/home/ubuntu/anaconda2/lib/python2.7/threading.py", line 754, in run
    self.__target(*self.__args, **self.__kwargs)
  File "/home/ubuntu/anaconda2/lib/python2.7/site-packages/keras/engine/training.py", line 425, in data_generator_task
    generator_output = next(generator)
  File "/home/ubuntu/anaconda2/lib/python2.7/site-packages/keras/preprocessing/image.py", line 593, in next
    index_array, current_index, current_batch_size = next(self.index_generator)
  File "/home/ubuntu/anaconda2/lib/python2.7/site-packages/keras/preprocessing/image.py", line 441, in _flow_index
    current_index = (self.batch_index * batch_size) % N
ZeroDivisionError: integer division or modulo by zero

My last hypothesis about this was that it must somehow be because I have too few images in the directory. So I tried it on the ‘test’ directory rather than the ‘smalltest’ directory, and got the same result again. Is this somehow a problem with the Keras version installed?

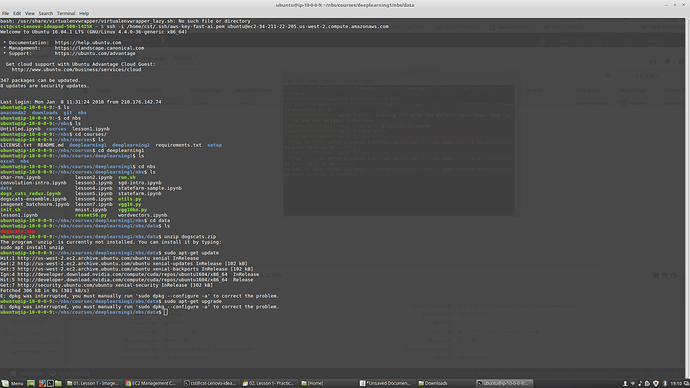
It is not working for me too :frowning:

I’m using Python 3.6 on AWS (linux) and I’m having issue pip3 installing pillow. I did try pip3 installing Image but still I’m getting error installing pillow:

‘Command "/usr/local/bin/python3.6 -u -c "import setuptools, tokenize;file=’/tmp/pip-build-6fiat3 yy/pillow/setup.py’;f=getattr(tokenize, ‘open’, open)(file);code=f.read().replace(’\r\n’, ‘\n’);f.close();exec(compile(code, file, ‘exec’))" install --record /tmp/pip-96wvf_jn-record/install-record.txt --single-version-externally-managed --compile --install-scripts=/usr/bin" failed with error code 1 in /tmp/pip-build-6fiat3yy/pillow/’

Any idea how I could fix it?

Follow-up on my previous question:
The problem was that there needed to be a sub-folder in the ‘test’ folder. It doesn’t read from the directory it’s pointed to, but rather it reads from its subdirectories. The modulo by zero error was because it was reading zero images in the ‘test’ directory. When I moved all the images to ‘test/unknown’, it fixed the issue.

The link has expired can you check that once.

Hi everybody.
I have Ubuntu 16.04 with nvidia GPU on my notebook and just installed fastai and everything was installed successfully.
I’m trying to run the code of lesson1 (cats and dogs) but i am having this error on the first import line:

ImportError: libavcodec.so.53: cannot open shared object file: No such file or directory

I have libavcodec56 and tried to install libevcode53 but seems like for some reason it is not possible!!

when trying to install it or any older dependancies like version 51, I constantly get this msg:

The following packages will be REMOVED:
  libavcodec53

and it is weird because apparently this package is not installed at all!!

apt-cache search libavcodec53
also doesn’t return anything!

Can somebody help me with this issue plz?
Many thanks in advance.

Hi,
Having completed the dogs/cats example and a good/bad images of my own, I would like to expand on it with a useful application by separating the results to 2 new folders: “good_images” and “bad_images”.
This also means that I would like to run the model without the validation folder.

In other words, I would like to run a cats/dogs example but the output would create the equivalent of the “data/dogscats/valid” folder.

I am a developer in multiple languages but not Python. Could someone point out in the lesson1 notebook which sections of code I need to modify and hint at a python commands I could use to do this?
I assume I will have to start in section In [134] (os.listdir(f’{PATH}valid’)) and continue until In [141]
(after 141 it would be no longer relevant)

Lastly: thank you all for the good information here and also for the course.

/Florin

I am getting same error while executing the code " import utils; reload(utils)
from utils import plots "

Seems that u got the same error .Did u get the solution?
“”""""""""""""""""""""""""""""“Error”""""""""""""""""


ValueError Traceback (most recent call last)
in ()
----> 1 import utils; reload(utils)
2 from utils import plots

/home/ubuntu/FastAI/PROJECTS/courses/deeplearning1/nbs/utils.py in ()
26 from IPython.lib.display import FileLink
27
—> 28 import theano
29 from theano import shared, tensor as T
30 from theano.tensor.nnet import conv2d, nnet

/home/ubuntu/anaconda2/lib/python2.7/site-packages/theano/init.pyc in ()
86
87
—> 88 from theano.configdefaults import config
89 from theano.configparser import change_flags
90

/home/ubuntu/anaconda2/lib/python2.7/site-packages/theano/configdefaults.py in ()
135 “letters, only lower case even if NVIDIA uses capital letters.”),
136 DeviceParam(‘cpu’, allow_override=False),
–> 137 in_c_key=False)
138
139 AddConfigVar(

/home/ubuntu/anaconda2/lib/python2.7/site-packages/theano/configparser.pyc in AddConfigVar(name, doc, configparam, root, in_c_key)
285 # This allow to filter wrong value from the user.
286 if not callable(configparam.default):
–> 287 configparam.get(root, type(root), delete_key=True)
288 else:
289 # We do not want to evaluate now the default value

/home/ubuntu/anaconda2/lib/python2.7/site-packages/theano/configparser.pyc in get(self, cls, type_, delete_key)
333 else:
334 val_str = self.default
–> 335 self.set(cls, val_str)
336 # print “RVAL”, self.val
337 return self.val

/home/ubuntu/anaconda2/lib/python2.7/site-packages/theano/configparser.pyc in set(self, cls, val)
344 # print “SETTING PARAM”, self.fullname,(cls), val
345 if self.filter:
–> 346 self.val = self.filter(val)
347 else:
348 self.val = val

/home/ubuntu/anaconda2/lib/python2.7/site-packages/theano/configdefaults.py in filter(val)
114 elif val.startswith(‘gpu’):
115 raise ValueError(
–> 116 'You are tring to use the old GPU back-end. ’
117 'It was removed from Theano. Use device=cuda* now. ’
118 'See https://github.com/Theano/Theano/wiki/Converting-to-the-new-gpu-back-end(gpuarray)

ValueError: You are tring to use the old GPU back-end. It was removed from Theano. Use device=cuda* now. See https://github.com/Theano/Theano/wiki/Converting-to-the-new-gpu-back-end(gpuarray) for more information.

After following the instruction from link ‘https://github.com/Theano/Theano/wiki/Converting-to-the-new-gpu-back-end(gpuarray)’ like used below command

conda install theano pygpu still issue is not resolved