Just discovered we never actually created a forum thread for discussing “lesson 0” - so here one is, for those folks as they go through the MOOC. There’s some rather sparse notes at http://wiki.fast.ai/index.php/Lesson_0 . Frankly most of the material from this “surprise lesson” I think we covered elsewhere in the course. But I still think the idea of pooling and learning from simple manual features is pretty interesting
So… if you have any questions or comments about this lesson, here’s the place for them!
Can someone share a link to the OpenAI research he mentioned in the video - Regarding supervised classification with 50 examples and ensembles on MNIST with 1.4% error rate? I wasn’t able to find it. It would be of great help if someone could do so.
Hi,
I have been successfully working through the course for a while… was using AWS instance last night to visualize some of the filter activations and try out batch norm for the first time.
However, all of a sudden (this morning), jupyter seems to have disappeared… this is the error message I’m getting in my terminal, and neither conda nor jupyter are recognized as commands. Any idea what might have happened or how to fix it?
hello
I am using Jupyter Notebook that is a part of Anaconda and the matplotlib version is 1.4.1.
In the notebook, when I execute:
rc(‘animation’, html=‘html5’)
rcParams[‘figure.figsize’] = 3, 6
I get a key error:
KeyError: ‘animation.html is not a valid rc parameter.See rcParams.keys() for a list of valid parameters.’
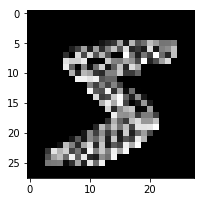
In the set you get 60000 images, so you need to delete the first 5000 to adjust it to the shape/size Jeremy works with.
Another point is that the pixel values in the Keras-downloaded set are coded as integers between 0 and 255. Pixels in Jeremy’s data set are all floats between 0.0 and 1.0. This is what I believe is causing your image to be all spotty rather than seeing smooth transitions.
To adjust to format Jeremy uses you can divide the data by 255 to convert the values from 0 - 255 to 0.0 – 1.0.
Here the code to adjust the downloaded data. It has resolved my spotty image issue:
# Delete the first 5000 images. After that the set should start with number 7
images = np.delete(images, slice(0,5000), axis=0)
labels = np.delete(labels, slice(0,5000))
# Convert the array type from int to float
images = images.astype(np.float32)
# Modify the data from 0 to 255 range to 0.0 to 1.0 range
images = images / 255